It recently became rather obvious there was something amiss with the water heater on board nb Tanya Louise – lots of smoke from the exhaust, failed starts, and finally a total refusal to start altogether.
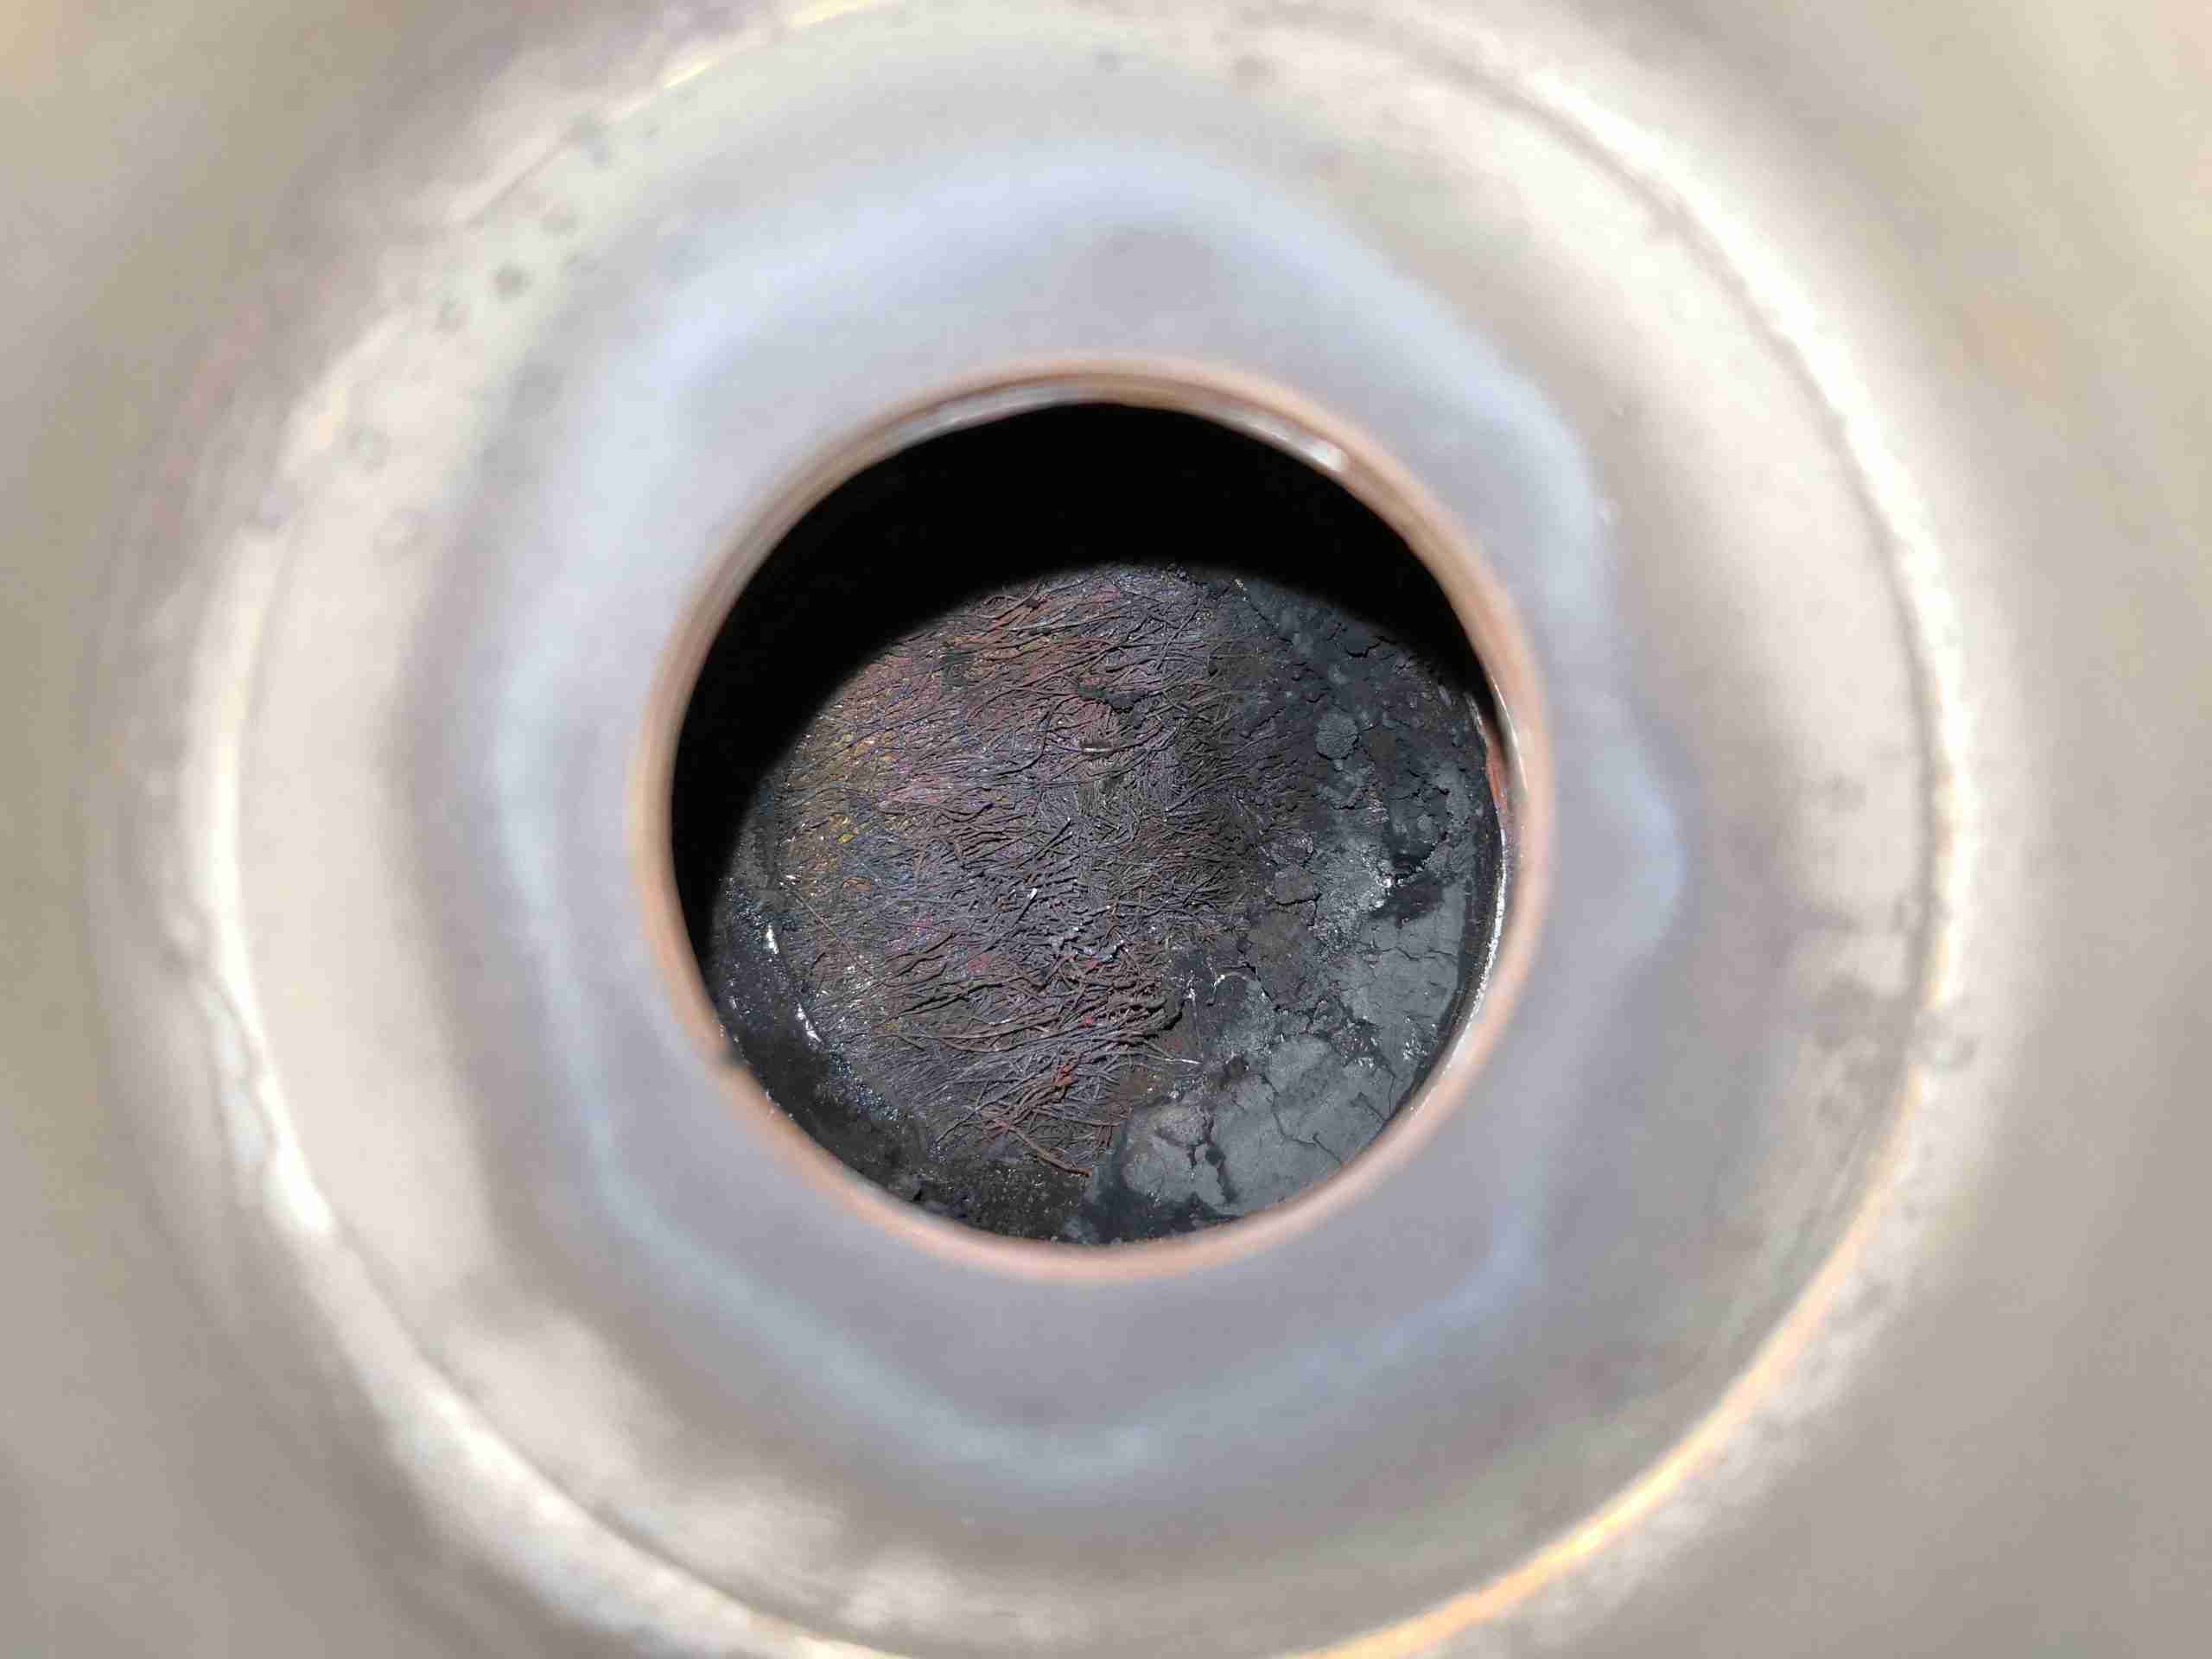
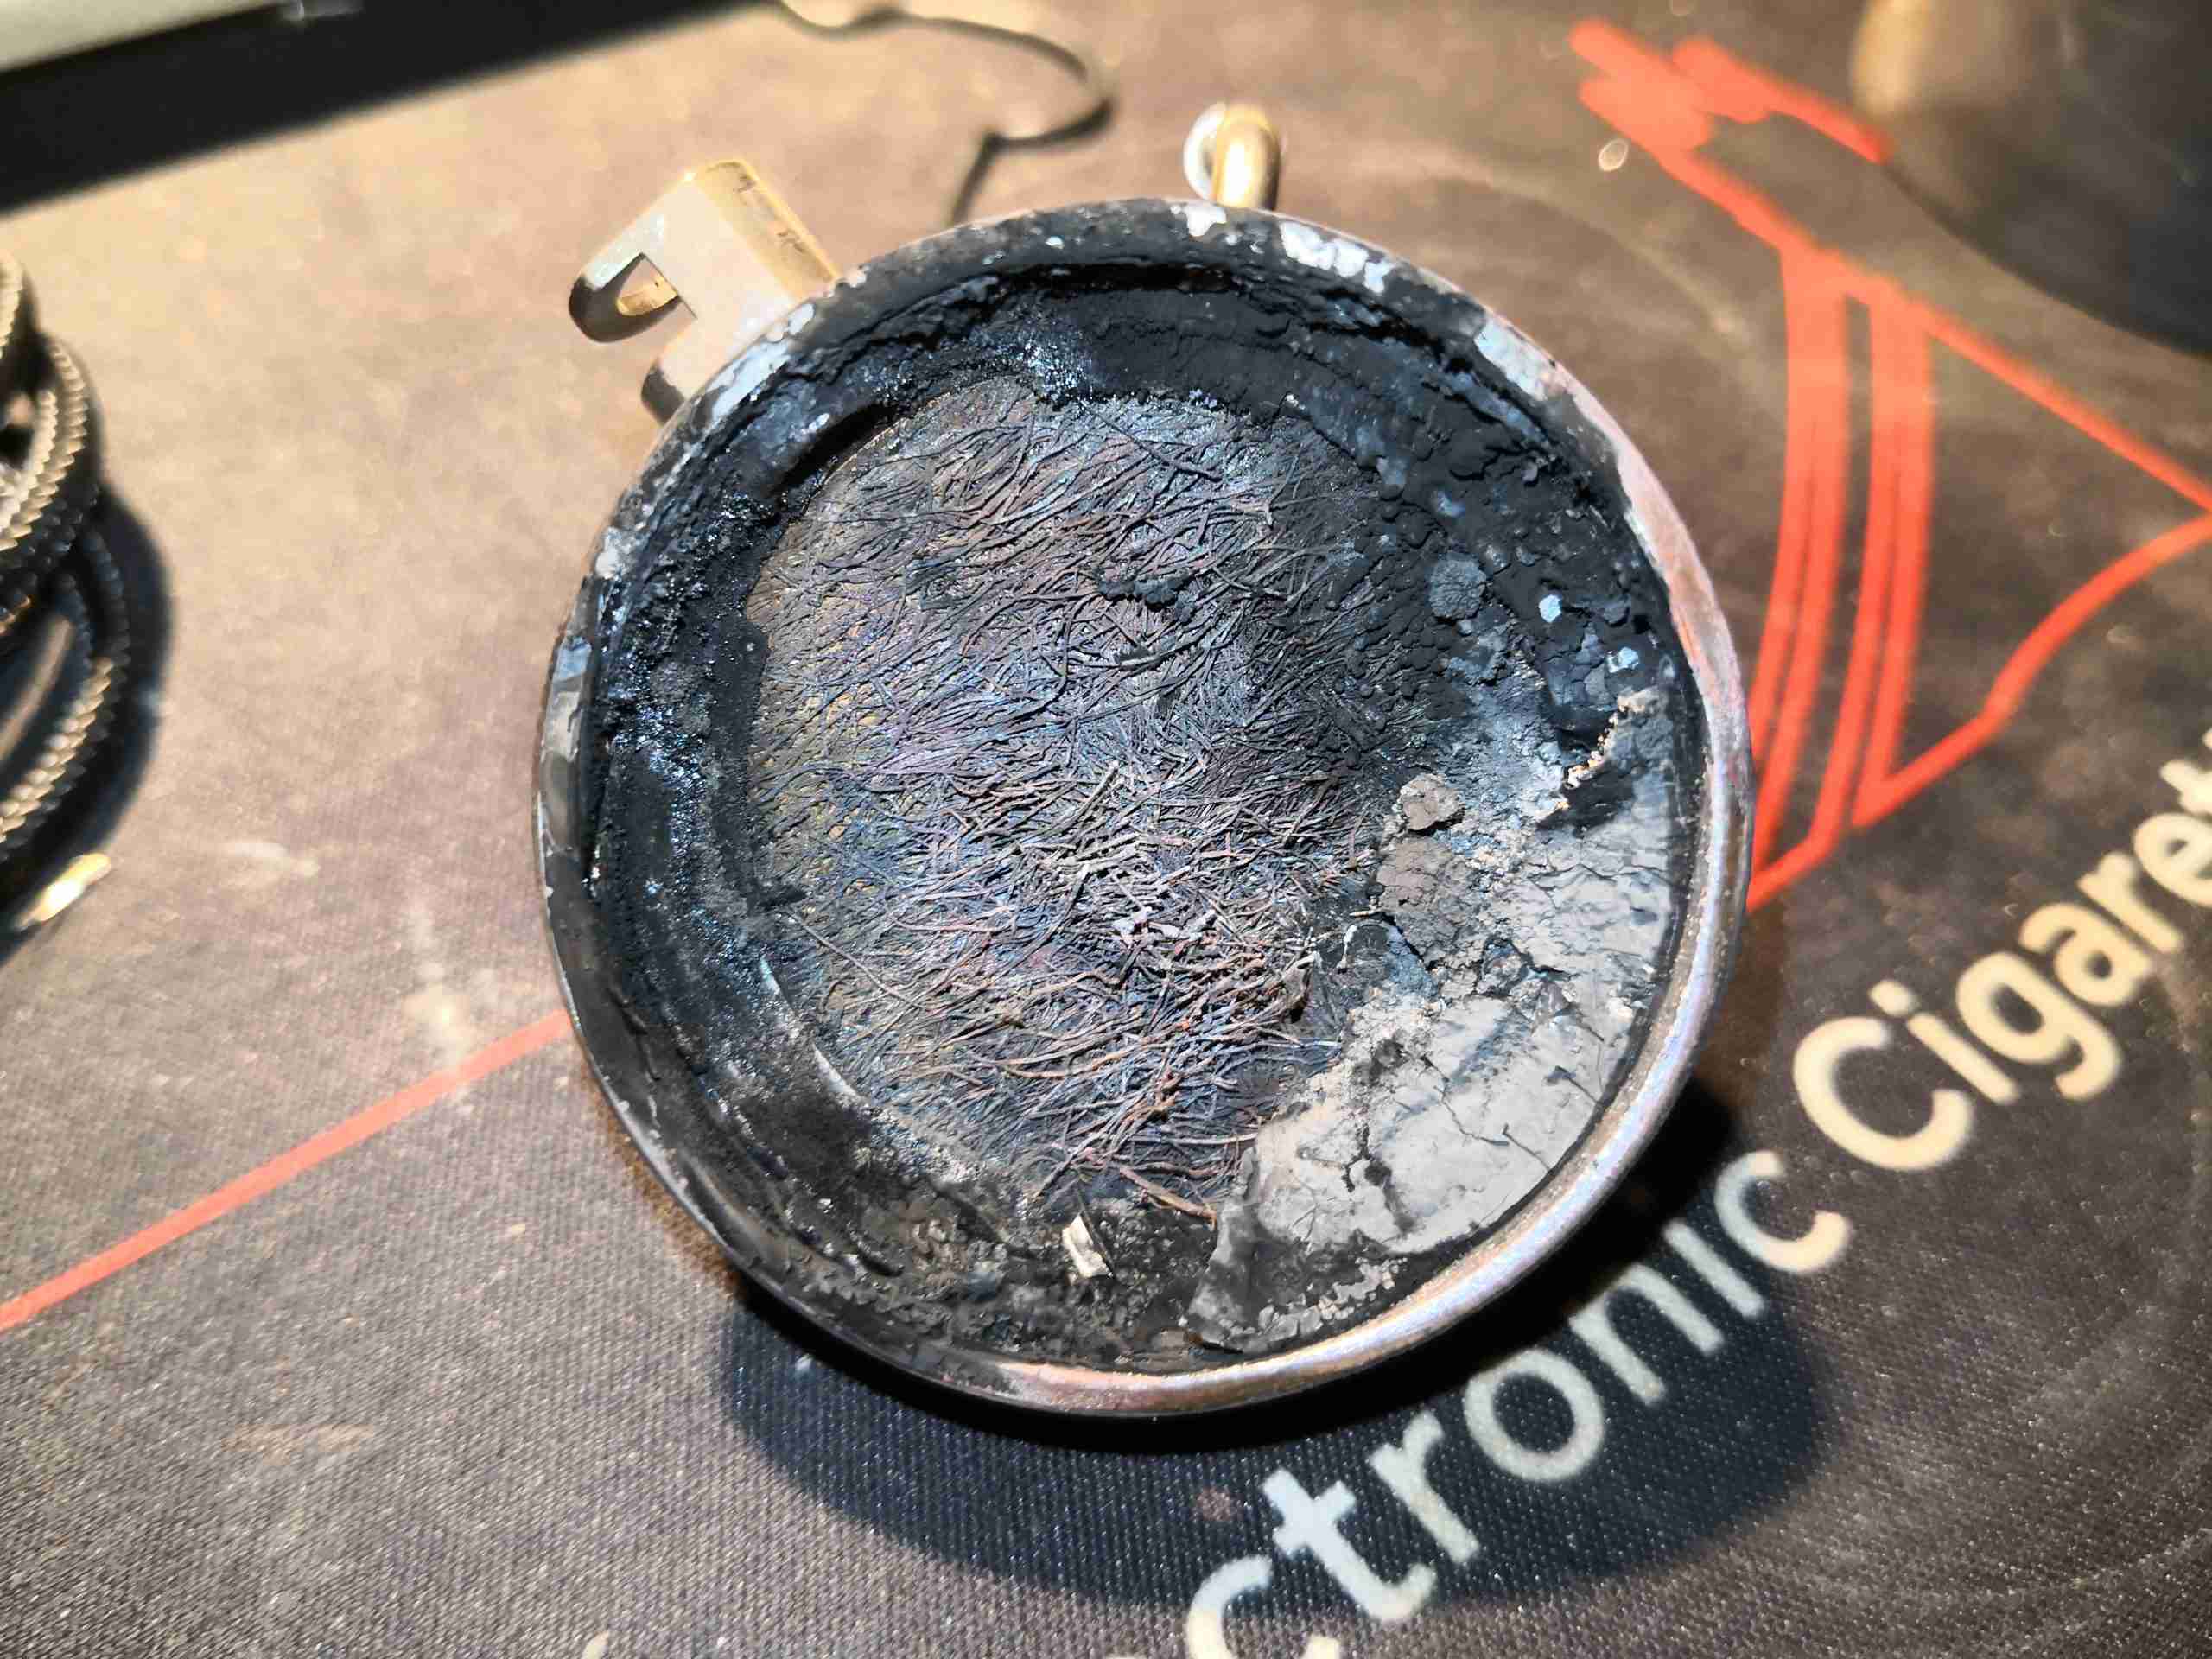
On disassembly, it was clear the burner was the issue – above. The mesh at the back where the fuel inlet enters the burner is completely knackered. The burner in these heaters, like the Eberspachers, is evaporative. Diesel fuel is led into a high-surface area mesh tube, or pad in this case, where it is vaporized to be burned with air from the combustion blower. Initially, this heat is provided by the glow plug, but after the unit has fired, the heat of combustion keeps the process going.
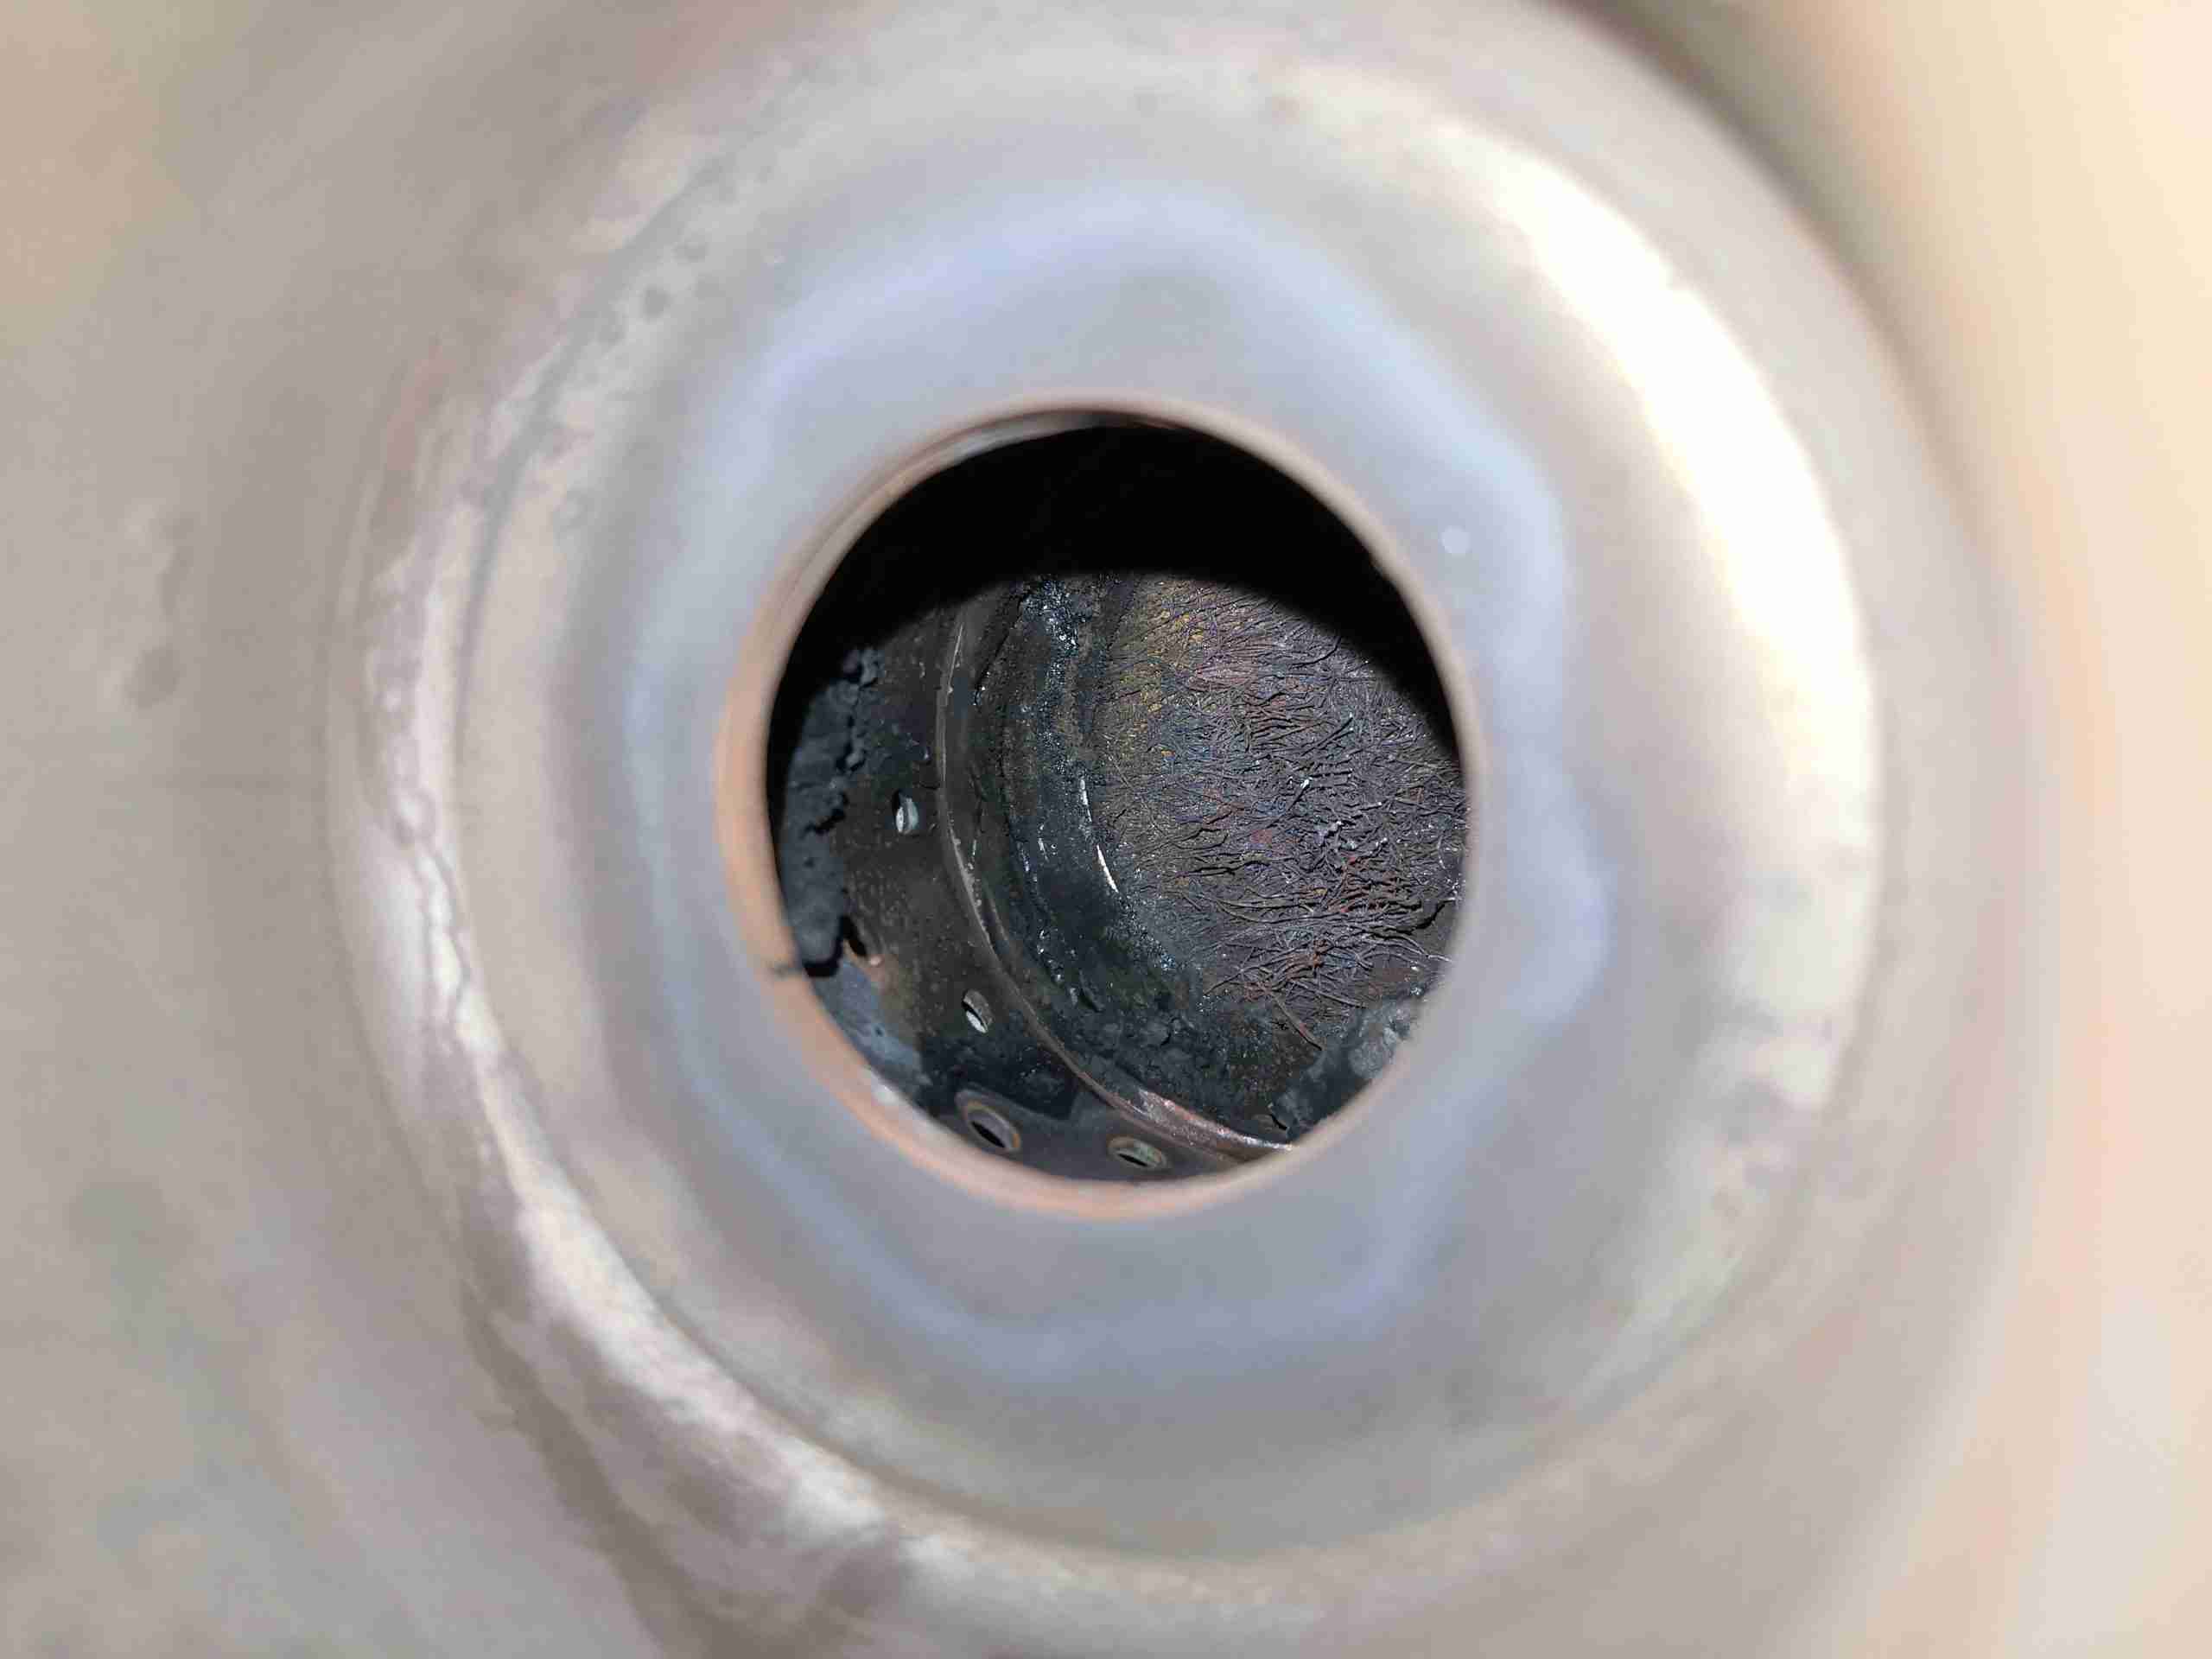
As can be seen at left, there’s quite the build-up of solid carbon around the burner, blocking most of the mesh & the air mixing holes in the tube. This was also after I’d removed most of the fouling!
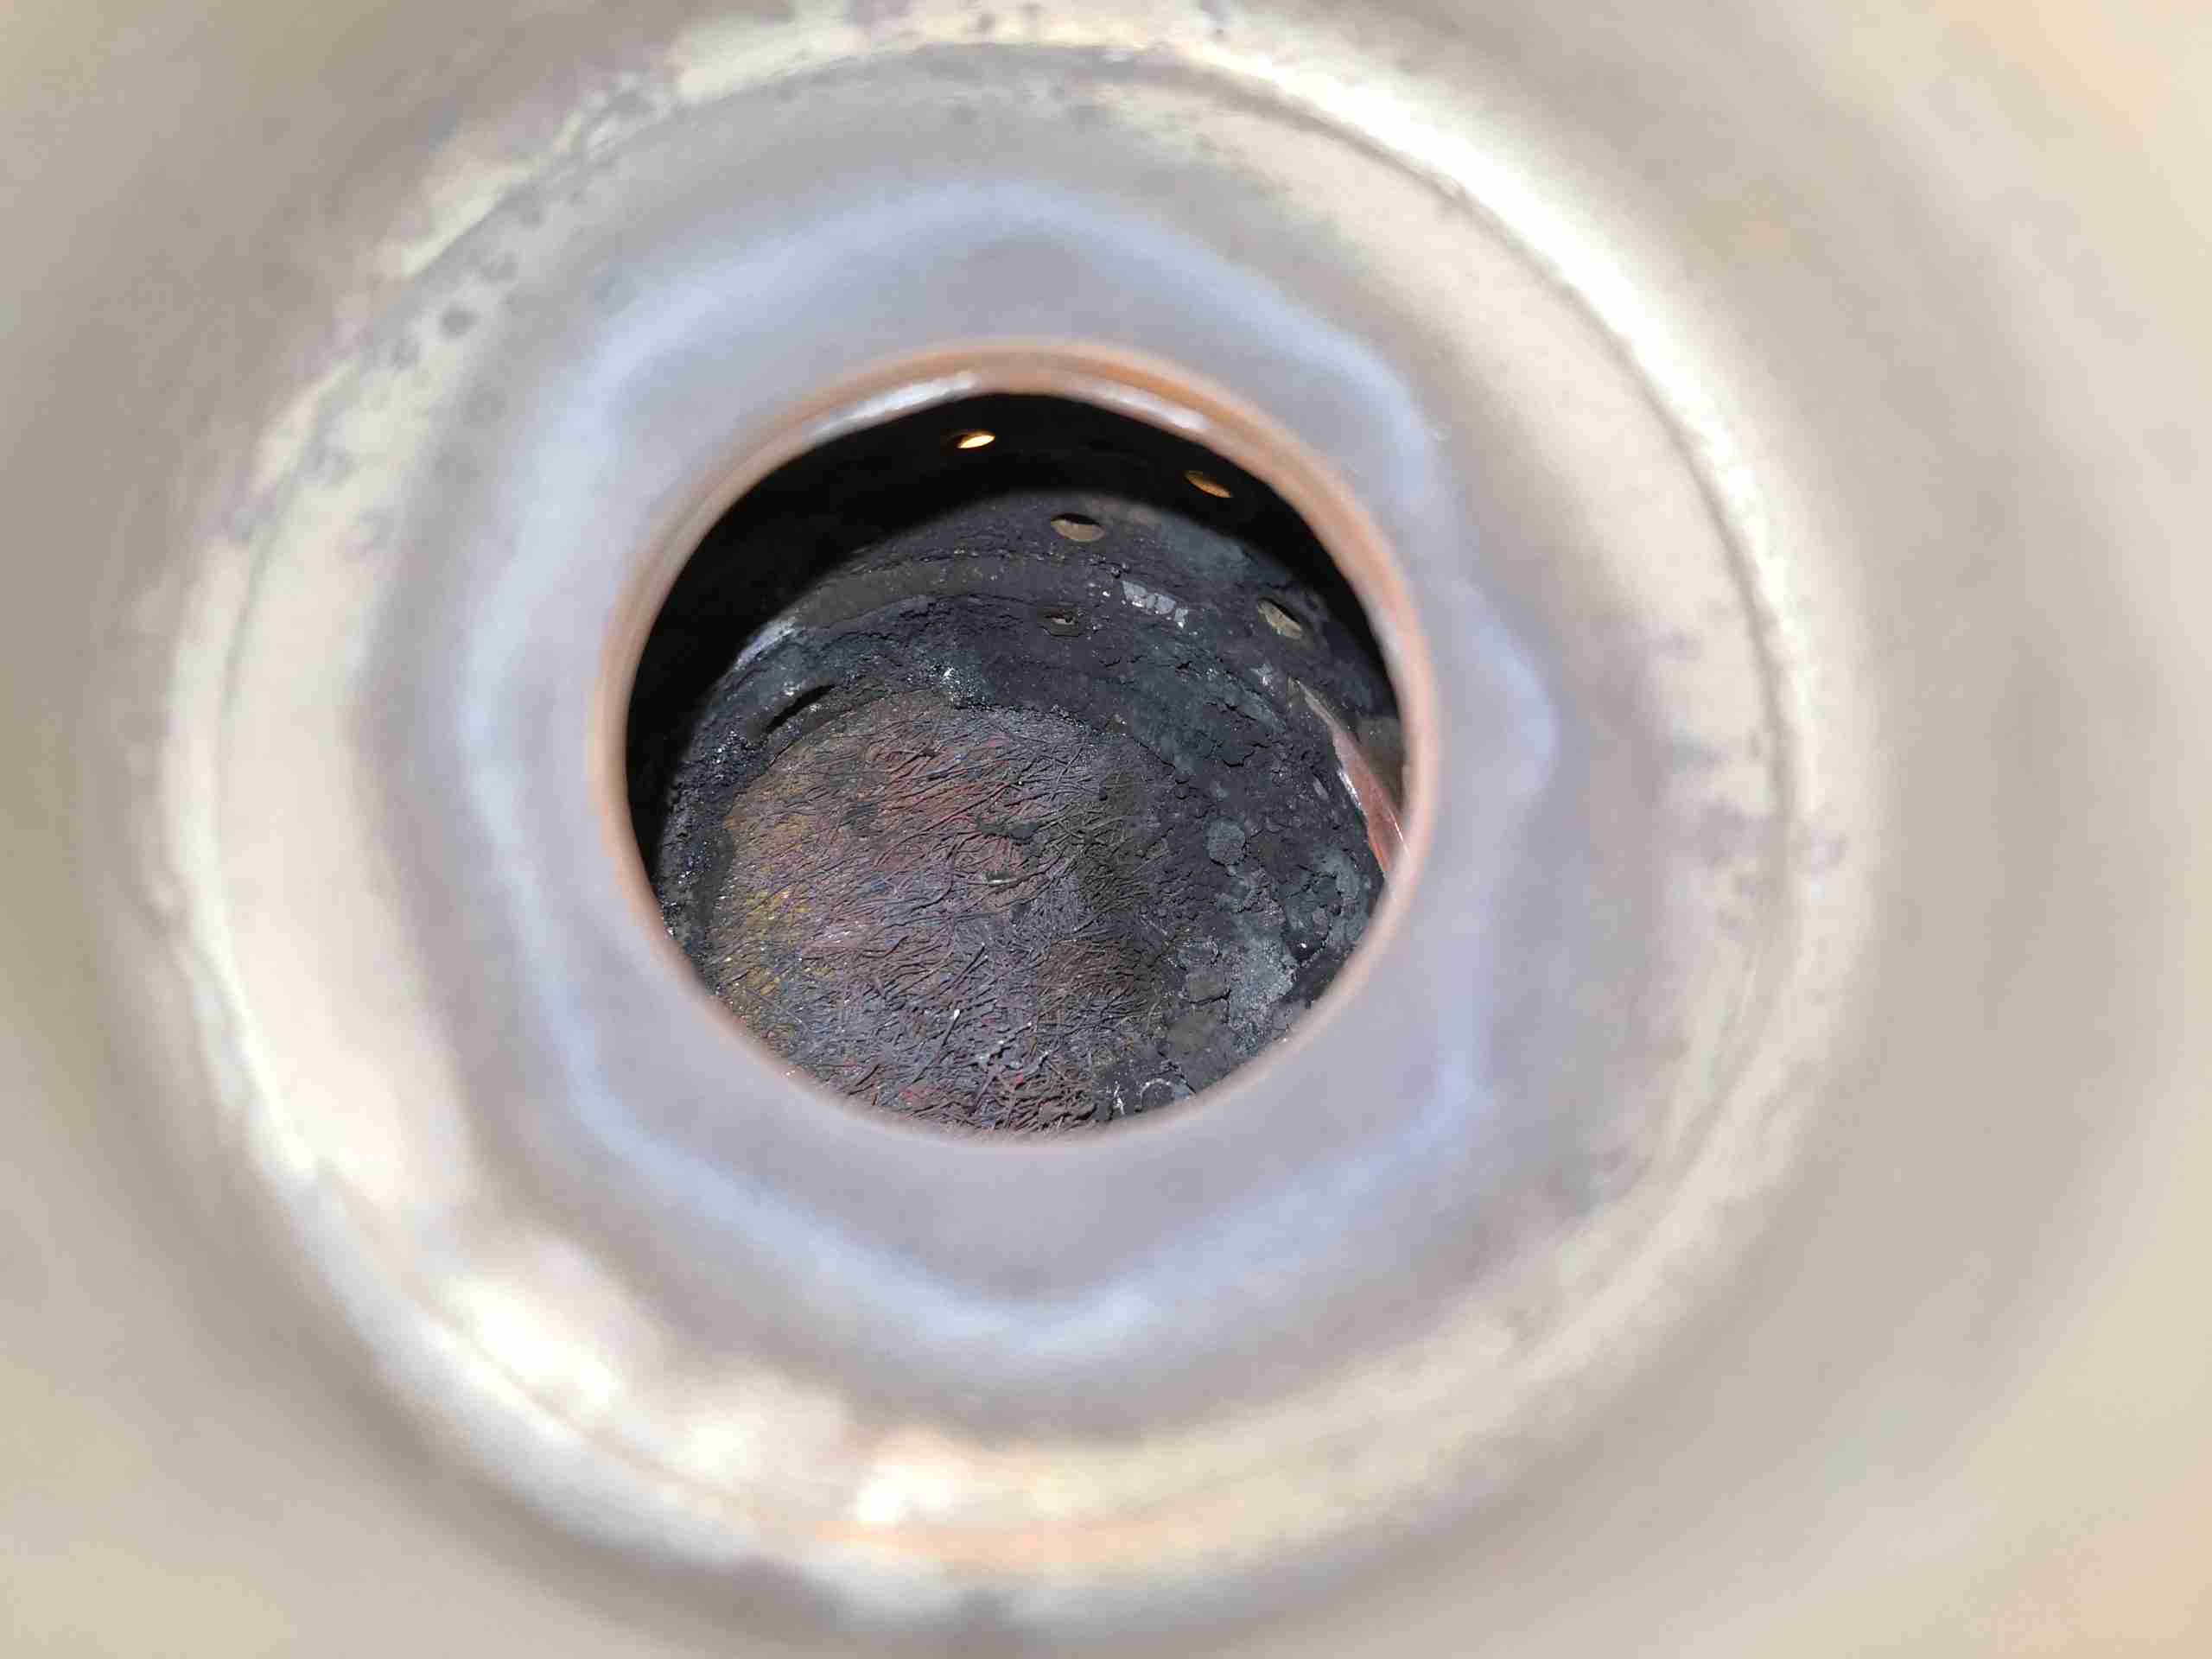
More deposits are seen on the other side, along with some of the air mixing holes.

Now, the problem is that these burner units are not meant to be refurbished. These units are considered by the manufacturer to be disposable, and are welded together as a result. There’s another issue – I don’t believe that a component costing around £295 in a service kit as DISPOSABLE. There’s nothing wrong with the structure of the burner at all – it’s Stainless Steel, and is in good shape with no heat damage. The only fault is with the mesh being burned out from long use. Luckily, replacement burner meshes are available on eBay from Chinese suppliers, so on with the repair!
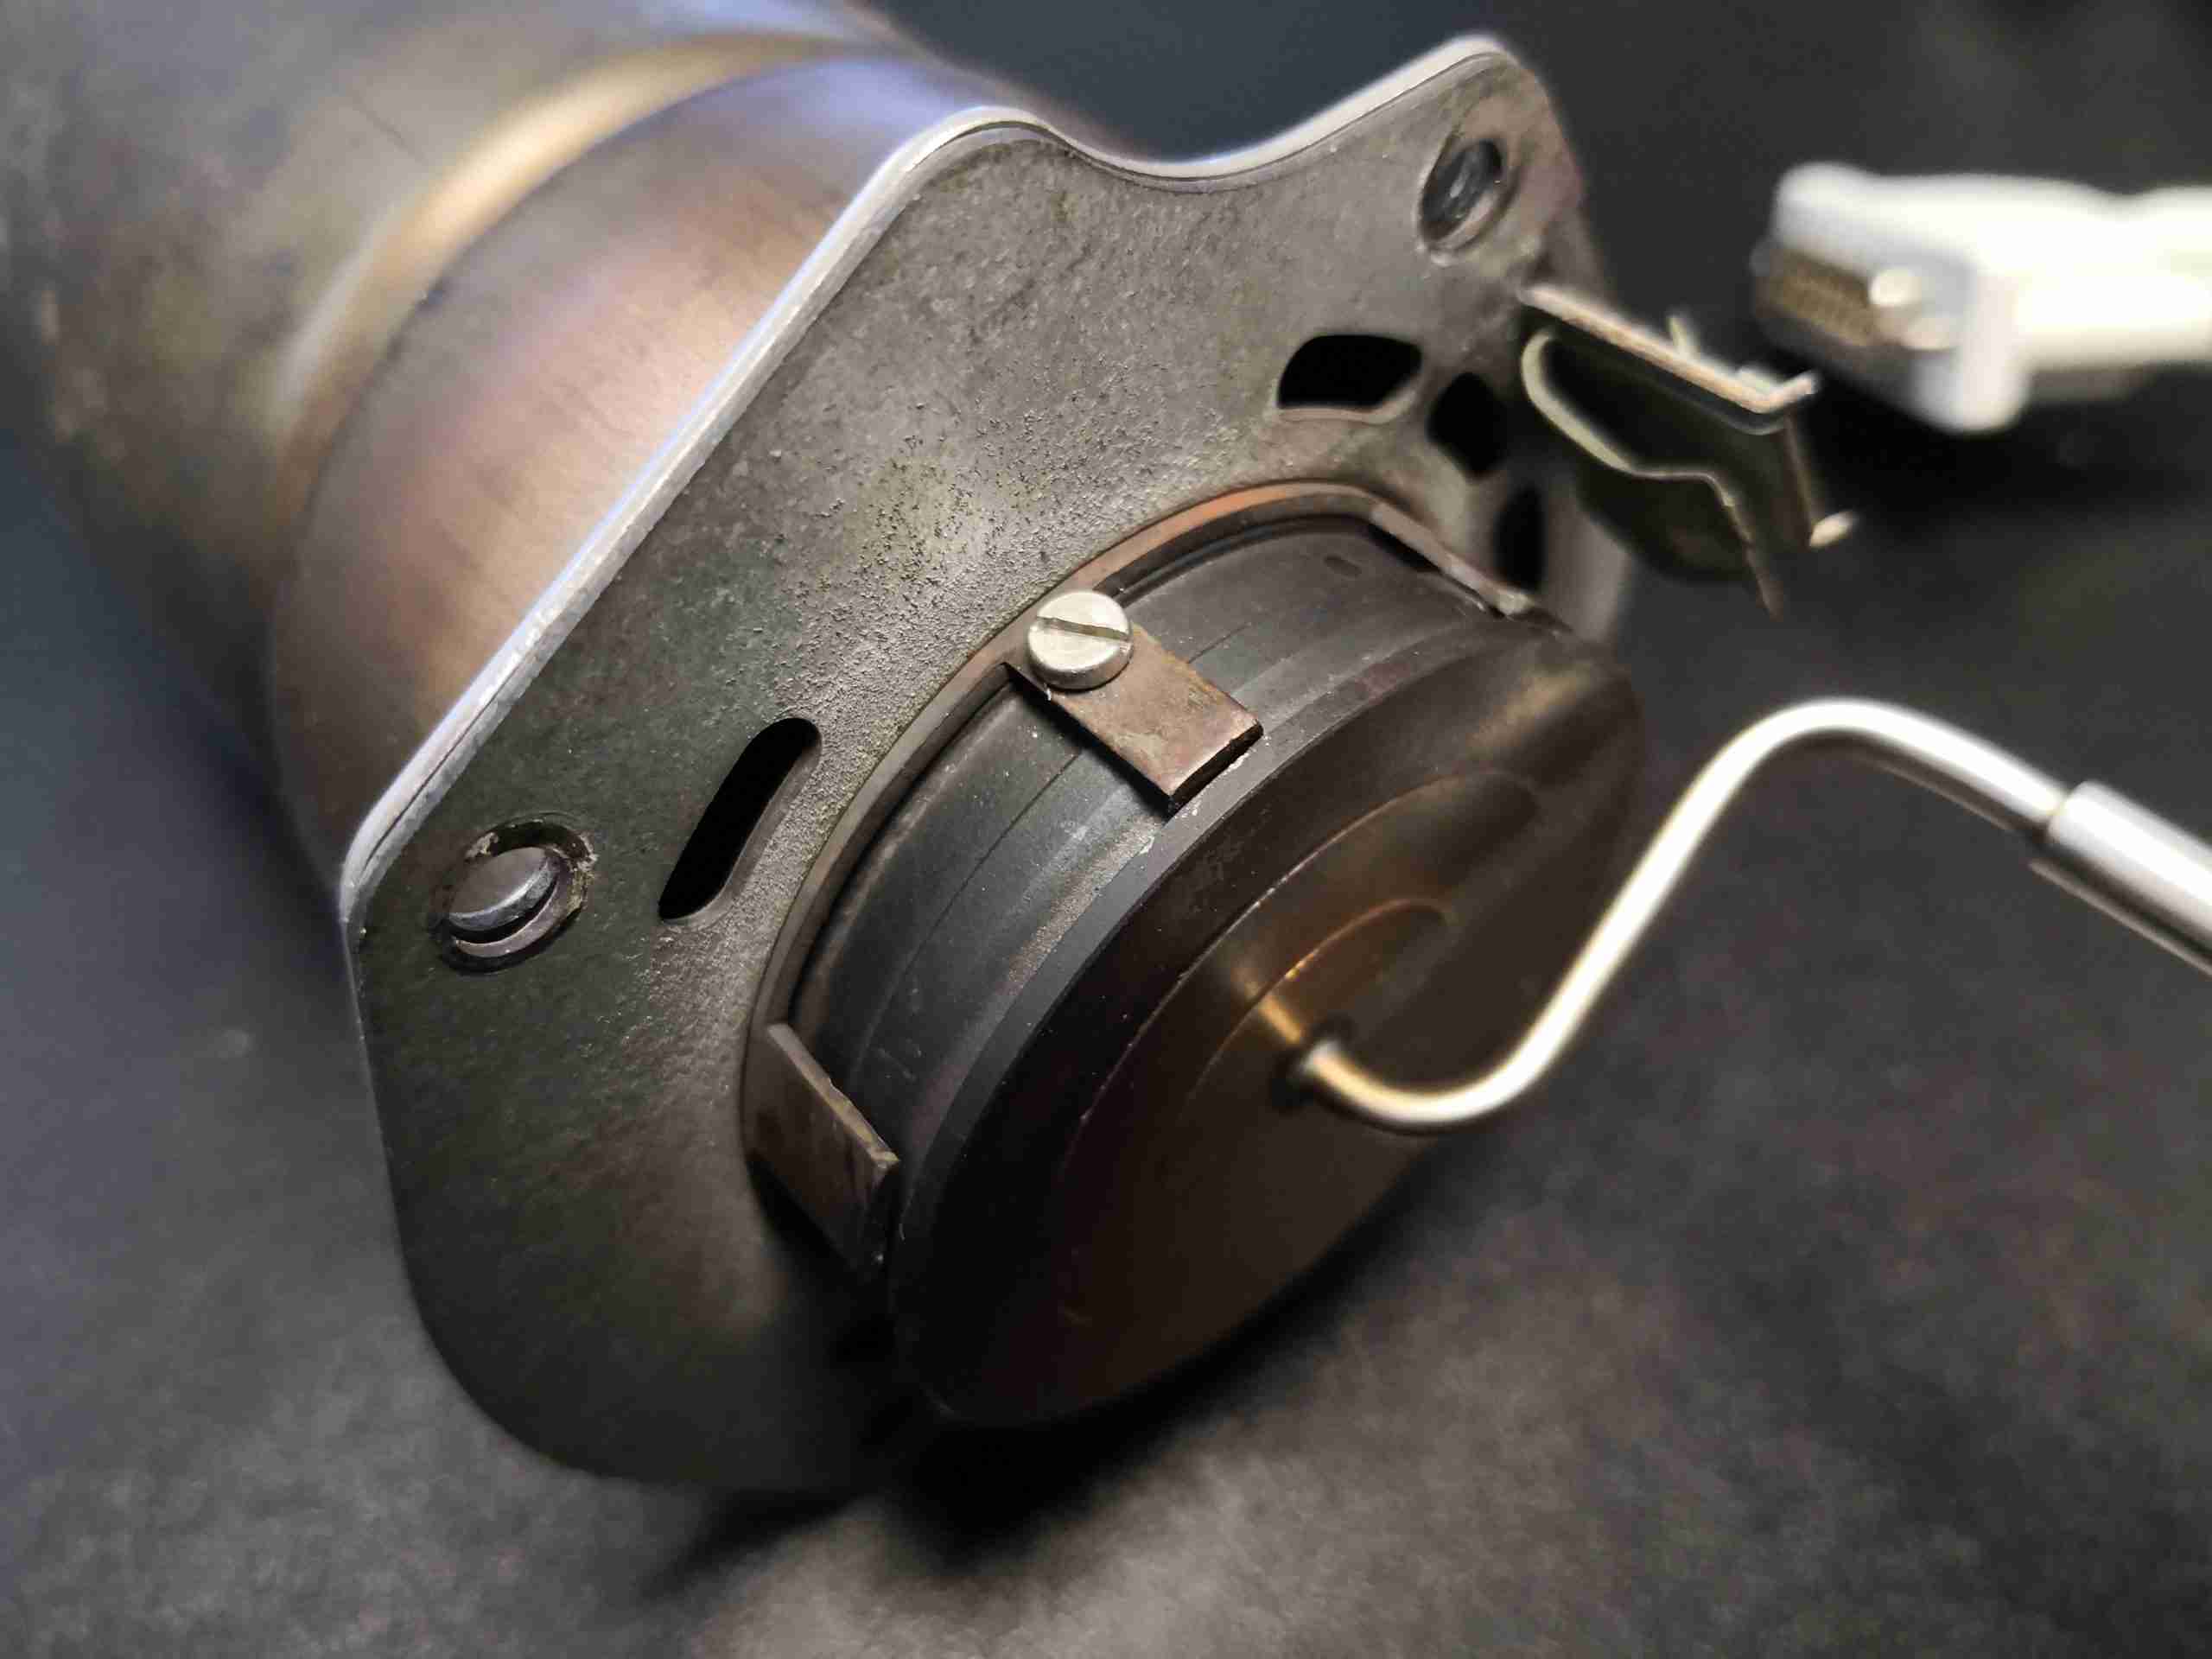
One of the welds that needs to be removed can be seen here next to the glow plug well, and there are 3 spots around the rim that are welded in this way. Delicate use of a grinding wheel on the welds allows this to be removed intact.
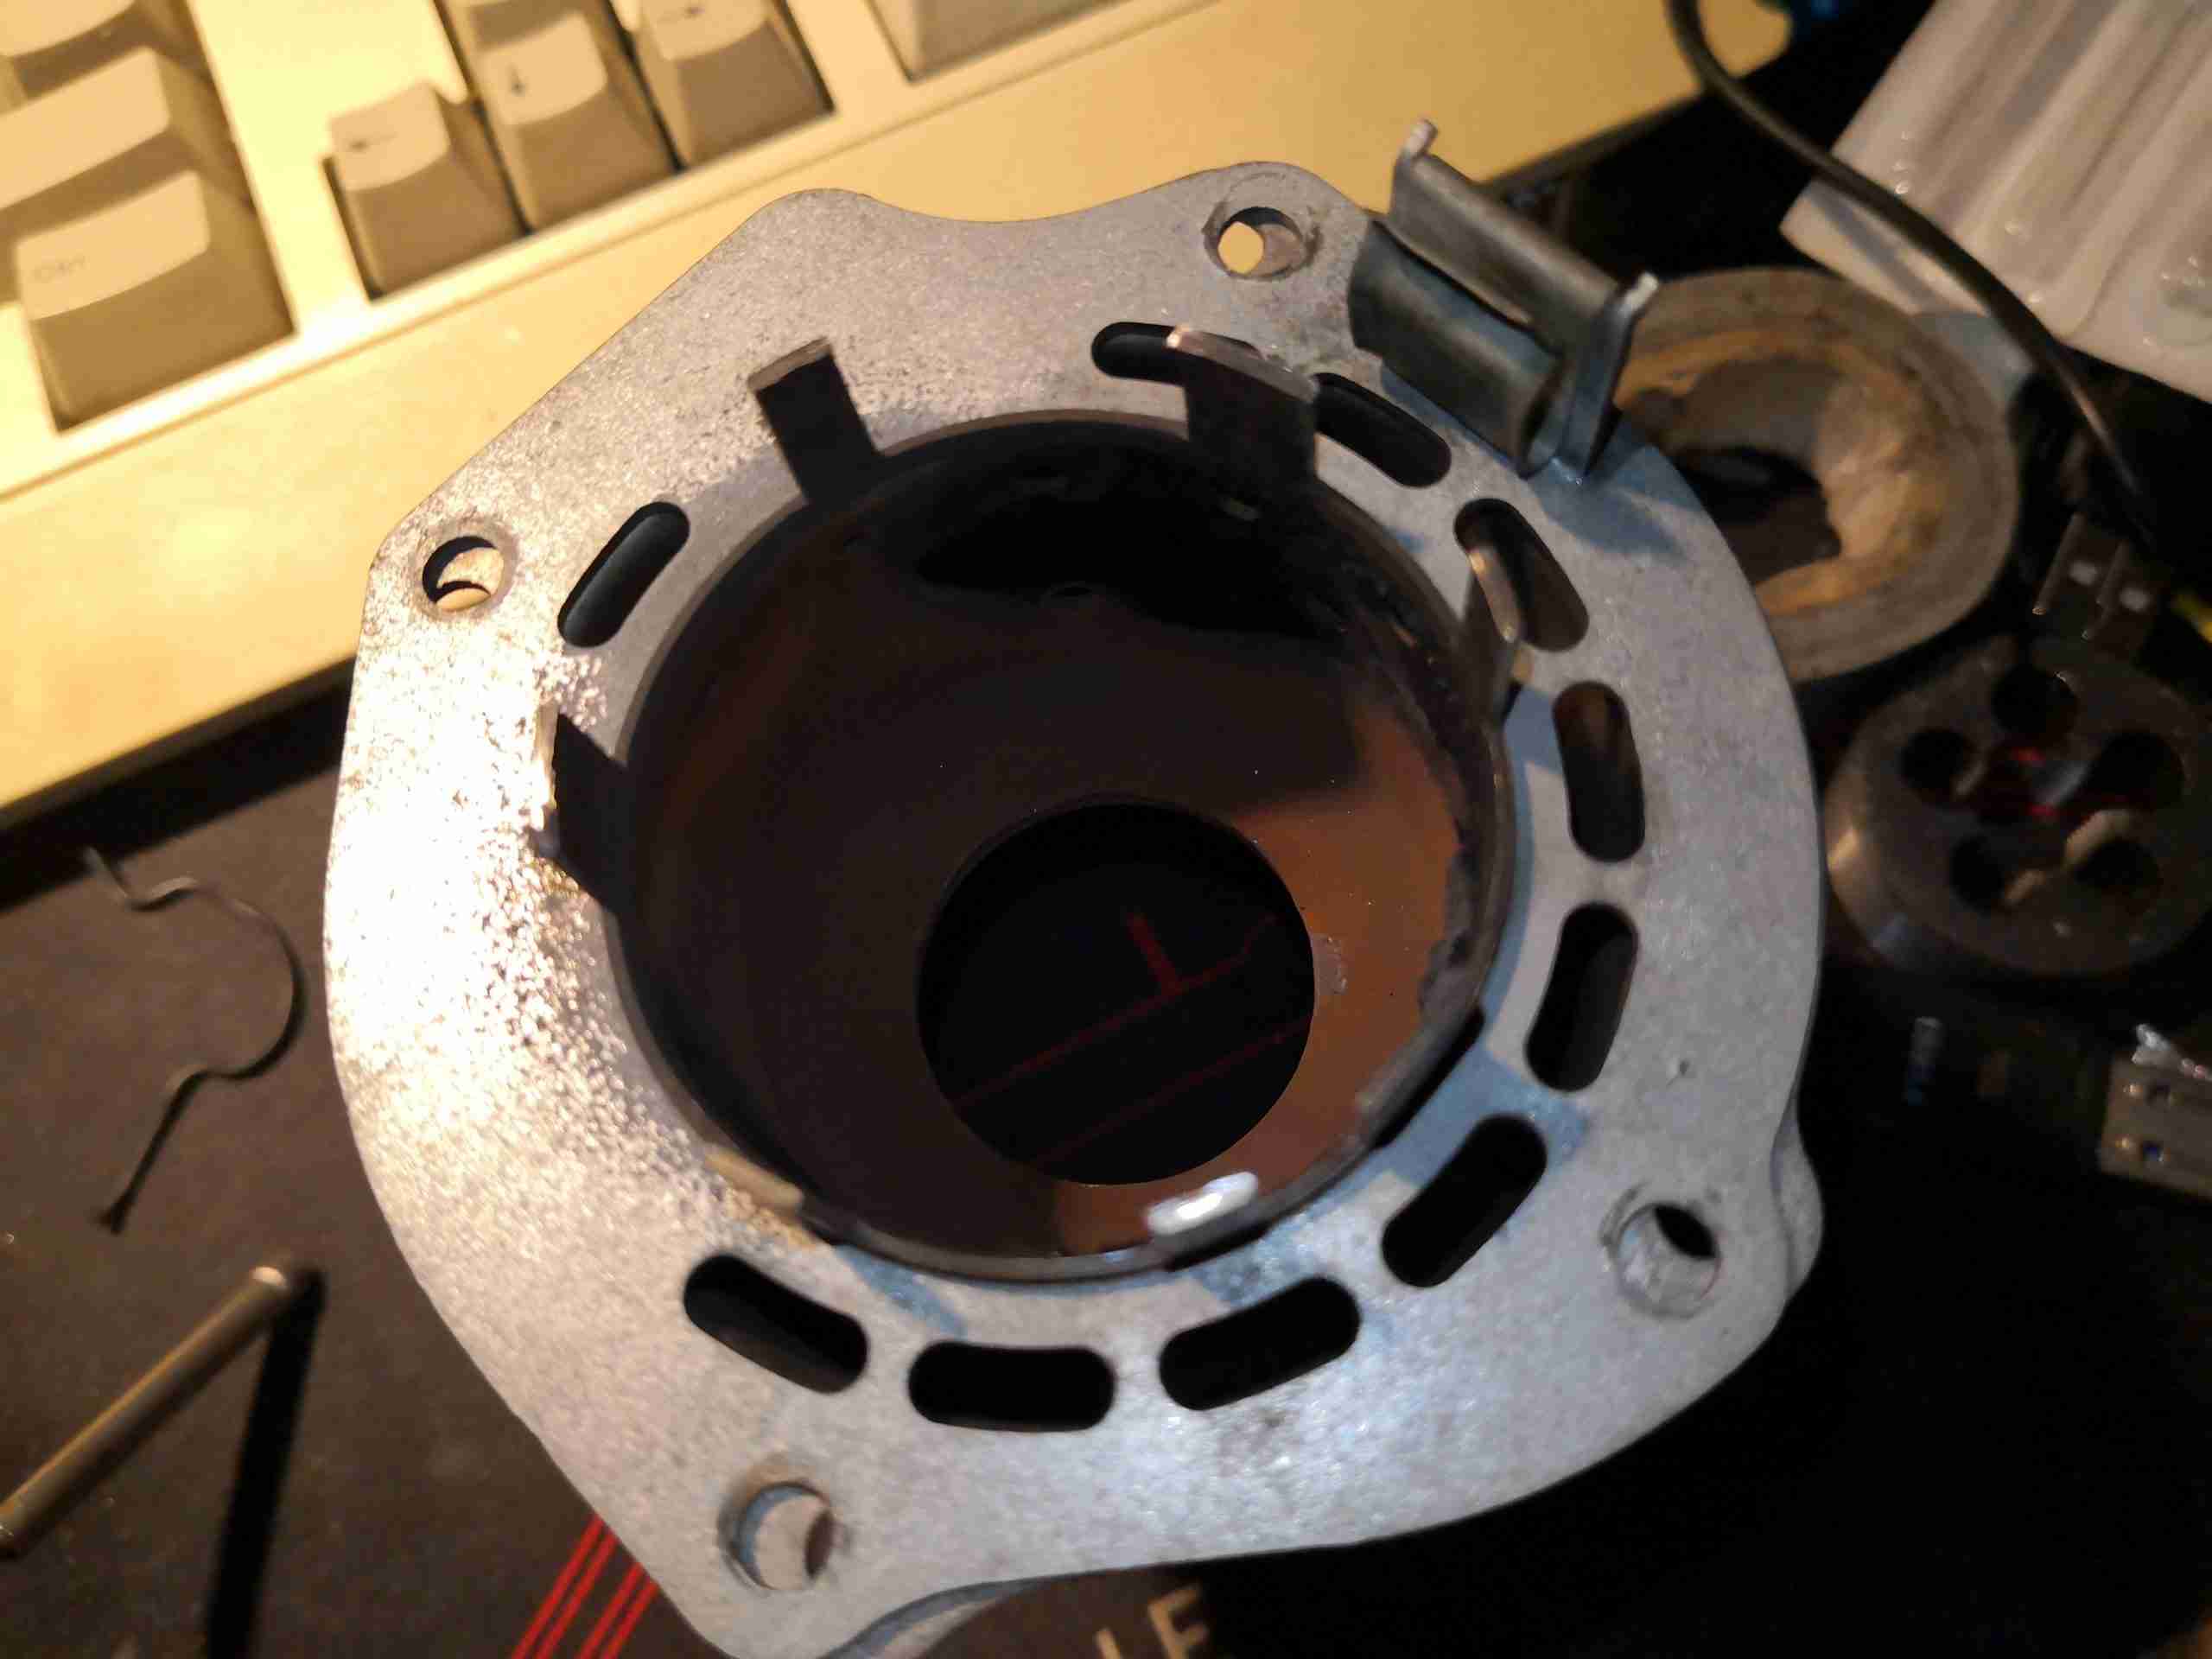
Once the welds have been ground off, the fuel inlet plate with the mesh can be pulled from the back of the burner. It’s a good idea to add some registration marks to both pieces before they’re separated, so they can be put back together in the same orientation – required for both the glow plug wiring, and the fuel inlet tube to line up with the hole in the heater housing. The ring of slots visible around the edge of the tube are the combustion air inlets, and the air is directed through a ring of holes in the combustion chamber, quite similar to a turbine engine combustor.
Now I’ve got the back of the burner removed, the clogging is much easier to see. The mesh itself has clearly been subject to very high heat, and is partially burned away, along with most of the surface being clogged up with coal from incomplete combustion. It’s difficult to see here, but the mesh pad is held in place with a large circlip around the edge, all will become clear after cleaning. All the hard carbon needs to be scraped out of the cup, clearing the way for the clip to be pried out of it’s groove.
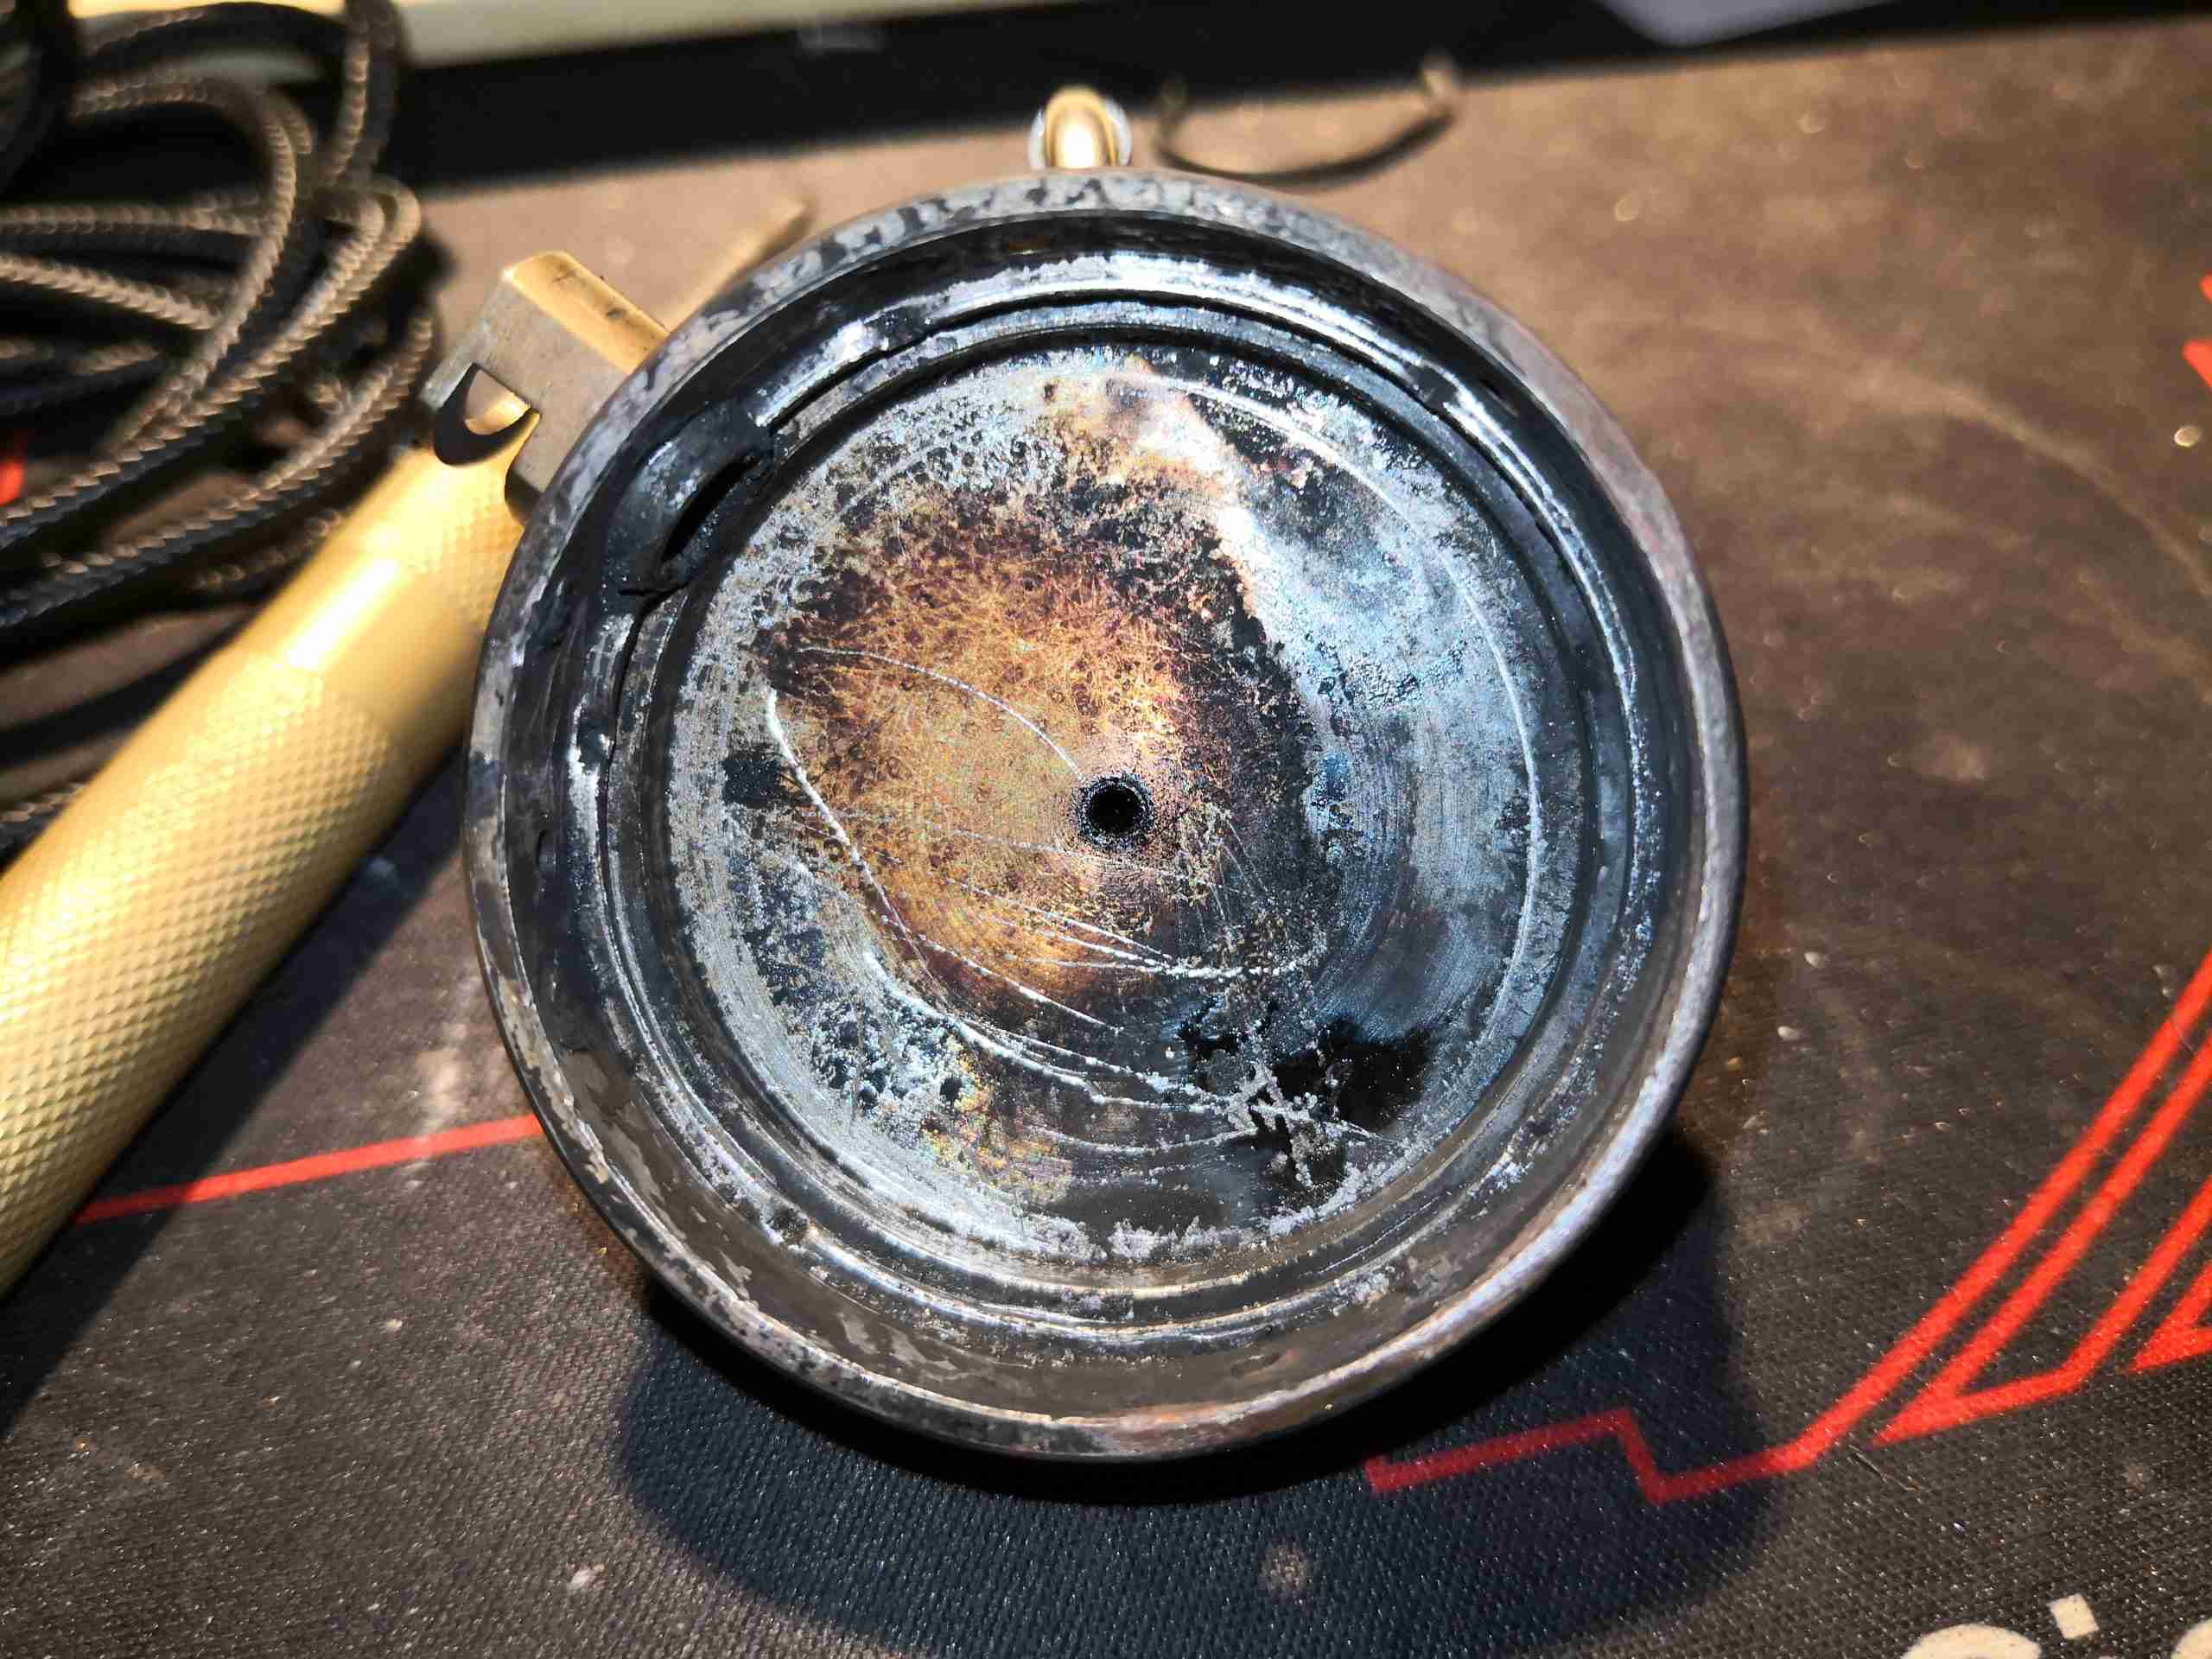
After a lot of scraping with the sharp end of a small screwdriver, the cup has been relieved of enough carbon to be recognisable again! The fuel inlet tube is in the centre of the backplate, with the circlip groove around the edge. Crimp marks are visible on the top edge of the groove – I think Webasto actually crimps the ring in place after fitting, which does make removal a bit more tricky, but I did manage to get it out intact, even if heat has removed most of the heat treat from the steel – making it soft. Be careful here!
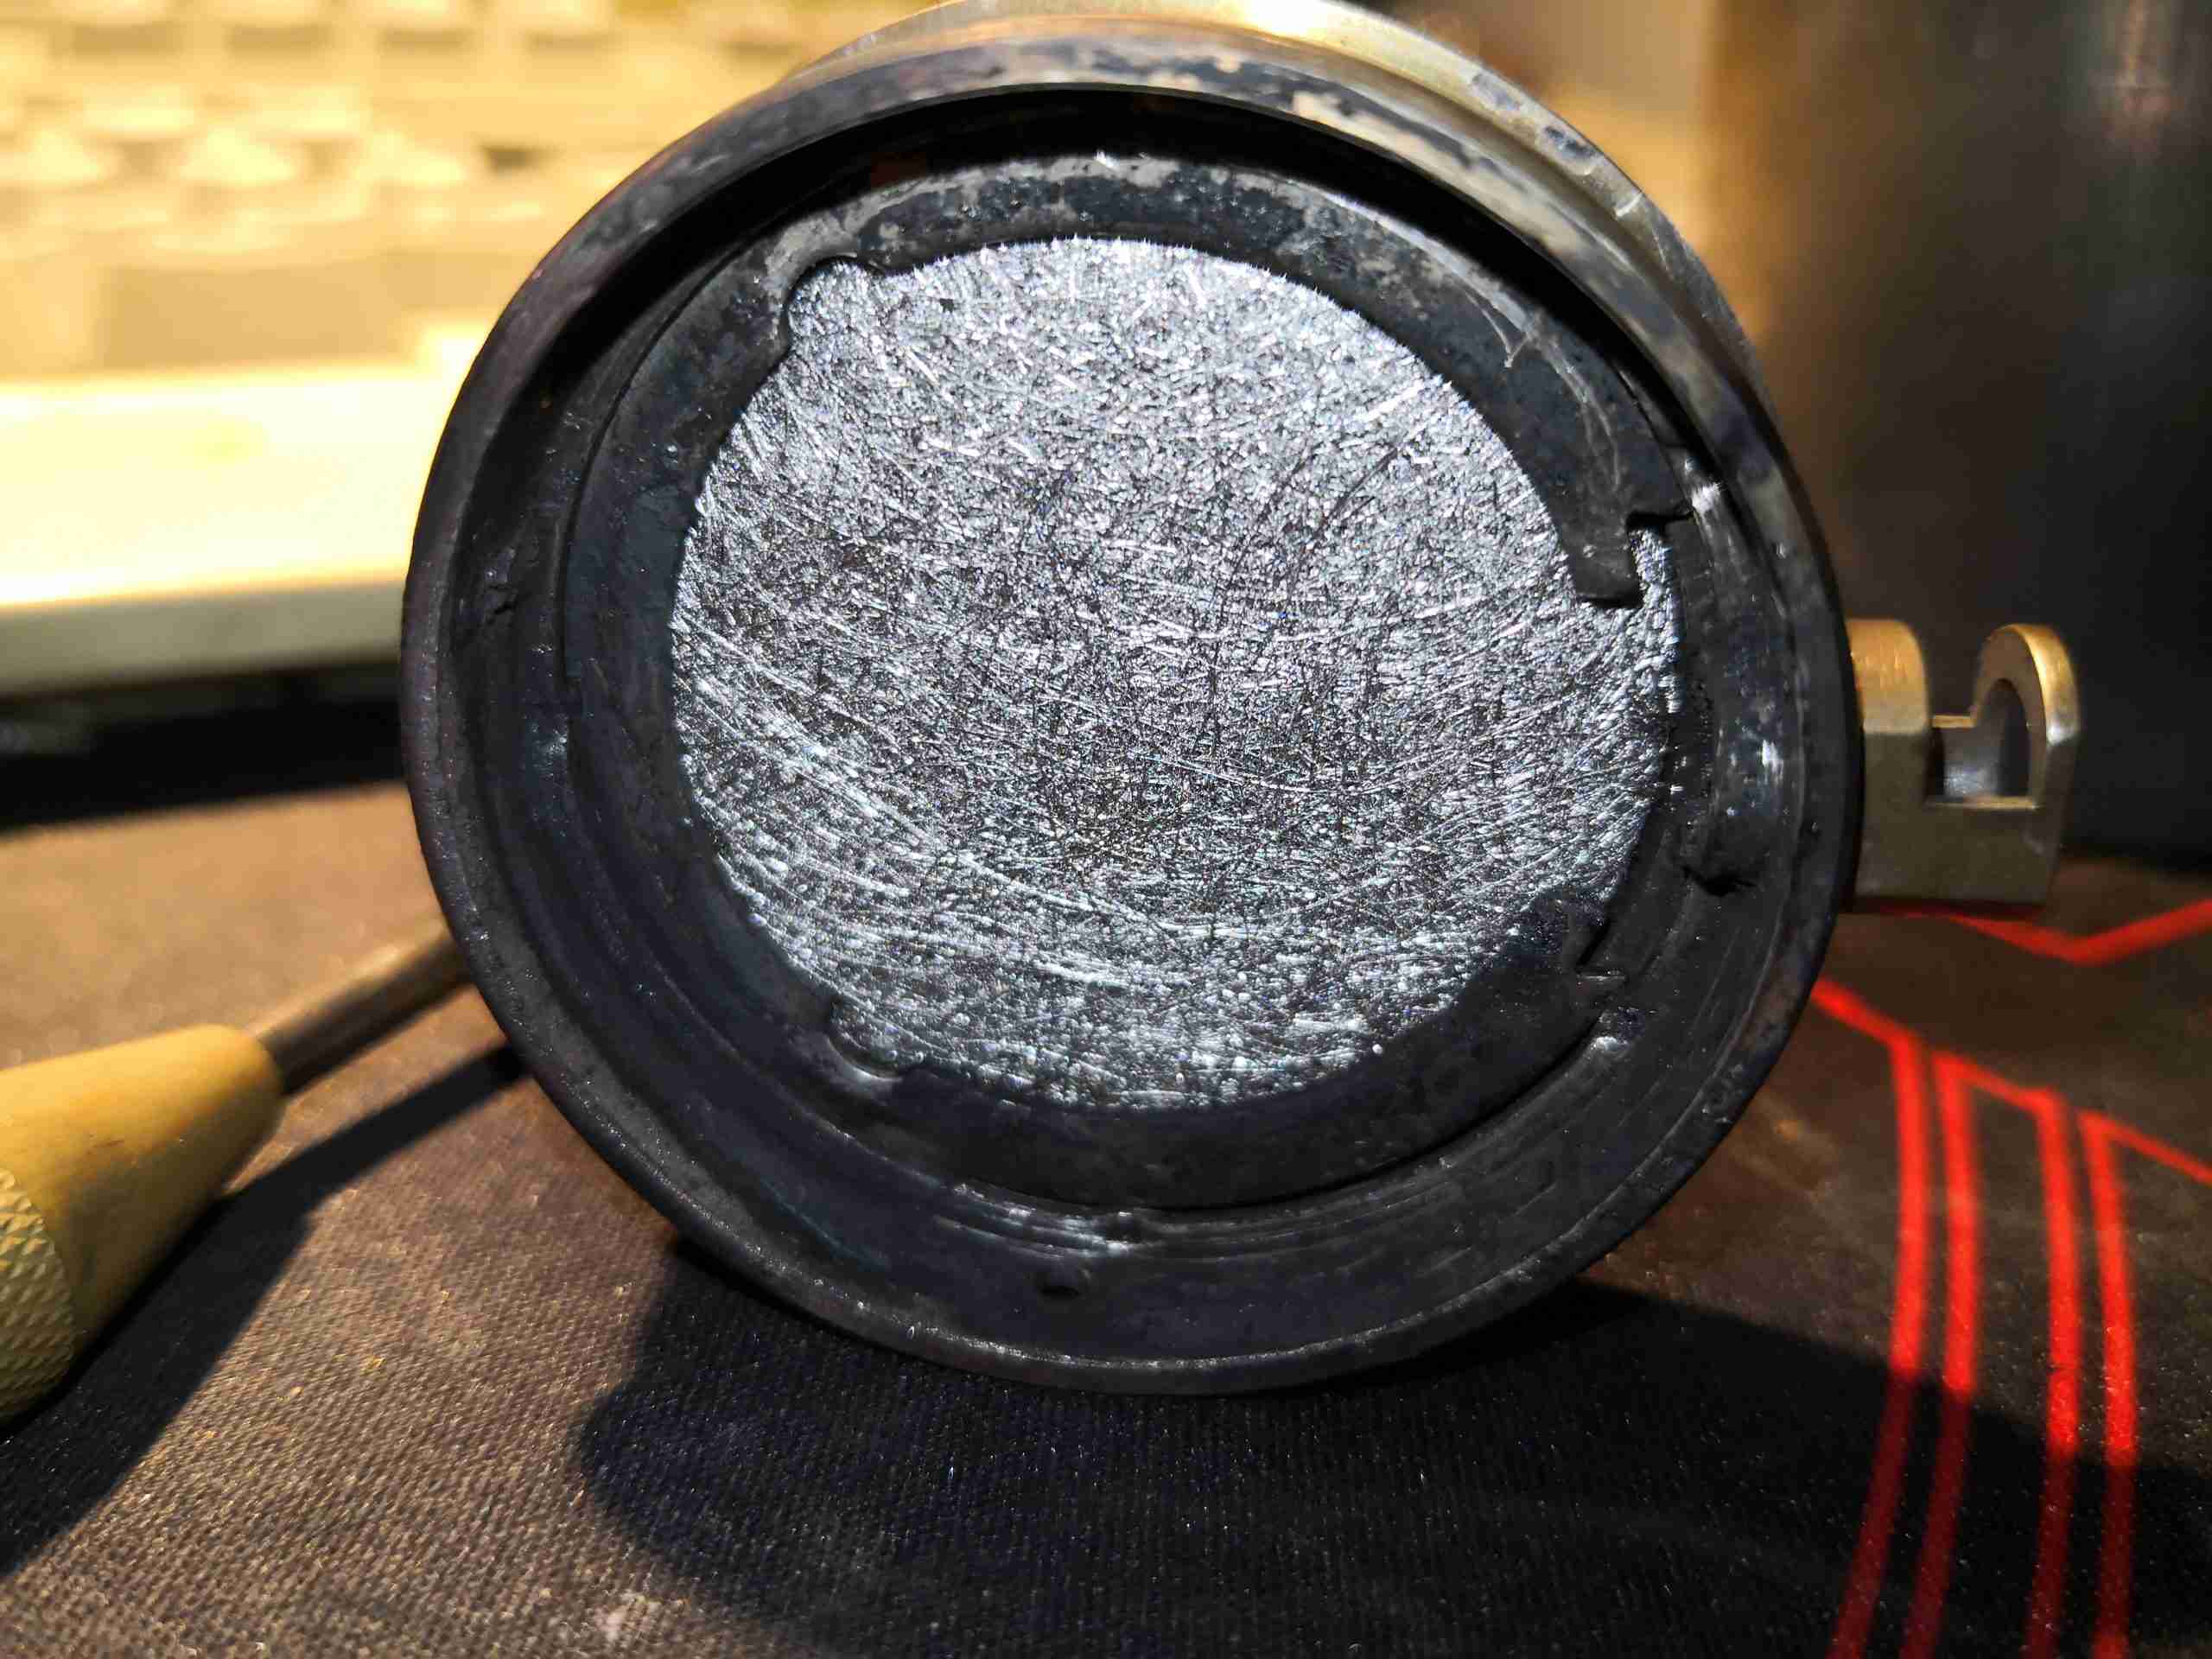
Fitting the new mesh is pretty simple. These have a sharp pressed side & a convex side, the convex side must face outwards from the cup. The circlip is visible around the edge of the mesh, with the ends next to the glow plug well. Make sure that the clip is equally spaced around the glow plug to make sure it doesn’t foul the plug when that’s replaced.
Now comes the issue of reattaching the cup to the back of the burner tube. I didn’t want to re-weld, since the assembly is Stainless Steel & I don’t have a TIG setup at present. I do have some stainless wire for the MIG, but this would also leave me with the issue of future disassembly if the mesh needs replacement again. Brazing is also not possible for the same reason – once brazed, it’s a permanent assembly.
Since there are some tabs that were never welded, I decided to drill & tap M2.5 through these & use 304 stainless screws to hold the components together. This should allow removal in the future if required.

I have been hoping to get round to doing this exercise on a spare burner I acquired about a year ago.
I was musing over how to reassemble after dismantling – I like the use of the screws to retain future access.
You didn’t say whether the repair was successful?
Hi Peter,
Apologies you’re right – I didn’t mention if it worked.
I can in fact confirm that it worked fine! The burner is now back to running like a new one, and should provide quite some life yet.
Cheers
Thanks for the excellent write up! I’ve been wondering how to get at it to change the mesh. There appears to be some quality meshes & circlips on eBay from Lithuania – think I’ll try one of those….
Hi Ken,
Glad you found it useful! I’m certainly no fan of throwing something away which is perfectly serviceable. Unfortunately the disposable society is only getting worse. I think I got my mesh from Lithuania, but I didn’t order a circlip. I found the original perfectly fine as long as you dig out the coke deposits with some caution.
Cheers
Did yours have an absorbent mineral pad & circular gasket (spacer) behind the stainless pad? Mine has……
Hi Ken,
Nope, no absorbent pad behind the mesh on mine, at least not that I could see for the tar deposits anyway.
Cheers
Don’t know what happened there, I sent a message but it’s never appeared!
So, was there a circular mineral fibre pad underneath your stainless one? Mine has one along with a polo shaped fibre gasket. (Which is broken up).
Also, did you screw into the end cap or just wedge it with the screws?
Hi Ken
It’s the anti-spam features of the blog – comments from folks who haven’t commented before go into a moderation queue, no worries about the repeats!
Nope, there was no fibre gasket, just the stainless mesh on the backplate. The screws are threaded into the cap – I tapped the burner housing M2.5. I didn’t think wedging the screws in would have held anything properly!
Cheers
Did yours have a thin absorbent pad & circular polo- shaped gasket under the stainless mesh pad btw?
Oops, now it’s repeating itself – sorry!
Well done.! Such a simple component to replace. This will save you over £100 in a new burner. These heaters are prone to coke up if the battery goes flat so this will really help.
One thing to note is that if you drill the mounting holes before you separate the burner it is easier to hold in the vice and they match up perfectly on re-assembly.
Hi , thanks for this , I have been looking for a while for such a detailed post.
Thanks again
Paul
Brilliant write up and just what I was looking for. I use 2 Thermotop C’s to heat up my 3500L 10ft swimming pool and after 3 years of service they are working very intermittently. Opening them up for inspection revealed a lot of coke. I run these on Kerosene and i pretty much guessed what the issue would be as they are heating of 100 times more water than they used too. Just ordered replacement gaskets and mesh screens and looking forward to testing them once they have arrived. Crazy that this is not designed as serviceable part especially as the Chinese made heaters are being well marketed at a third of the price and have these in their service kit!
There should be a 2mm thick ceramic/glass fiber mat under the metallic mesh from the factory. Mine was hardly recognizable from coal deposits. However noone sells these mats as a spare part. Not even the Chinese. (Webasto had them for very old models as a spare – for insane prices as usual.)
Either they are not really necessary or it is overlooked or assumed you keep using the old one. On a German forum I have seen someone forming a replacement mat from a bit of Rockwool (roof isolation) that should withstand 1000°C. As your heater is doing fine with just the metal mesh, both solutions seem to work.
Great clear instructions. Will get some new mesh from Aliexpress.
I took apart two more heaters and did some research. From what I gather Webasto dropped the glass fiber mat backing with later production burners. The first generation had them while later production and replacement burners came just with the metal mesh.
So it won’t hurt leaving it out either and you are not missing any vital part if yours came with only the metal mesh. It’s just a more recent version.
Great find, I’m going to try this on my heater. Do you recall what length the M2.5 screws were?