
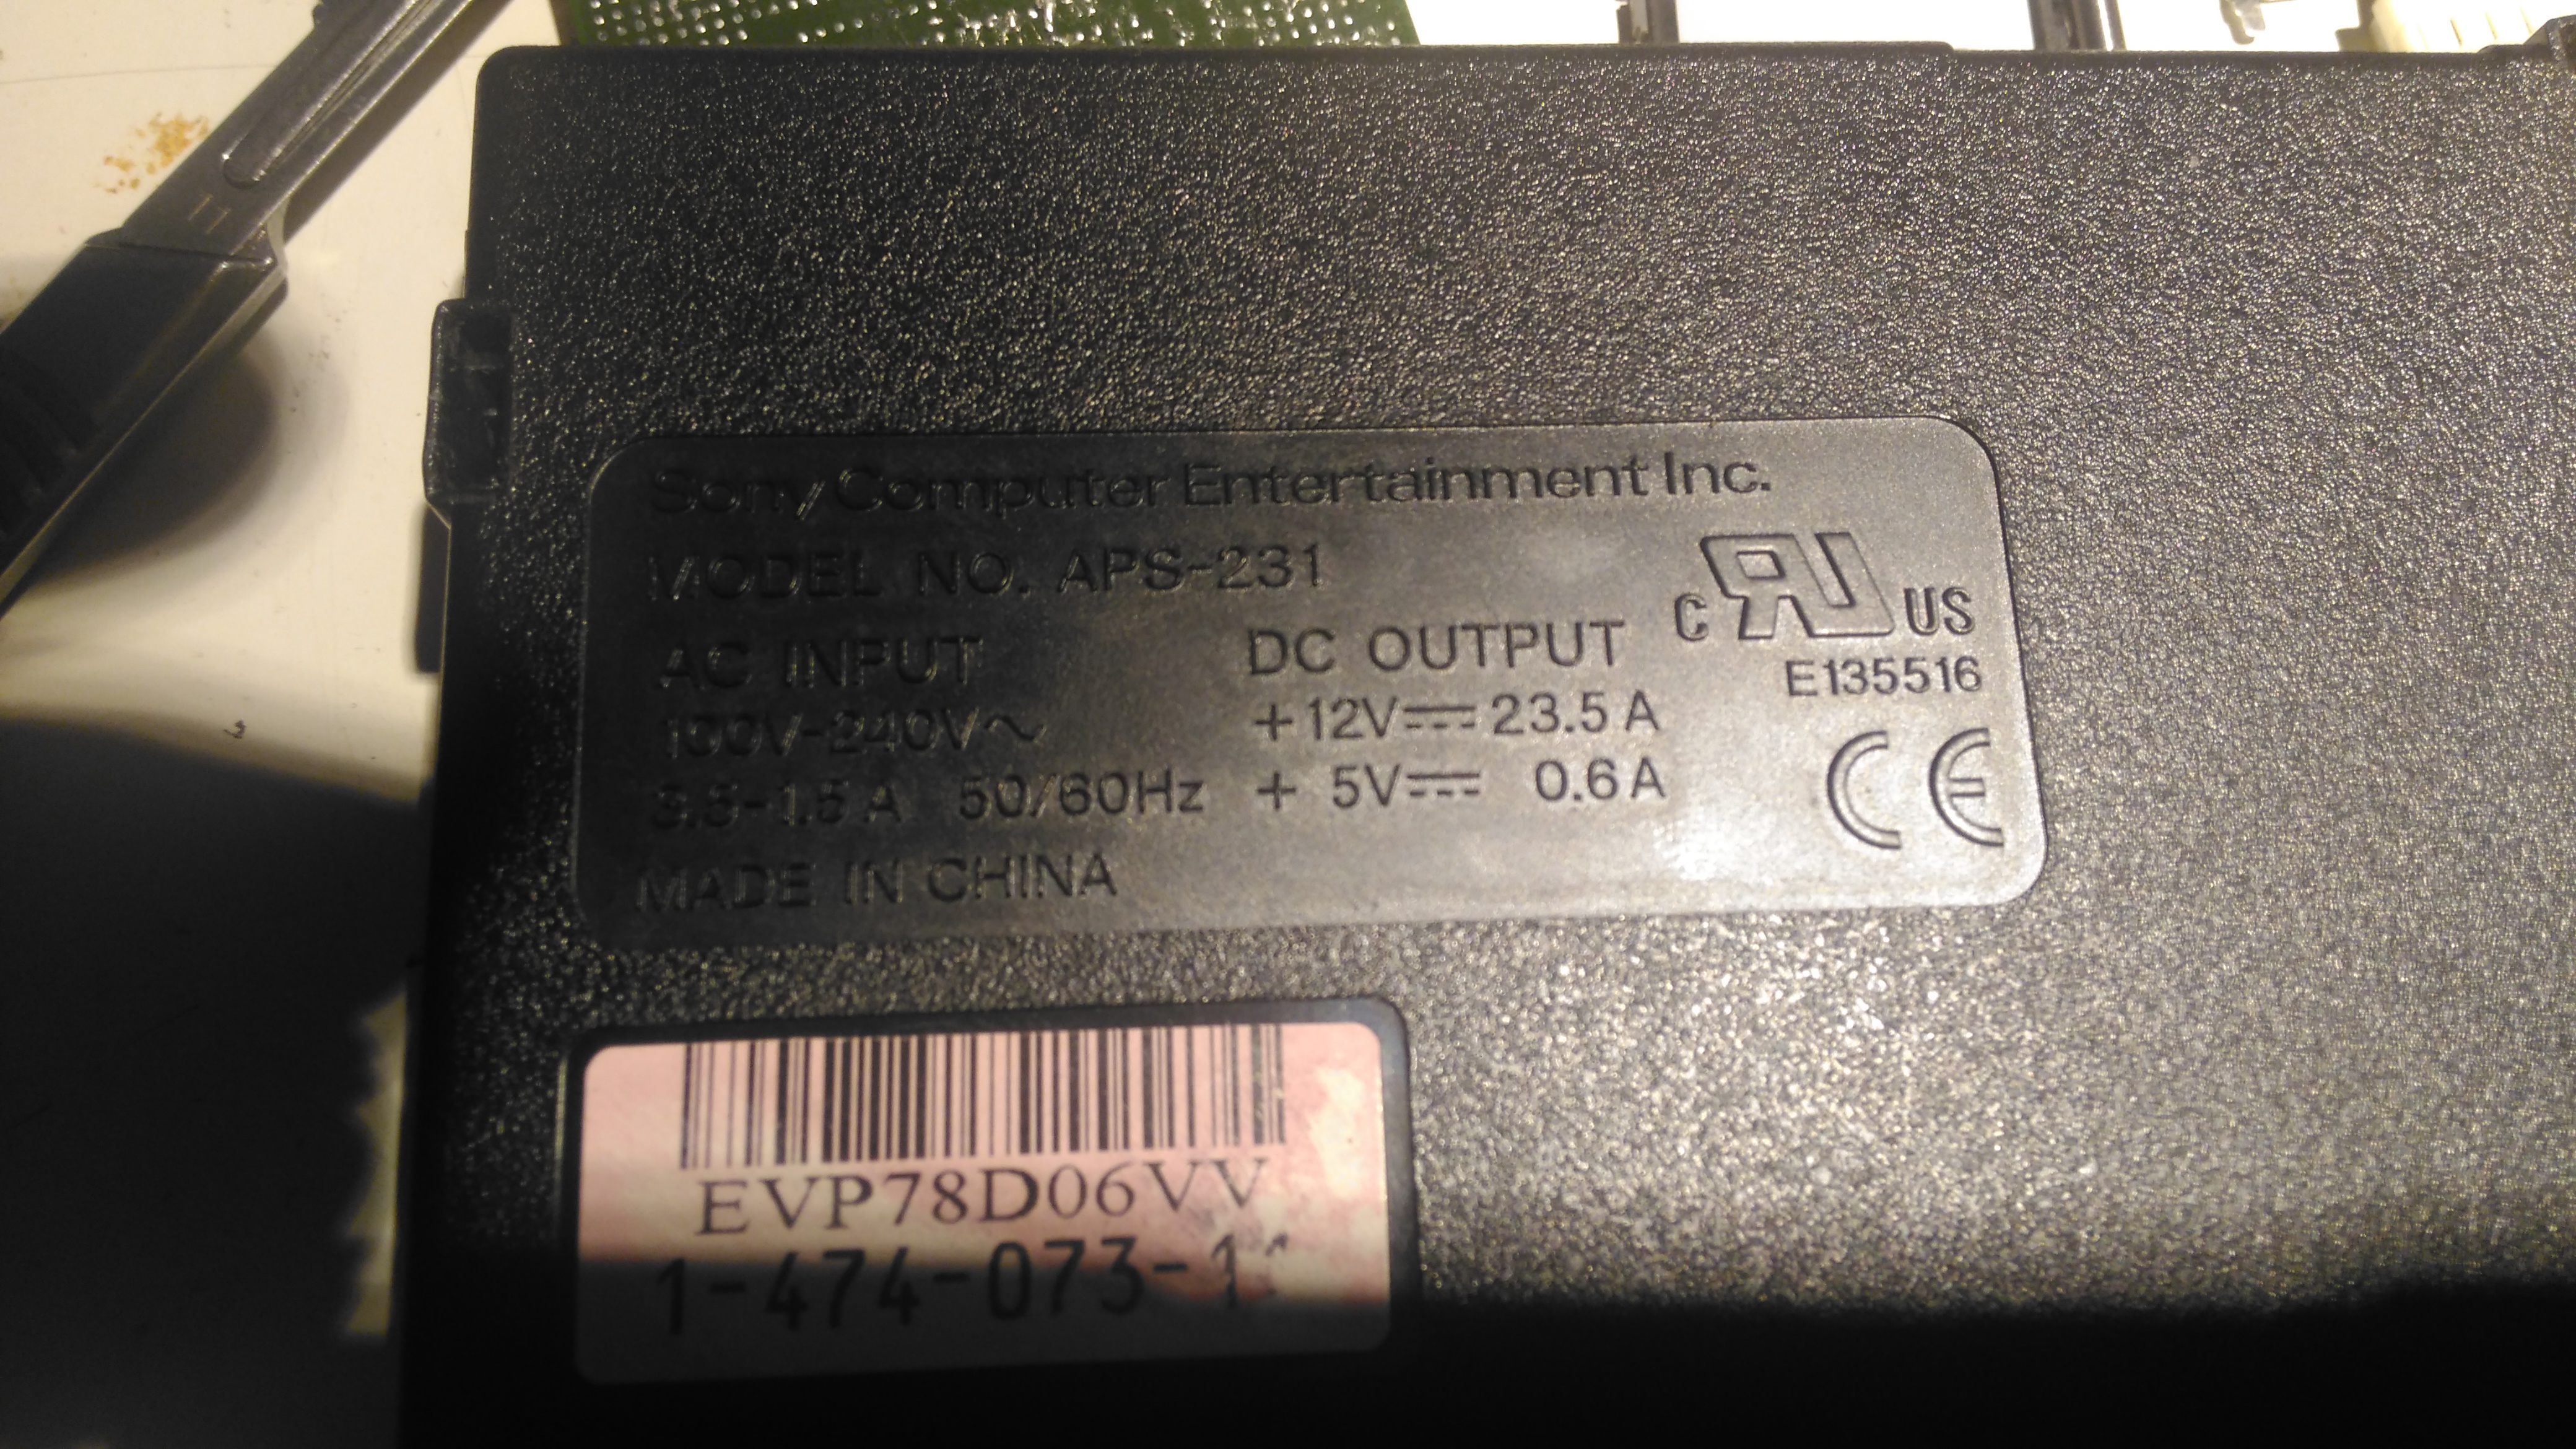
I was recently given a Sony PS3 with a dead disc drive, and since I’m not a console gamer I figured I’d see if there were any handy parts inside. Turns out these units contain a rather nice SMPS, the Sony APS-231 with a high power 12v rail, rated at 23.5A. A bit of searching around discovered a thread on the BadCaps Forums about voltage modding these supplies for a 13.8v output, suitable for my Ham radio gear.
These supplies are controlled by a Sony CXA8038A, for which there is very little information. Active PFC is included, along with synchronous rectification which increases the efficiency of the supply, and in turn, reduces the waste heat output from the rectifiers.
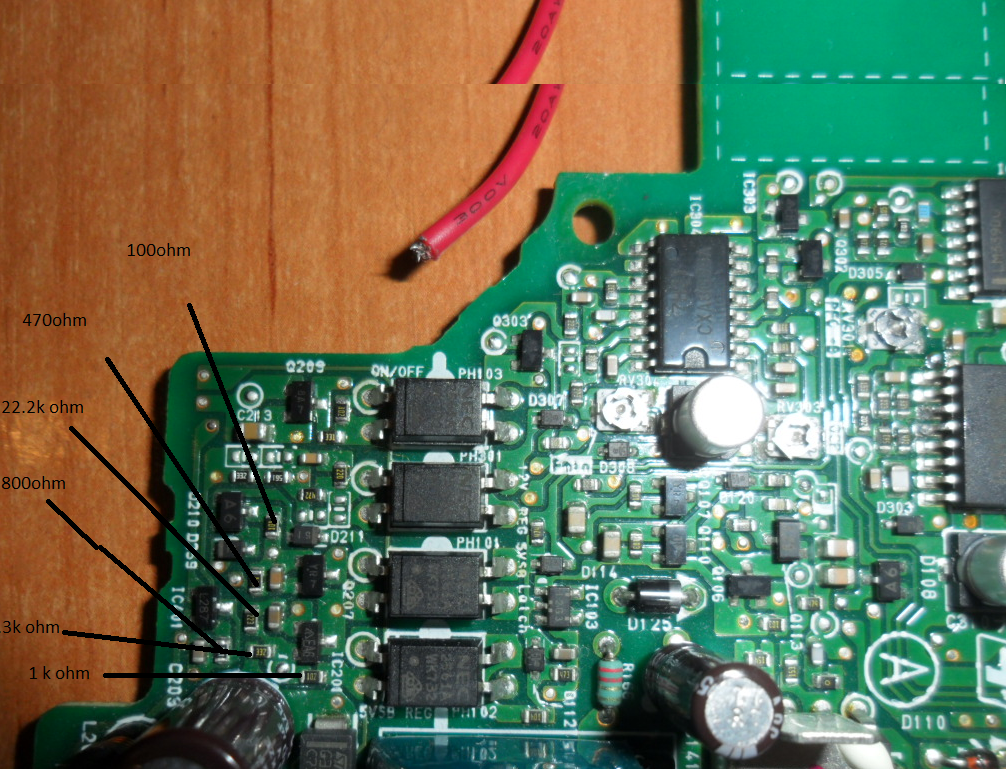
Like many of the SMPS units I’ve seen, the output voltage is controlled by referencing it to an adjustable shunt reference, and adjusting the set point of this reference will in turn adjust the output voltage of the supply, this is done in circuit by a single resistor.
Here’s the regulator section of the PSU, with the resistors labelled. The one we’re after changing is the 800Ω one between pins 2 & 3 of the TS2431 shunt reference. It’s a very small 0402 size resistor, located right next to the filter electrolytic for the 5v standby supply circuit. A fine tip on the soldering iron is required to get this resistor removed.
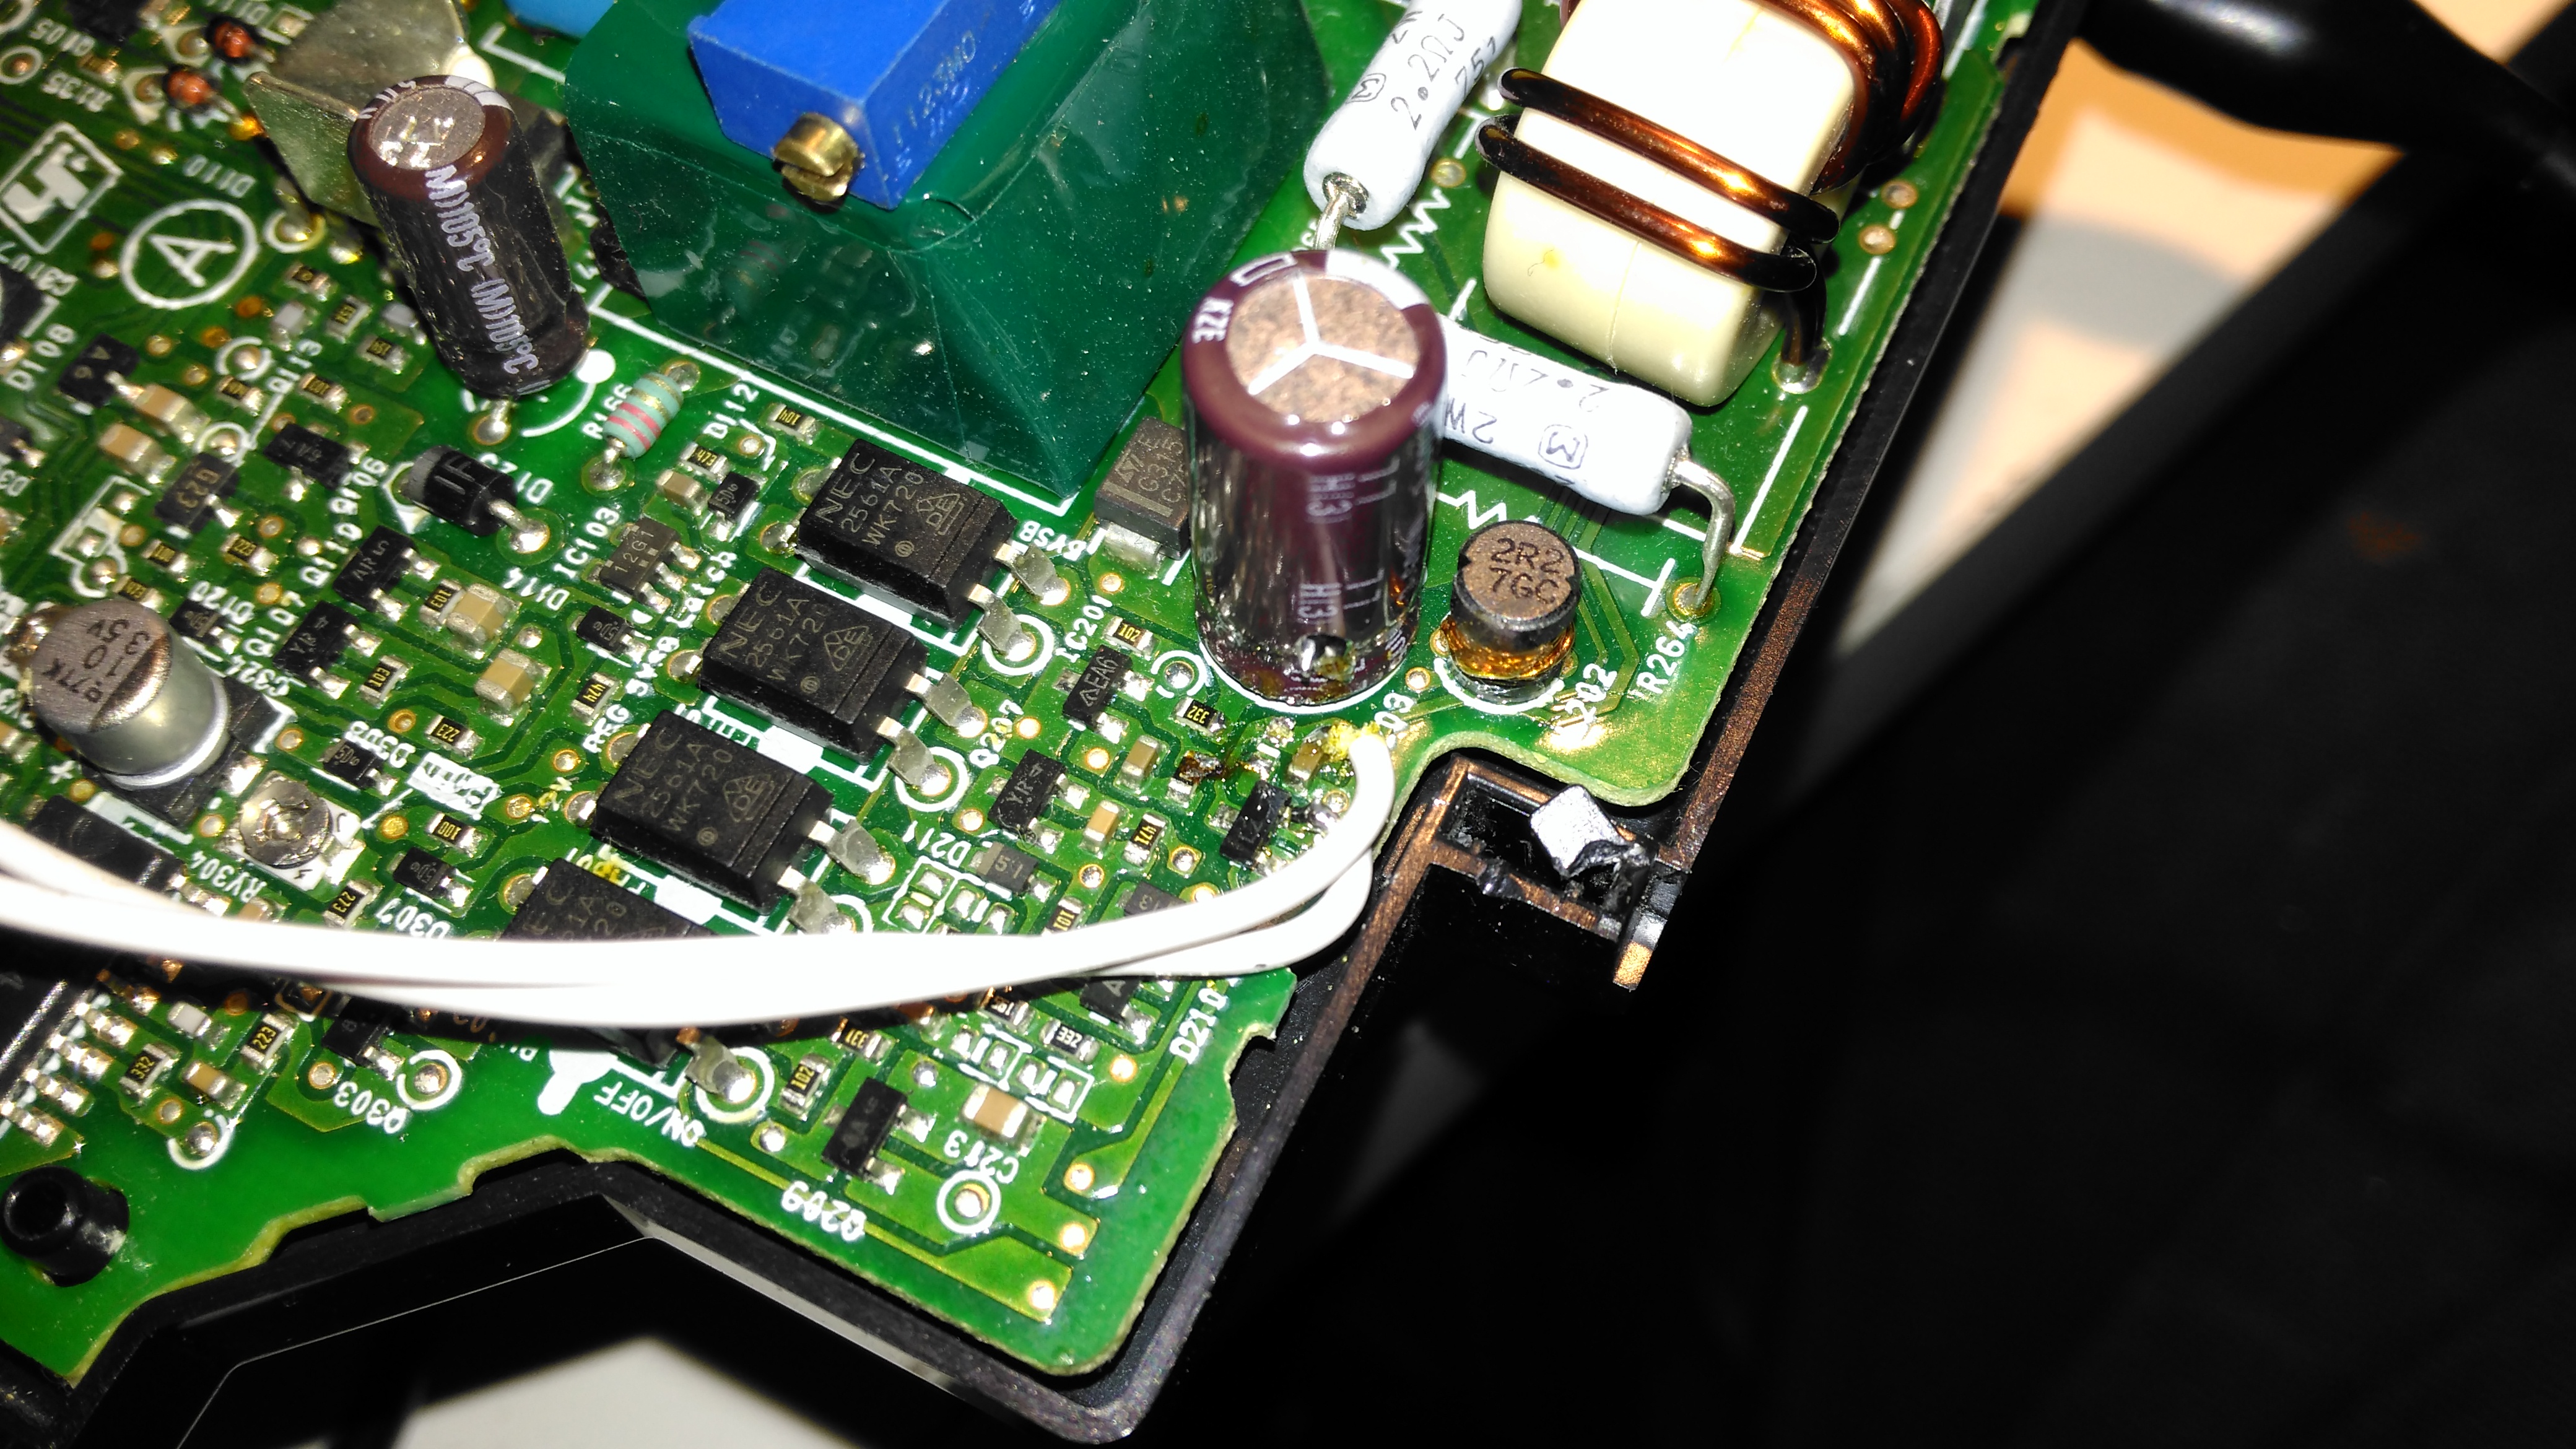
Once this resistor is removed from the circuit, a 1KΩ 18-turn potentiometer is fitted in it’s place, from the Anode (Pin 3) to the Ref. (Pin 2) pins of the TS2431 shunt reference. I initally set the potentiometer to be the same 800Ω as the factory set resistor, to make sure the supply would start up at a sensible voltage before I did the adjustment.
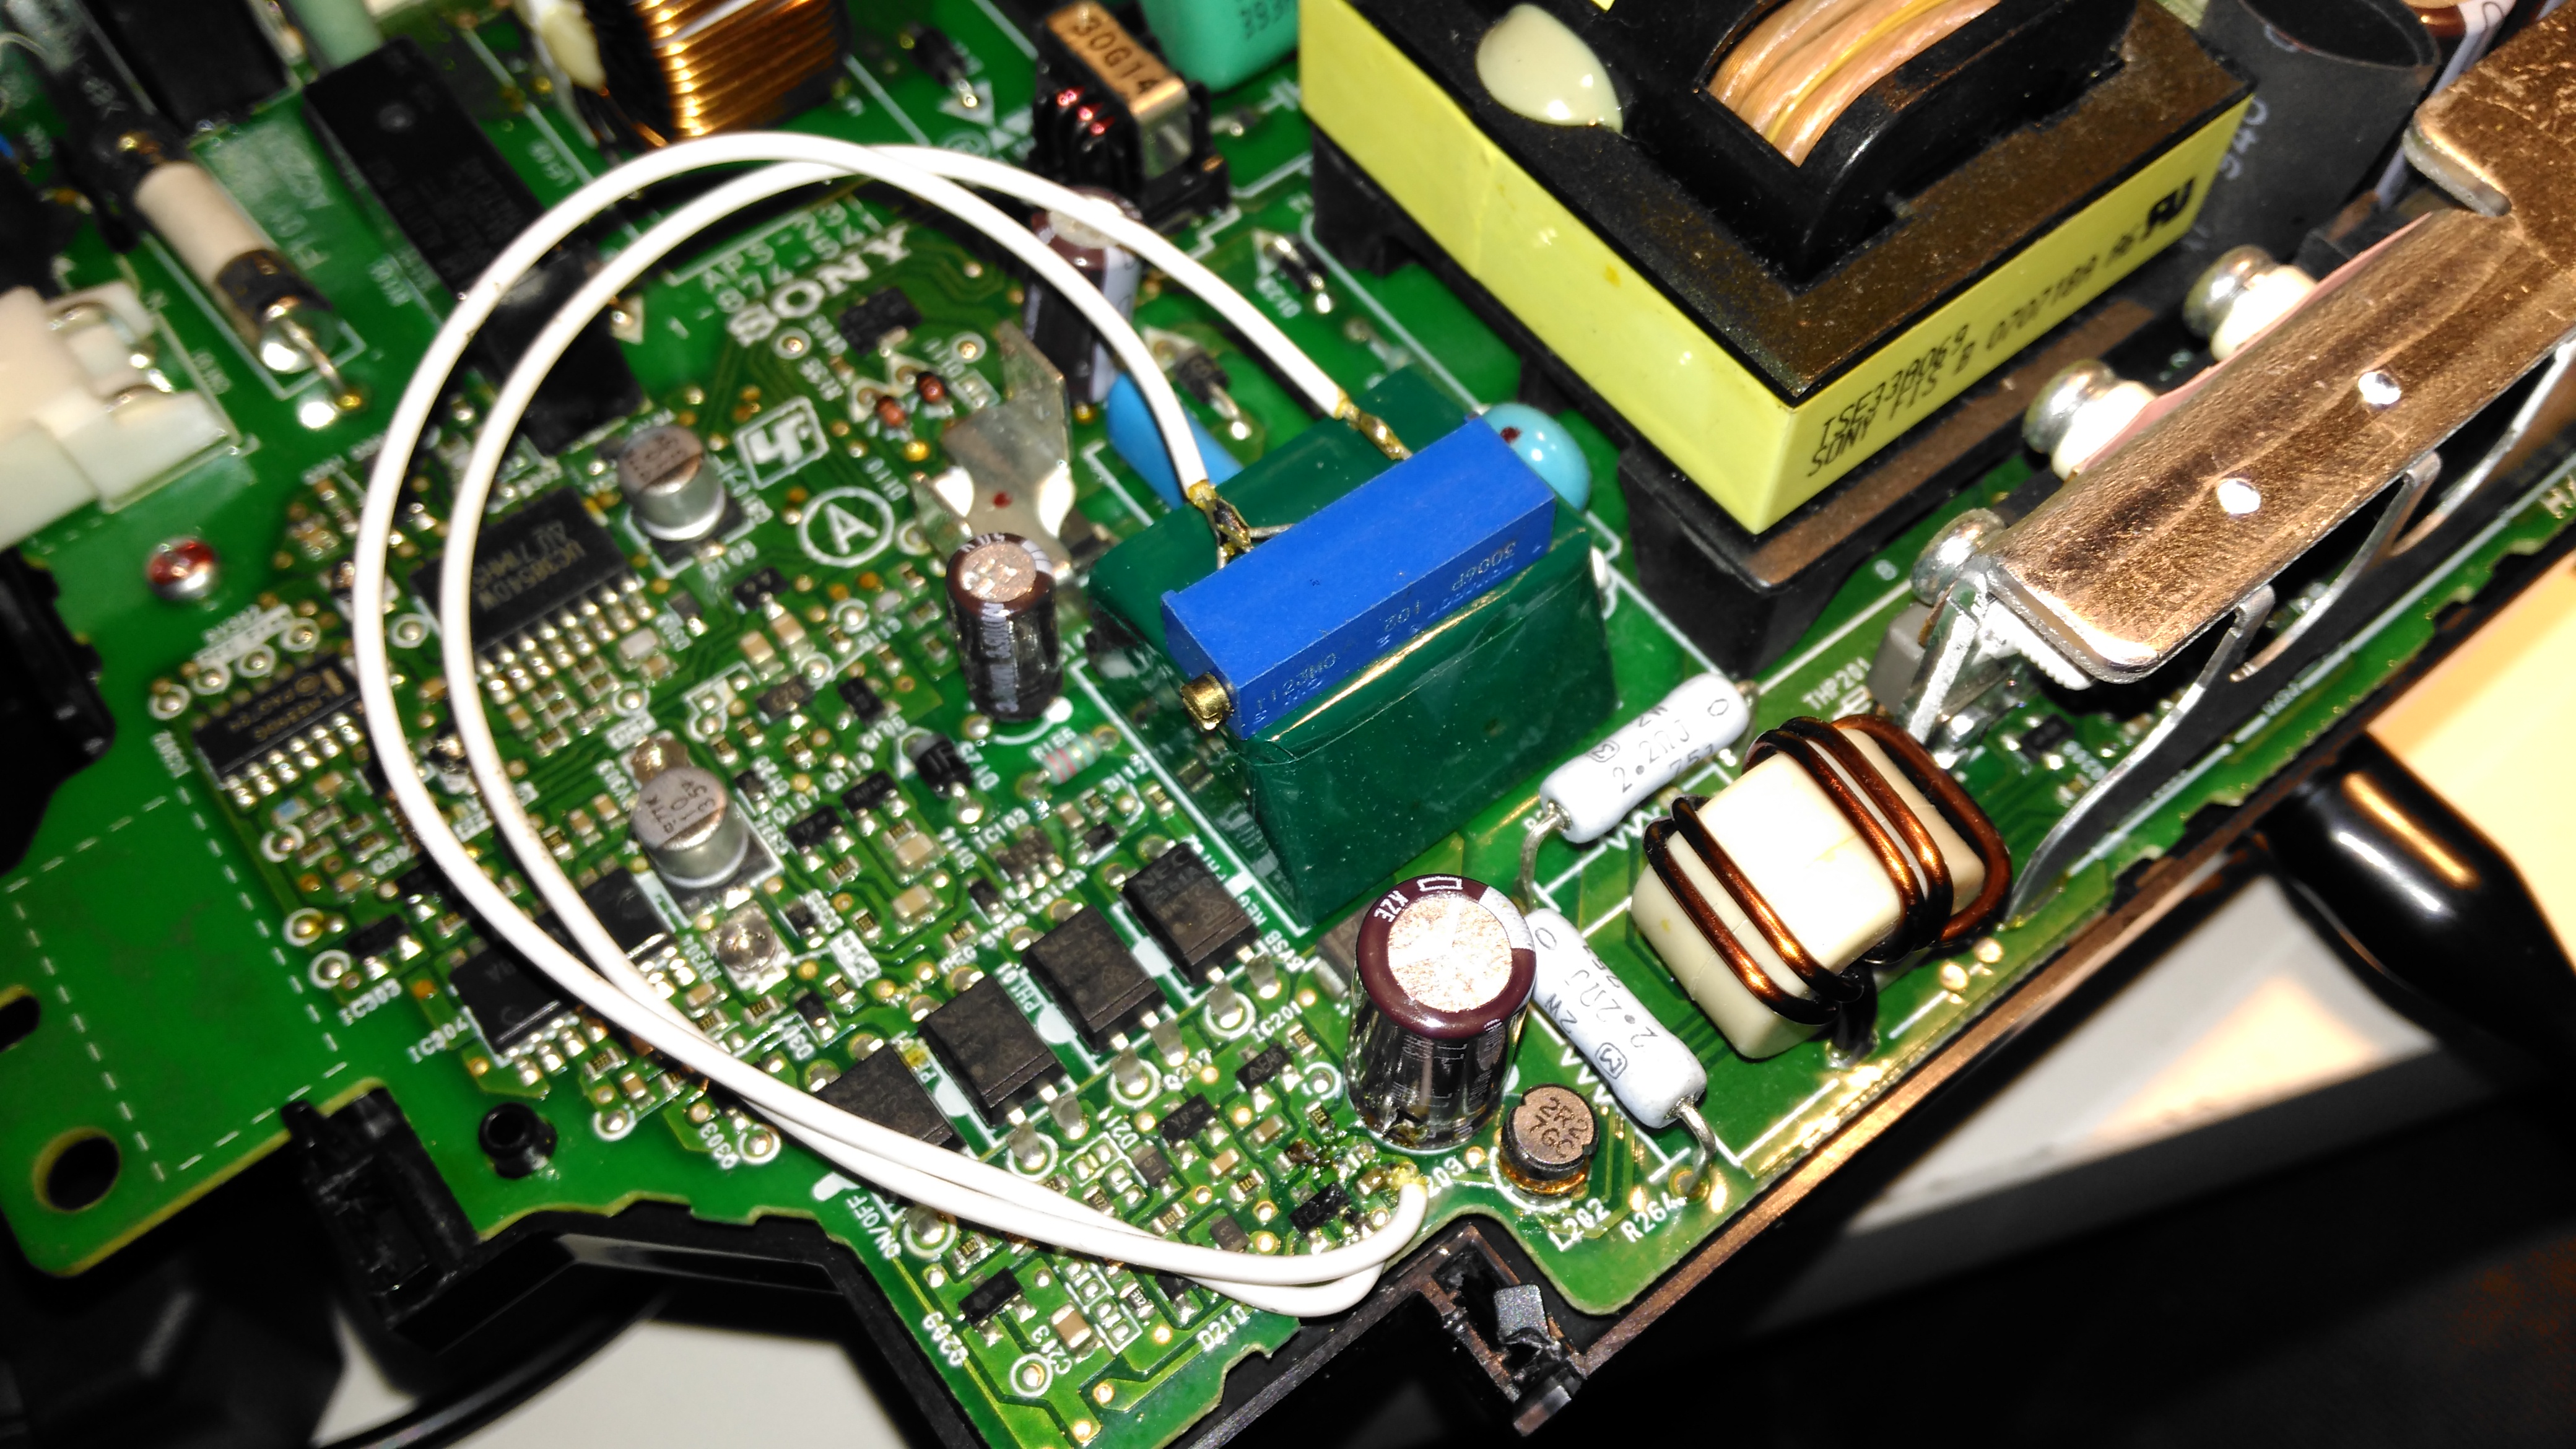
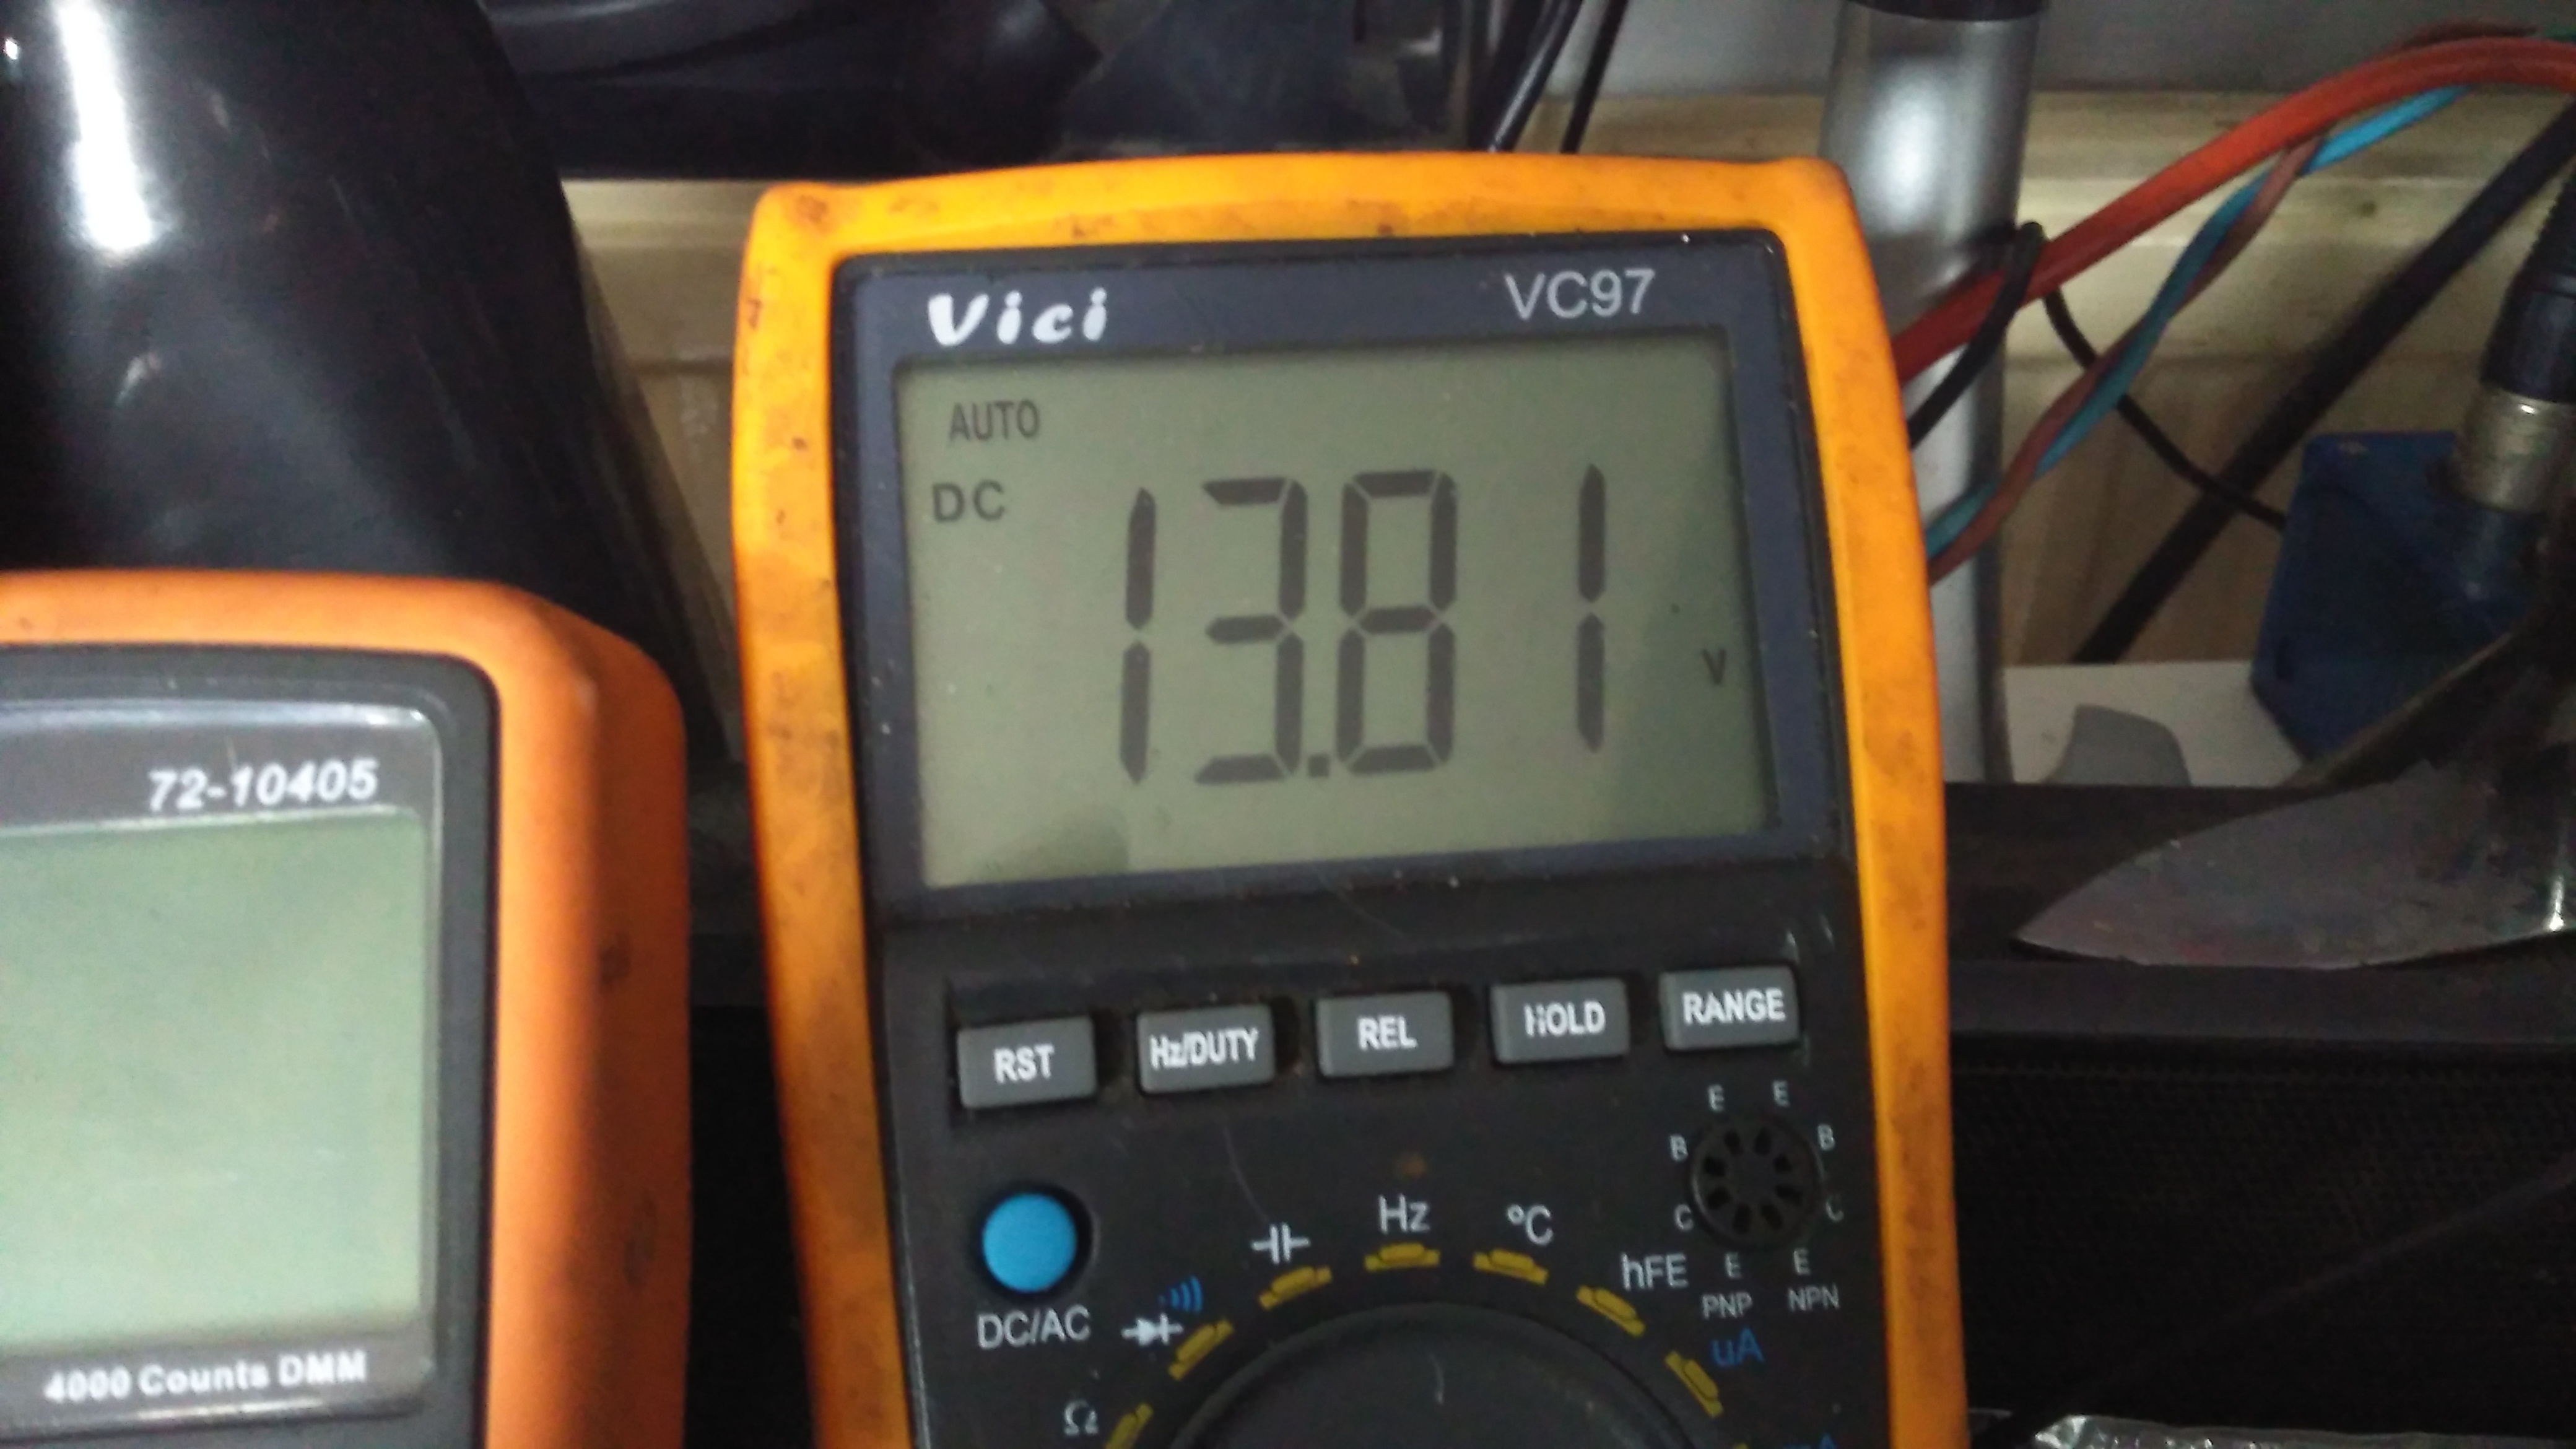
The pot is secured to the top of the standby supply transformer with a drop of CA glue to stop everything moving around. The supply can now be adjusted to a higher setpoint voltage – 13.8v is about the maxumum, as the OVP cuts the supply out at between 13.9v-14v.
After doing some testing at roughly 50% of the supply’s rated load, everything seems to be stable, and nothing is heating up more than I’d expect.

Very useful information! But could you tell me what’s the set resistance of the potentiometer to get that voltage? I’d like to do this mod but I don’t really have a potentiometer laying around, so I’d like to use a resistor directly! Thanks in advance!
Hi, I don’t know what the setpoint resistance is off the top of my head, as I haven’t had the need to measure it. If I remember rightly though the resistance has to drop to get the output voltage to rise. You’re much better off with the potentiometer though – I doubt you’ll find a fixed resistor that’s just the right value to get the supply to 13.8v & it gives some room for error in the circuit without having to keep resoldering very small pads on the mainboard. Getting things wrong here may result in catastrophic failure of other components in the PSU!
Cheers for reading 🙂
de 2E0GXE
hello, i am trying to install a fan to help cool this power supply for my ps3. do you know of a point on the PSU’s pcb from which i could draw +5v? thanks in advance.
Hi,
Unfortunately I don’t, I’ve never seen the main PCB! A 12v fan could be driven directly from the PSU. The available voltage rails on the mainboard may not be able to sustain the extra draw from a fan.
Thx for sharing this, I did It 🙂
Hello, the lowest outpout we can take from this mod with this potentiometer; I want to use it as variable power supply. Thank you!
how to turn off the ovp so it can reach the highes voltage?
Hi Kidd,
I wouldn’t advise you do that – the output capacitors aren’t rated much higher than the standard output voltage. But it’s probably possible by removing the correct optocoupler drive. I don’t know which one though.
Cheers
it is easy to replace the capacitors but the same trick with aps 227 about the opto doesnt work at all,, any suggestion which opto should be removed?
No hace falta quitar nada. Hay que cortocircuitar las patillas del secundario en el segundo opto empezando a contar desde el transformador blanco