The Sterling charger we’ve had on board nb Tanya Louise since Feb 2014 has bitten the dust, with 31220 hours on it’s internal clock. Since we’re a liveaboard boat, this charger has had a lot of use while we’re on the mooring during winter, when the solar bank isn’t outputting it’s full rate. First, a bit of a teardown to explore the unit, then onto the repair:
There’s the usual mains input filtering on the left, with the bridge rectifier on it’s heatsink.
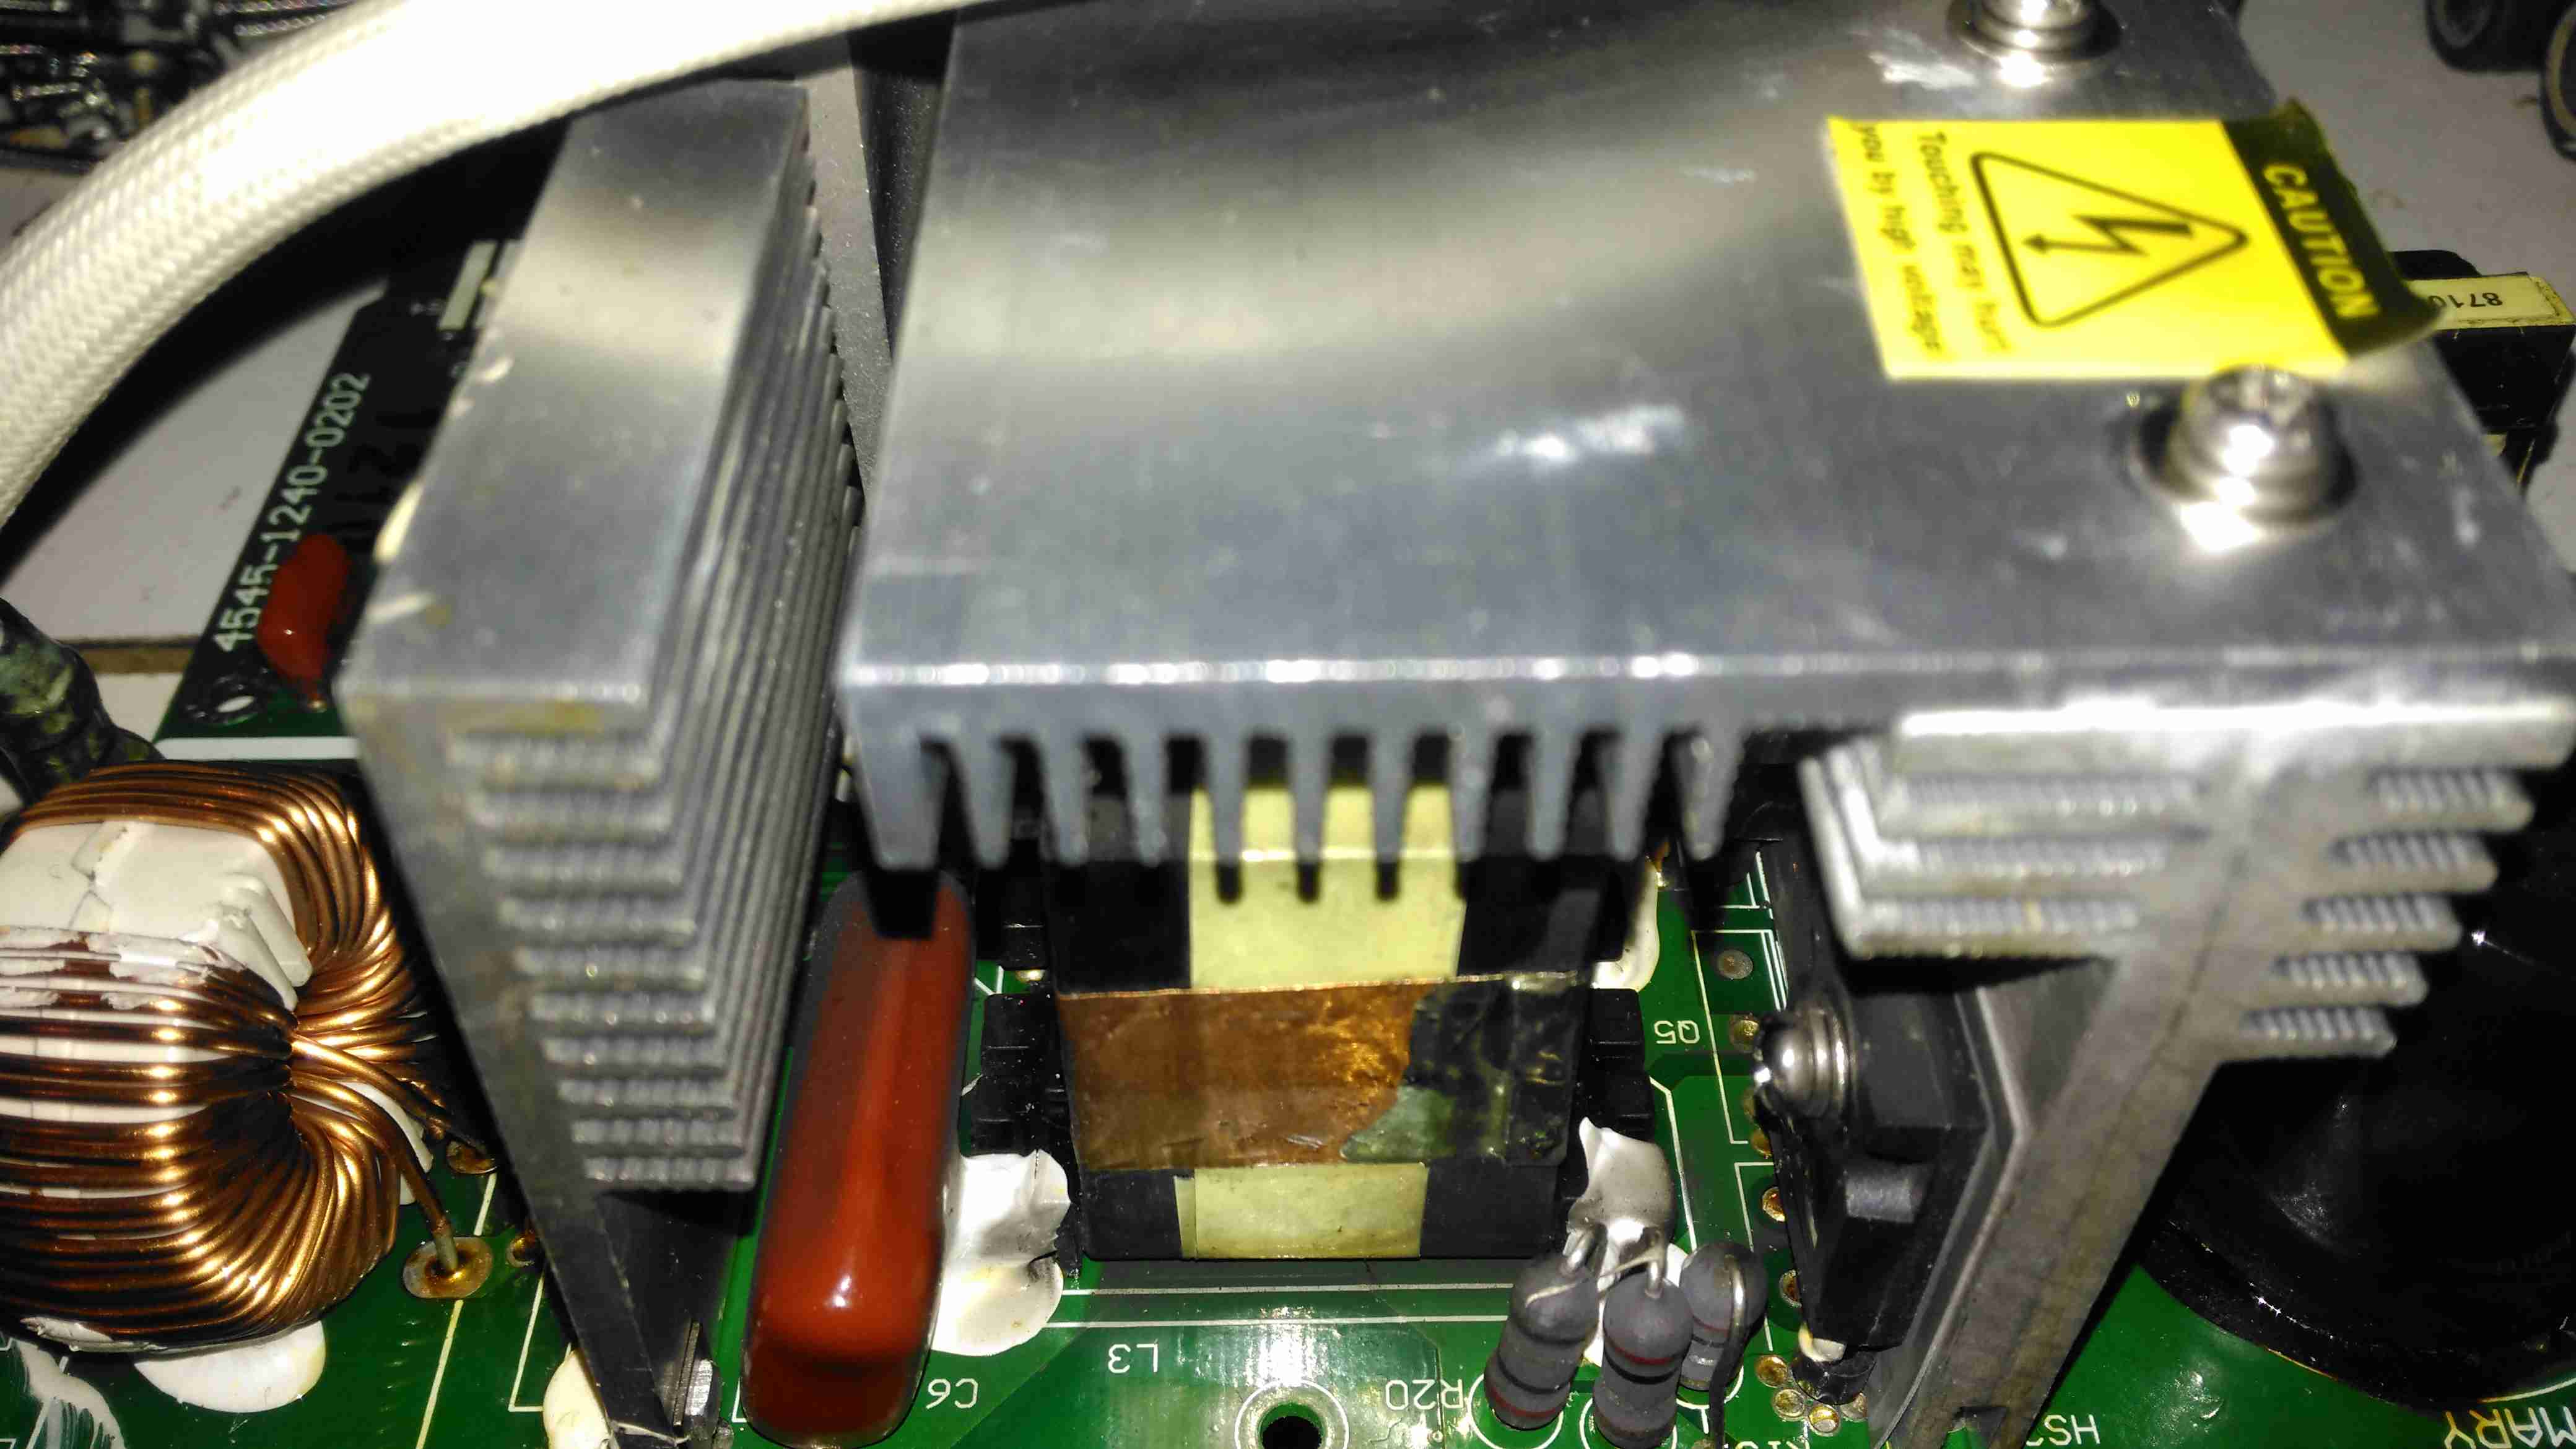
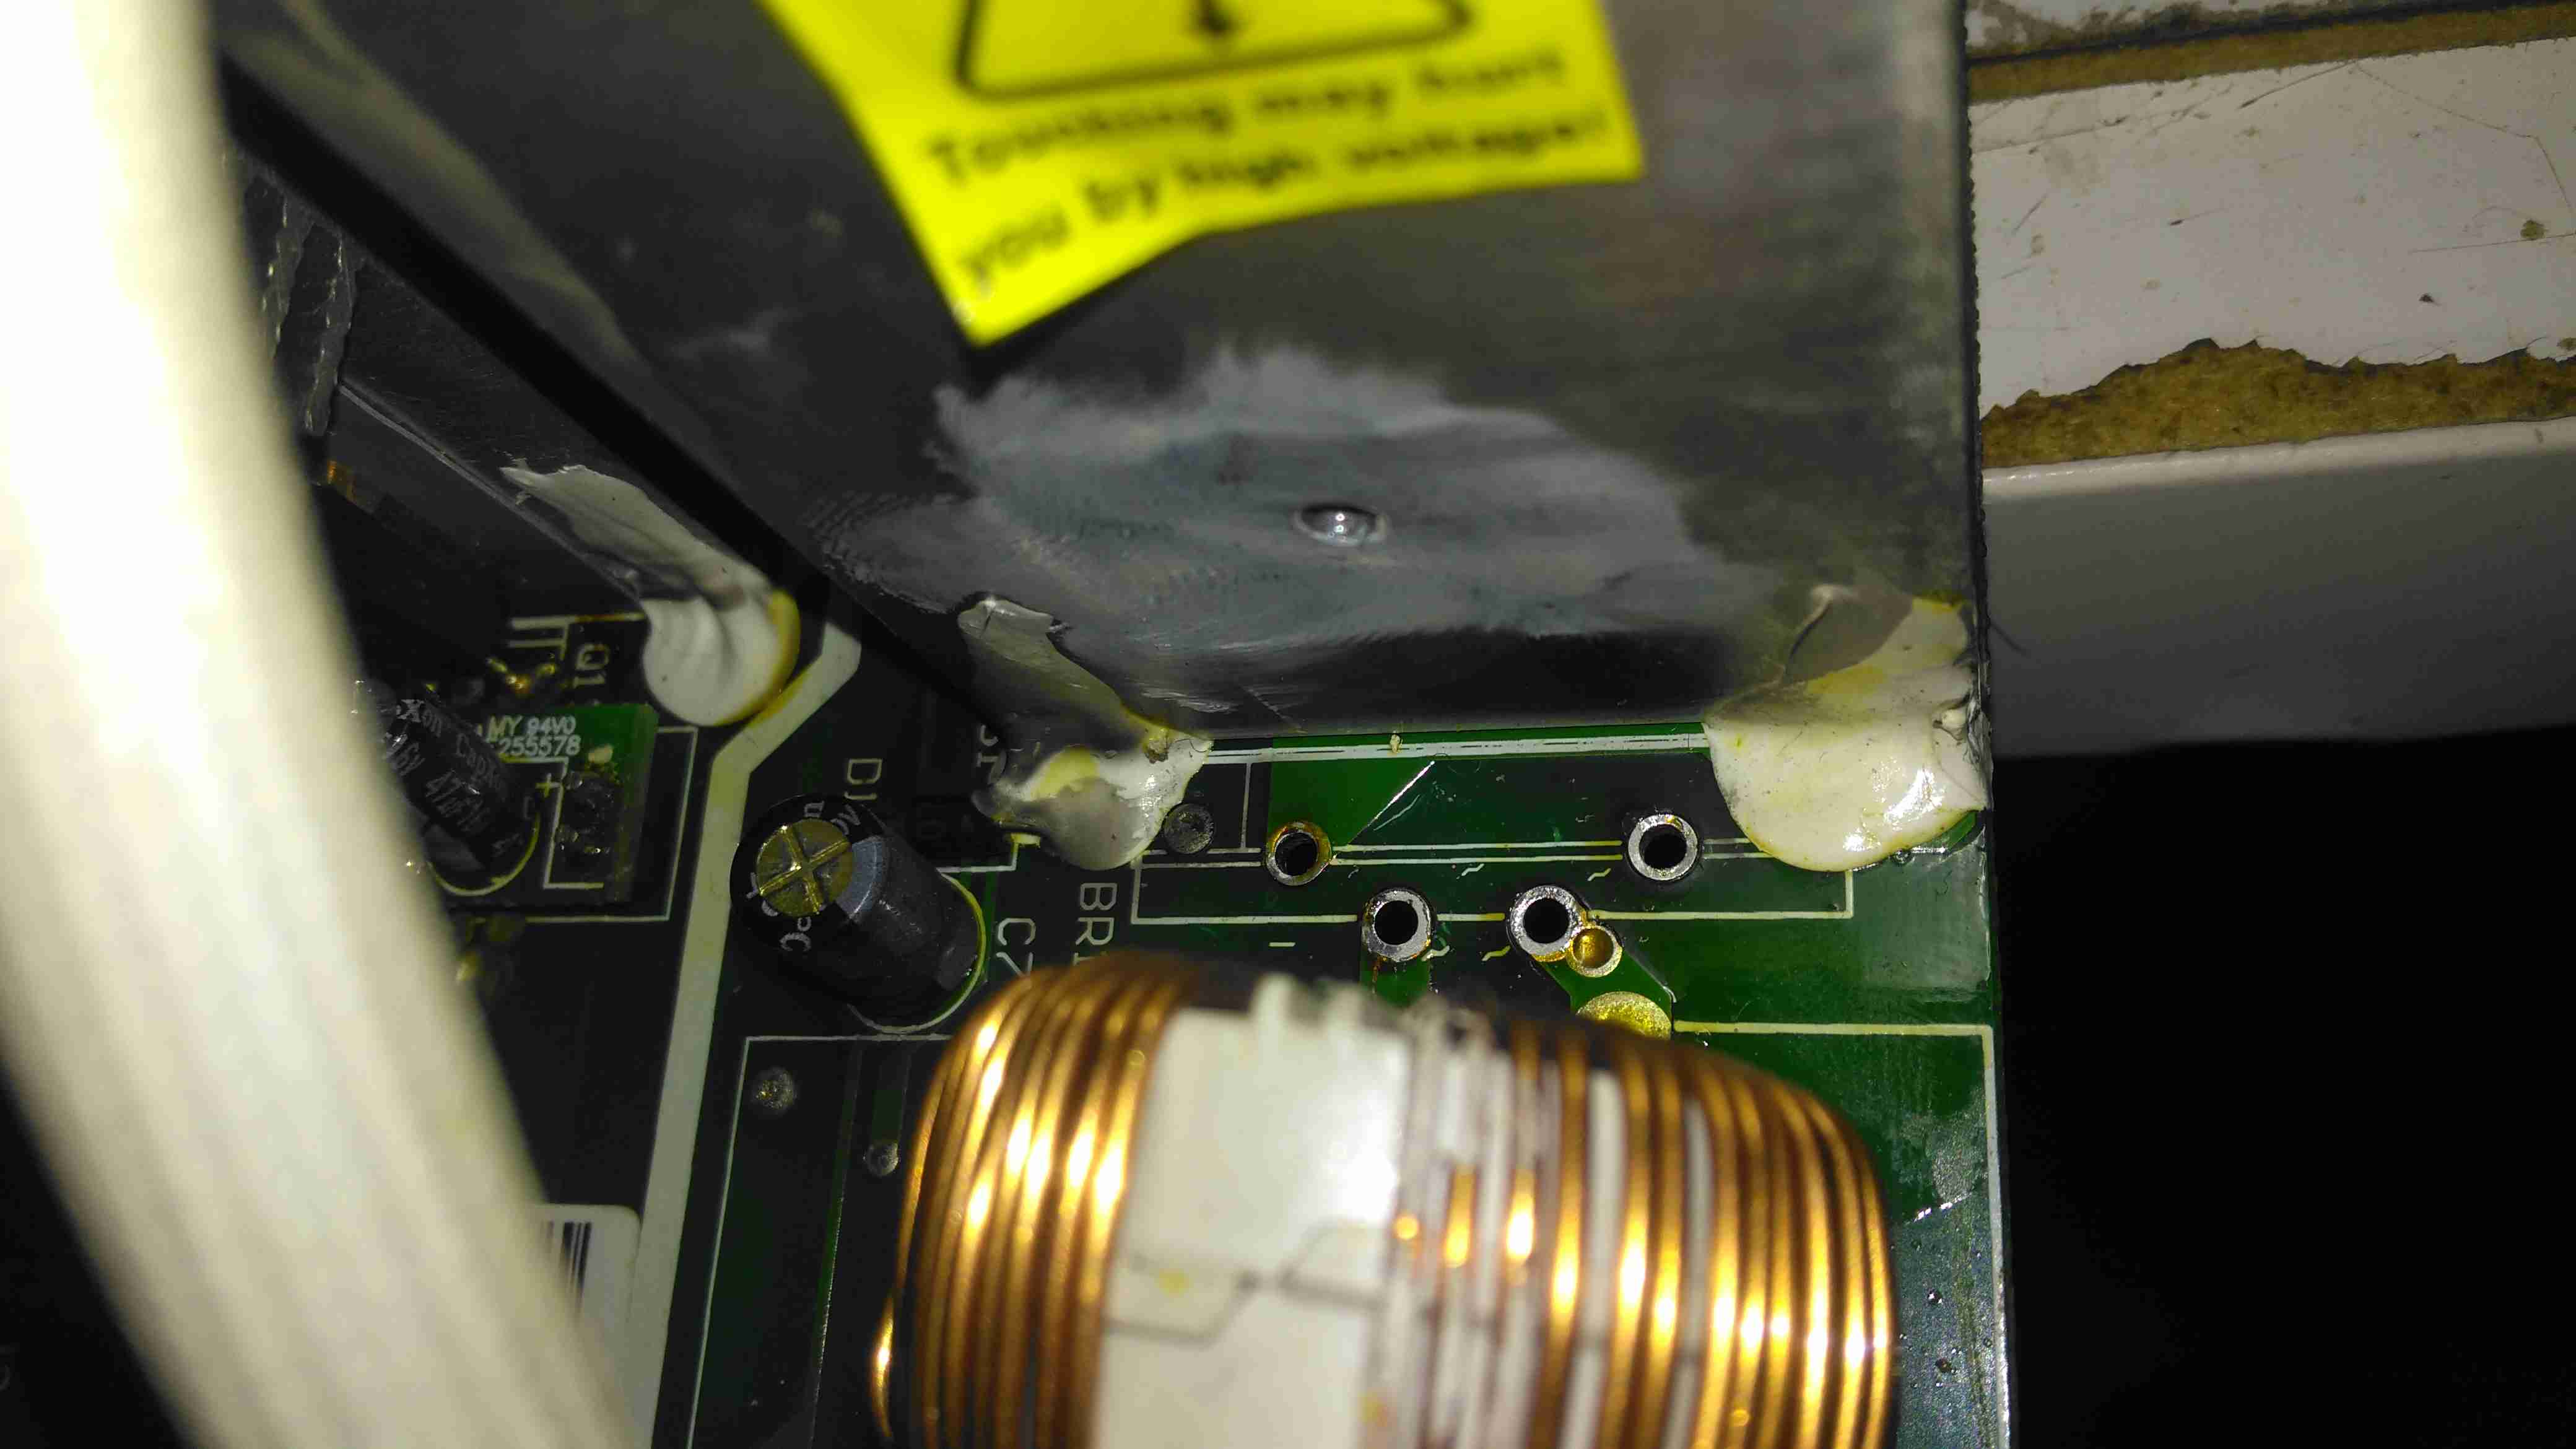
Underneath the centre massive heatsinks is the main transformer (not visible here) & active PFC circuit. The device peeking out from underneath is the huge inductor needed for PFC. It’s associated switching MOSFET is to the right.
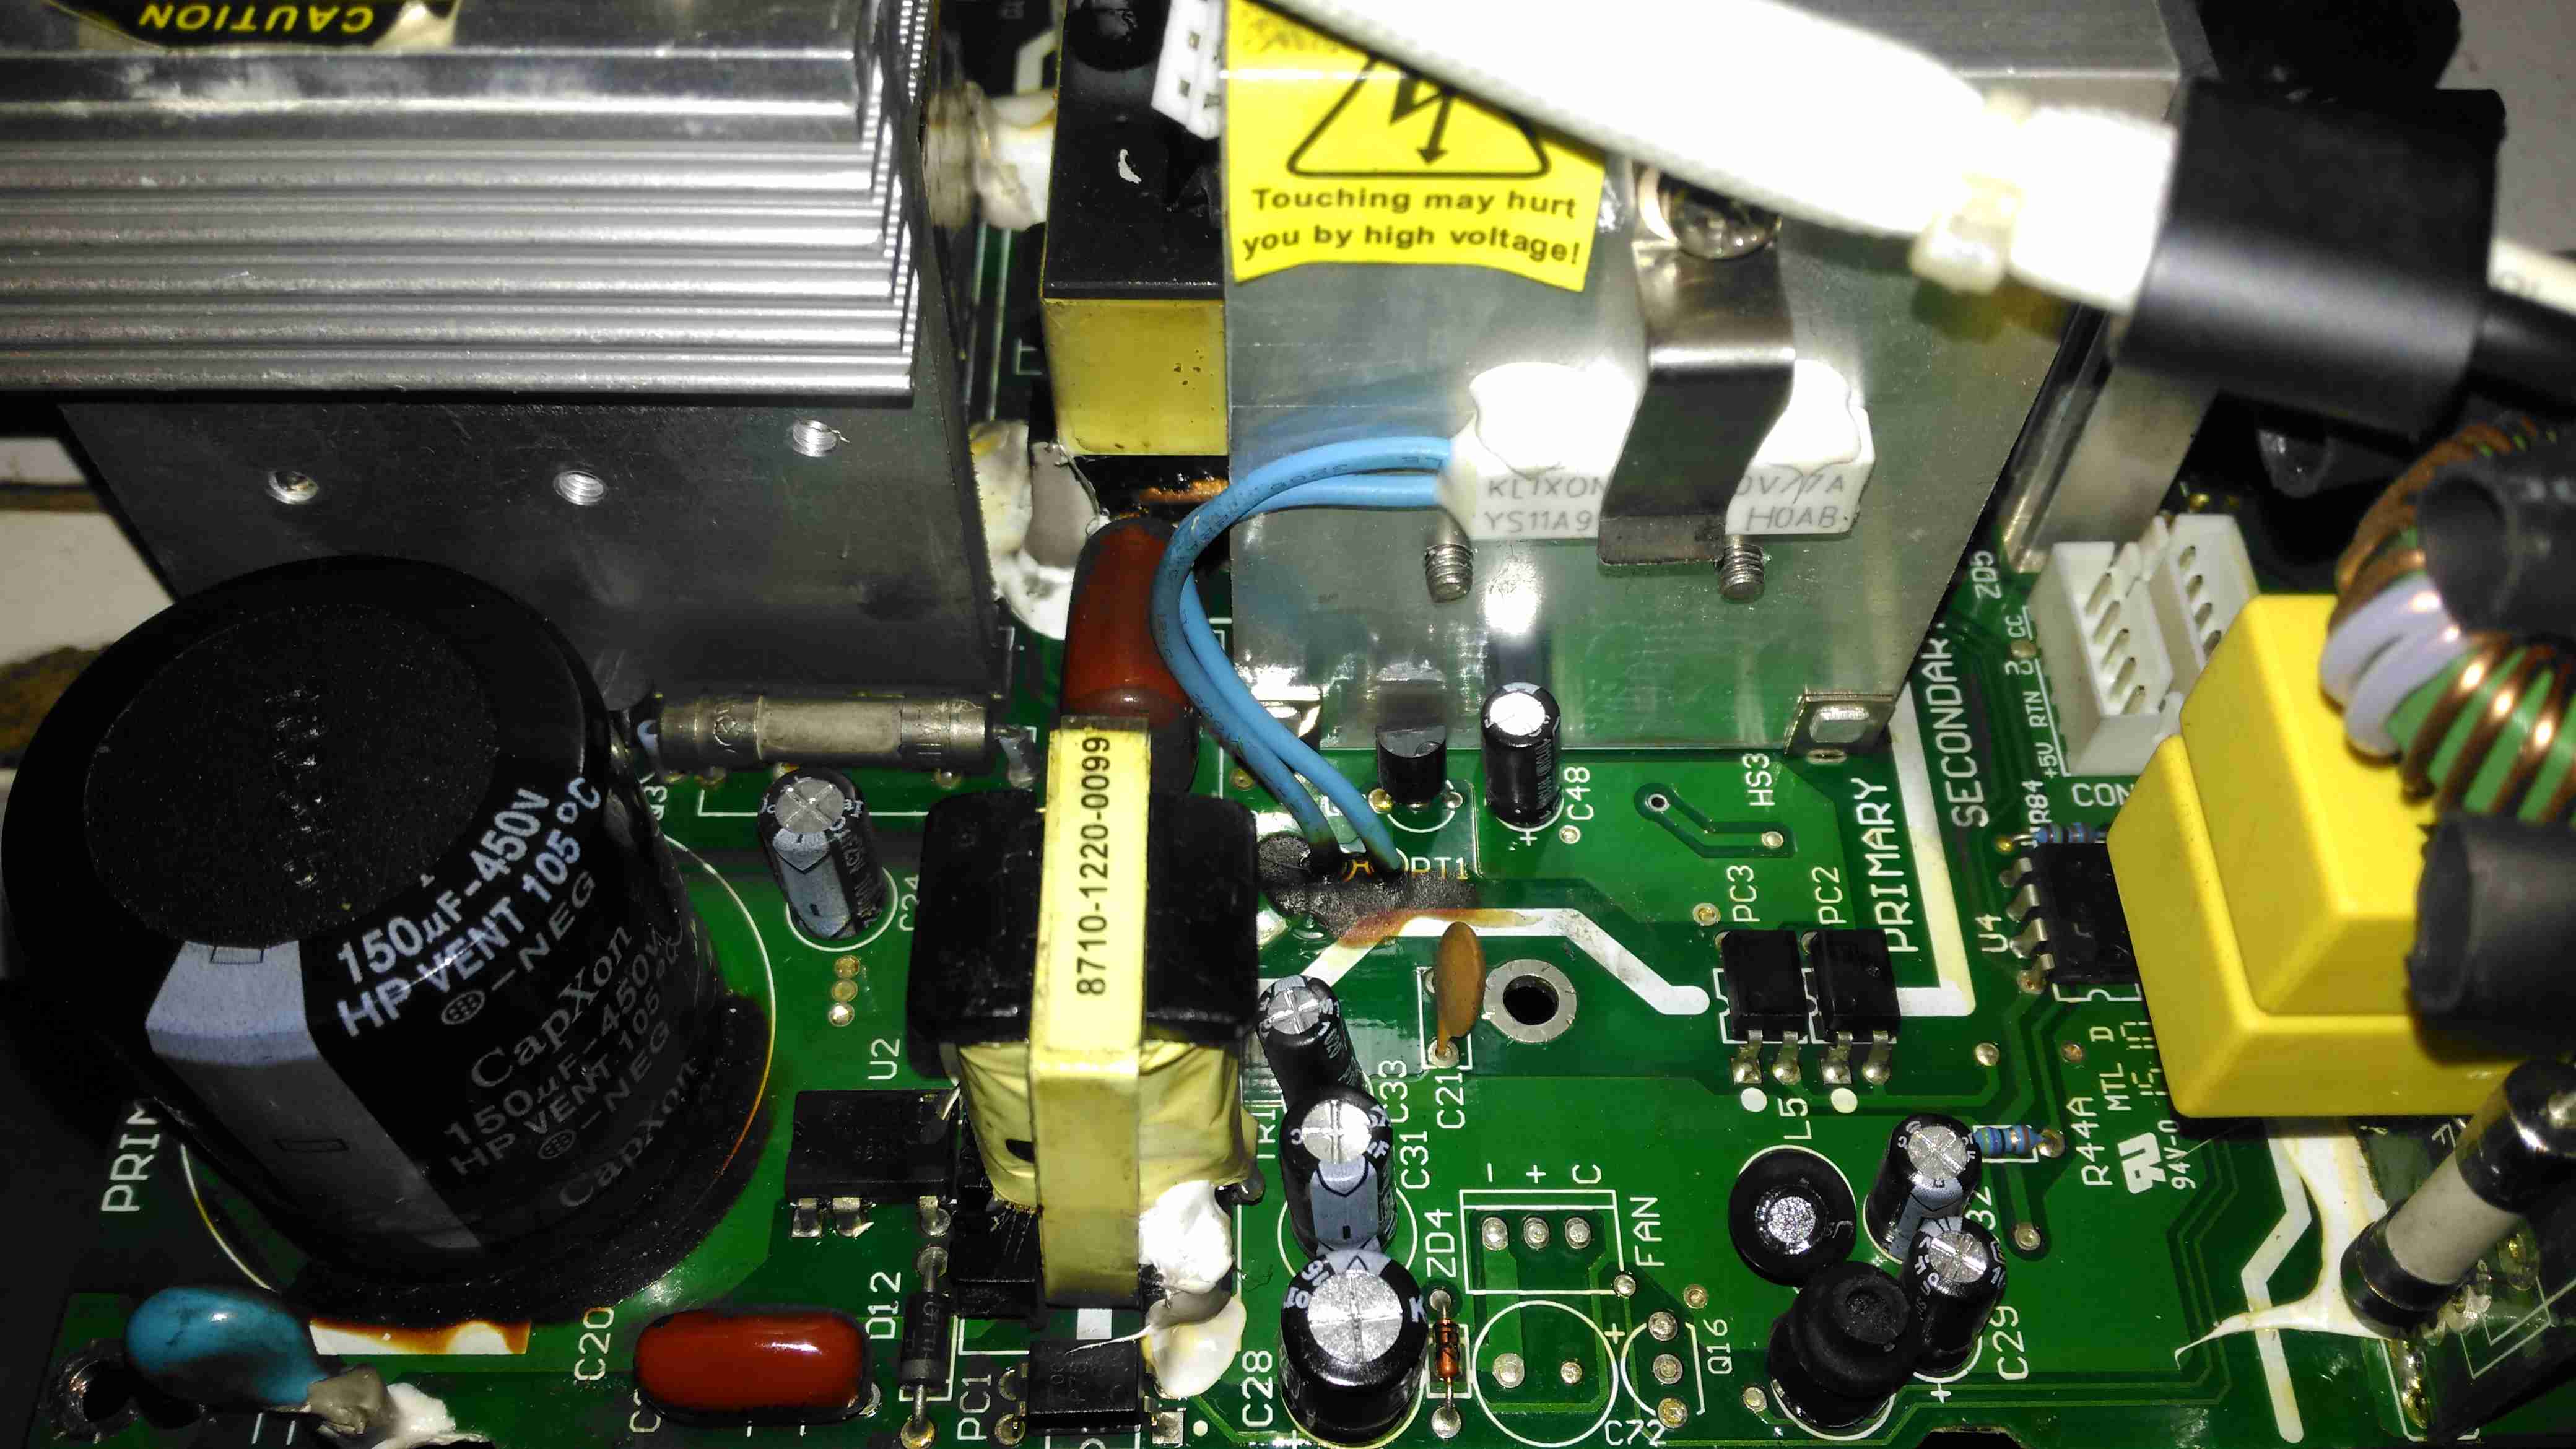
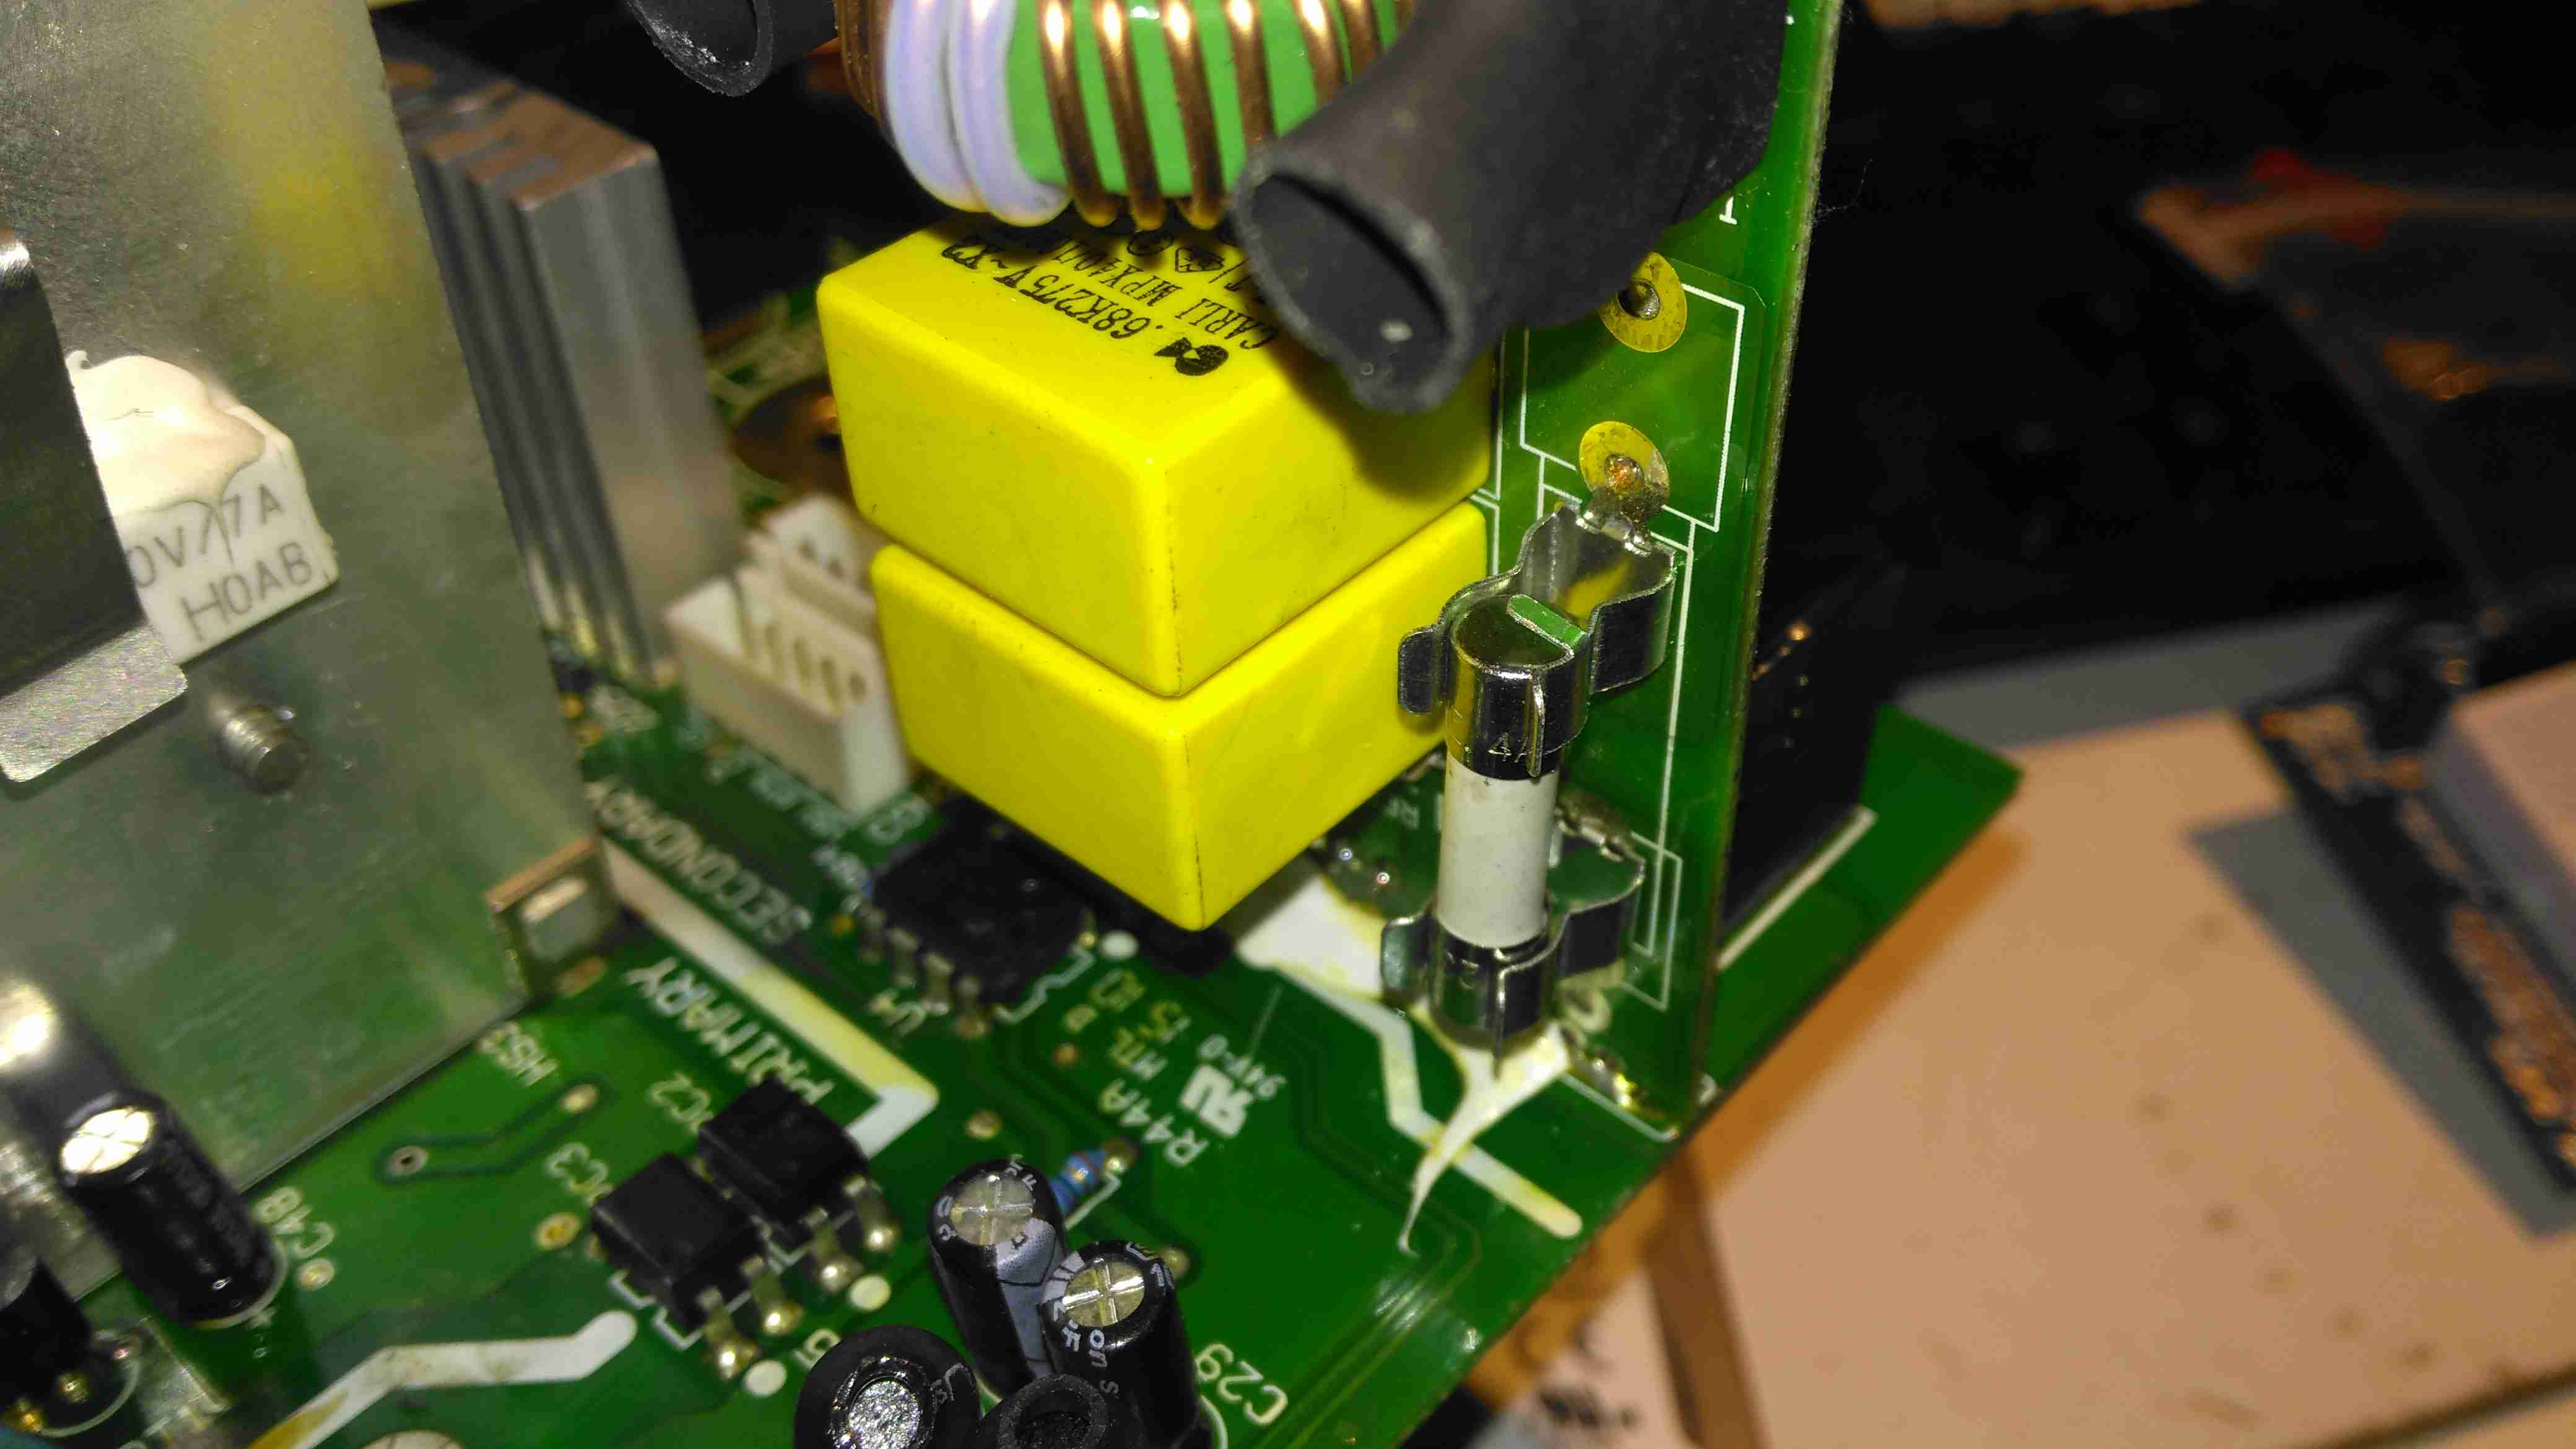
On the other side of the PFC section is the main DC rail filter electrolytic, a 450v 150µF part. Here some evidence of long-term heating can be seen in the adhesive around the base, it’s nearly completely turned black! It’s not a decent brand either, a Chinese CapXon.
The PCB fuse just behind it is in the DC feed to the main switching supply, so the input fuse only protects the filter & Active PFC circuitry. Luckily this fuse didn’t blow during the failure, telling me the fault was earlier in the power chain.
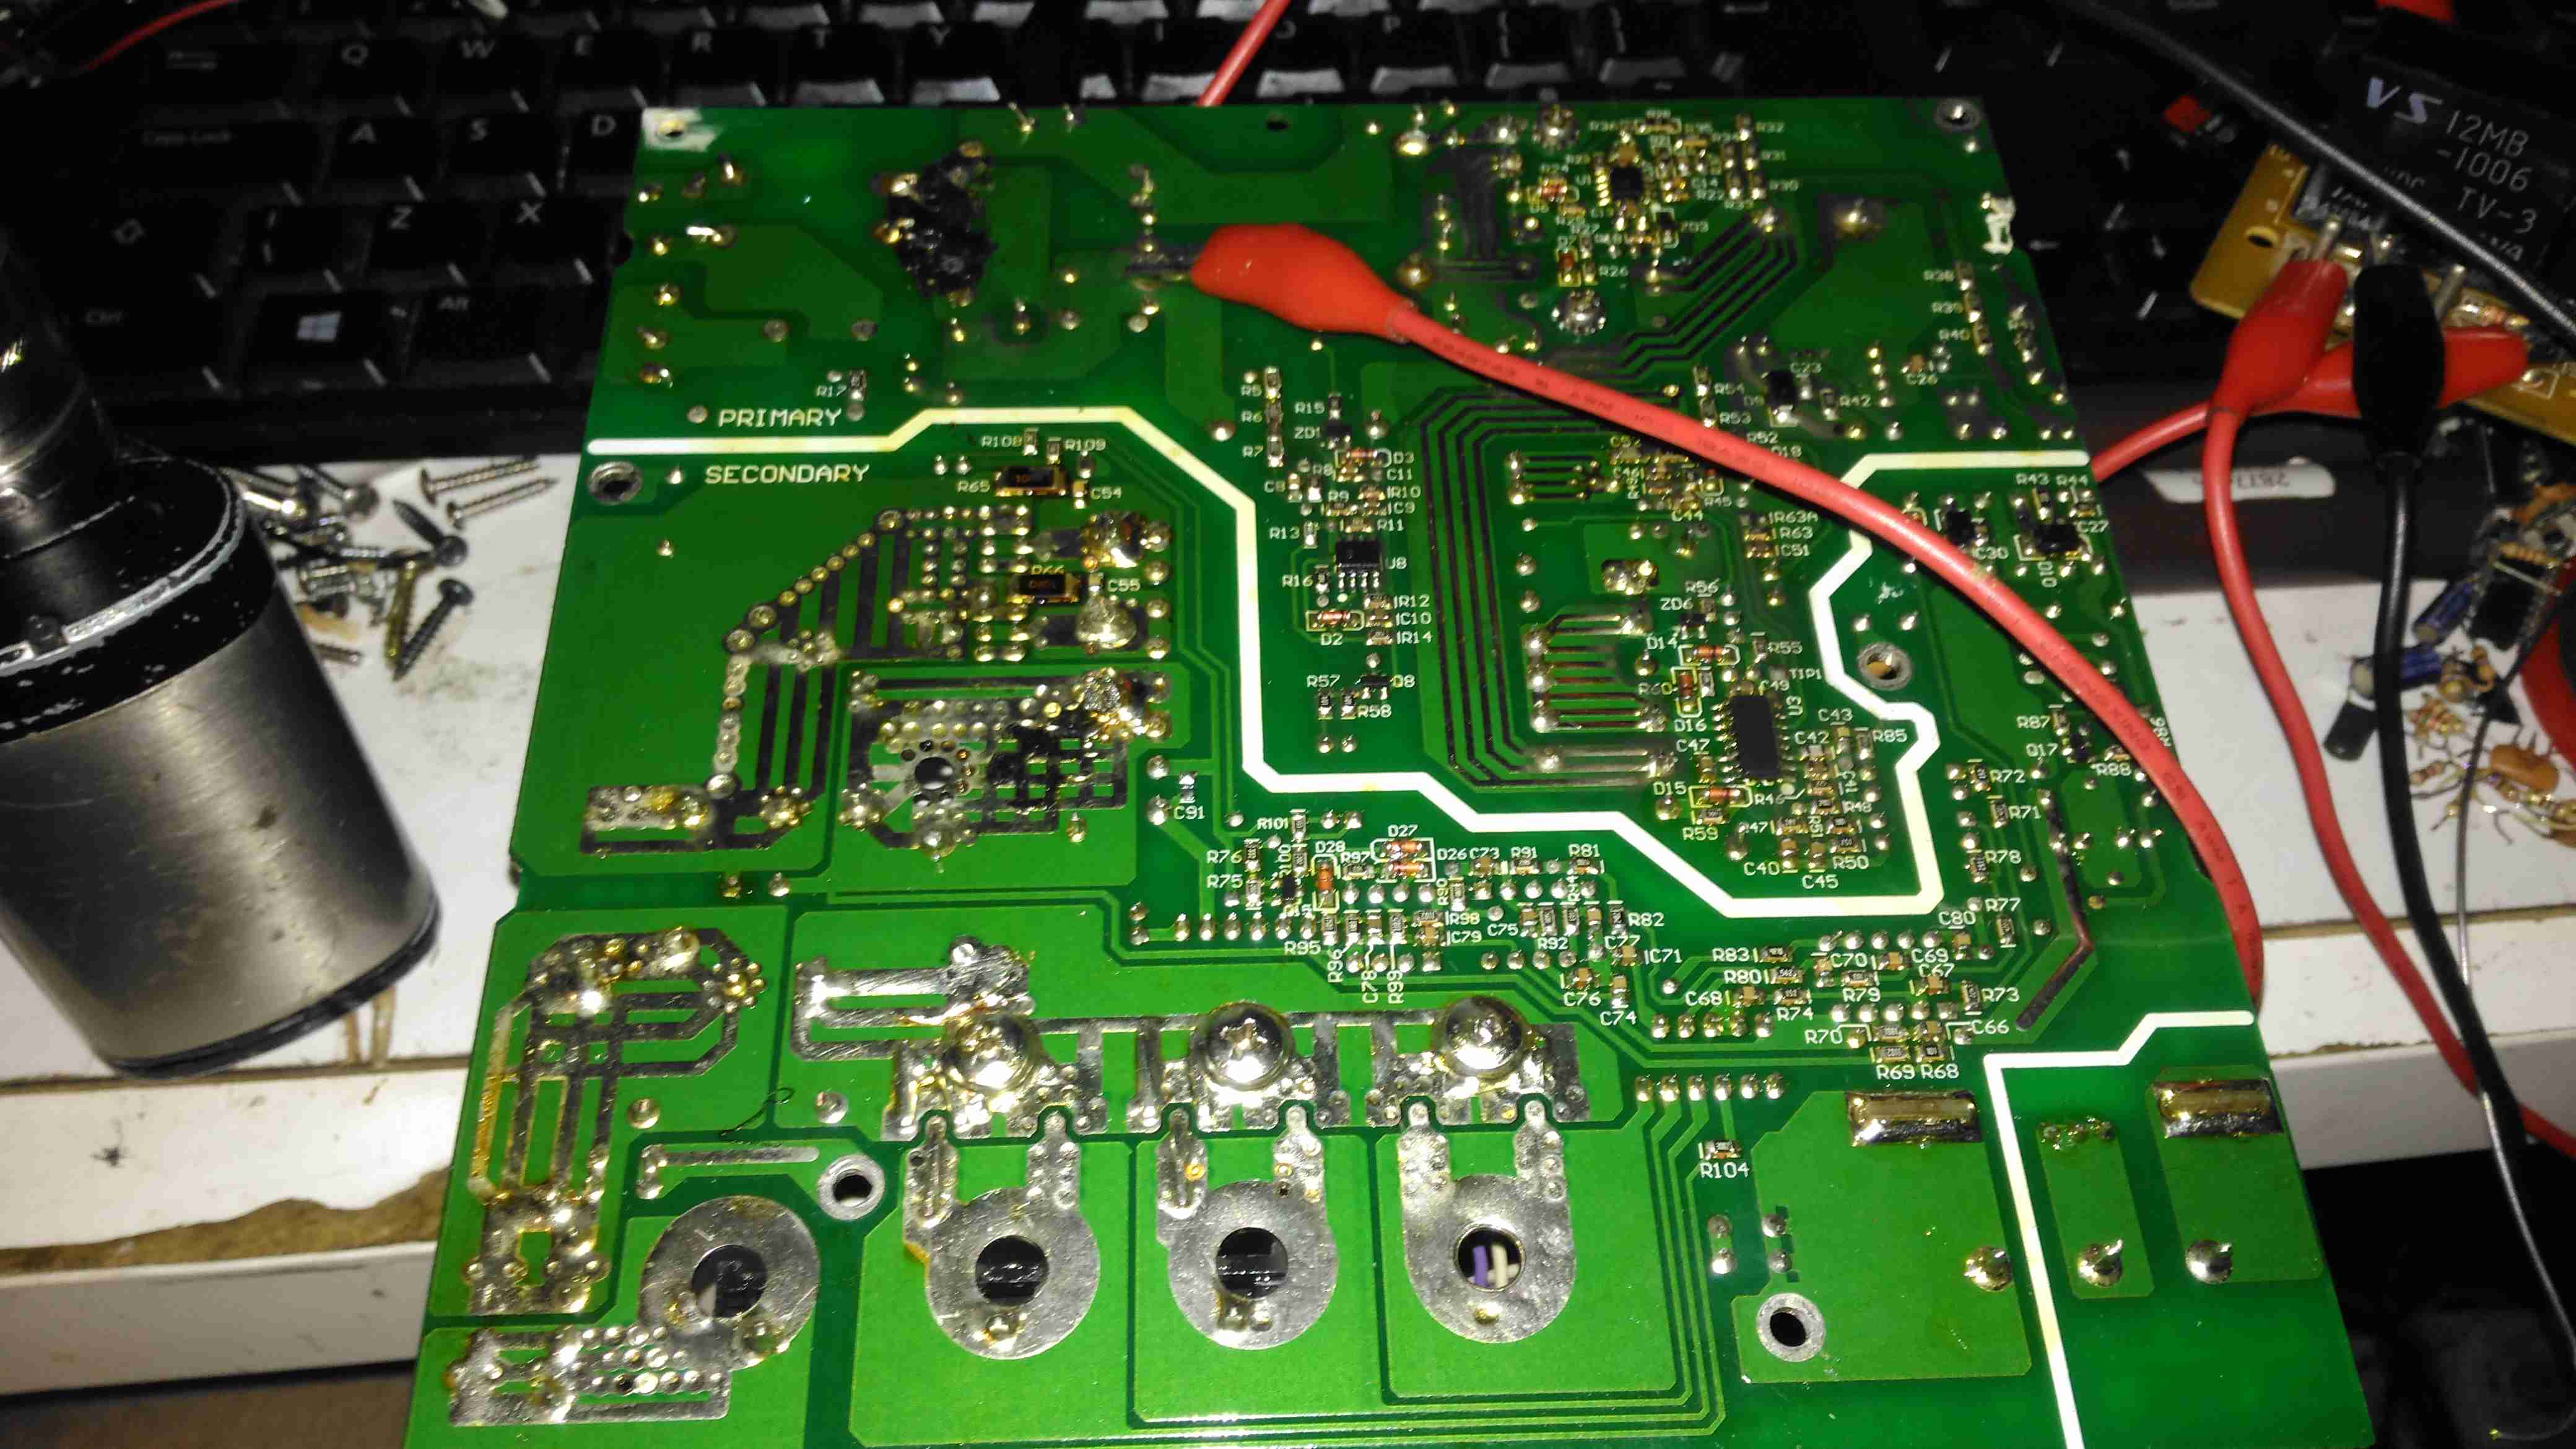
The logic circuits are powered by an independent switching supply in the centre, providing a +5v rail to the microcontroller. The fan header & control components are not populated in this 10A model, but I may end up retrofitting a fan anyway as this unit has always run a little too warm. The entire board is heavily conformal coated on both sides, to help with water resistance associated with being in a marine environment. This has worked well, as there isn’t a single trace of moisture anywhere, only dust from years of use.
There is some thermal protection for the main SMPS switching MOSFETS with the Klixon thermal fuse clipped to the heatsink.
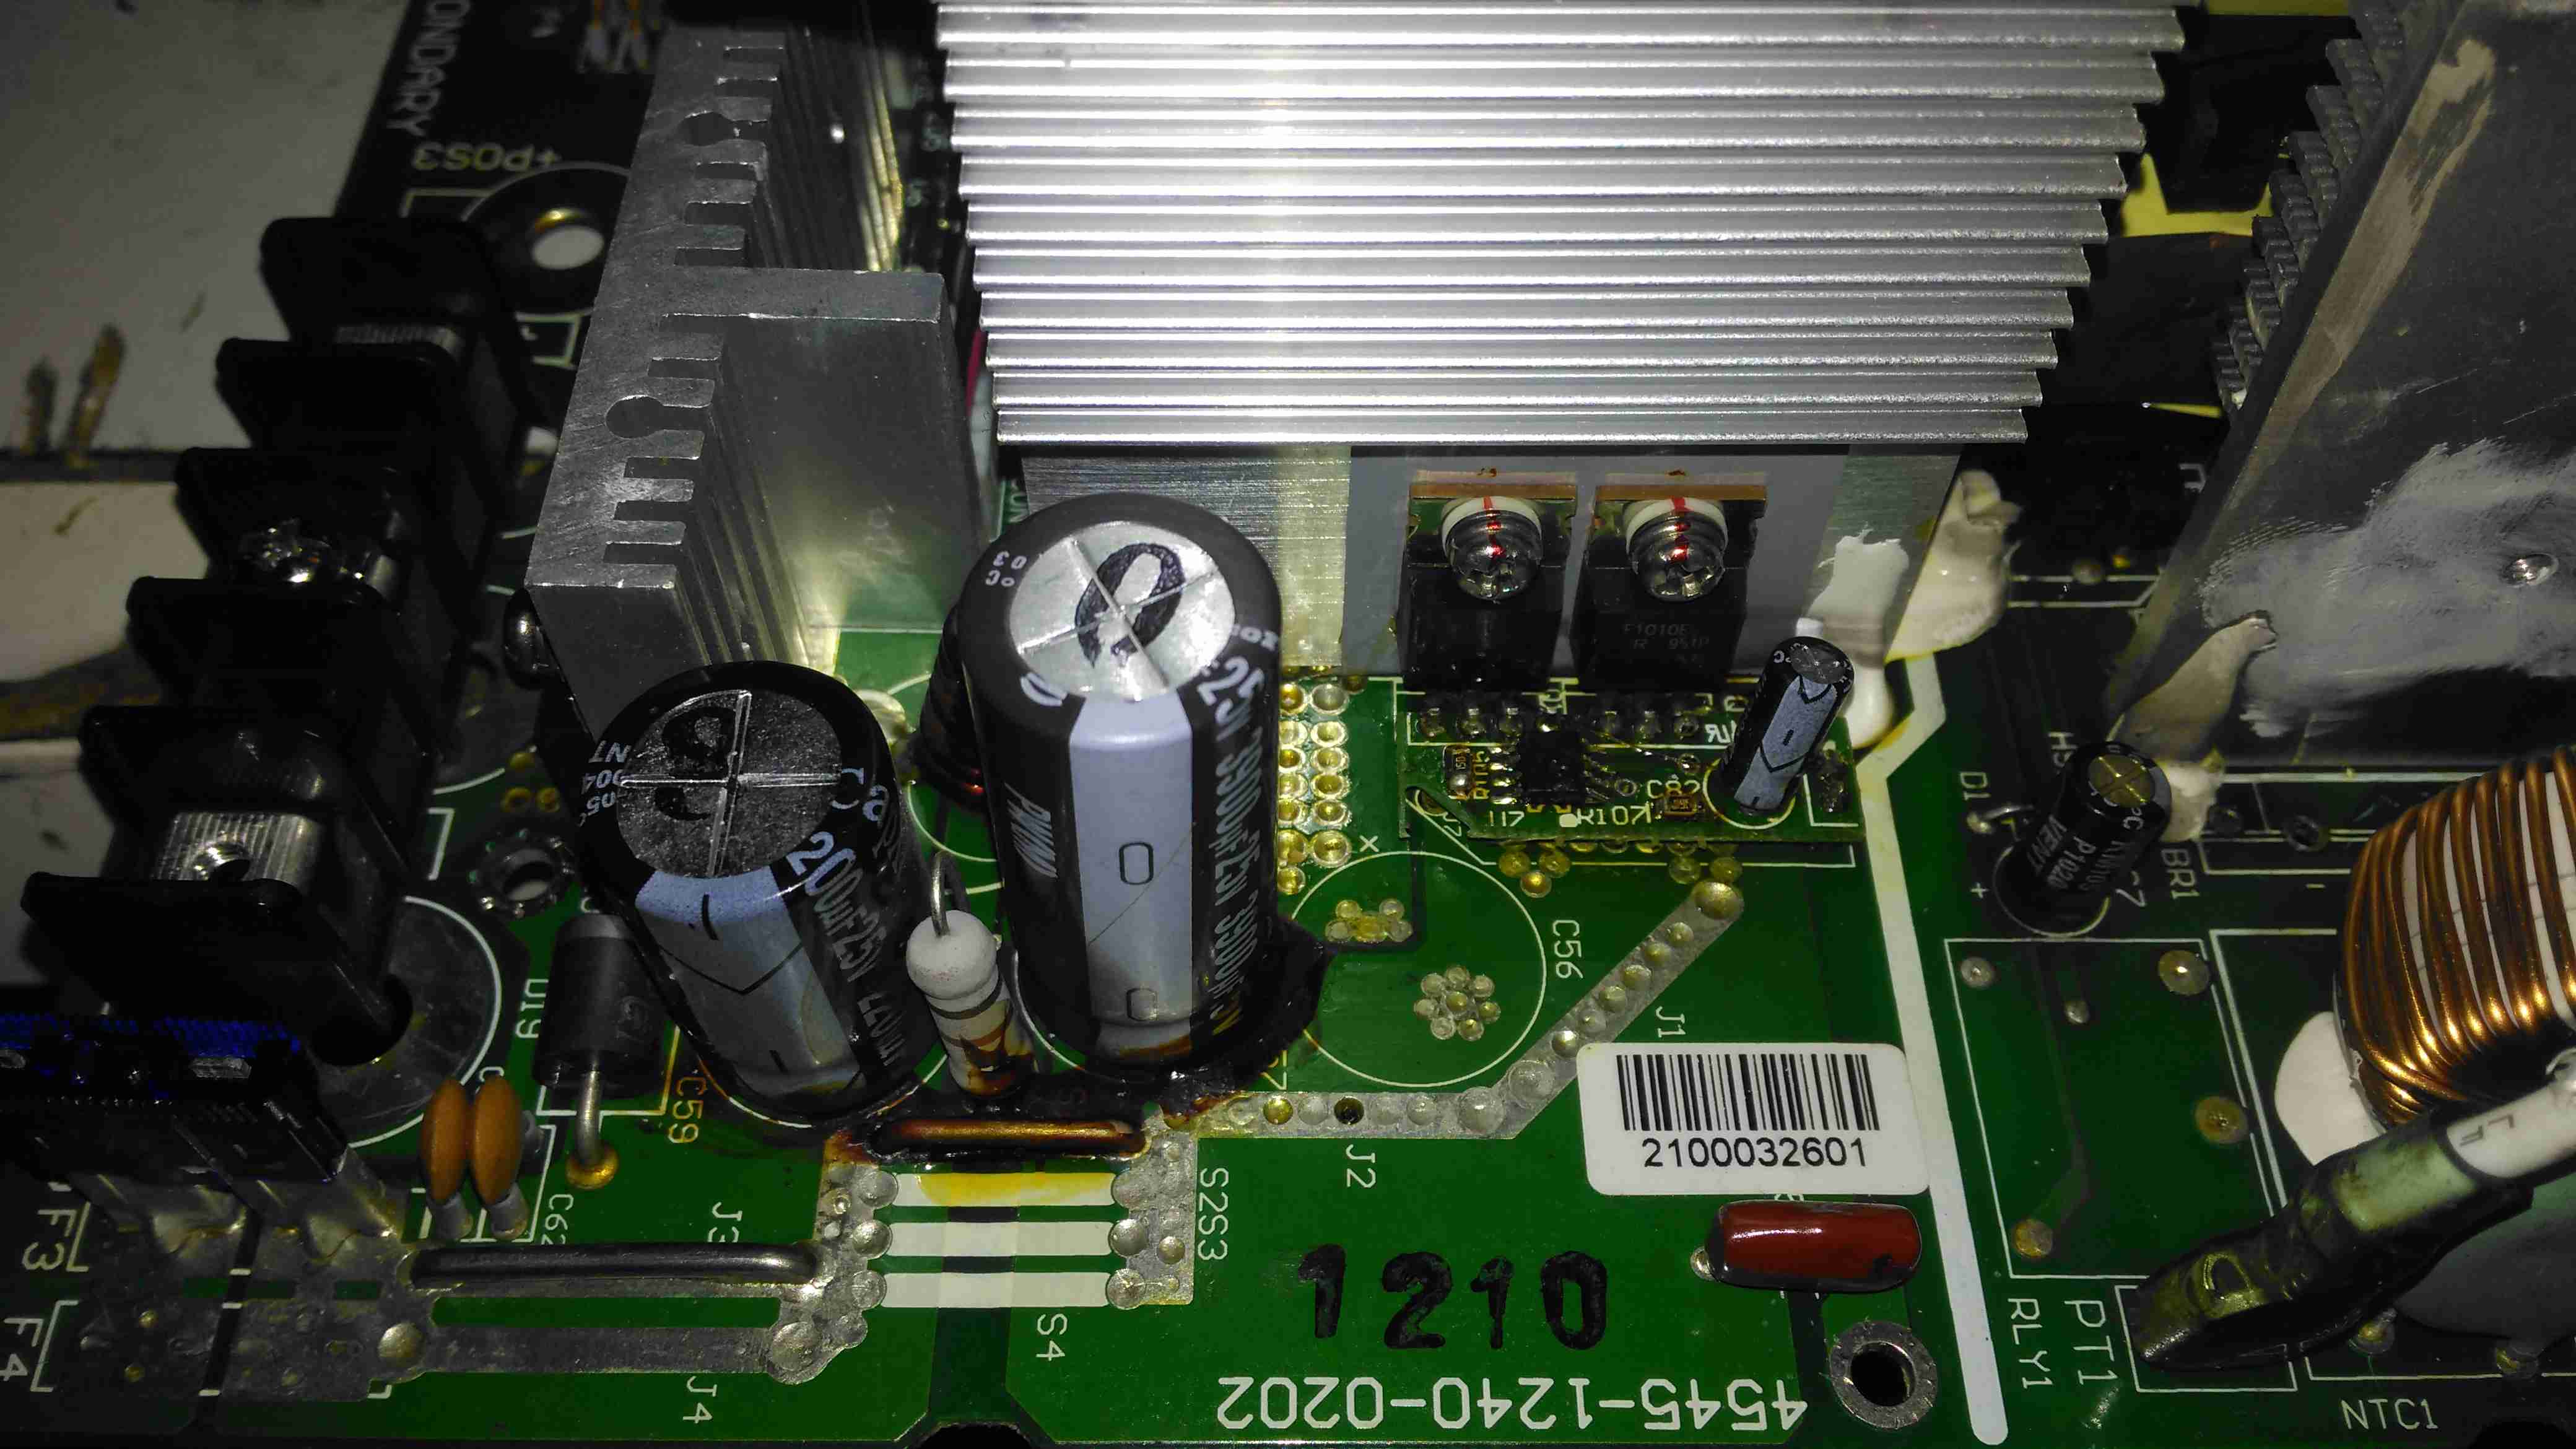
The DC output rectifiers are on the large heatsink in the centre, with a small bodge board fitted. Due to the heavy conformal coating on the board I can’t get the ID from this small 8-pin IC, but from the fact that the output rectifiers are in fact IRF1010E MOSFETS, rated at 84A a piece, this is an synchronous rectifier controller.
Oddly, the output filter electrolytics are a mix of Nichicon (nice), and CapXon (shite). A bit of penny pinching here, which if a little naff since these chargers are anything but cheap. (£244.80 at the time of writing).
Hiding just behind the electrolytics is a large choke, and a reverse-polarity protection diode, which is wired crowbar-style. Reversing the polarity here will blow the 15A DC bus fuse instantly, and may destroy this diode if it doesn’t blow quick enough.
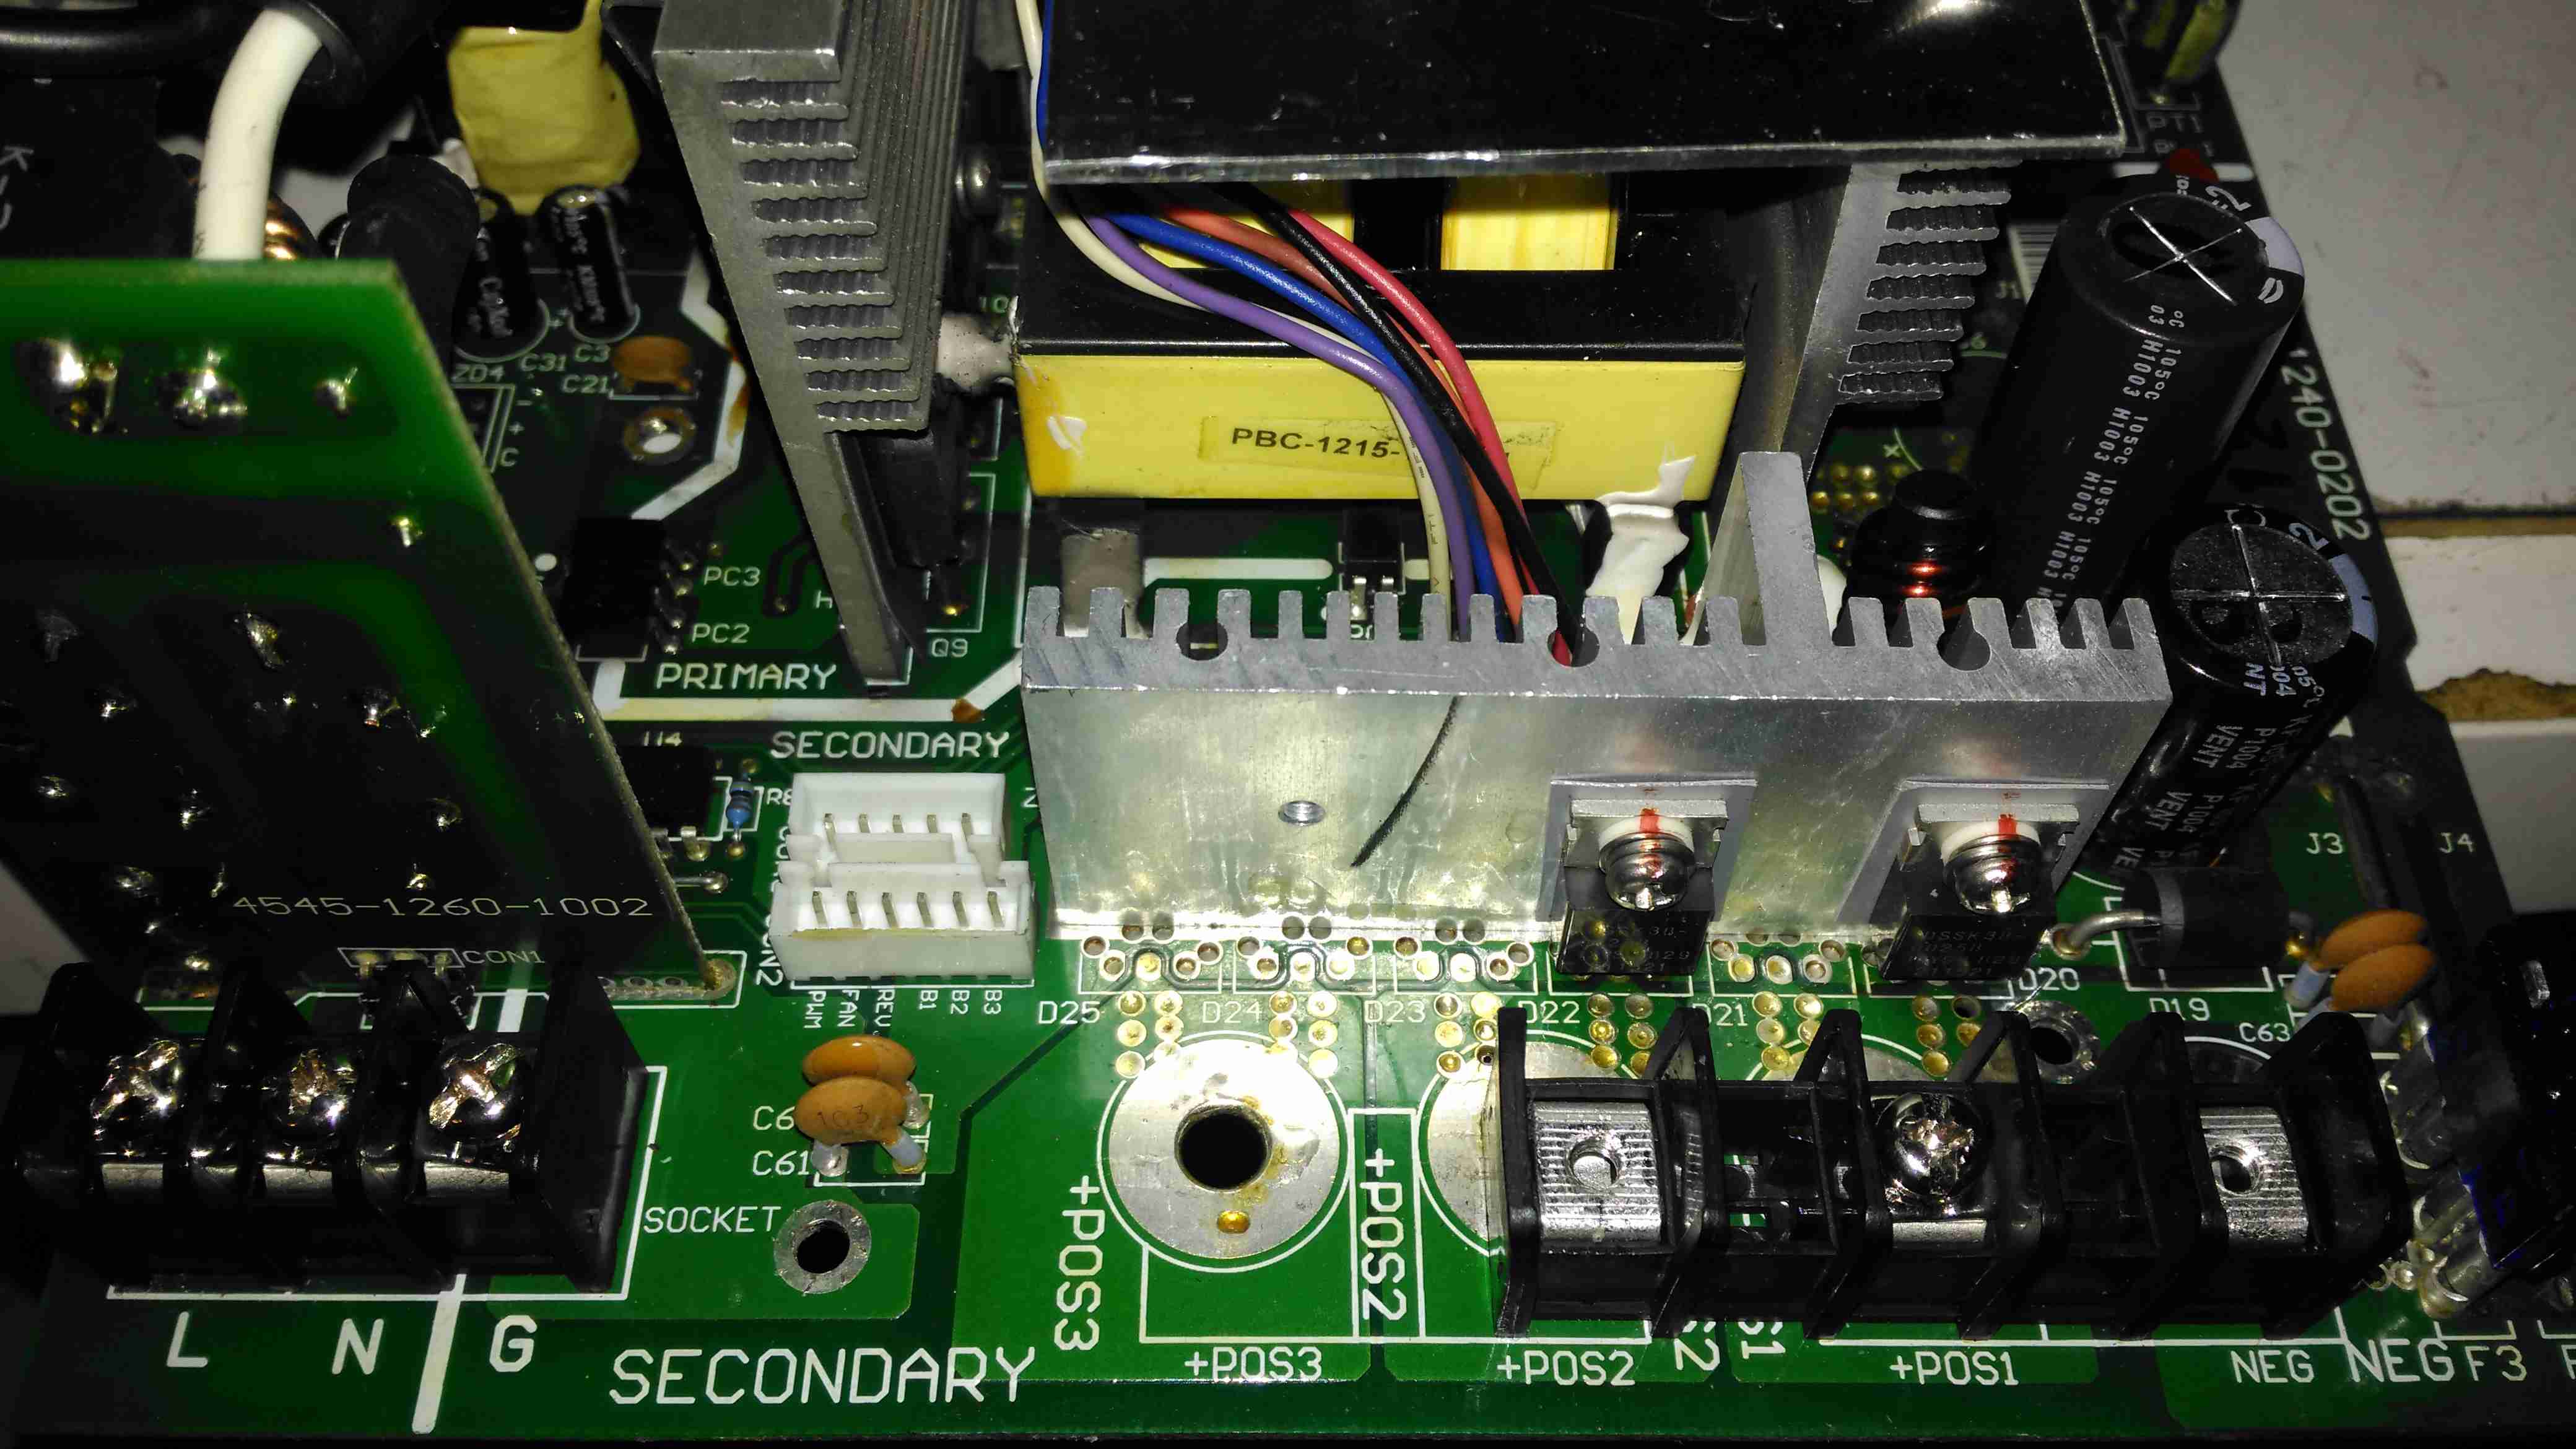
Right on the output end are a pair of large Ixys DSSK38 TO220 Dual 20A dual Schottky diodes, isolating the two outputs from each other, a nice margin on these for a 10A charger, since the diodes are paralleled each channel is capable of 40A. This prevents one bank discharging into another & allows the charger logic to monitor the voltages individually. The only issue here is the 400mV drop of these diodes introduce a little bit of inefficiency. To increase current capacity of the PCB, the aluminium heatsink is being used as the main positive busbar. From the sizing of the power components here, I would think that the same PCB & component load is used for all the chargers up to 40A, since both the PFC inductor & main power transformer are massive for a 10A output. There are unpopulated output components on this low-end model, to reduce the cost since they aren’t needed.
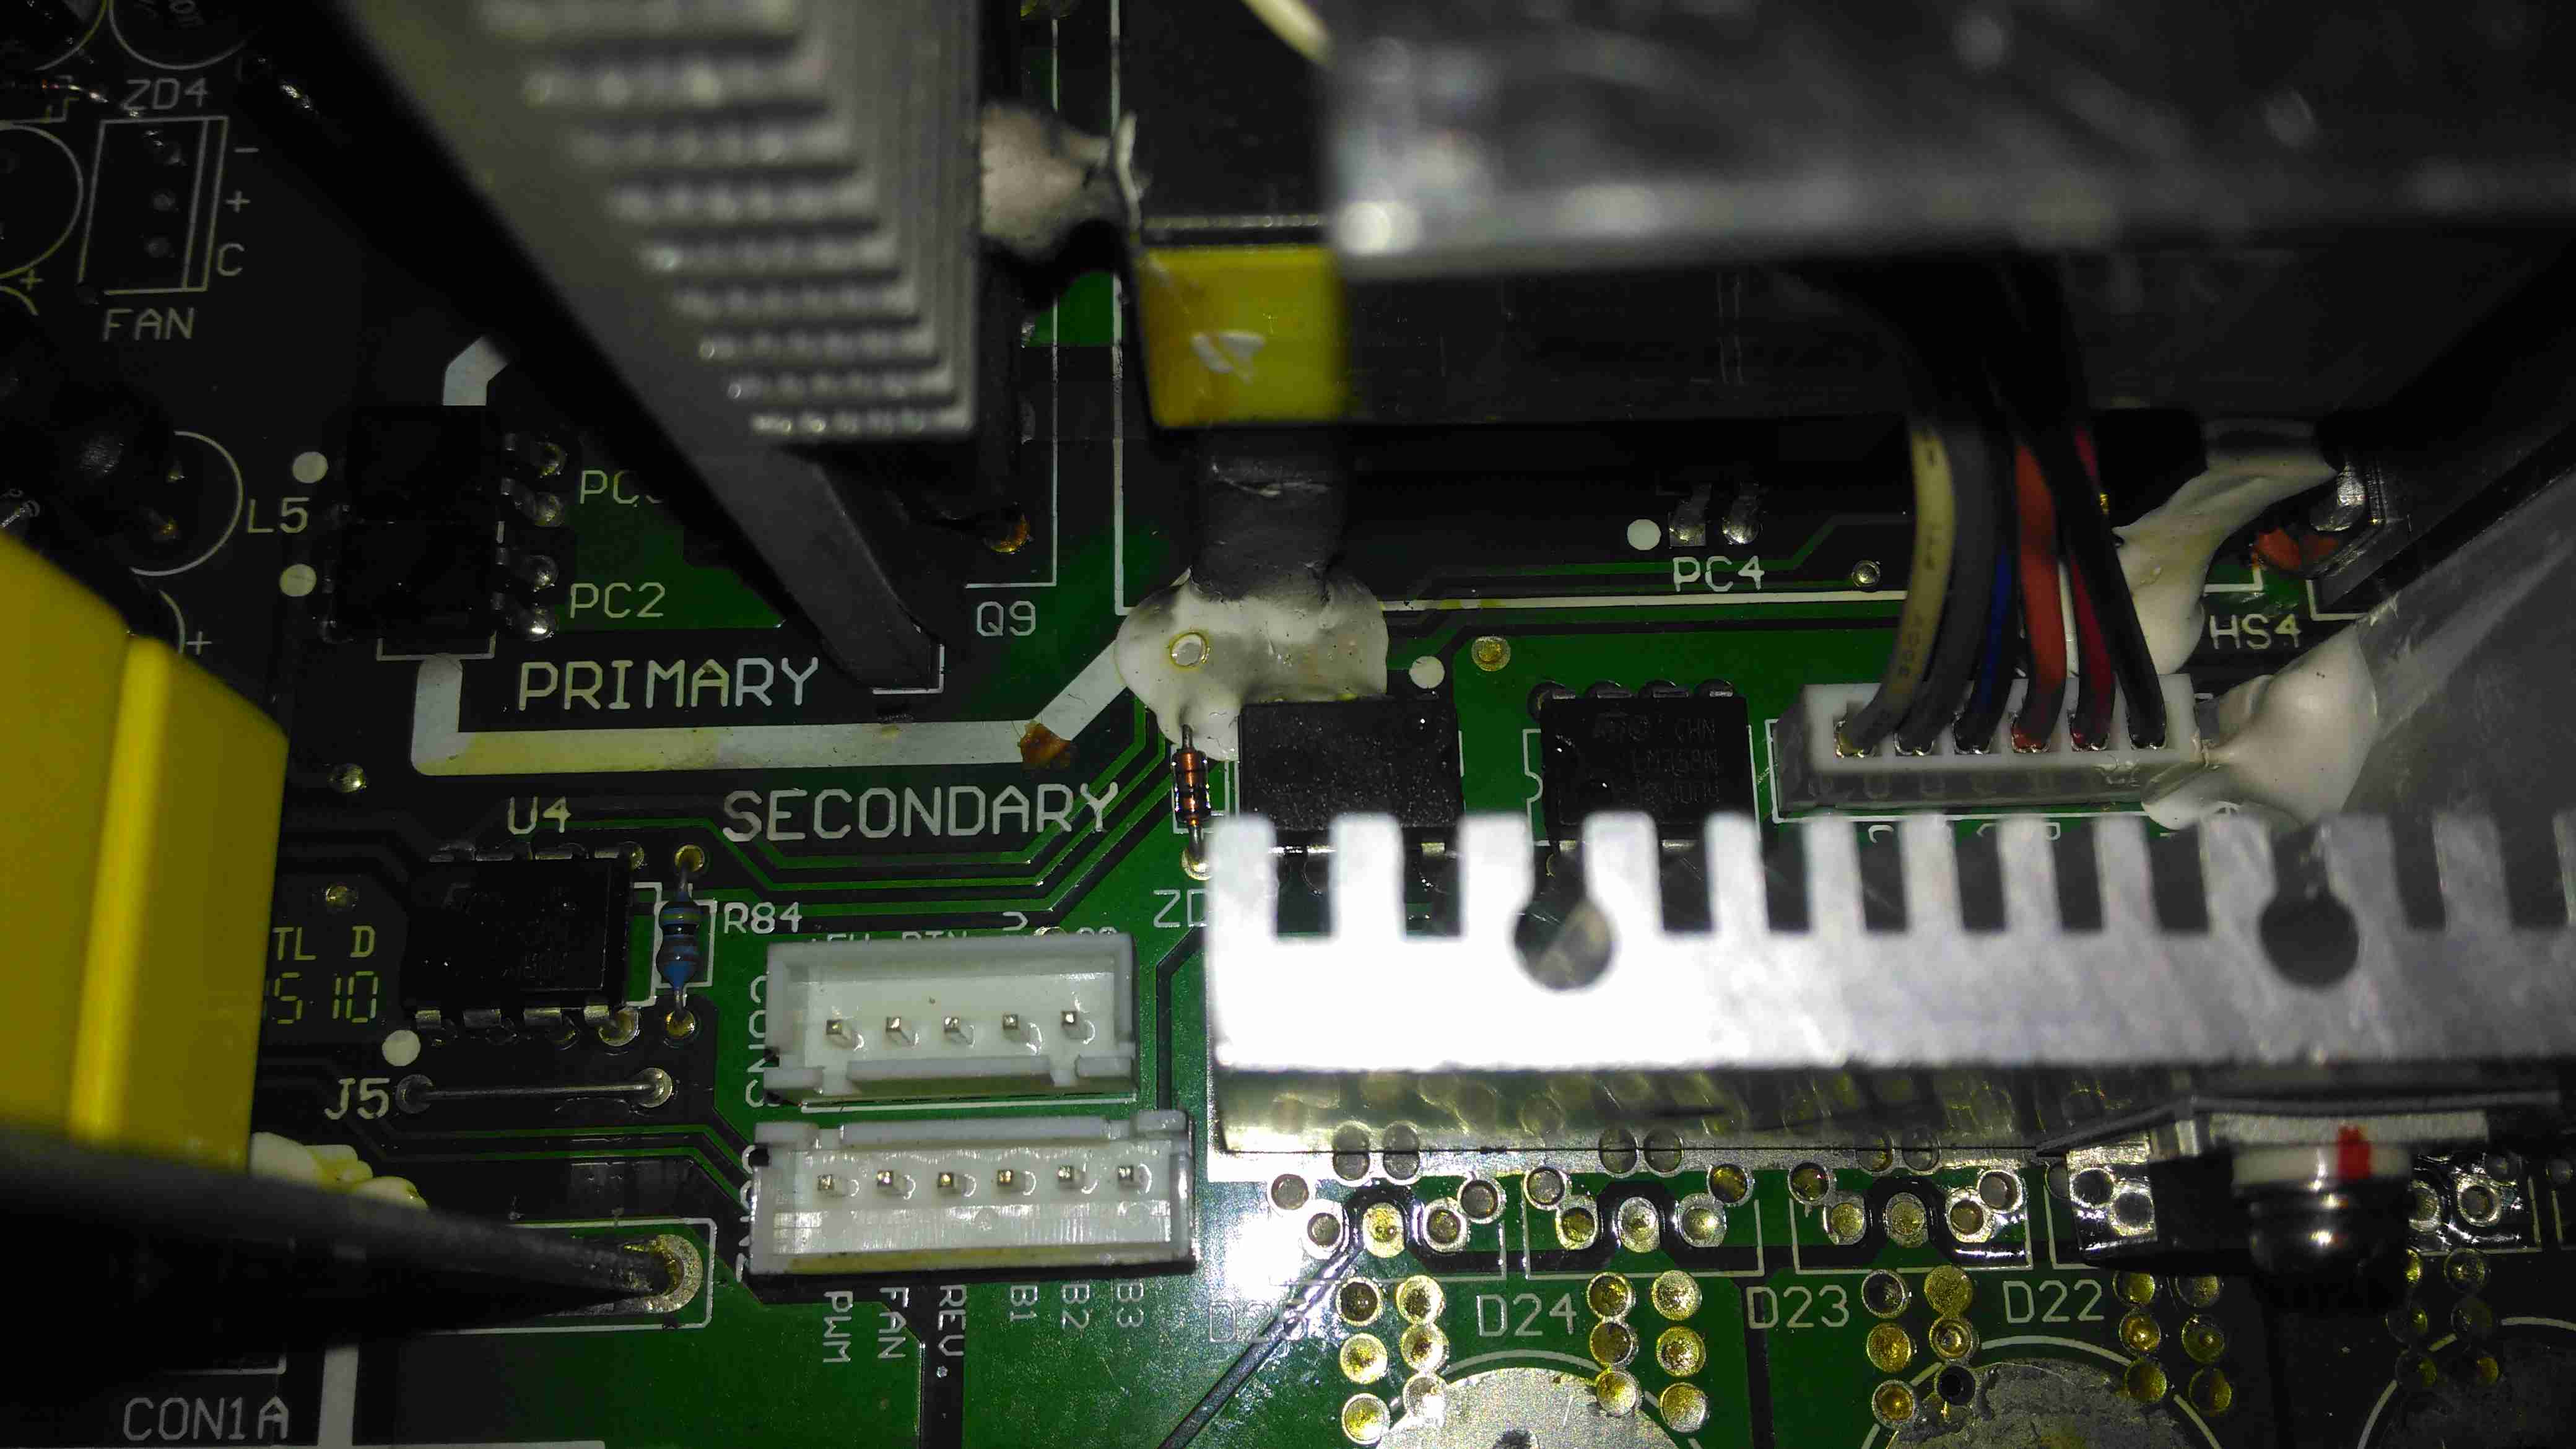
A trio of headers connect all the control & sense signals to the front panel PCB, which contains all the control logic. This unit is sensing all output voltages, output current & PSU rail voltages.
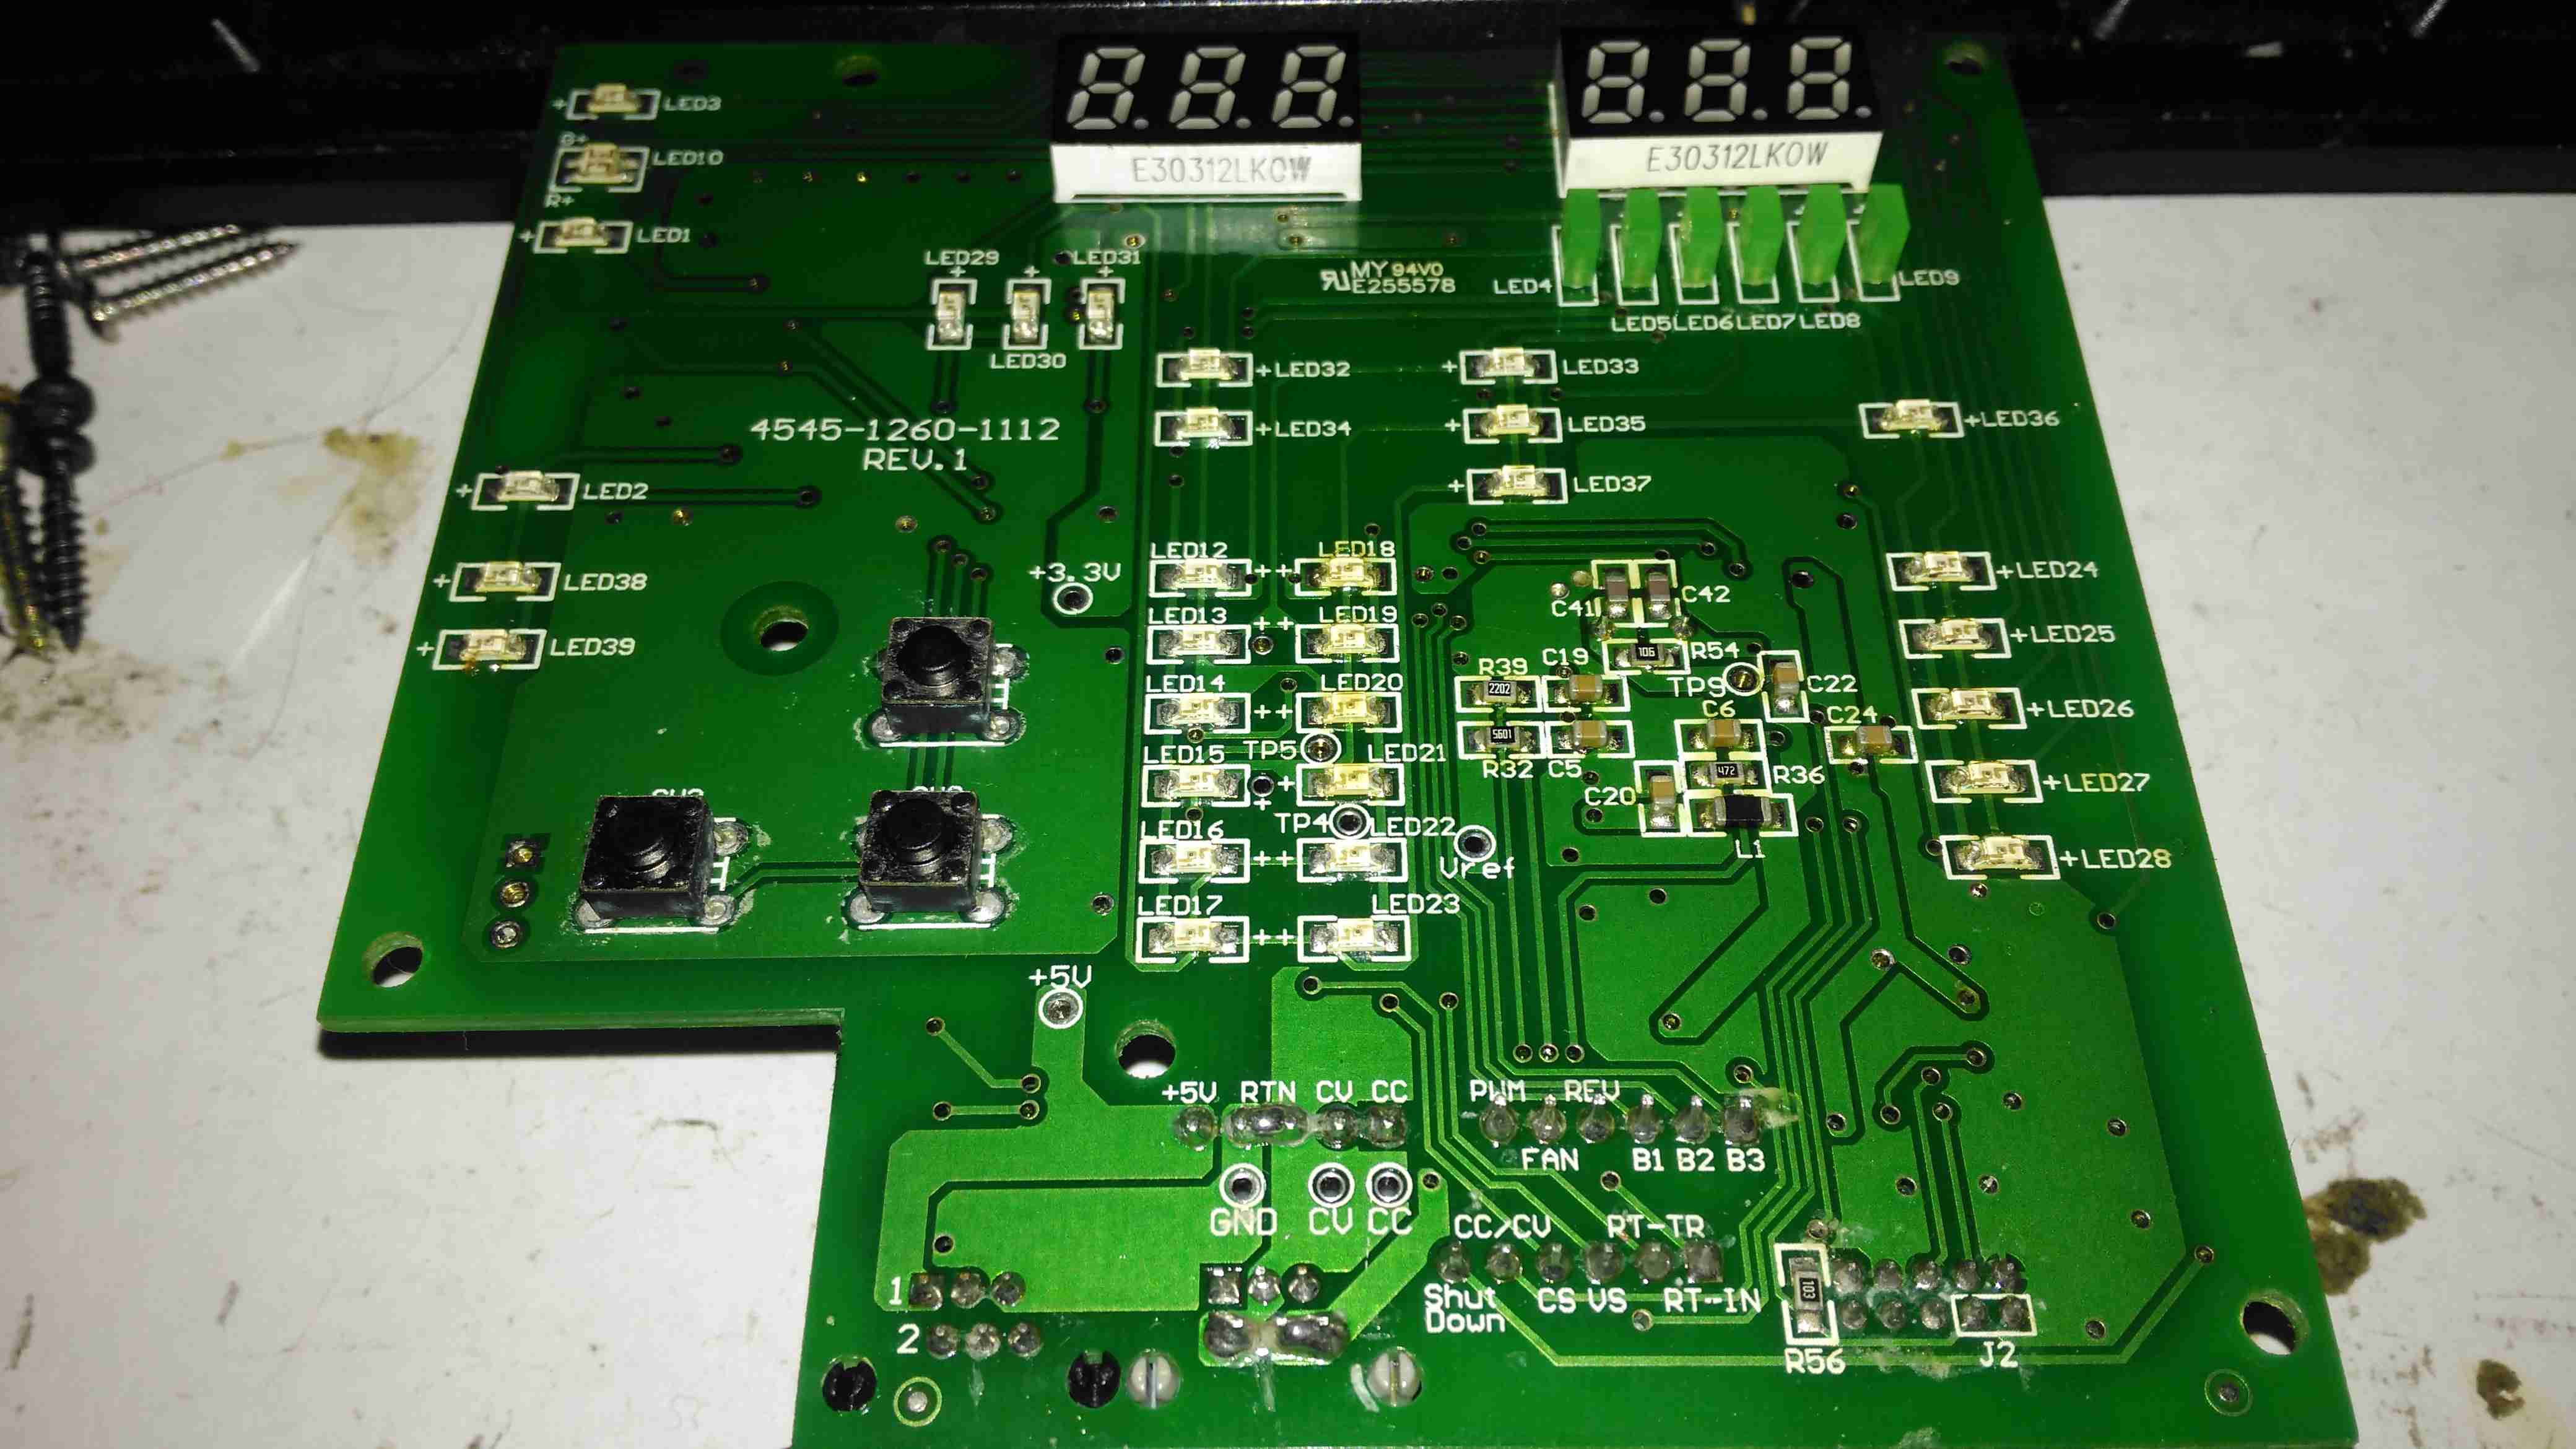
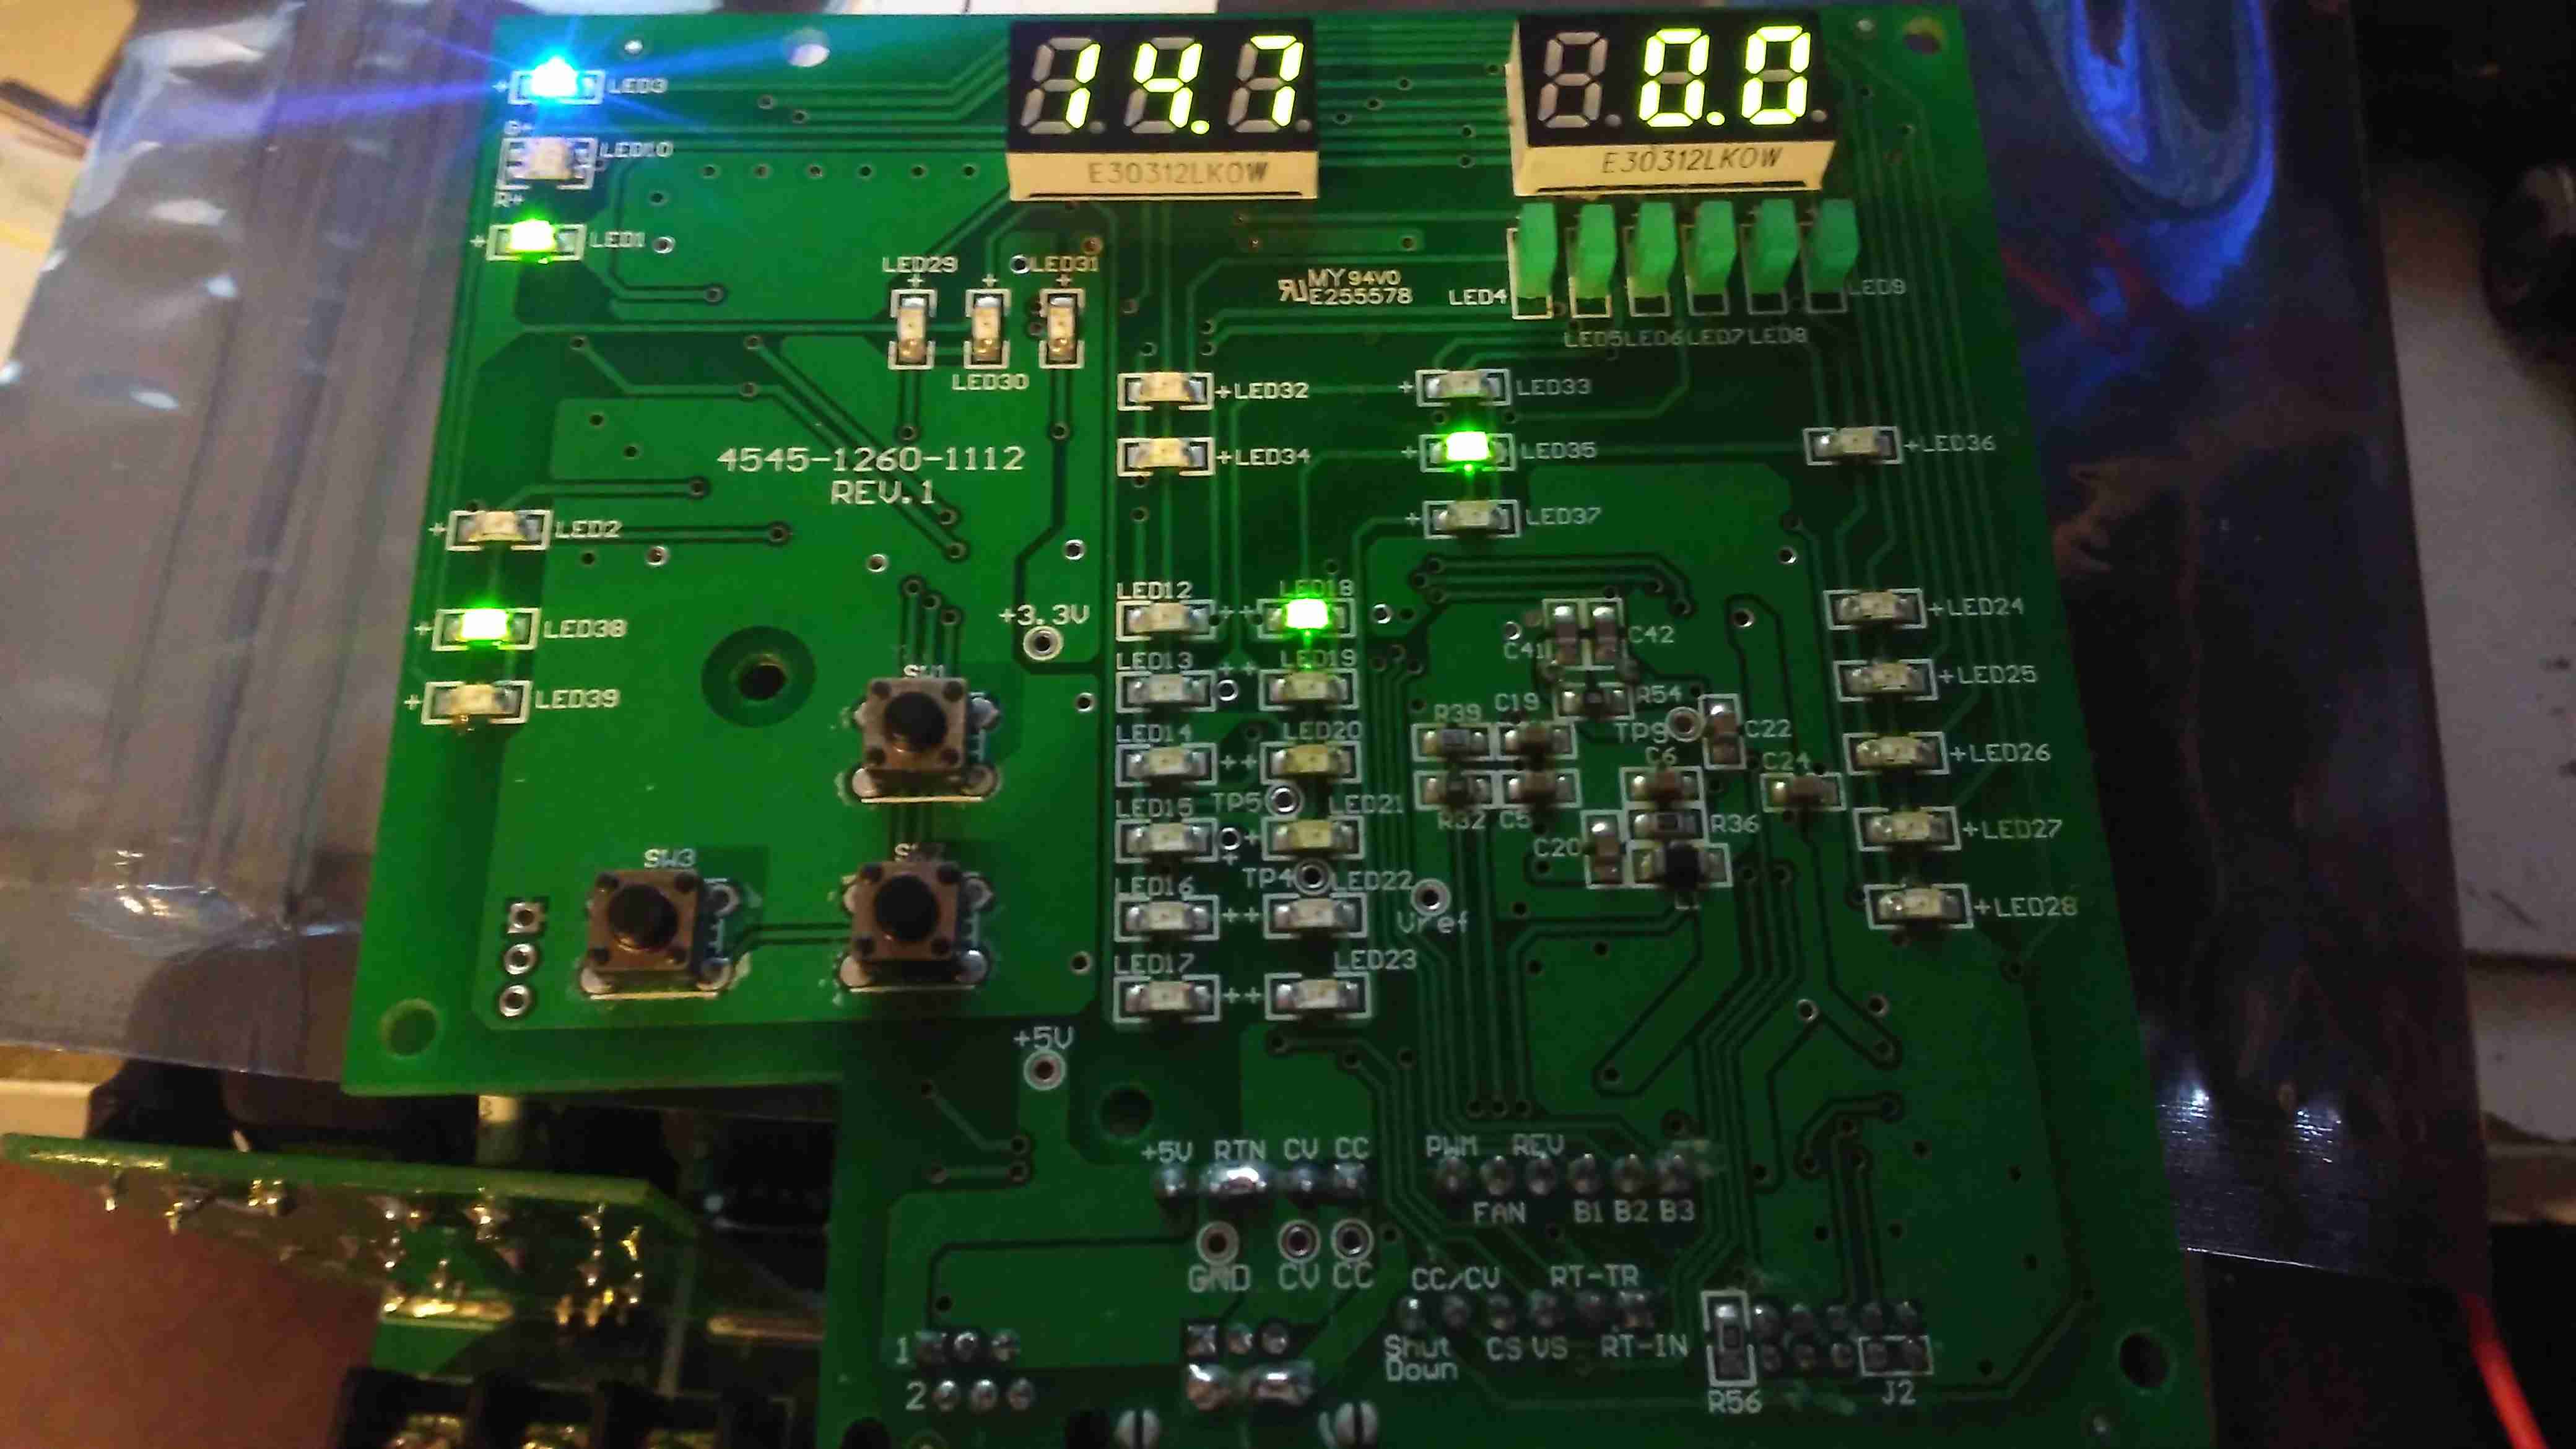
The front panel is stuffed with LEDs & 7-segment displays to show the current mode, charging voltage & current. There’s 2 tactile switches for adjustments.
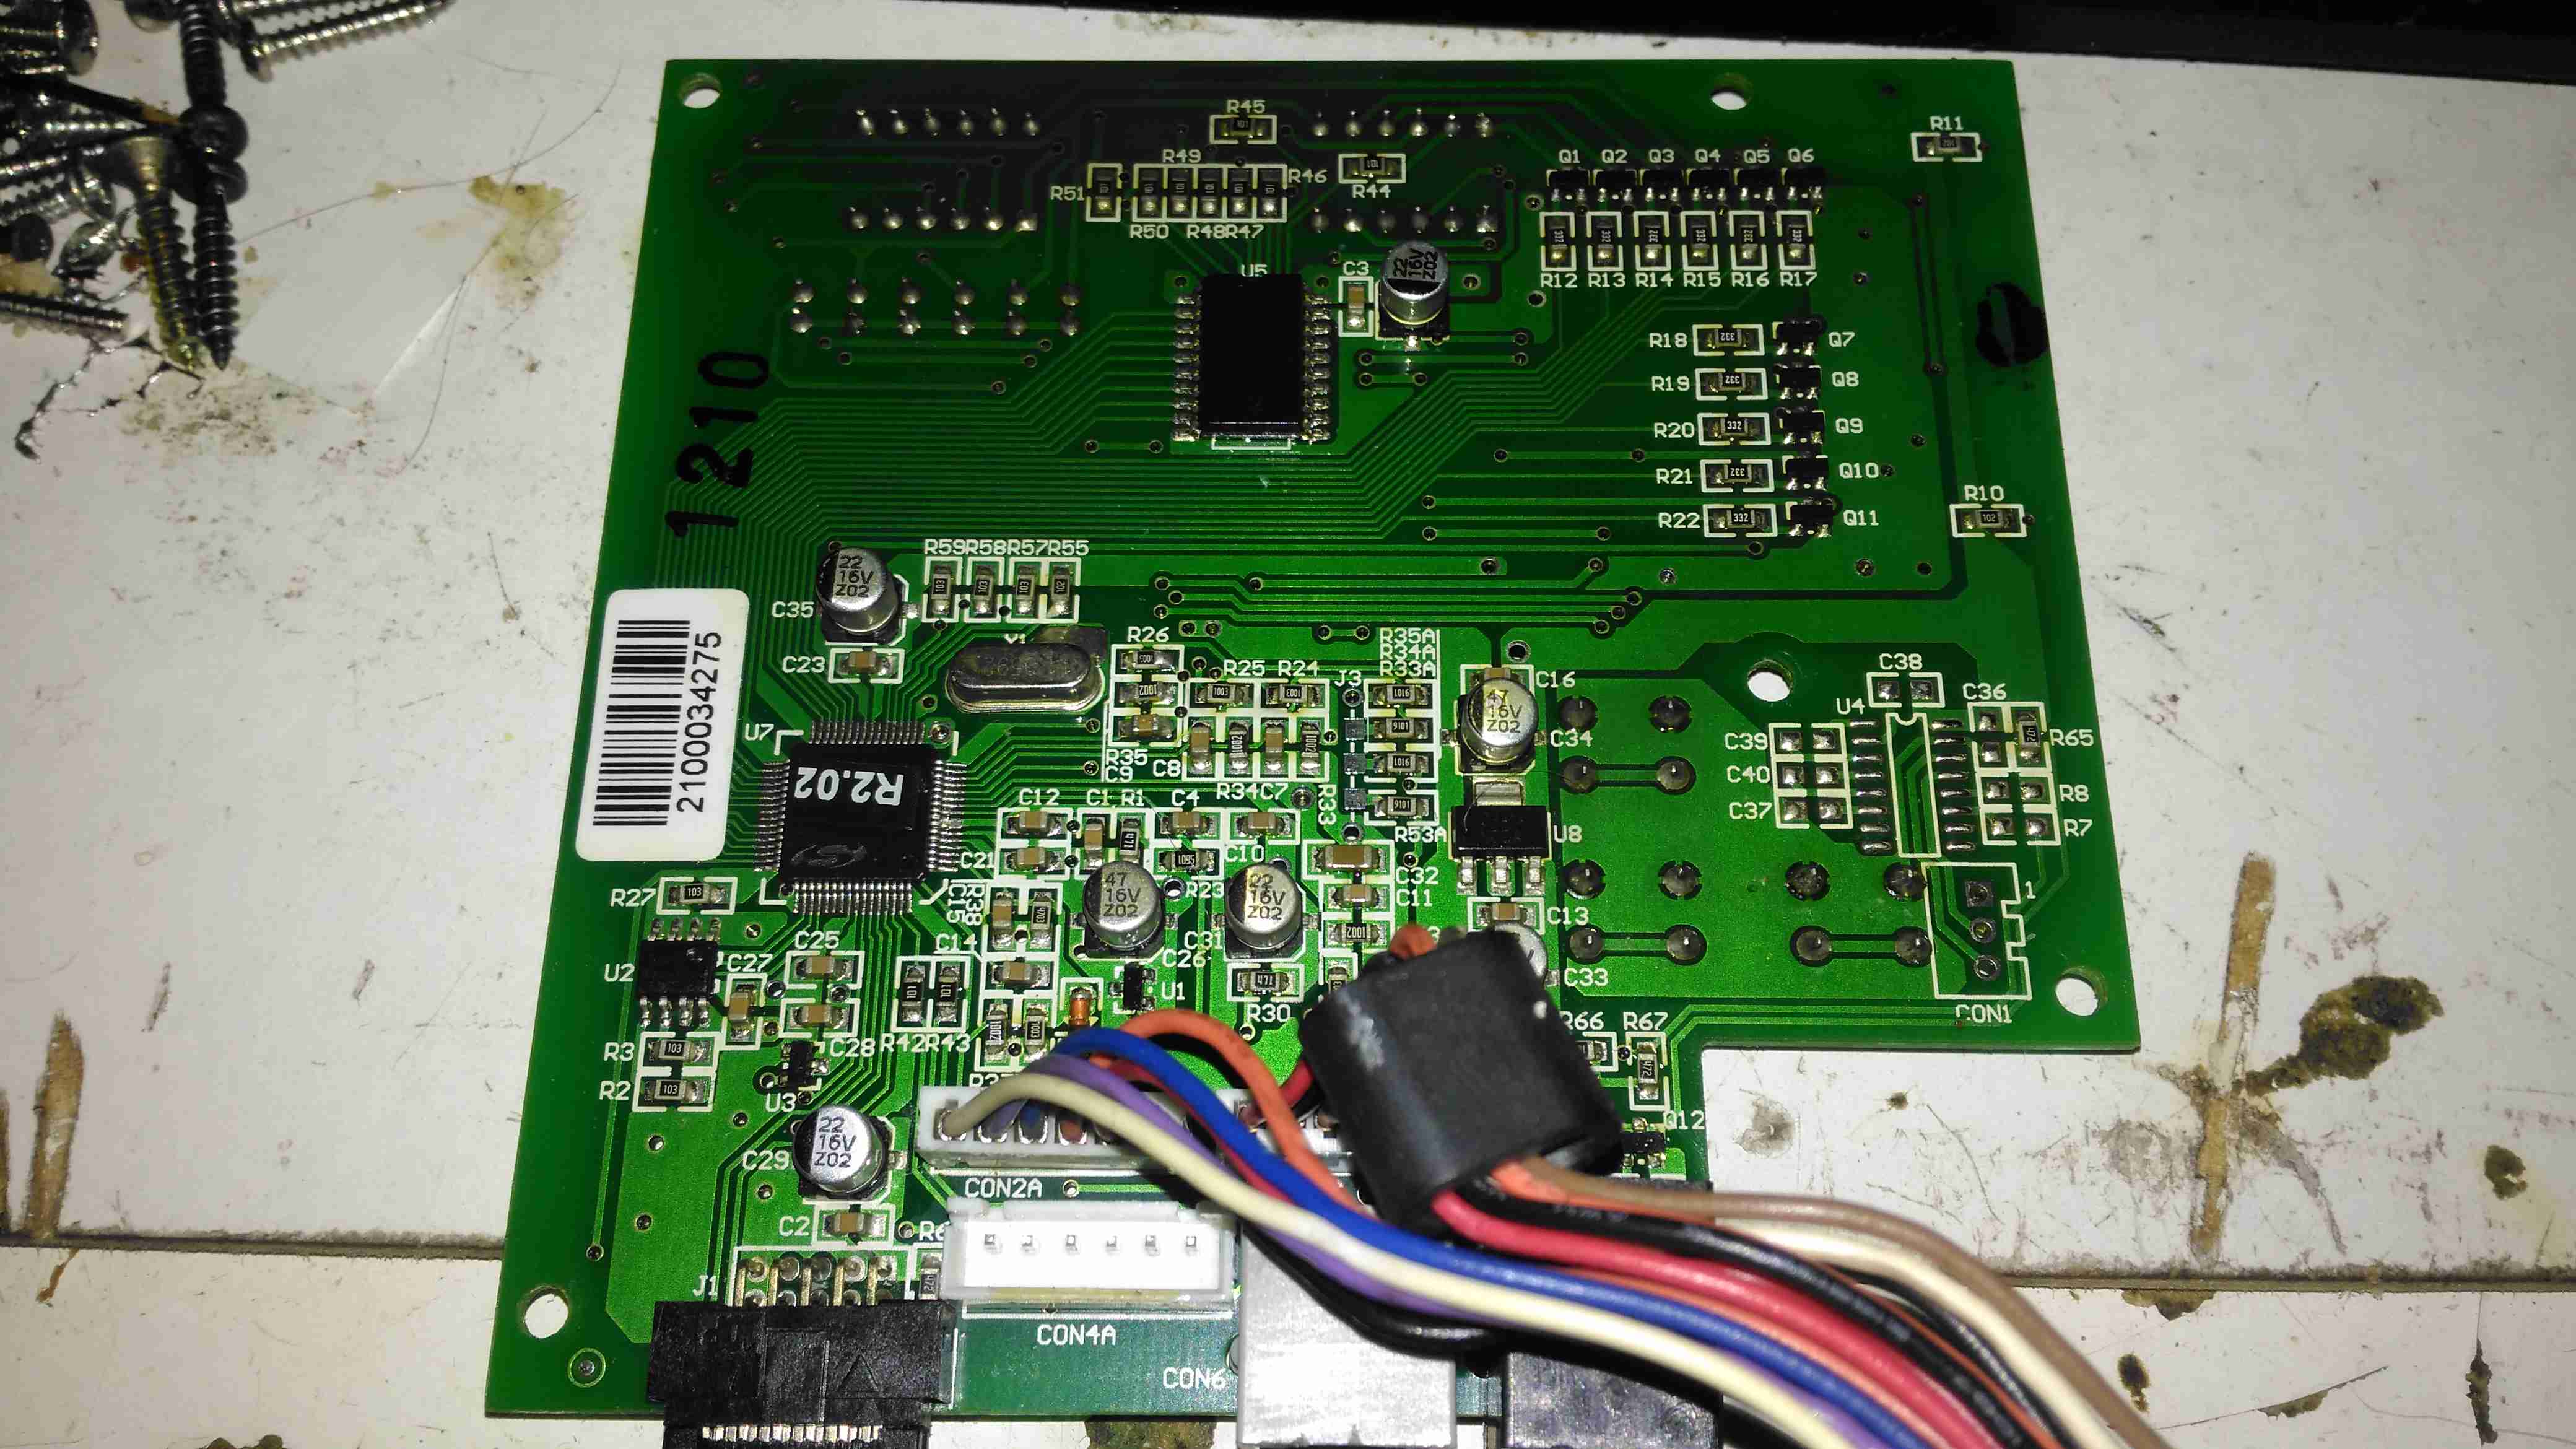
The reverse of the board has the main microcontroller – again identifying this is impossible due to the heavy conformal coat. The LEDs are being driven through a 74HC245D CMOS Octal Bus Transceiver.
Now on to the repair! I’m not particularly impressed with only getting 4 years from this unit, they are very expensive as already mentioned, so I would expect a longer lifespan. The input fuse had blown in this case, leaving me with a totally dead charger. A quick multimeter test on the input stage of the unit showed a dead short – the main AC input bridge rectifier has gone short circuit.
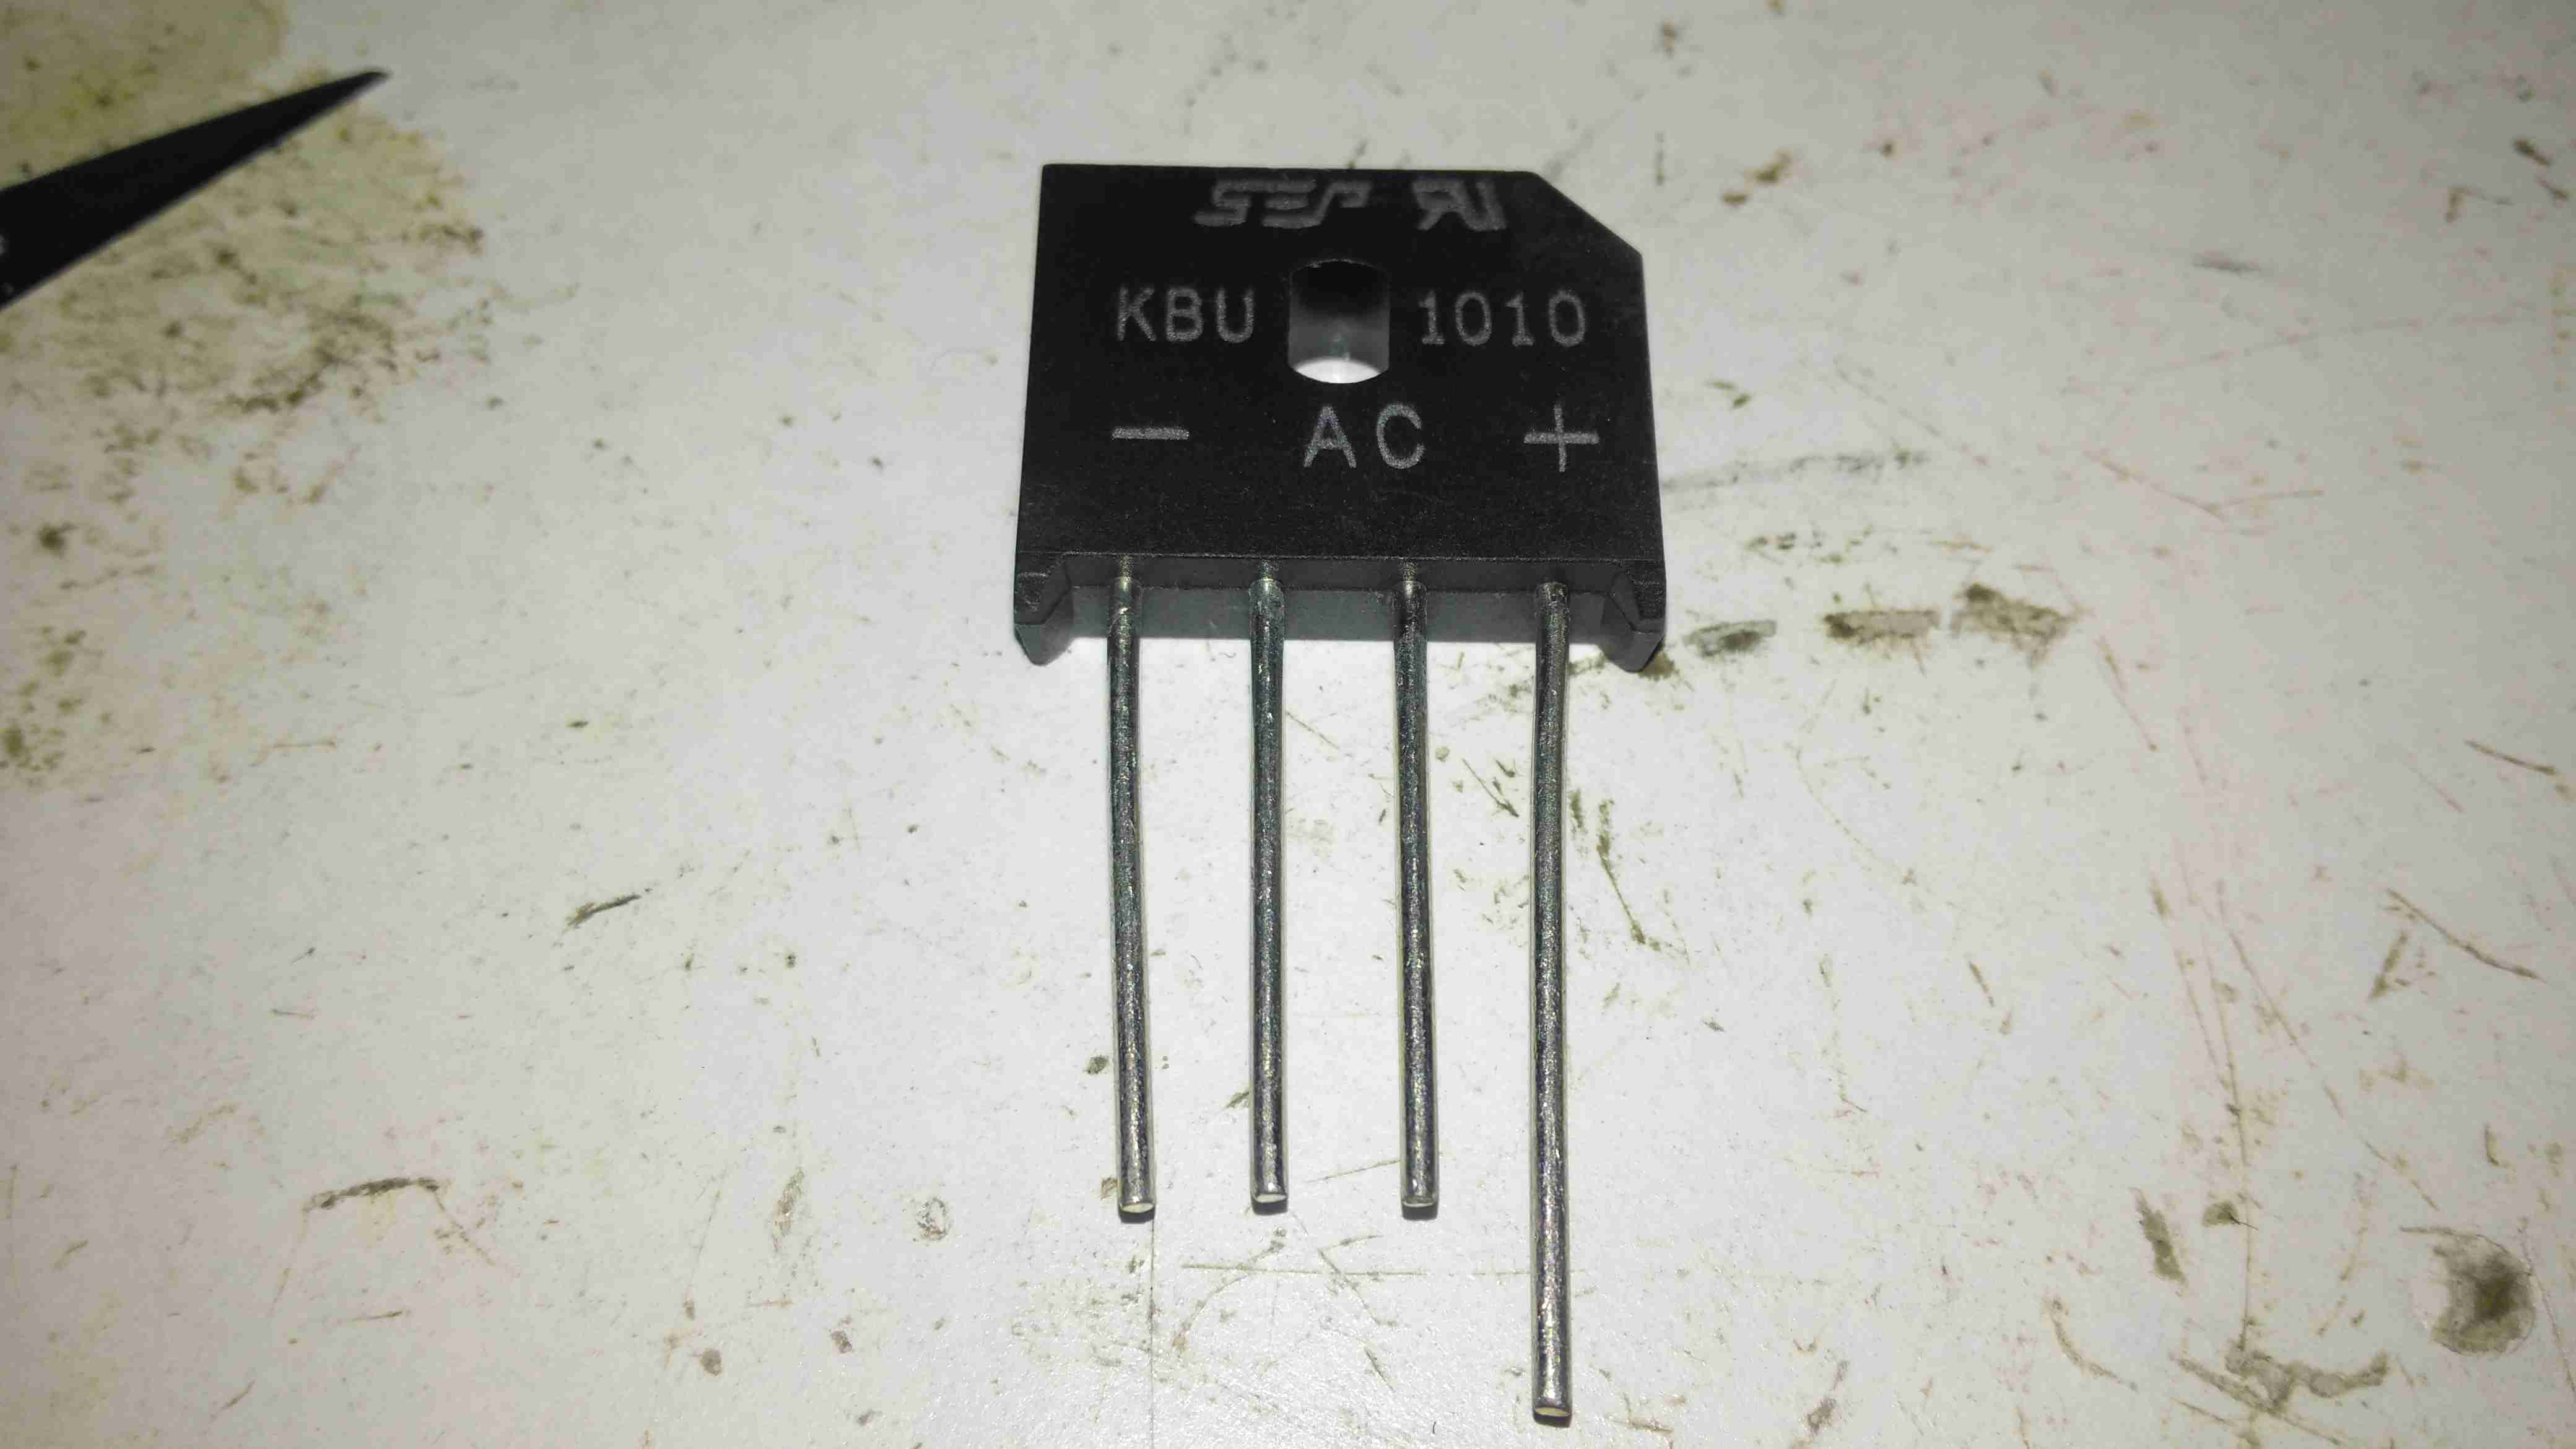
Here the defective bridge has been desoldered from the board. It’s a KBU1008 10A 800v part. Once this was removed I confirmed there was no longer an input short, on either the AC side or the DC output side to the PFC circuit.
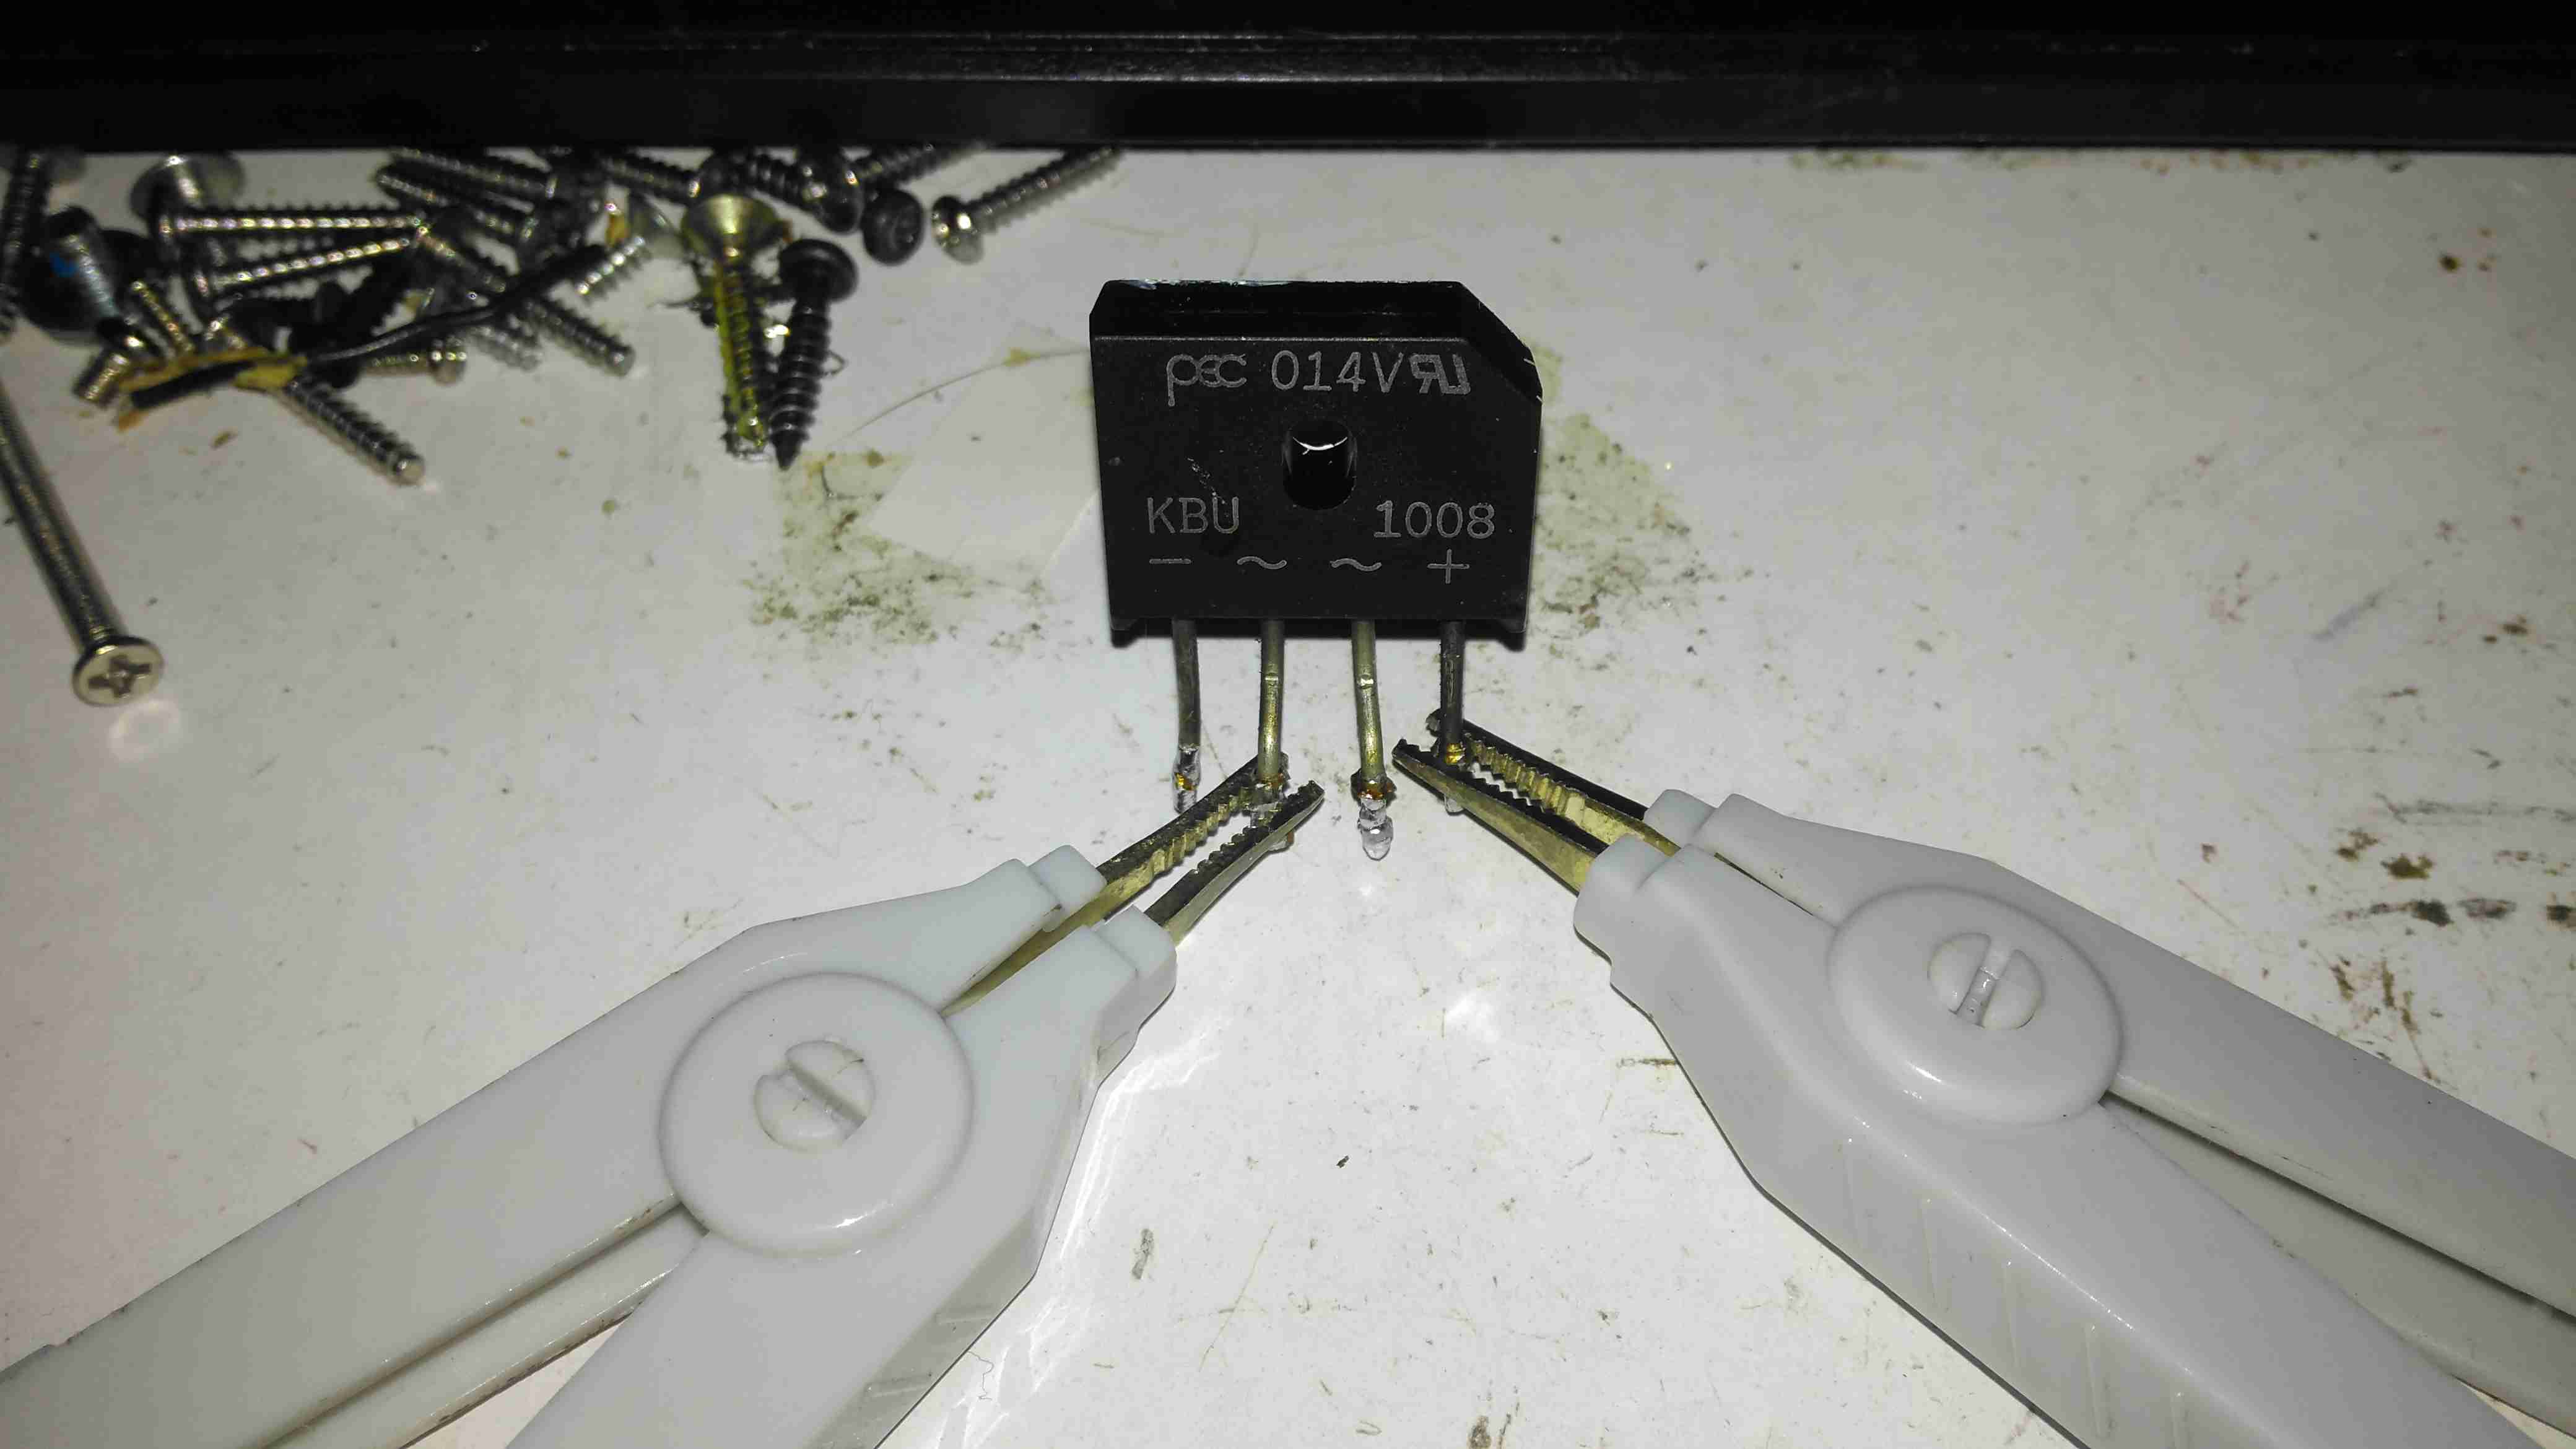
Time to stick the desoldered bridge on the milliohm meter & see how badly it has failed.
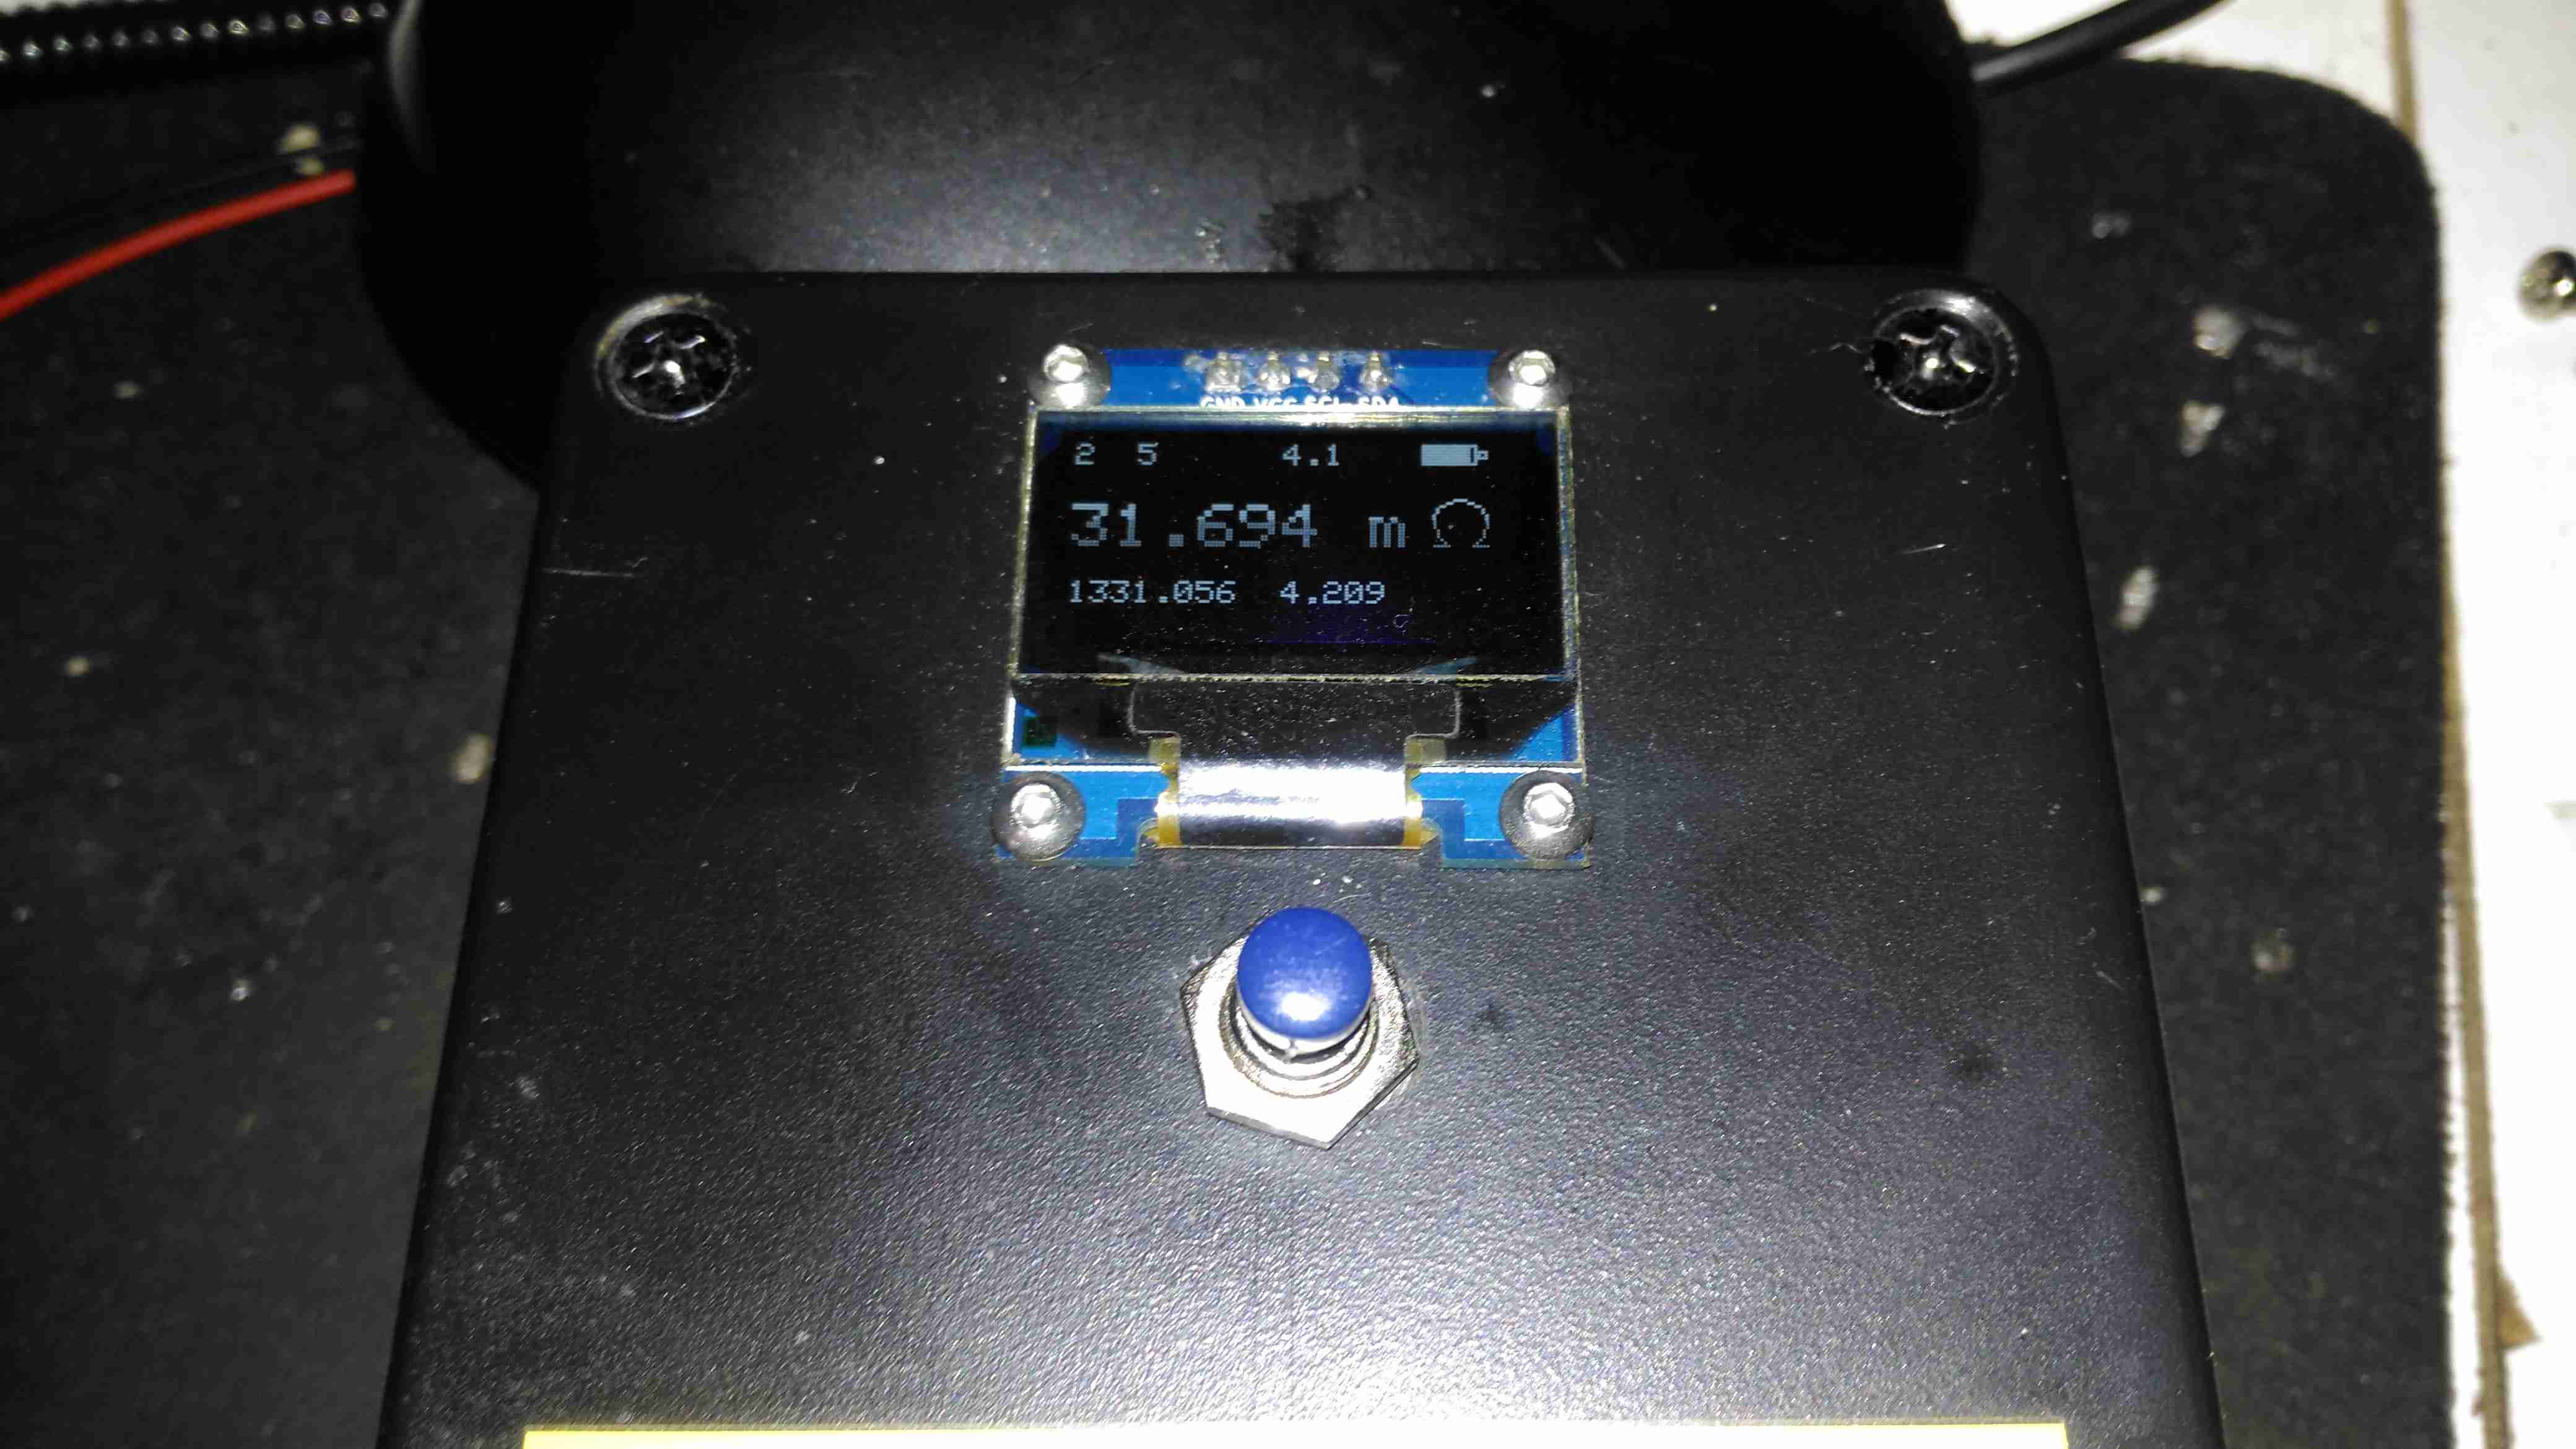
I’d say 31mΩ would qualify as a short. It’s no wonder the 4A input fuse blew instantly. There is no sign of excessive heat around the rectifier, so I’m not sure why this would have failed, it’s certainly over-rated for the 10A charger.
Now the defective diode bridge has been removed from the circuit, it’s time to apply some controlled power to see if anything else has failed. For this I used a module from one of my previous teardowns – the inverter from a portable TV.
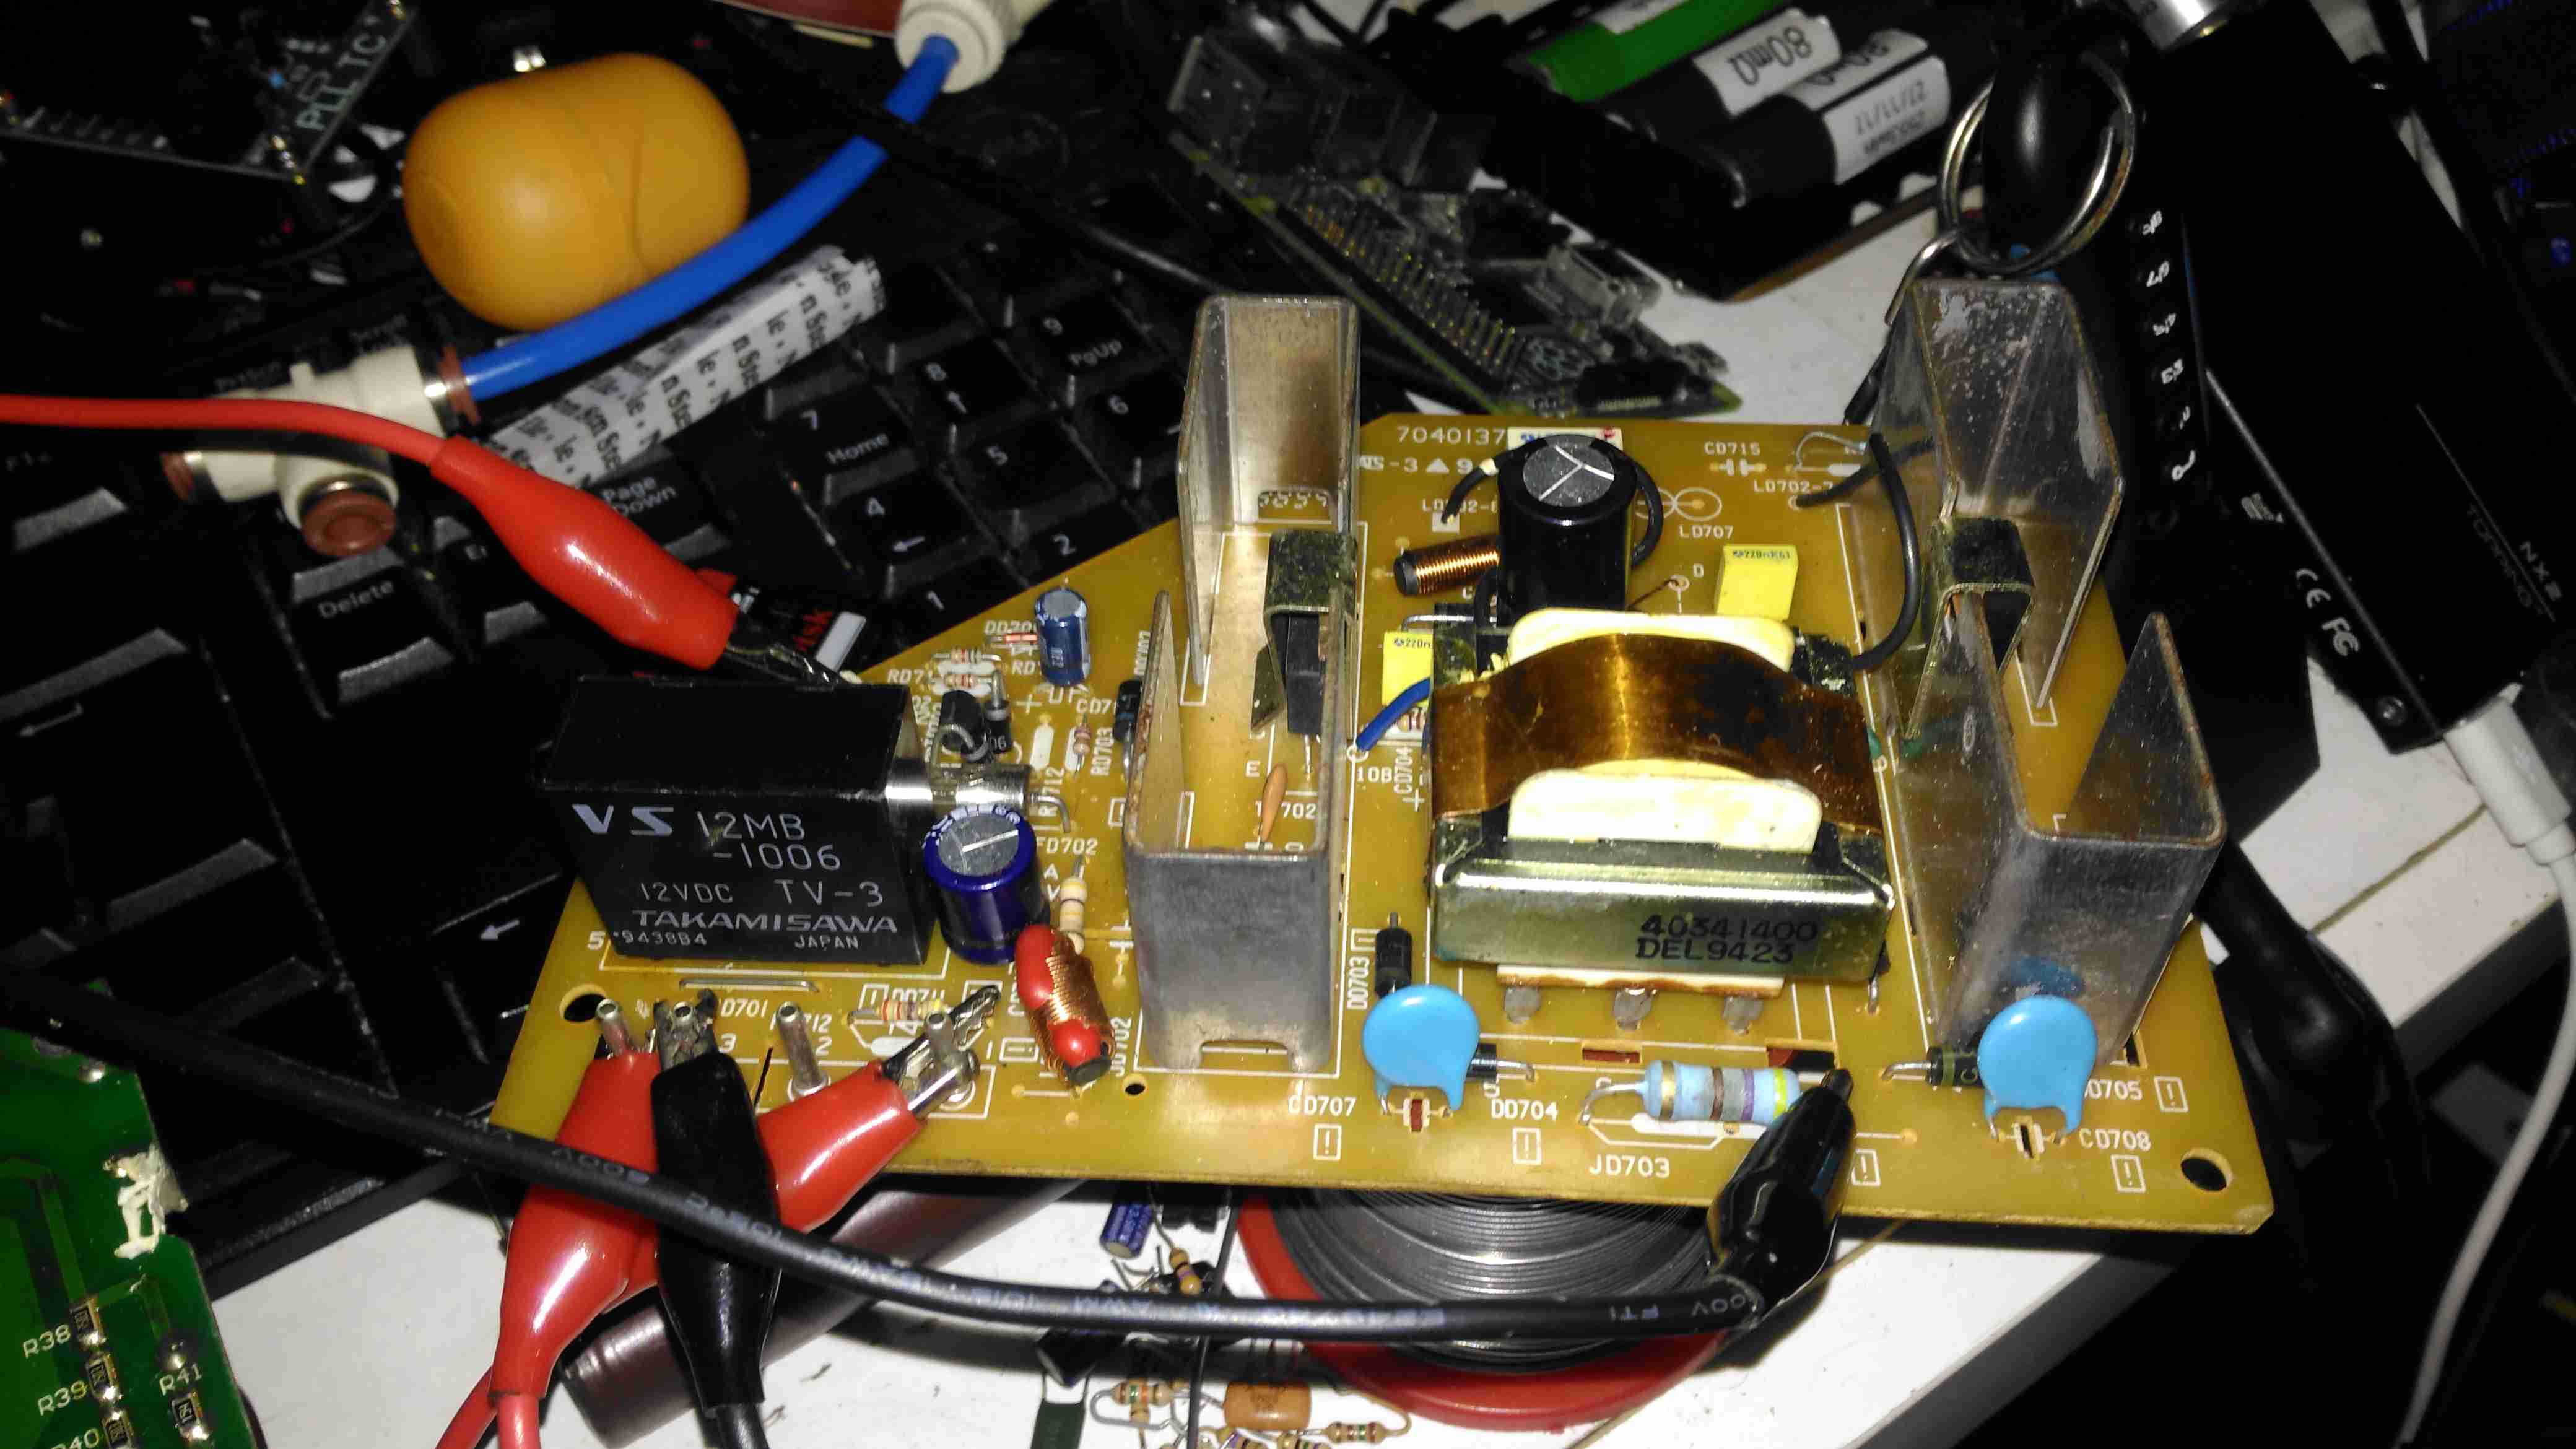
This neat little unit outputs 330v DC at a few dozen watts, plenty enough to power up the charger with a small load for testing purposes. The charger does pull the voltage of this converter down significantly, to about 100v, but it still provides just enough to get things going.
After applying some direct DC power to the input, it’s ALIVE! Certainly makes a change from the usual SMPS failures I come across, where a single component causes a chain reaction that writes off everything.
Unfortunately I couldn’t find the exact same rectifier to replace the shorted one, so I had to go for the KBU1010, which is rated for 1000v instead of 800v, but the Vf rating (Forward Voltage), is the same, so it won’t dissipate any more power.
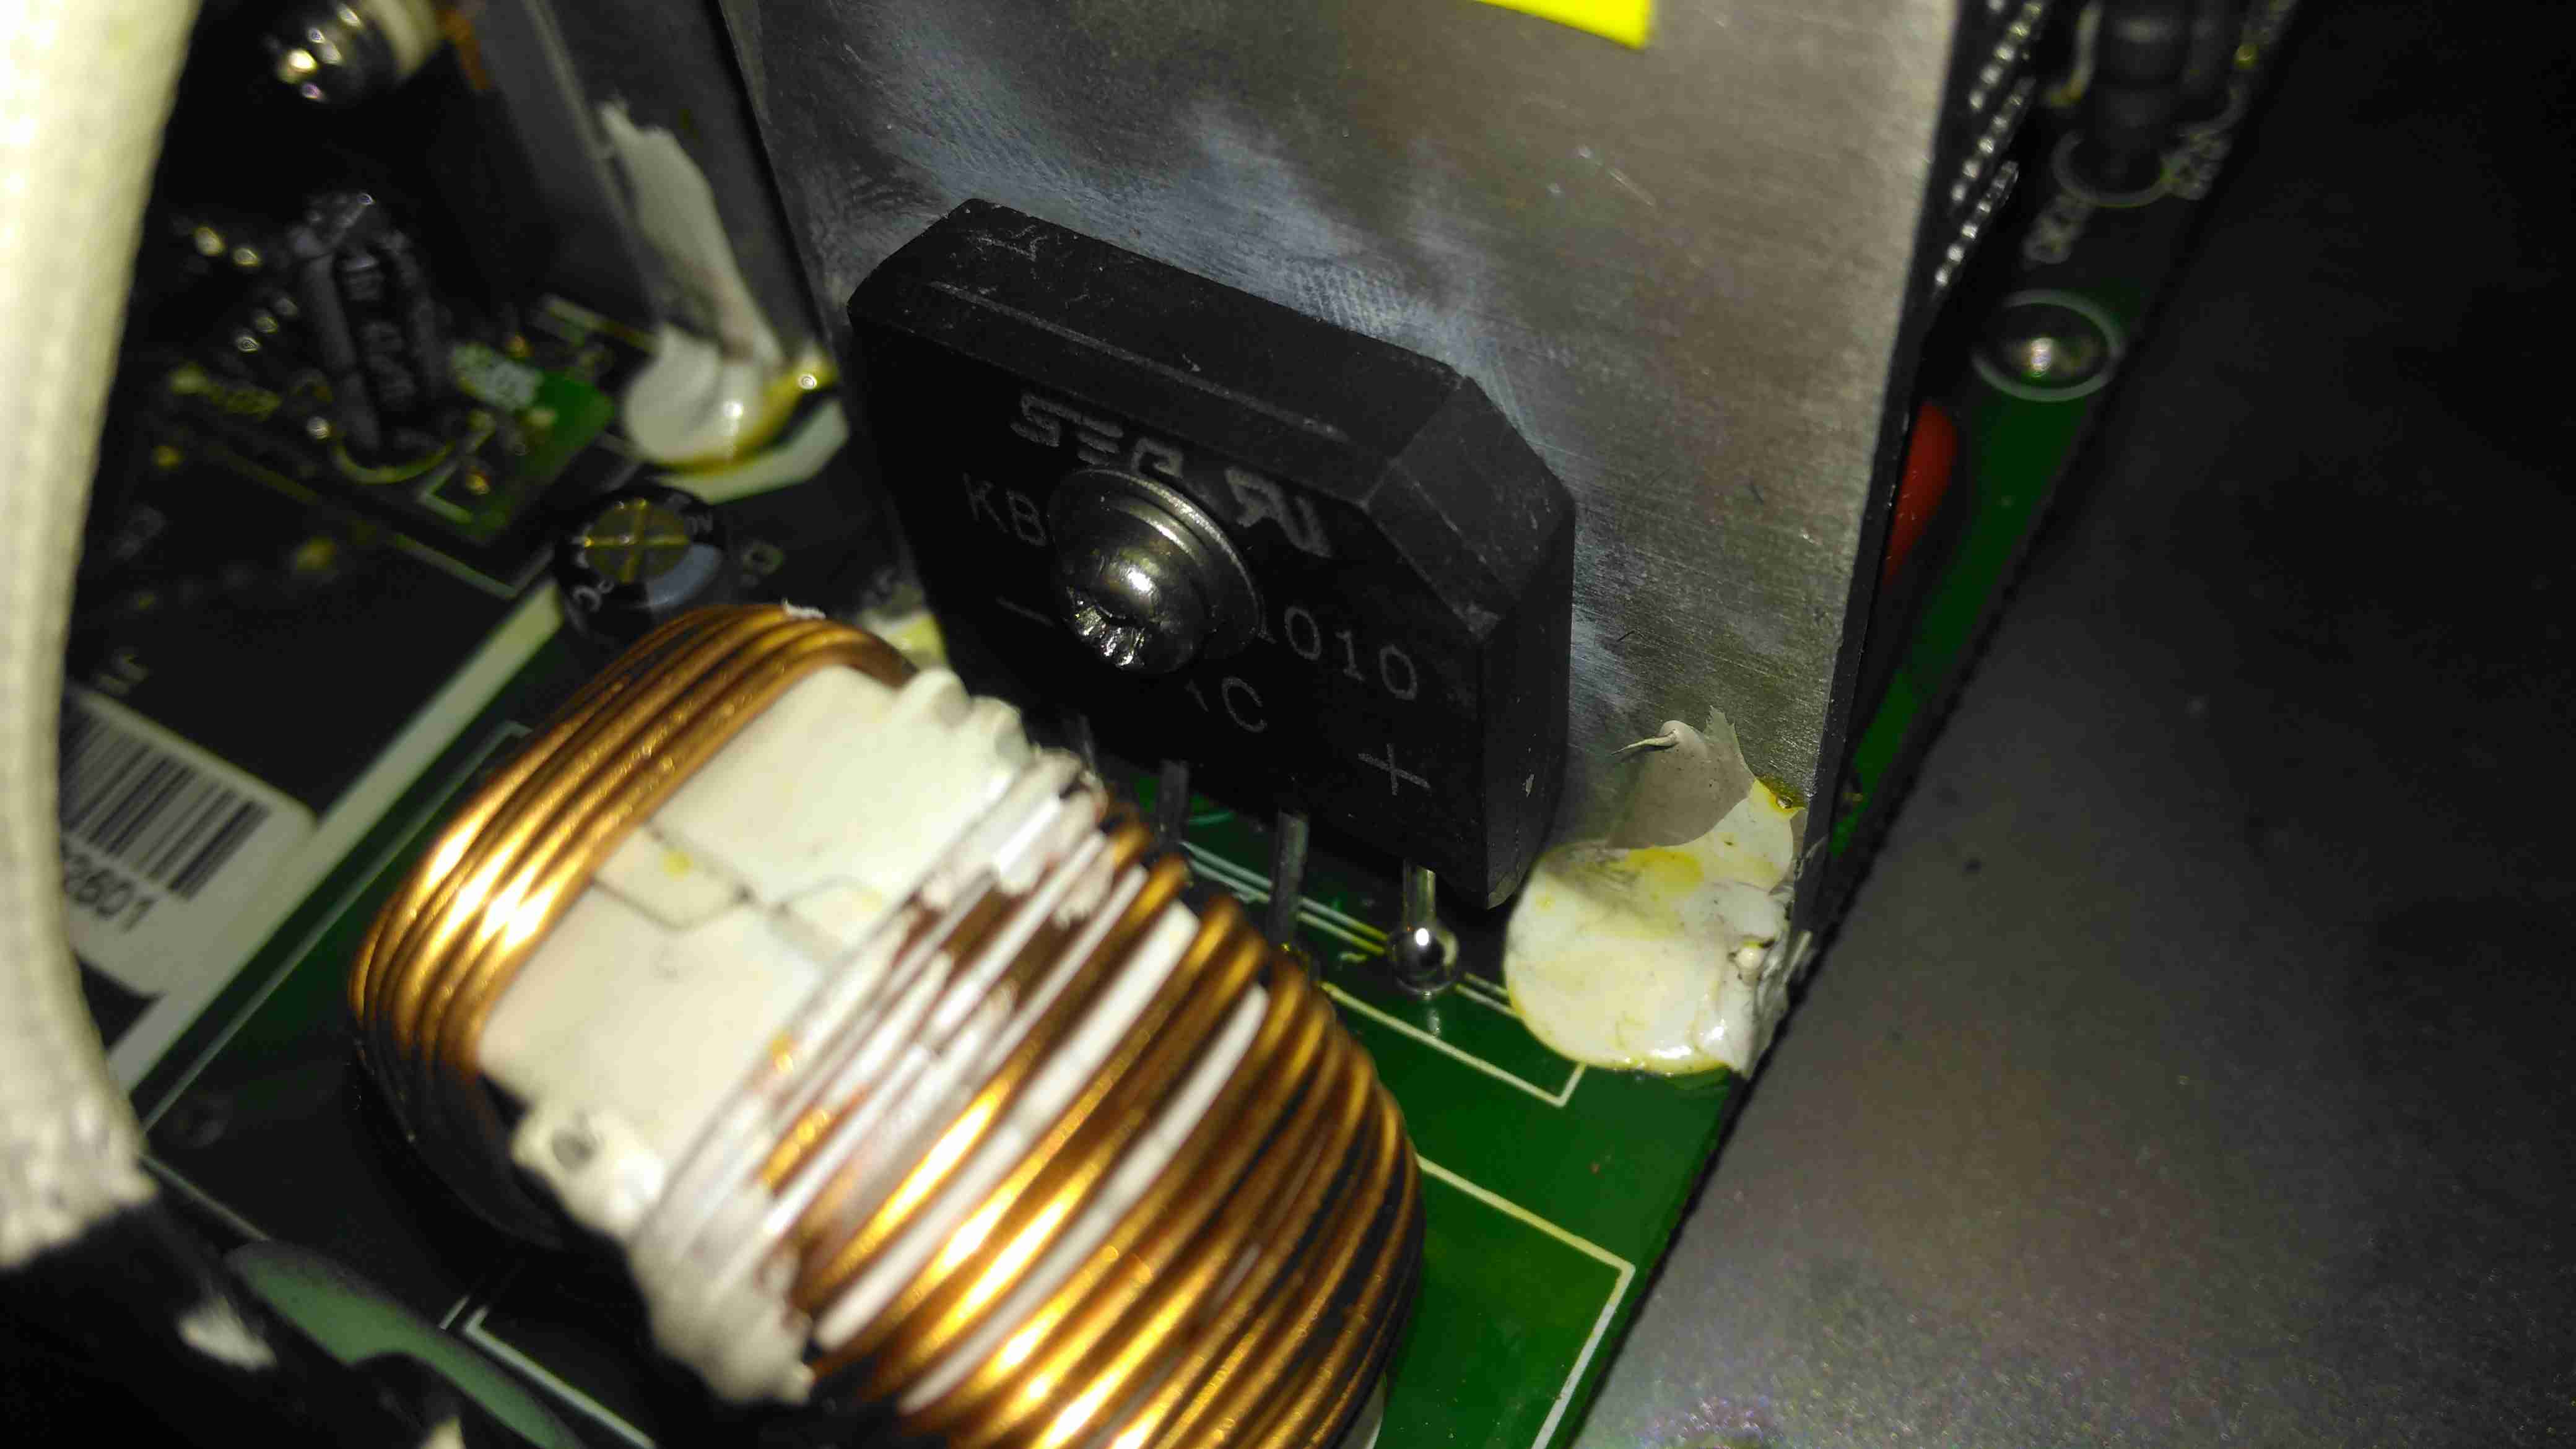
Here’s the new rectifier soldered into place on the PCB & bolted to it’s heatsink, with some decent thermal compound in between.
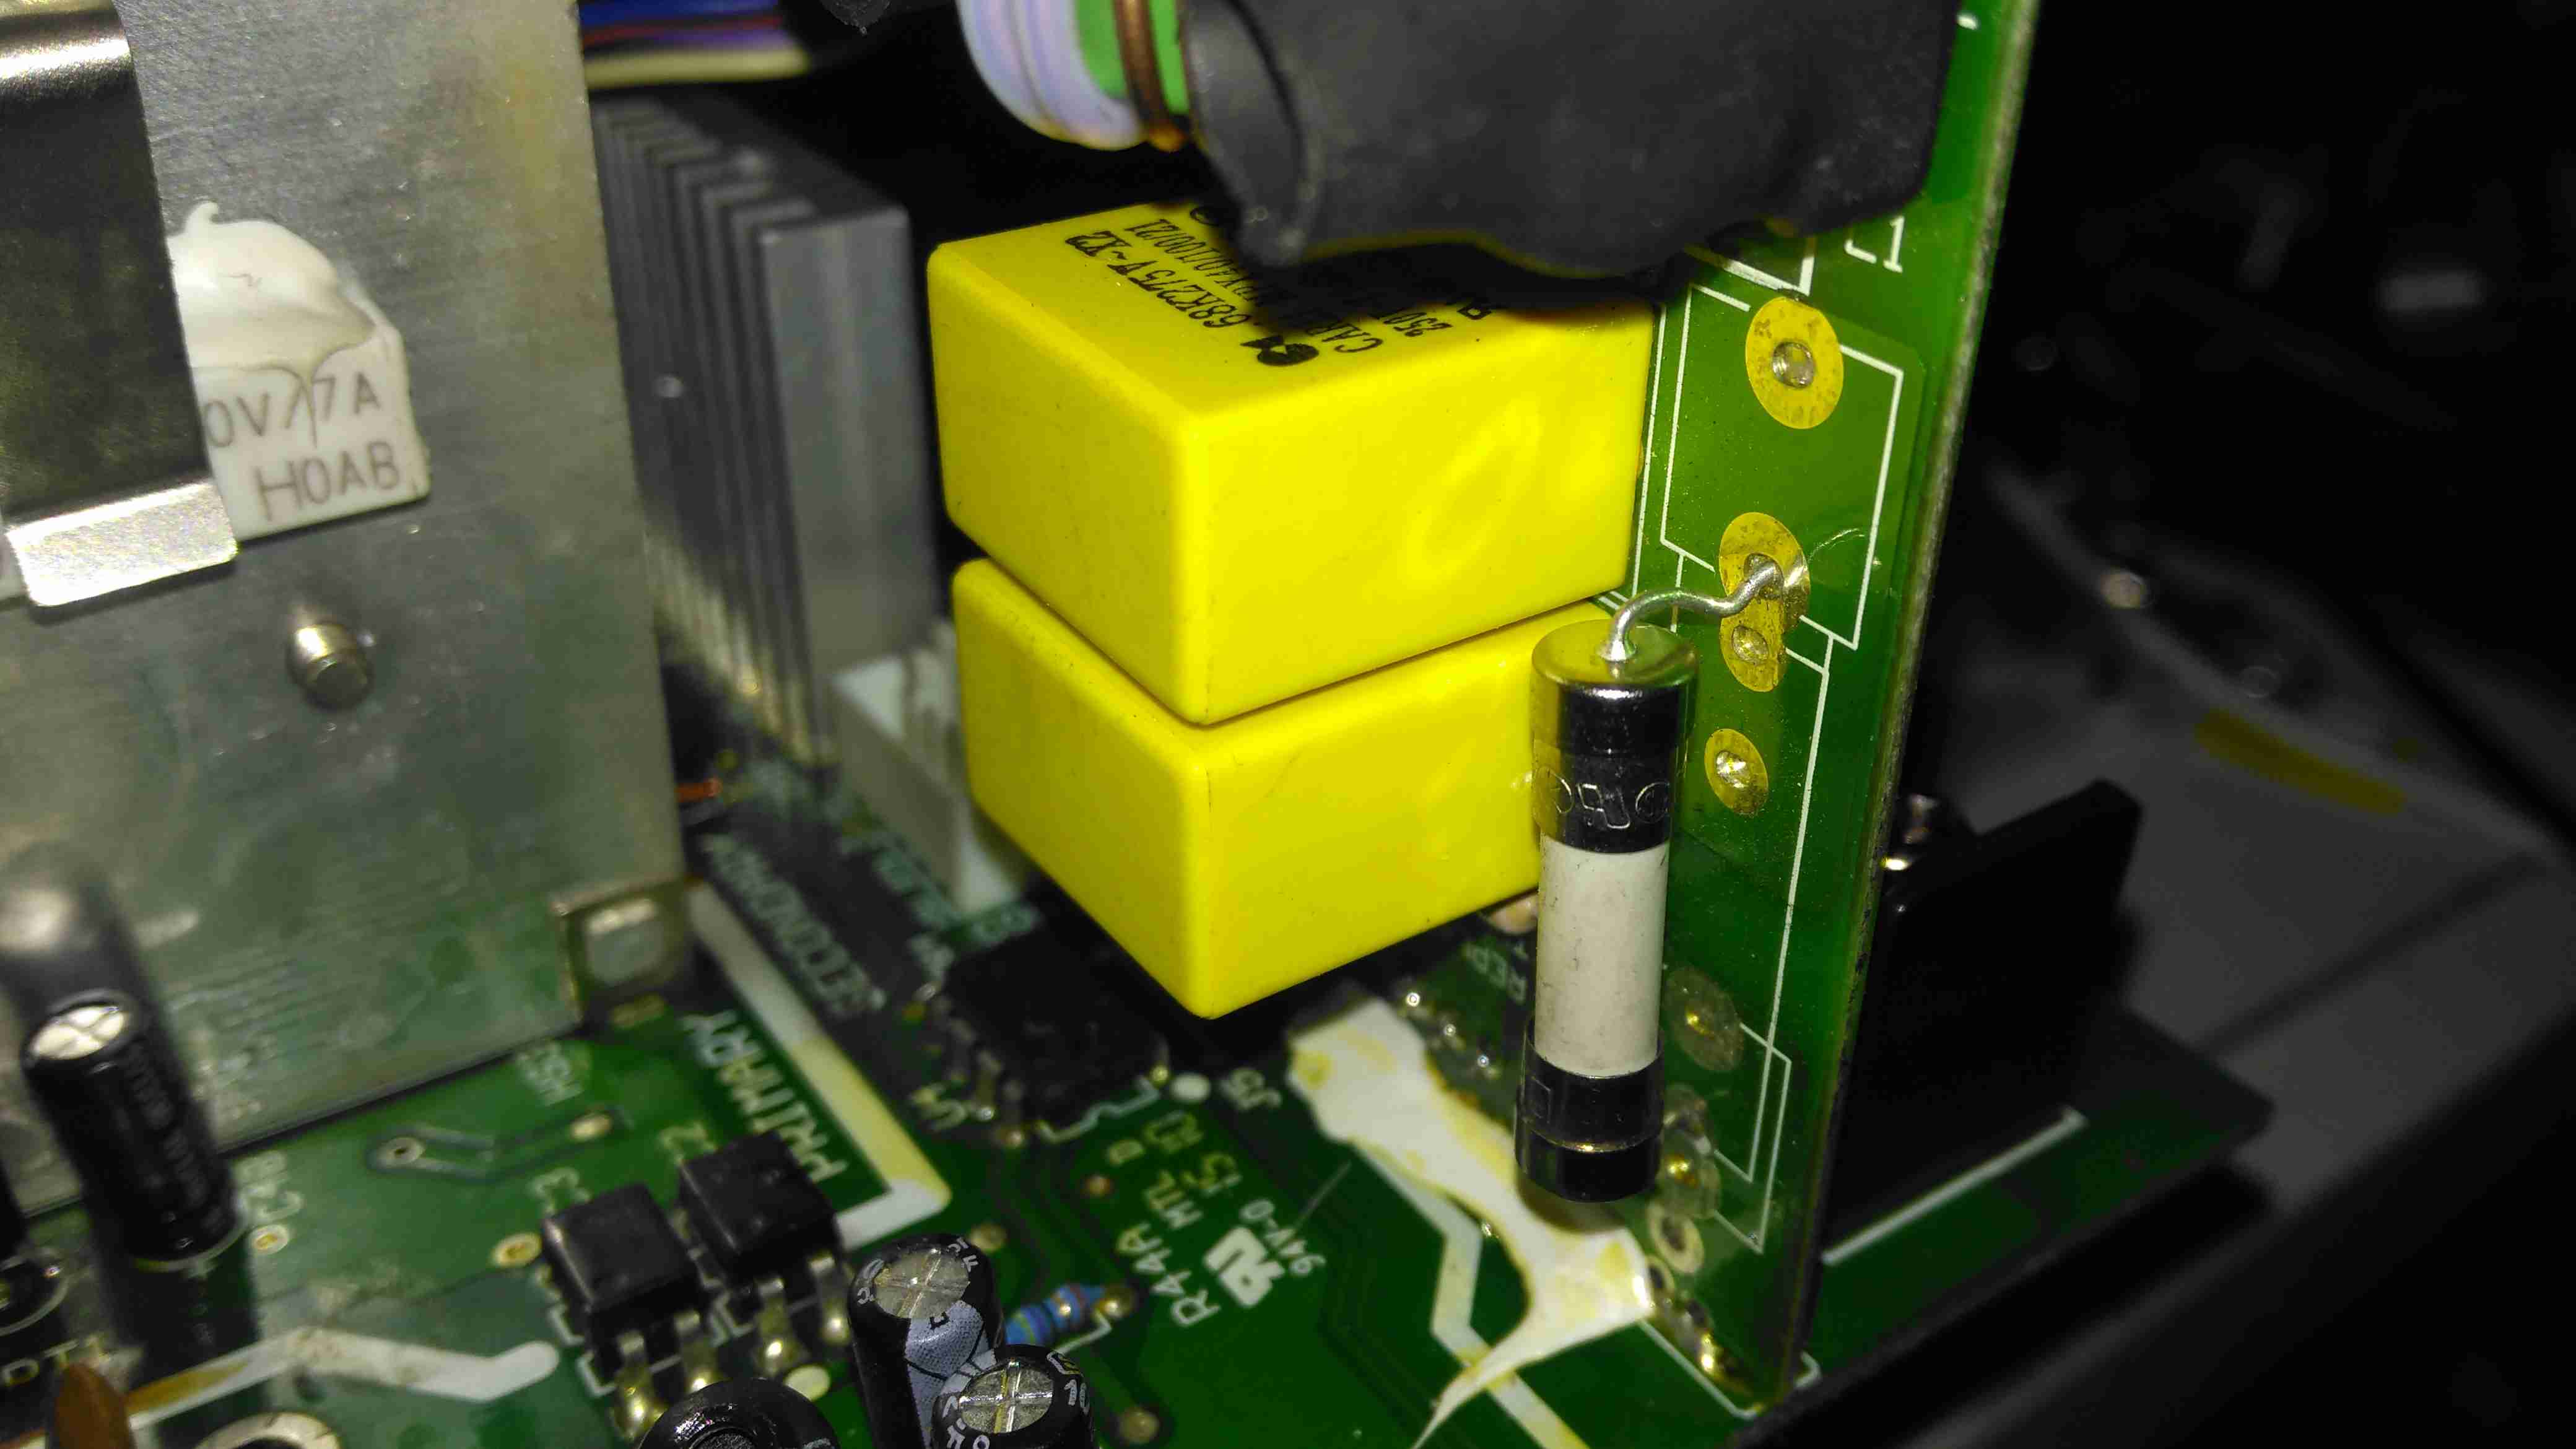
Here is the factory fuse, a soldered in device. I’ll be replacing this with standard clips for 20x5mm fuses to make replacement in the future easier, the required hole pattern in the PCB is already present. Most of the mains input filtering is also on this little daughterboard.
Now the fuse has been replaced with a standard one, which is much more easily replaceable. This fuse shouldn’t blow however, unless another fault develops.
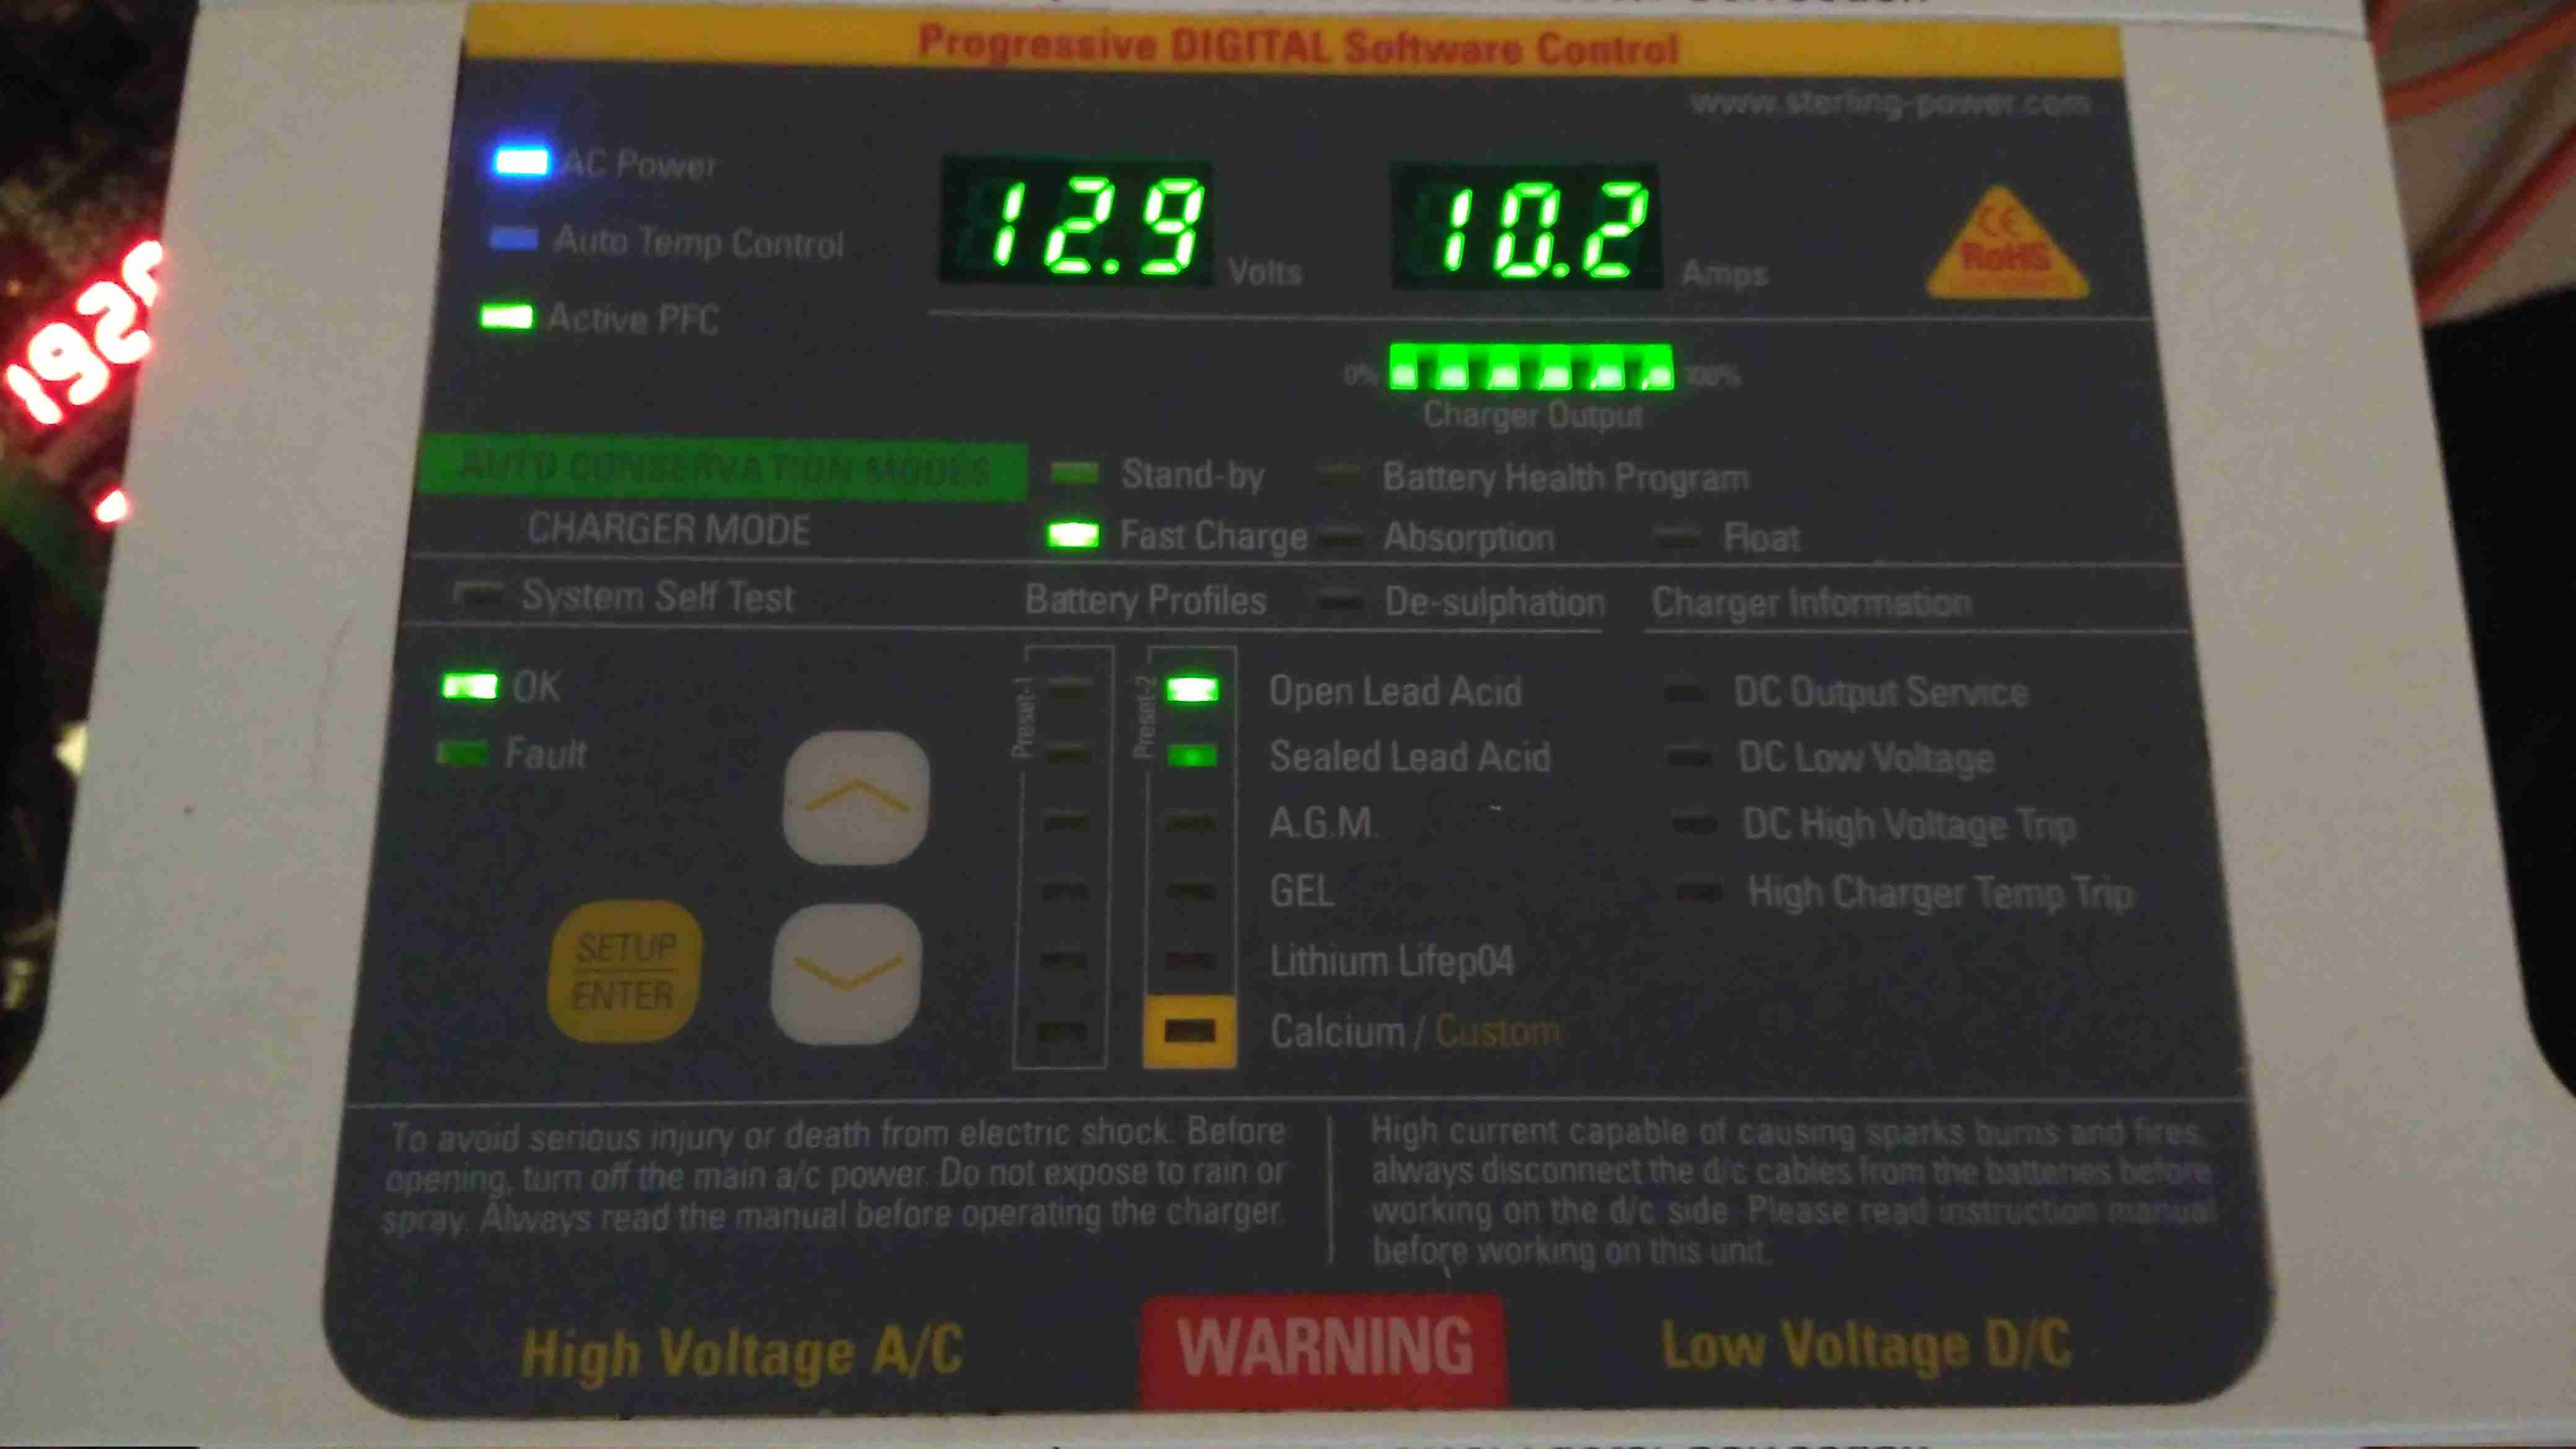
Now everything is back together, a full load test charging a 200Ah 12v battery for a few hours will tell me if the fix is good. This charger won’t be going back into service onboard the boat, it’s being replaced anyway with a new 50A charger, to better suit the larger loads we have now. It won’t be a Sterling though, as they are far too expensive. I’ll report back if anything fails!

So what charger did you get in the end?
My 30amp sterling just gives a DC Output fault , so in the market for a better unit too
Thanks great website
I have a Pro Charge Ultra 60A with one repeatedly blowing blade fuse, but without the skills to remove and solder stuff. It’s running at 30A presumably on one of the 2 x 40A paralleled fuses. Only 2 years old, so as disappointed as you with the quality. I’m now looking for a 50A charger to better suit my generator…. so am as interested as bonito in what you replaced your Sterling with 🙂
Hi Richard,
I would avoid the cheapo 40A+ chargers from anywhere – they’re mostly nasty in terms of reliability and EMC noise. As I run an EpEver solar controller, I ordered a 48v TDK-Lambda power supply, and parallel that with the solar panels to do the battery charging. As far as the solar controller is concerned, it doesn’t care where the DC input comes from. This also means that any high-quality supply could be used, as the controller does all the battery charging logic.
Please let me know if you require further information.
Cheers
Hi there,
Not sure if you can help?!
I live on a boat and have a Pro charge Ultra 12v – 40a. Today when using the generator I realised that the batteries were not charging. The charger isn’t displaying a fault light, but the volt and amp are reading as zero. The only other light are the AC power and the battery type. Any ideas what’s wrong? I need to get it sorted asap or I’ll be out of power in no time, sorry if its a daft question. I’m new to boat life and batteries!
Cheers
Laura
Hi Laura,
If the charger isn’t displaying a fault light, then I’d definitely be checking the fuses which are under the grey cover on the bottom that hides the wiring – they may be blown. If not check the wiring, and any other fusing in the cabling to the battery bank. These chargers are quite intelligent in their fault sensing, it just a shame they’re not better at being reliable for the price!
Cheers
If you search for Sterling Pro Charge Ultra troubleshooting on youtube you will see an official video about precicely the 0V and 0A problem. They propose three different solutions.
Hi,
Well done.
I need to change a U2 IC but cannot read the type and model, do you have a circuitry scheme of the charger ?
Thanks,
Lyes
Unfortunately I don’t have a schematic, sorry!
Thanks for this report, I recently aquired a faulty sterling charger. ( I found it in the garbage at my yacht club, and thought it might be repairable.)
Visual Inspection revealed nothing spectacular only minimal smoke remnants at the input section.
So I hope the same fault my be the issue.
With your info I feel more confidant to give it a try.
I will report the progress.
Thanks.
Tony
Hi Tony!
Glad you’ve found it useful. I hope it’s the same fault and the charger is repairable!
I don’t use this charger any longer (even though I do still have it as an emergency spare), because it’s failed more than once in the same way, and I have repaired it the same way each time. The design is pretty poorly specced out!
Cheers
Hi there from Germany! I also would like to know what IC U2 is. Can‘t read the marking on mine because it‘s exploded. Seems to be an TNY-xxx AC/DC offline switcher. Would be great if someone can take a look at it.
Best Regards
Steffen
TNY275PN is the U2 IC