Overview
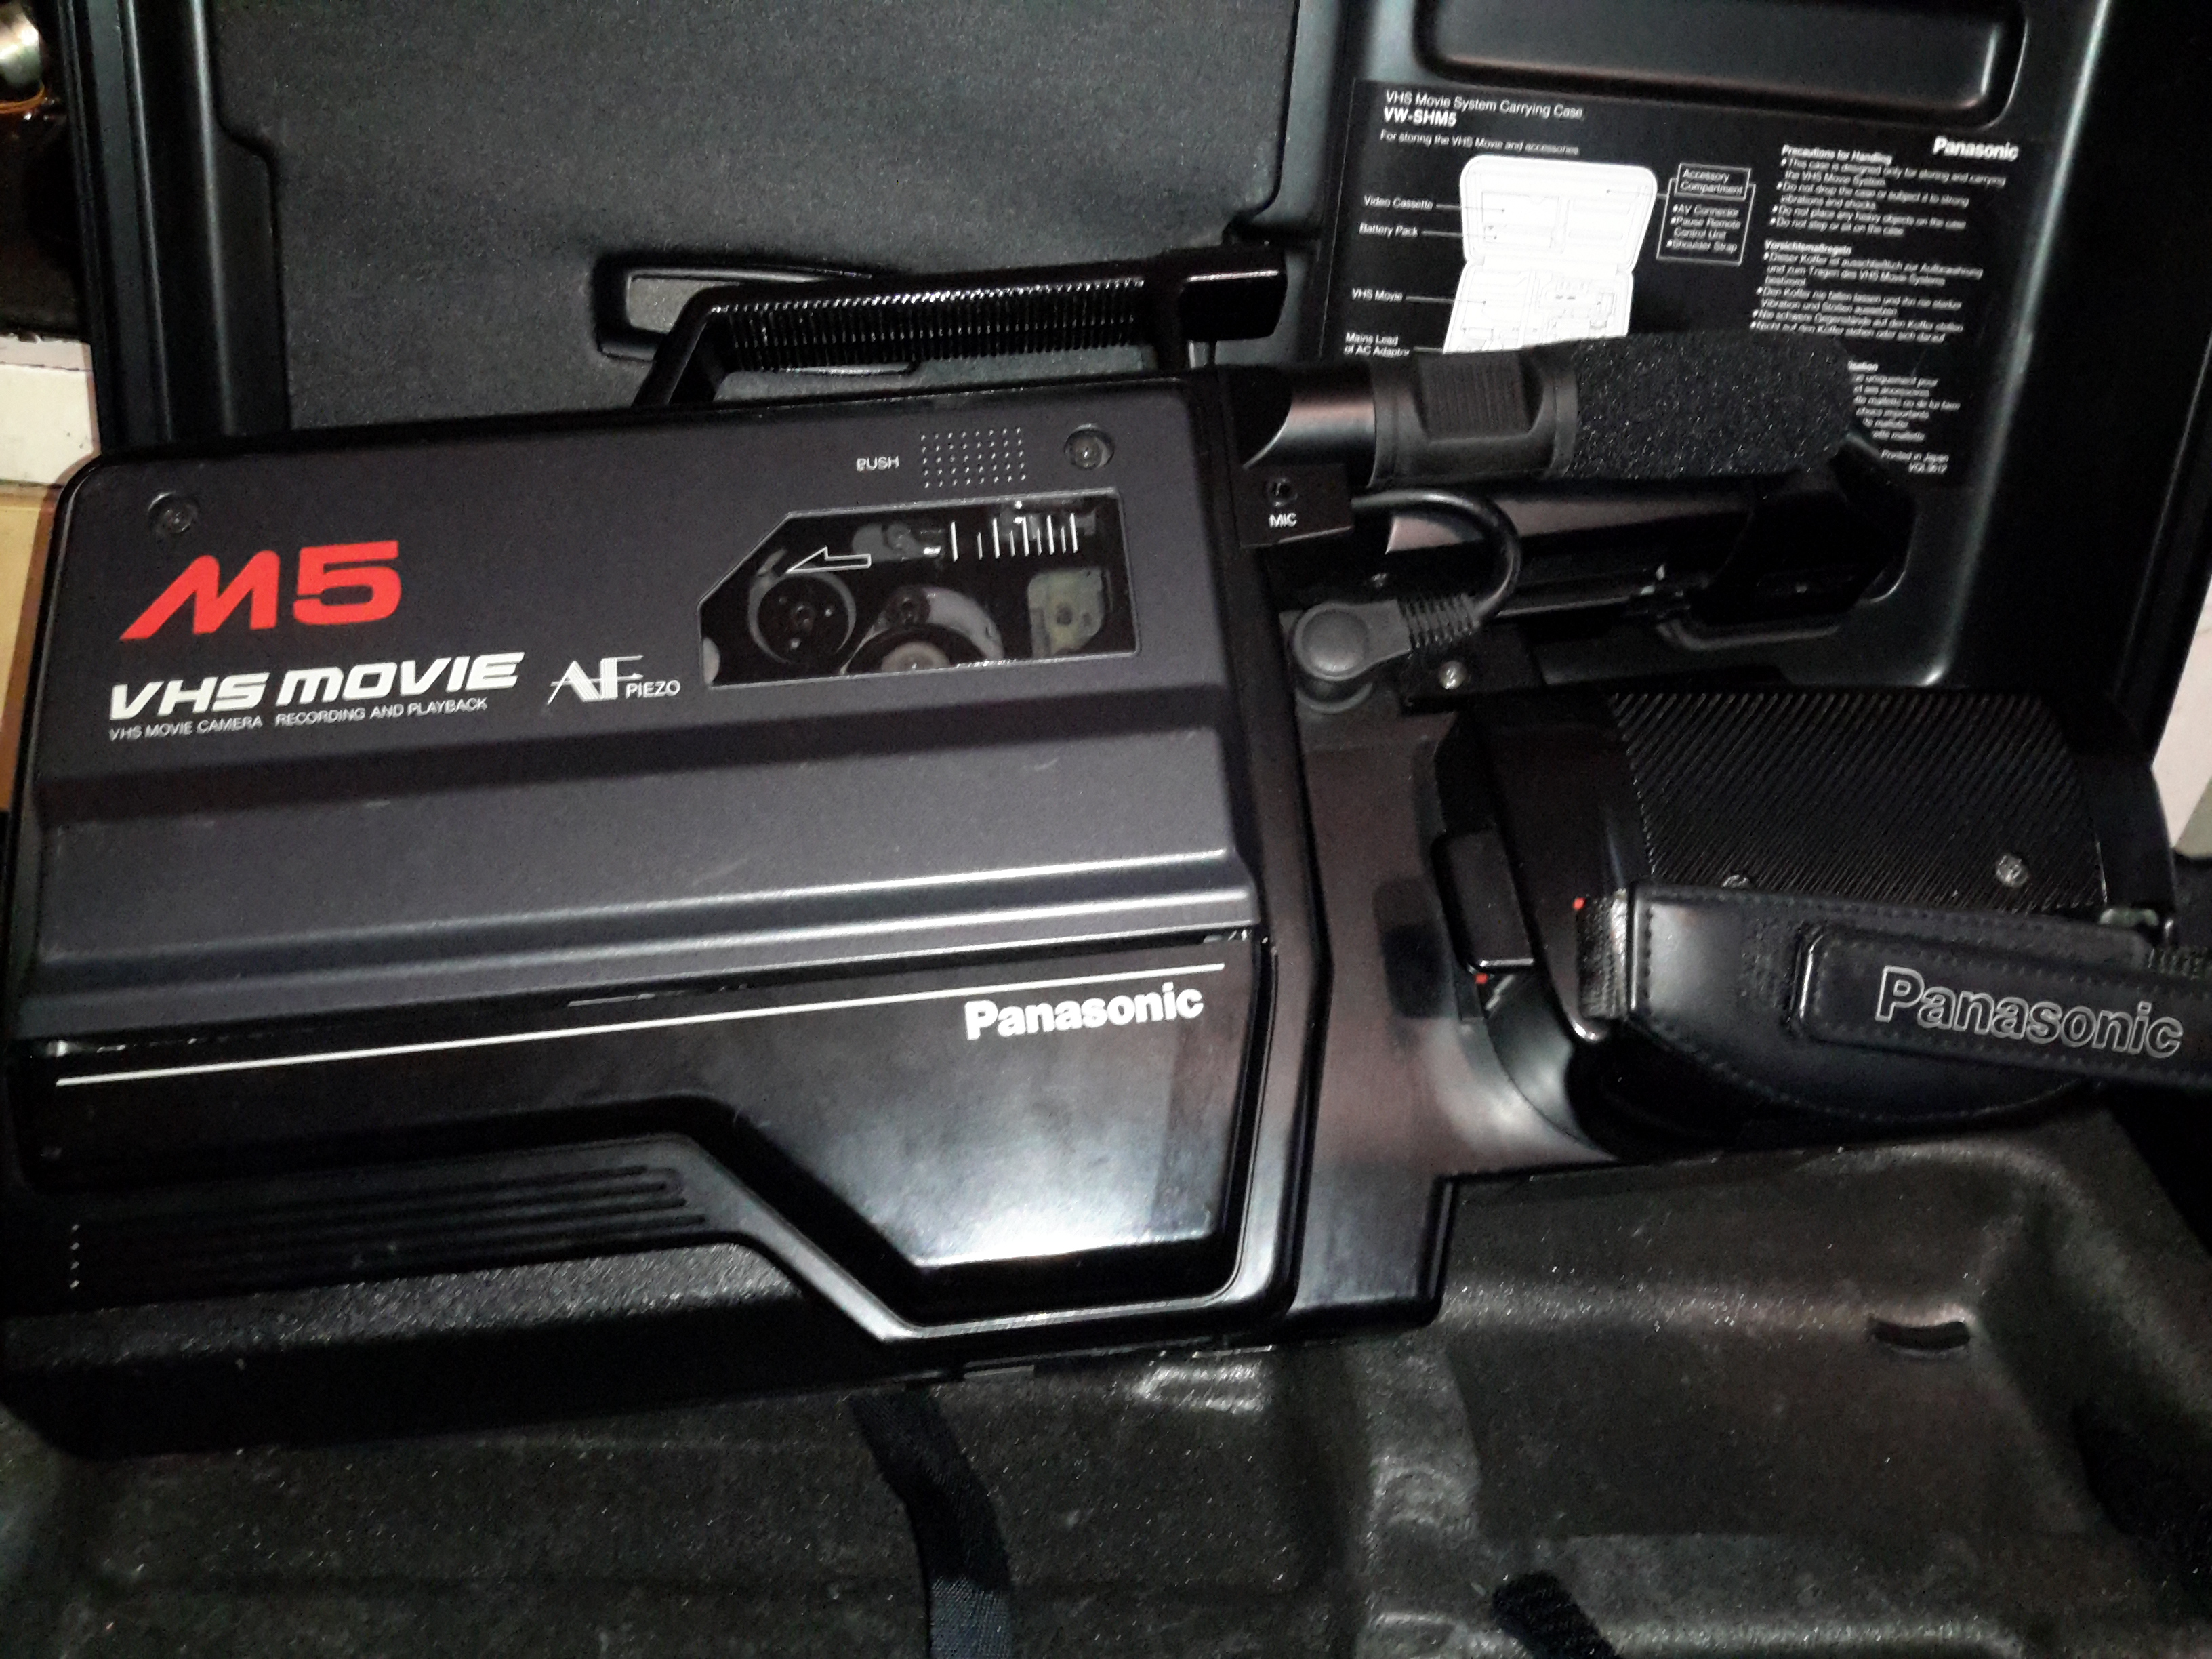
Time foe some more retro tech! This is a 1980’s vintage CCD-based VHS camcorder from Panasonic, the NV-M5. There are a lot of parts to one of these (unlike modern cameras), so I’ll split this post into several sections to make things easier to read (and easier to keep track of what I’m talking about :)).
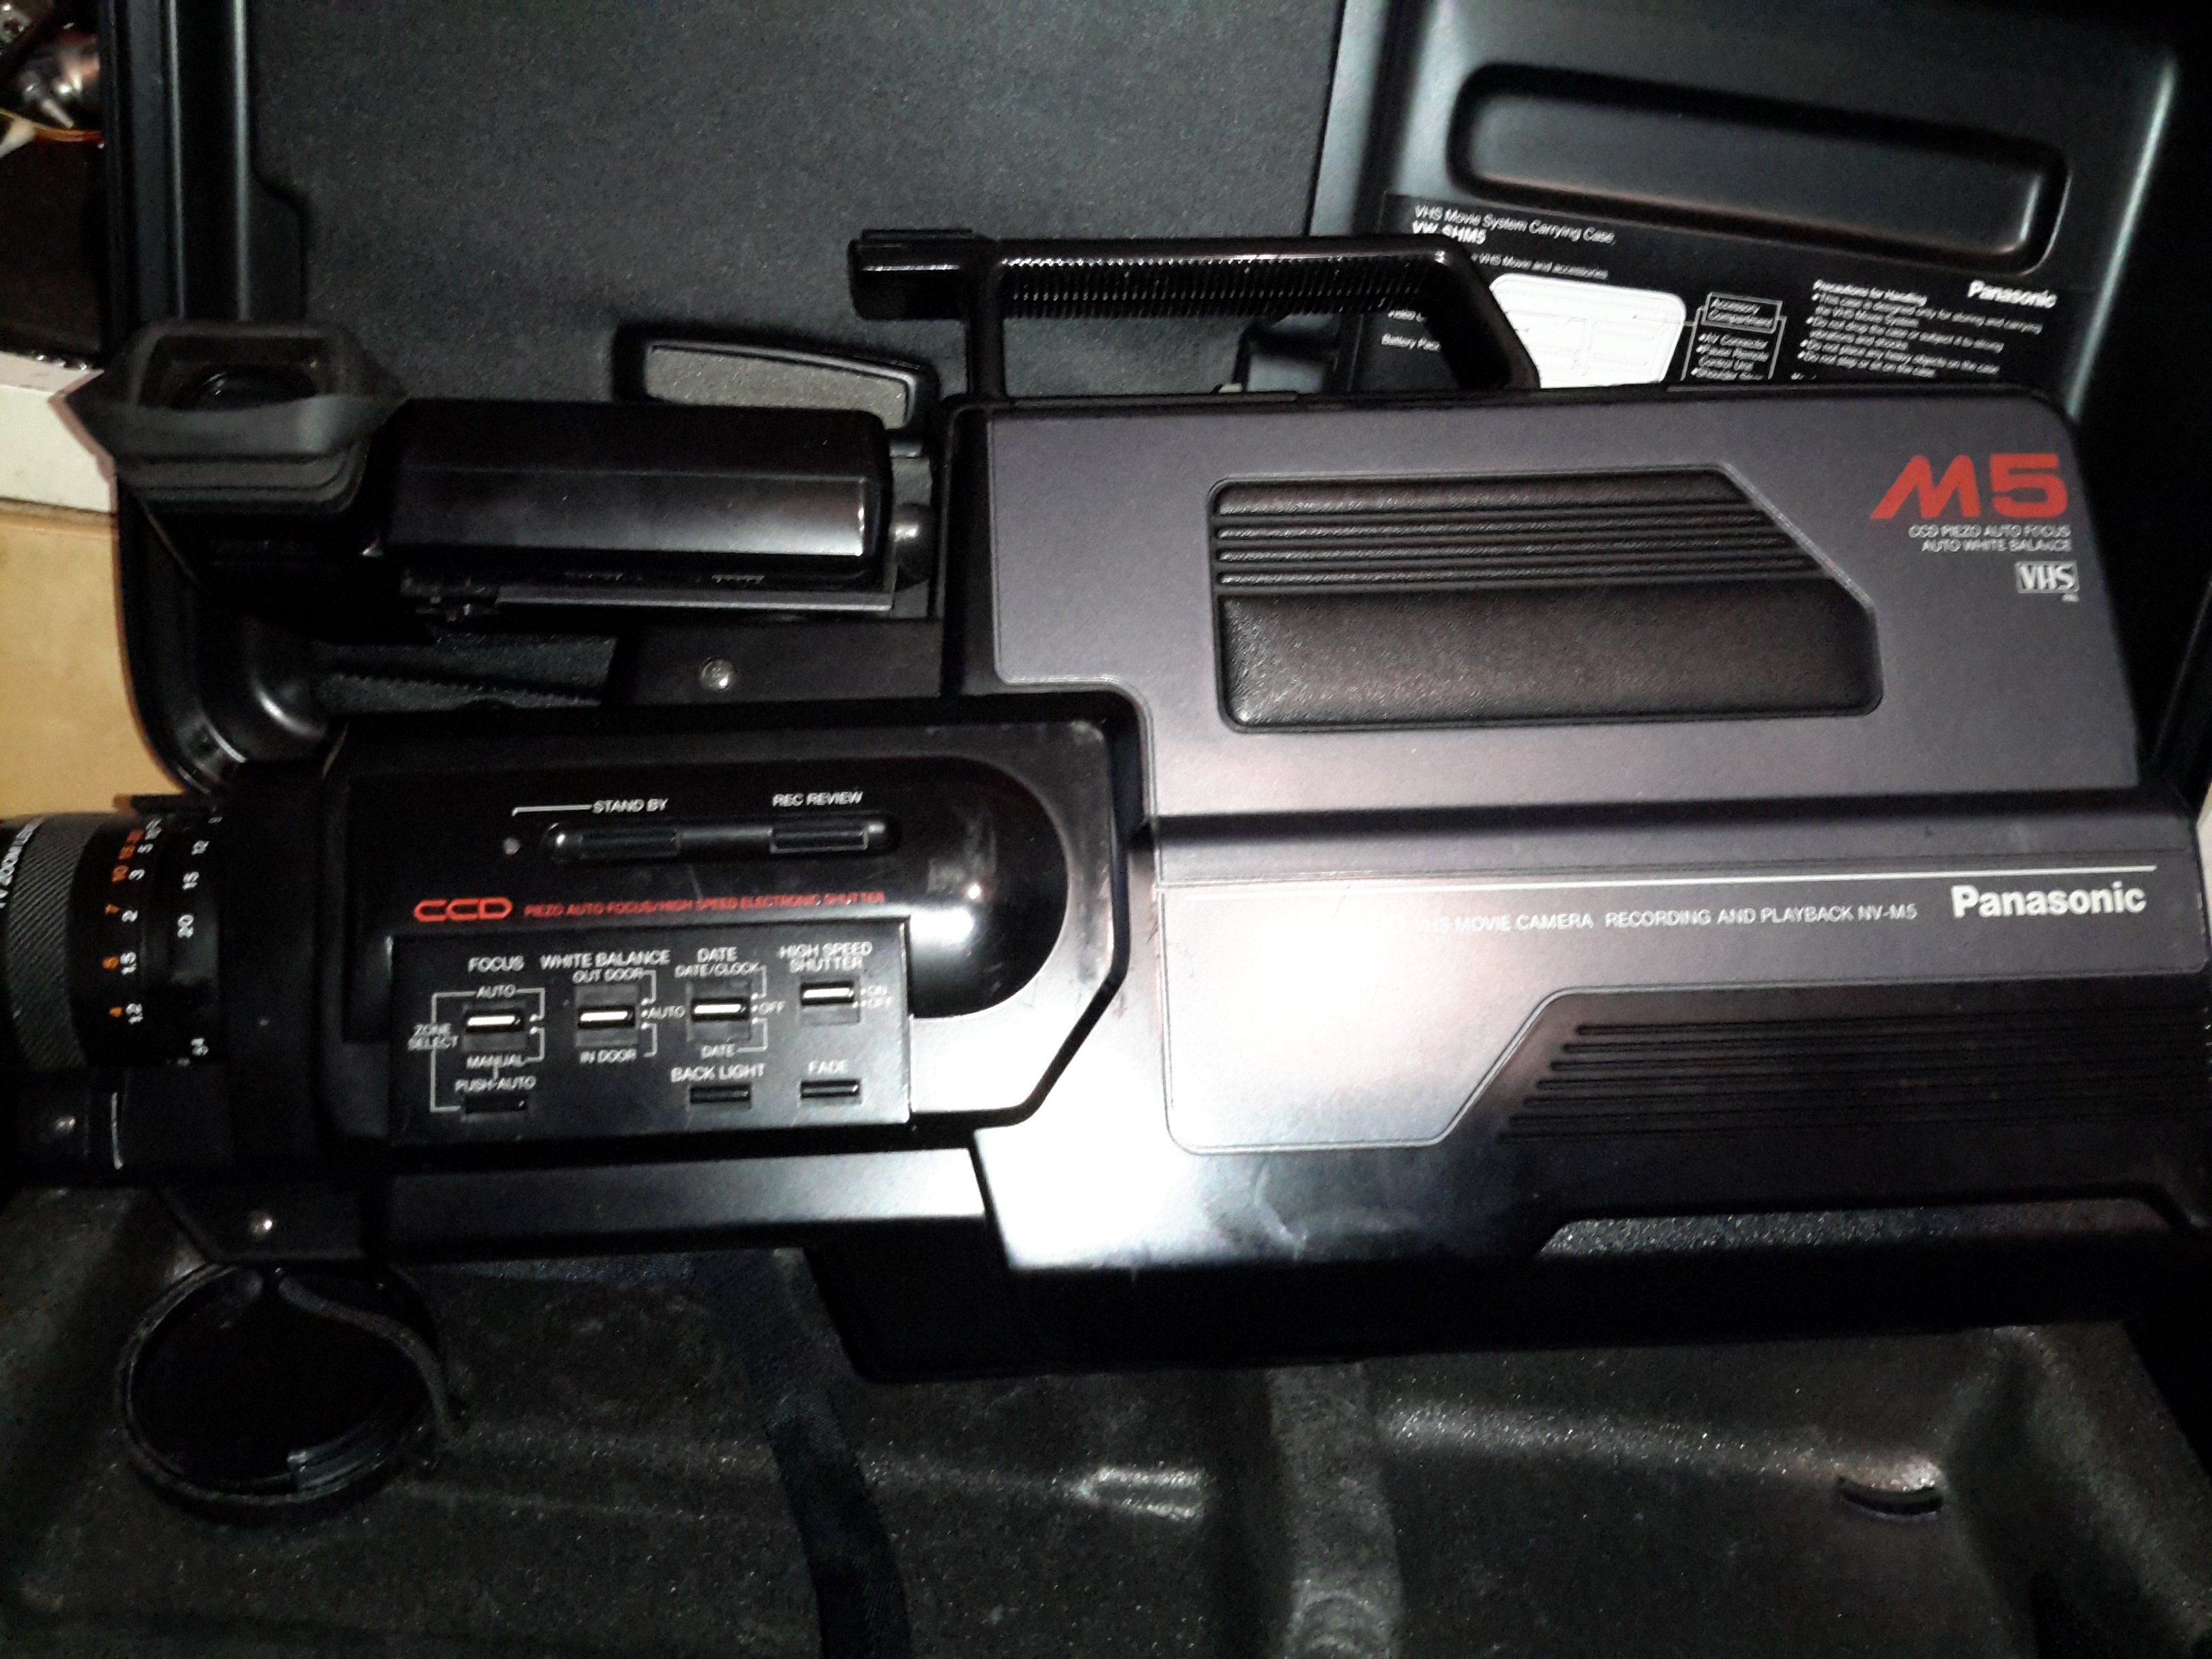
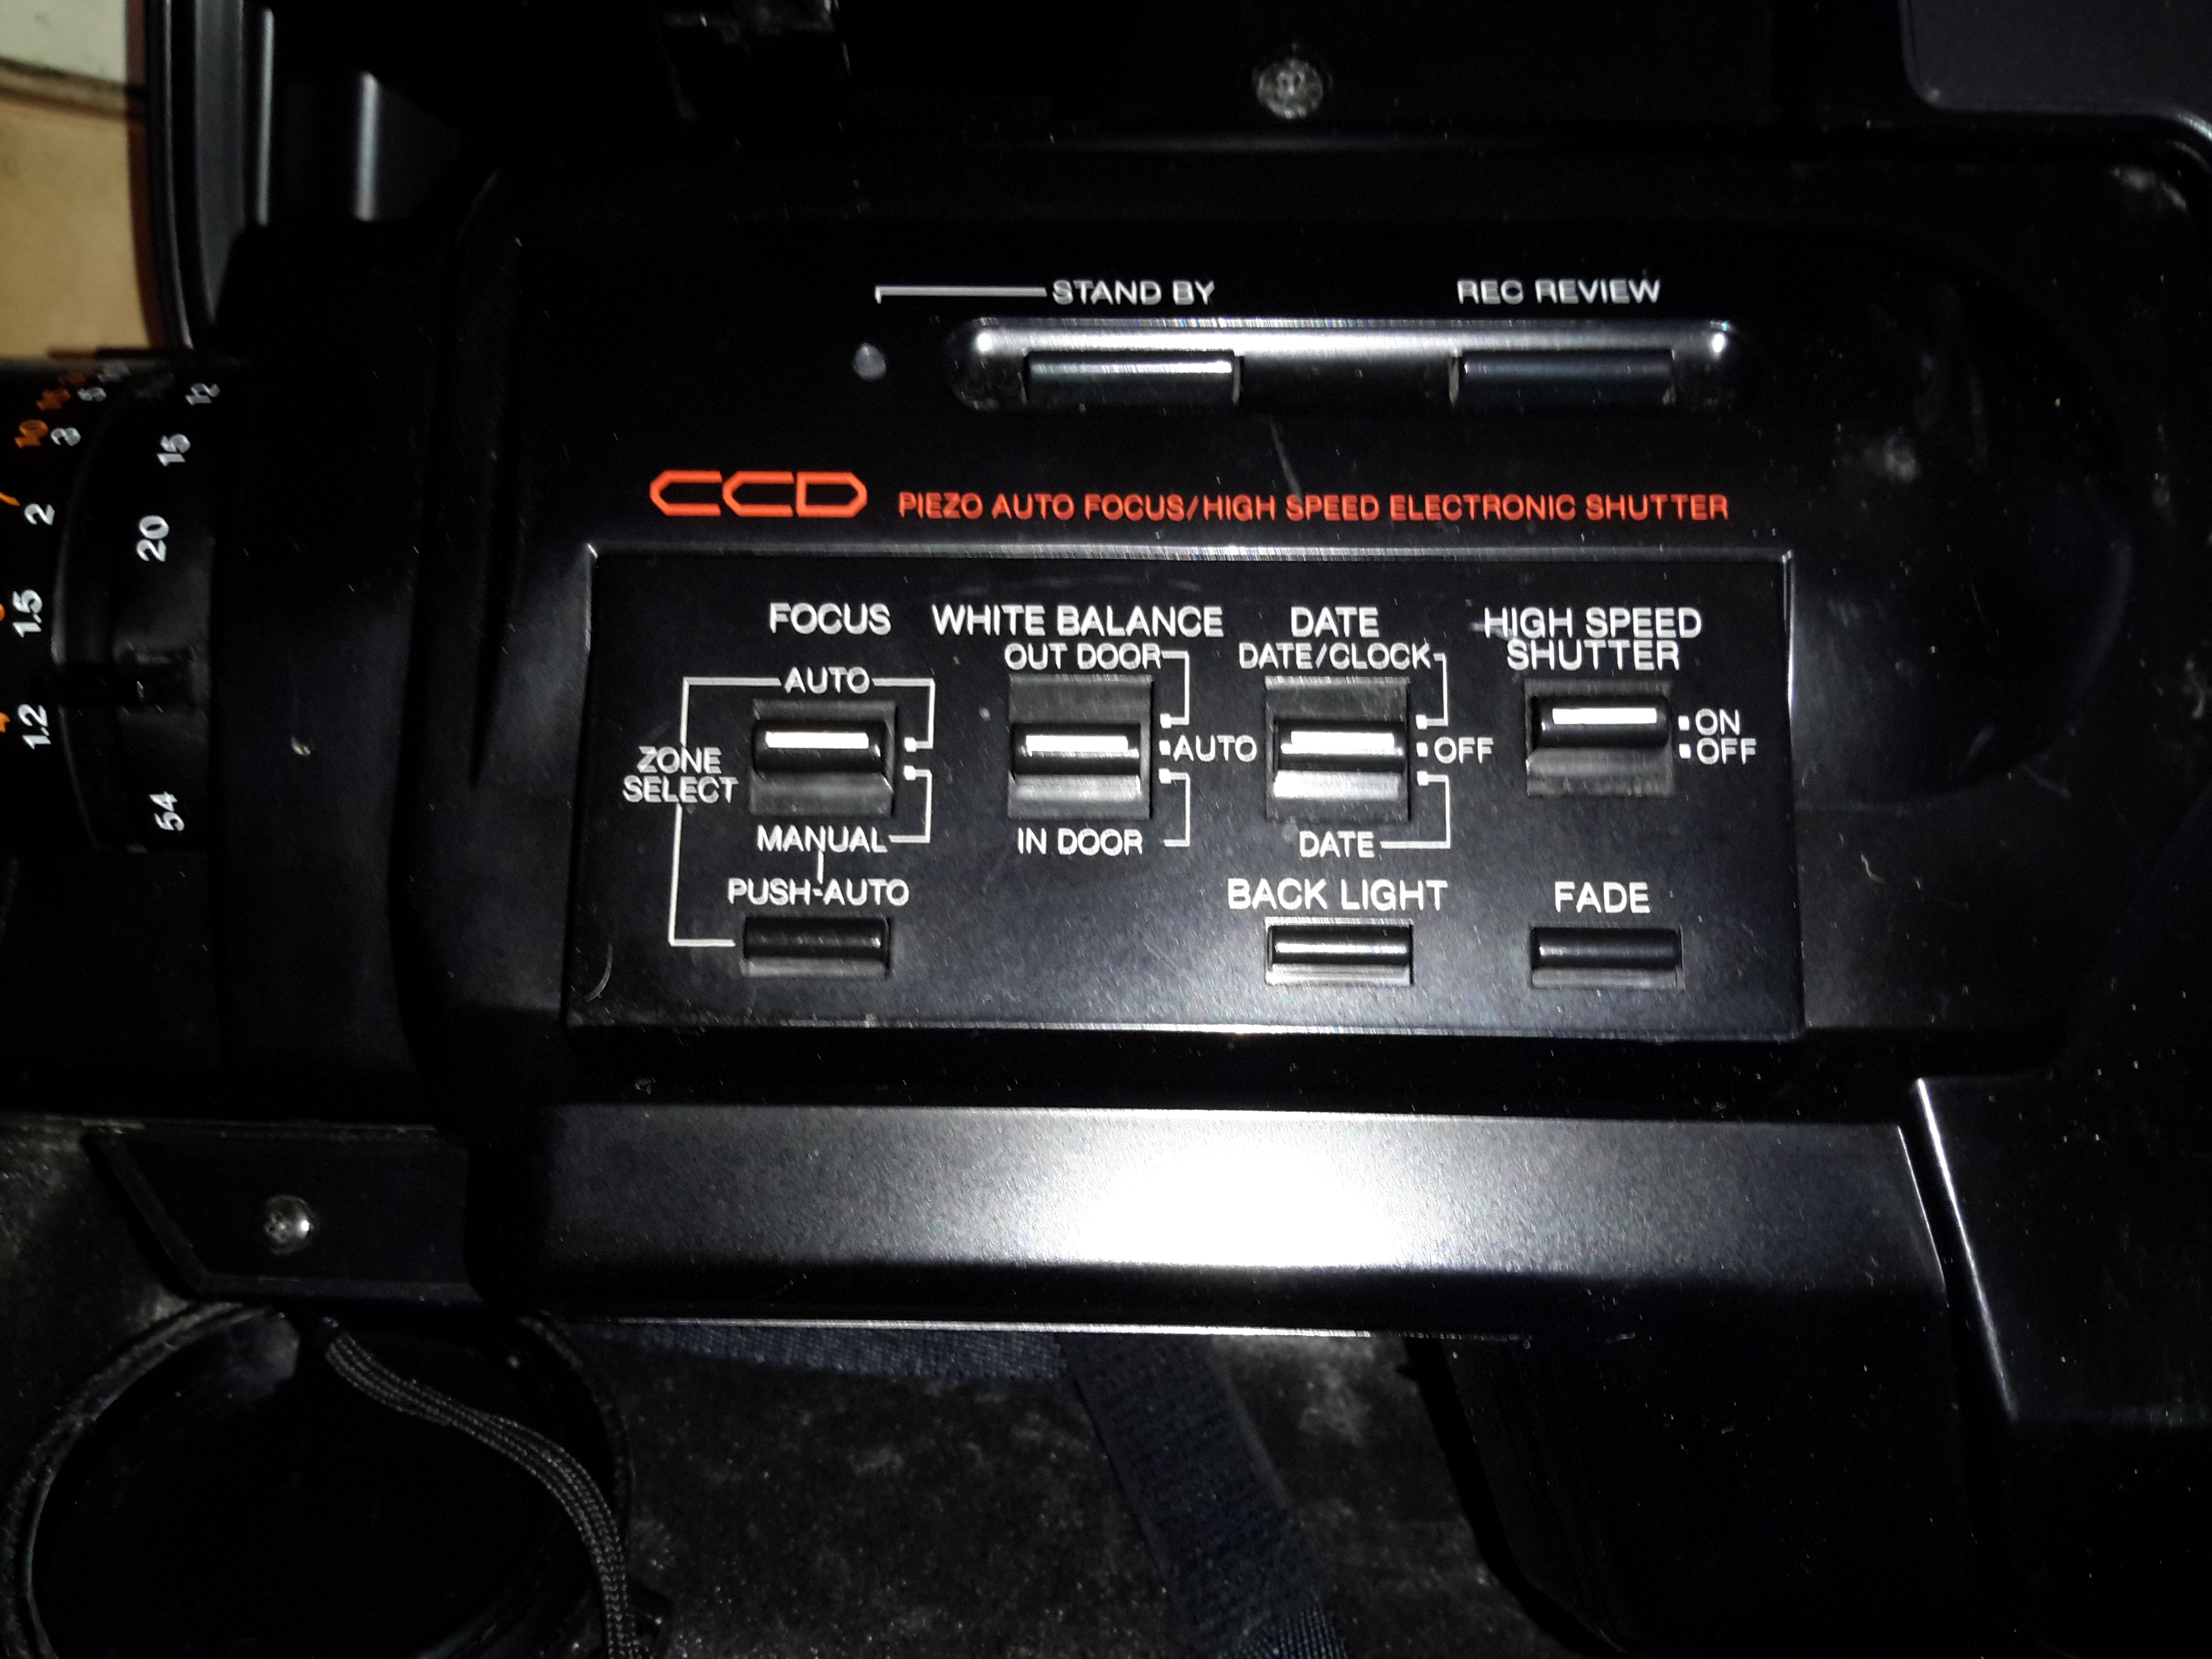
The left side of the camera holds the autofocus, white balance, shutter speed & date controls.
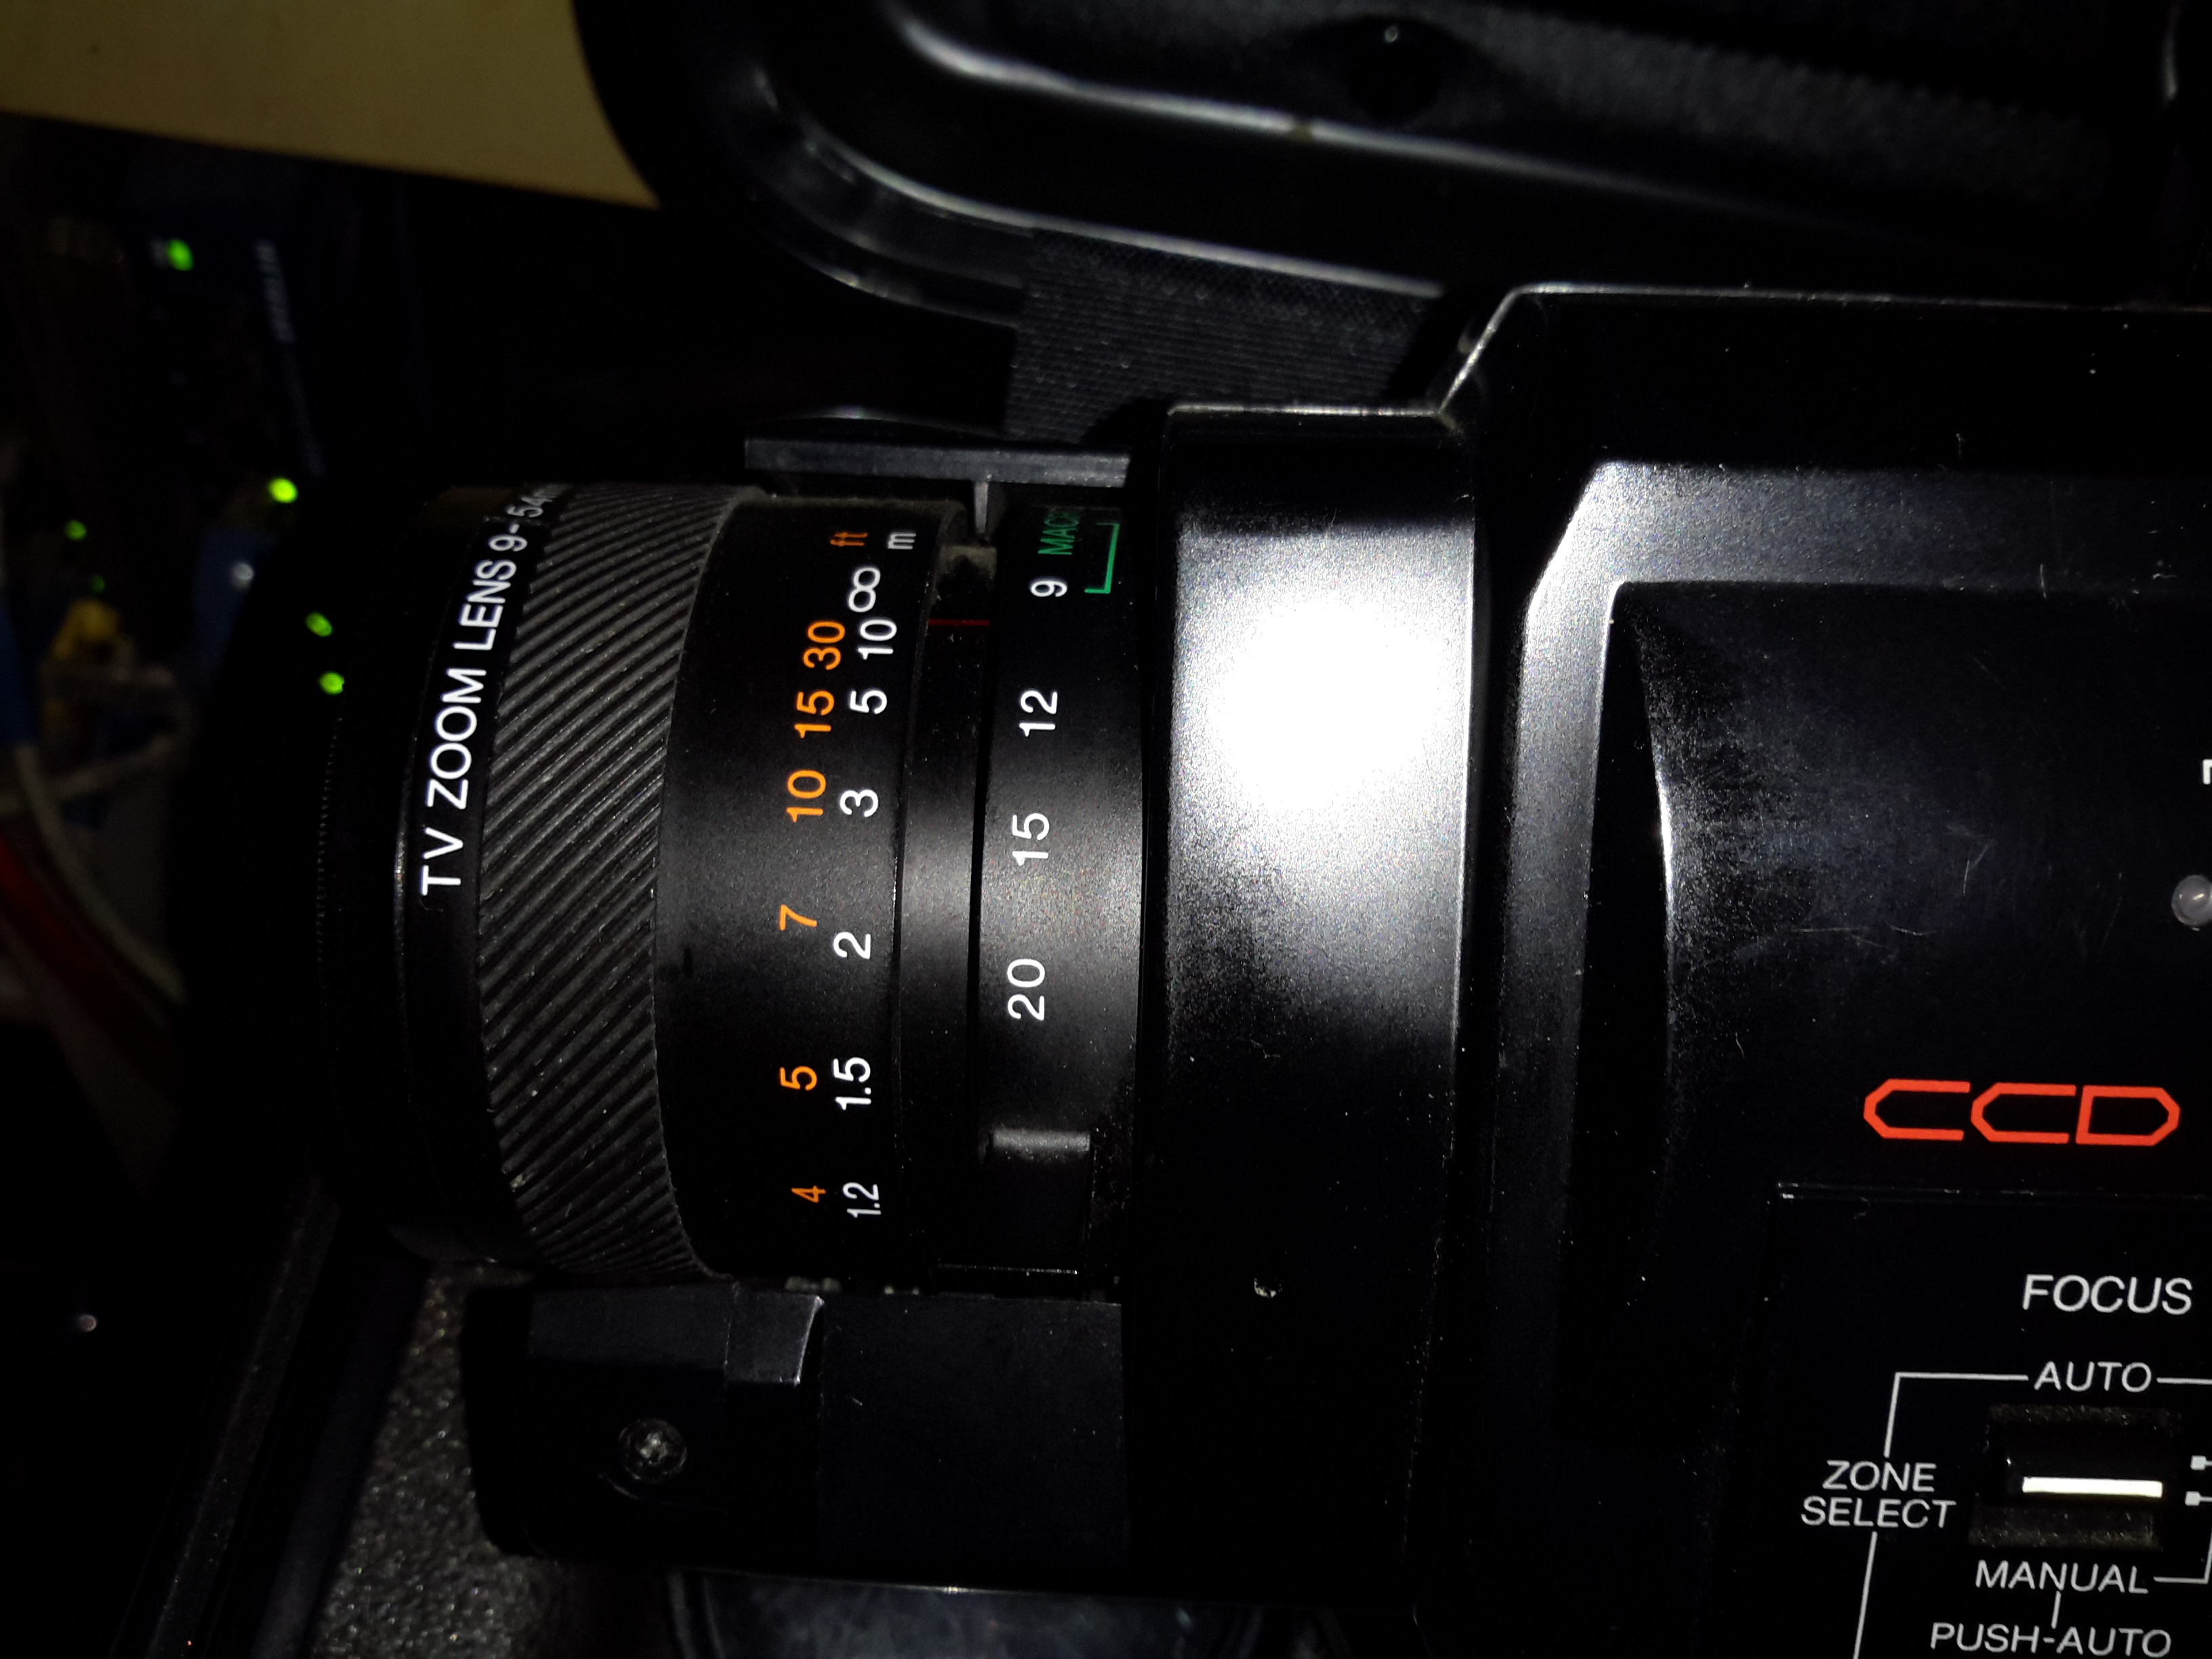
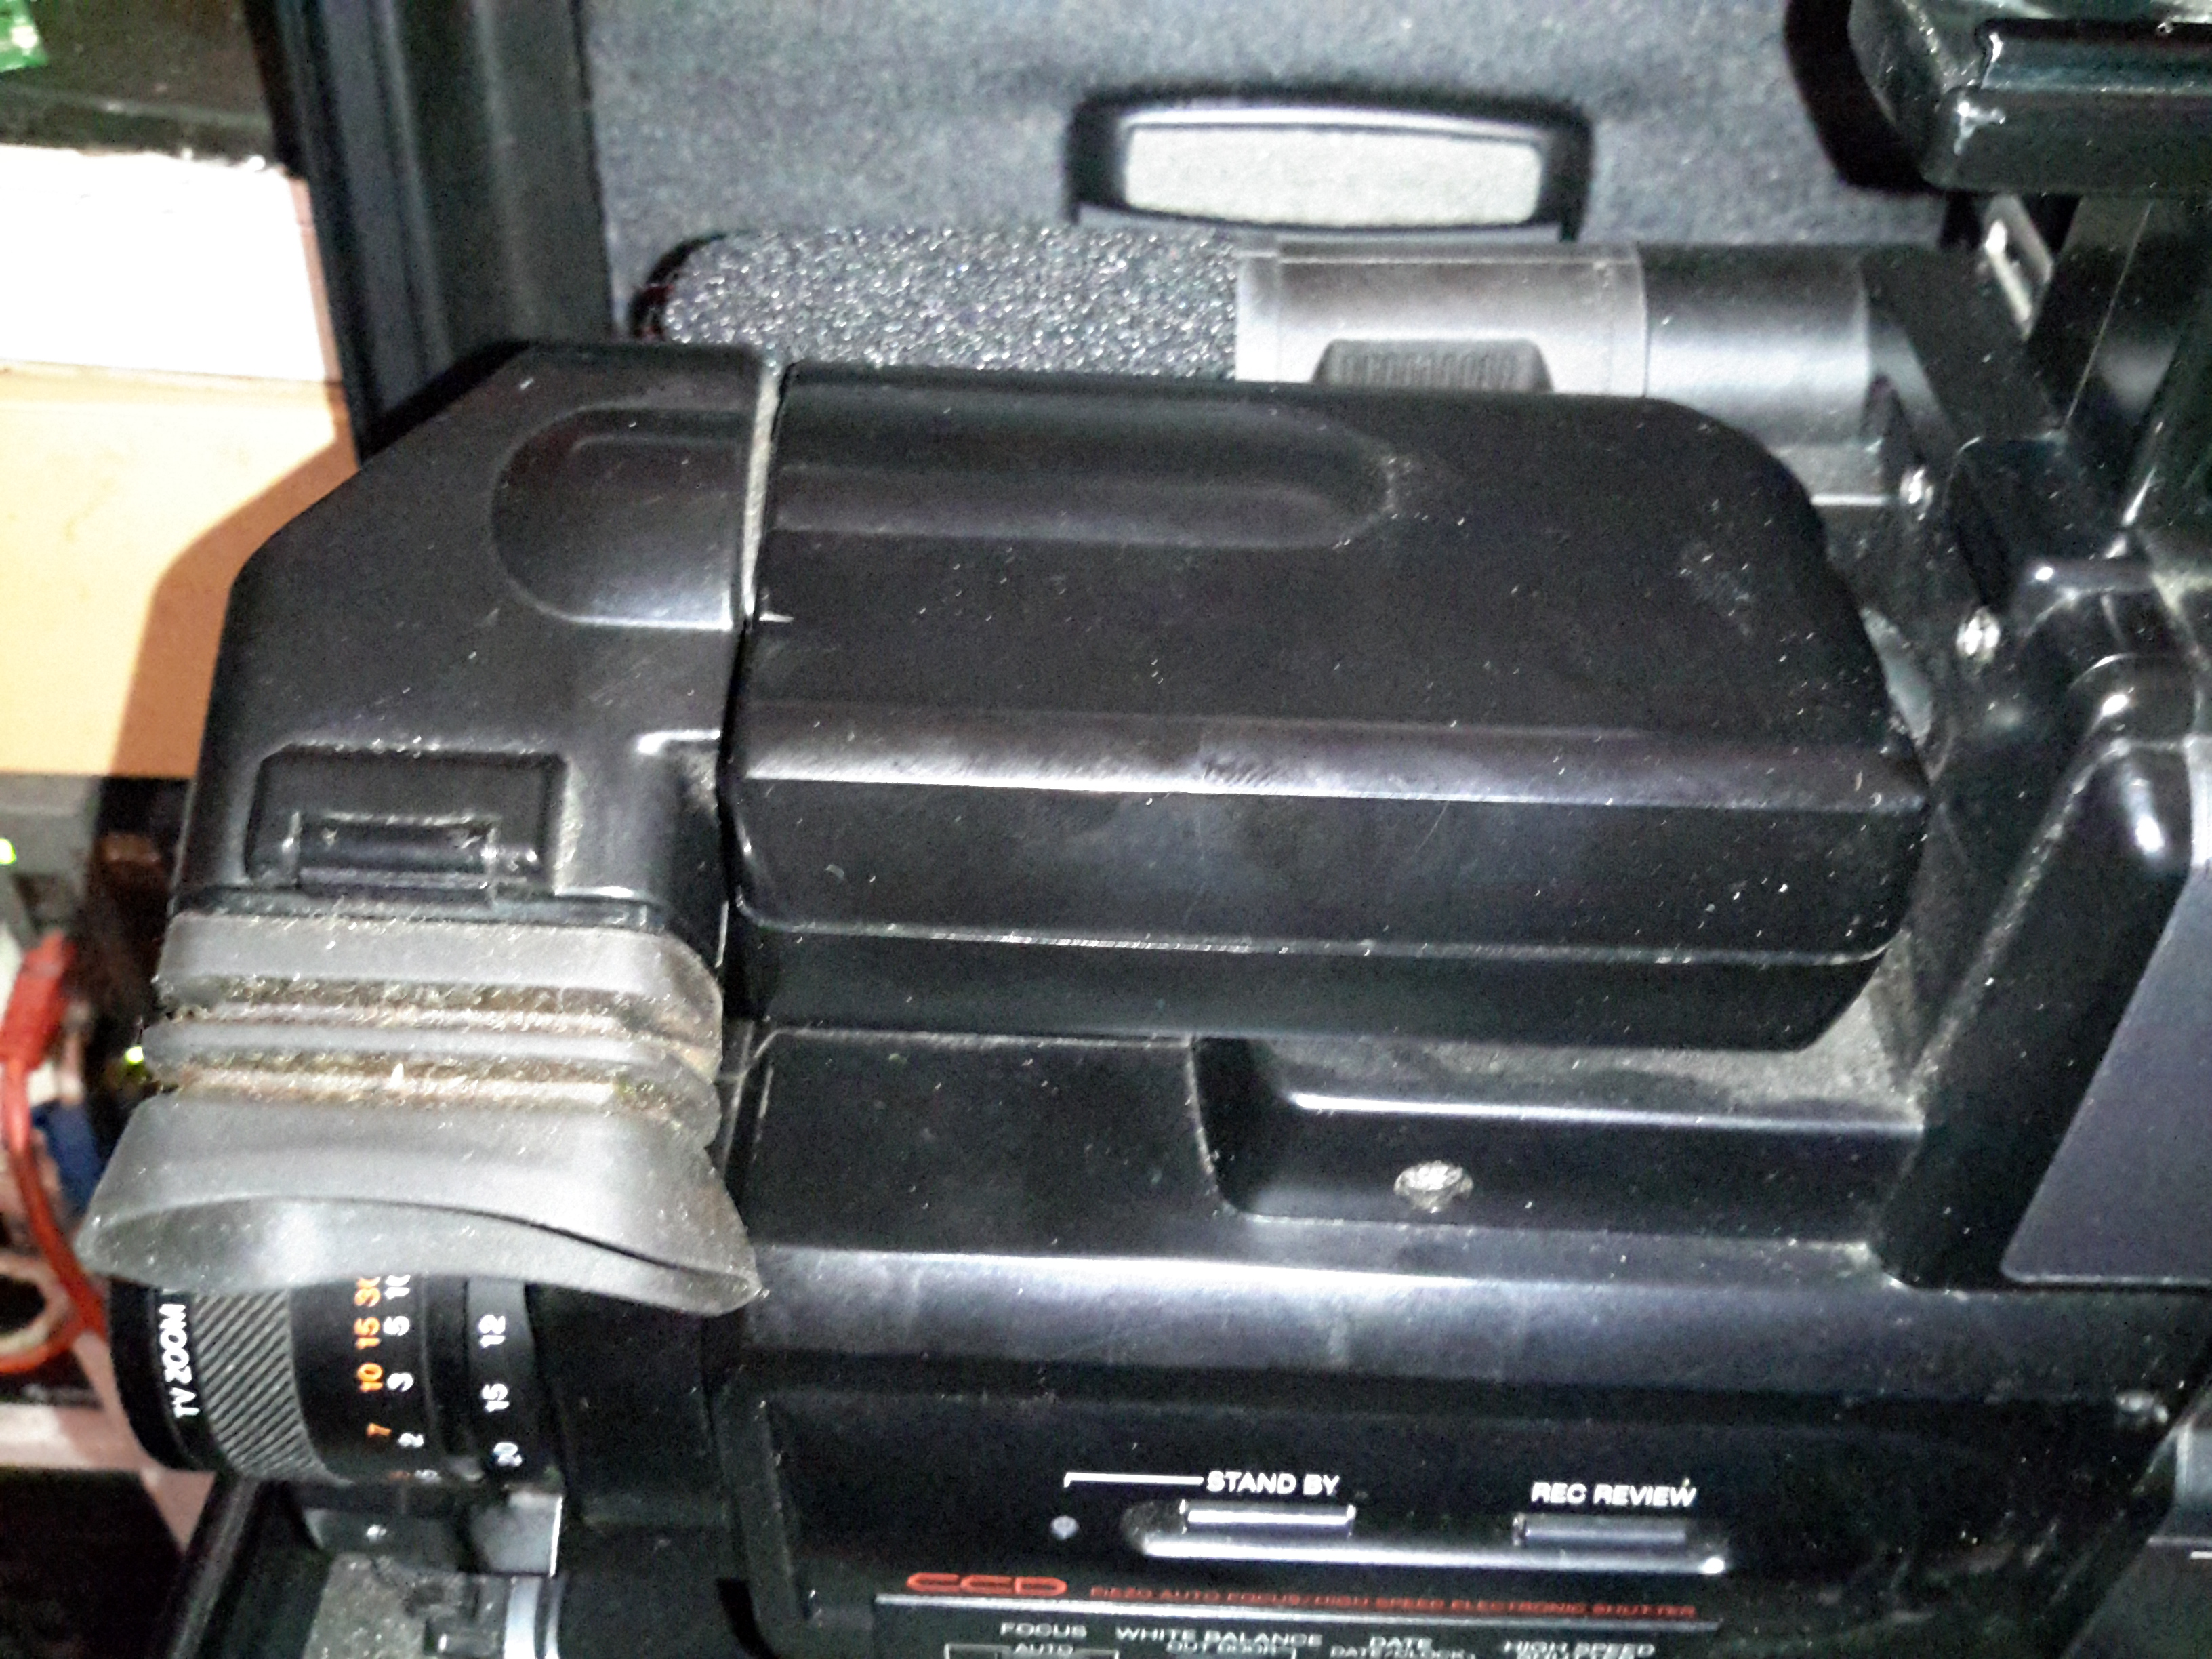
The lens is fully adjustable, with either manual or motorized automatic control.
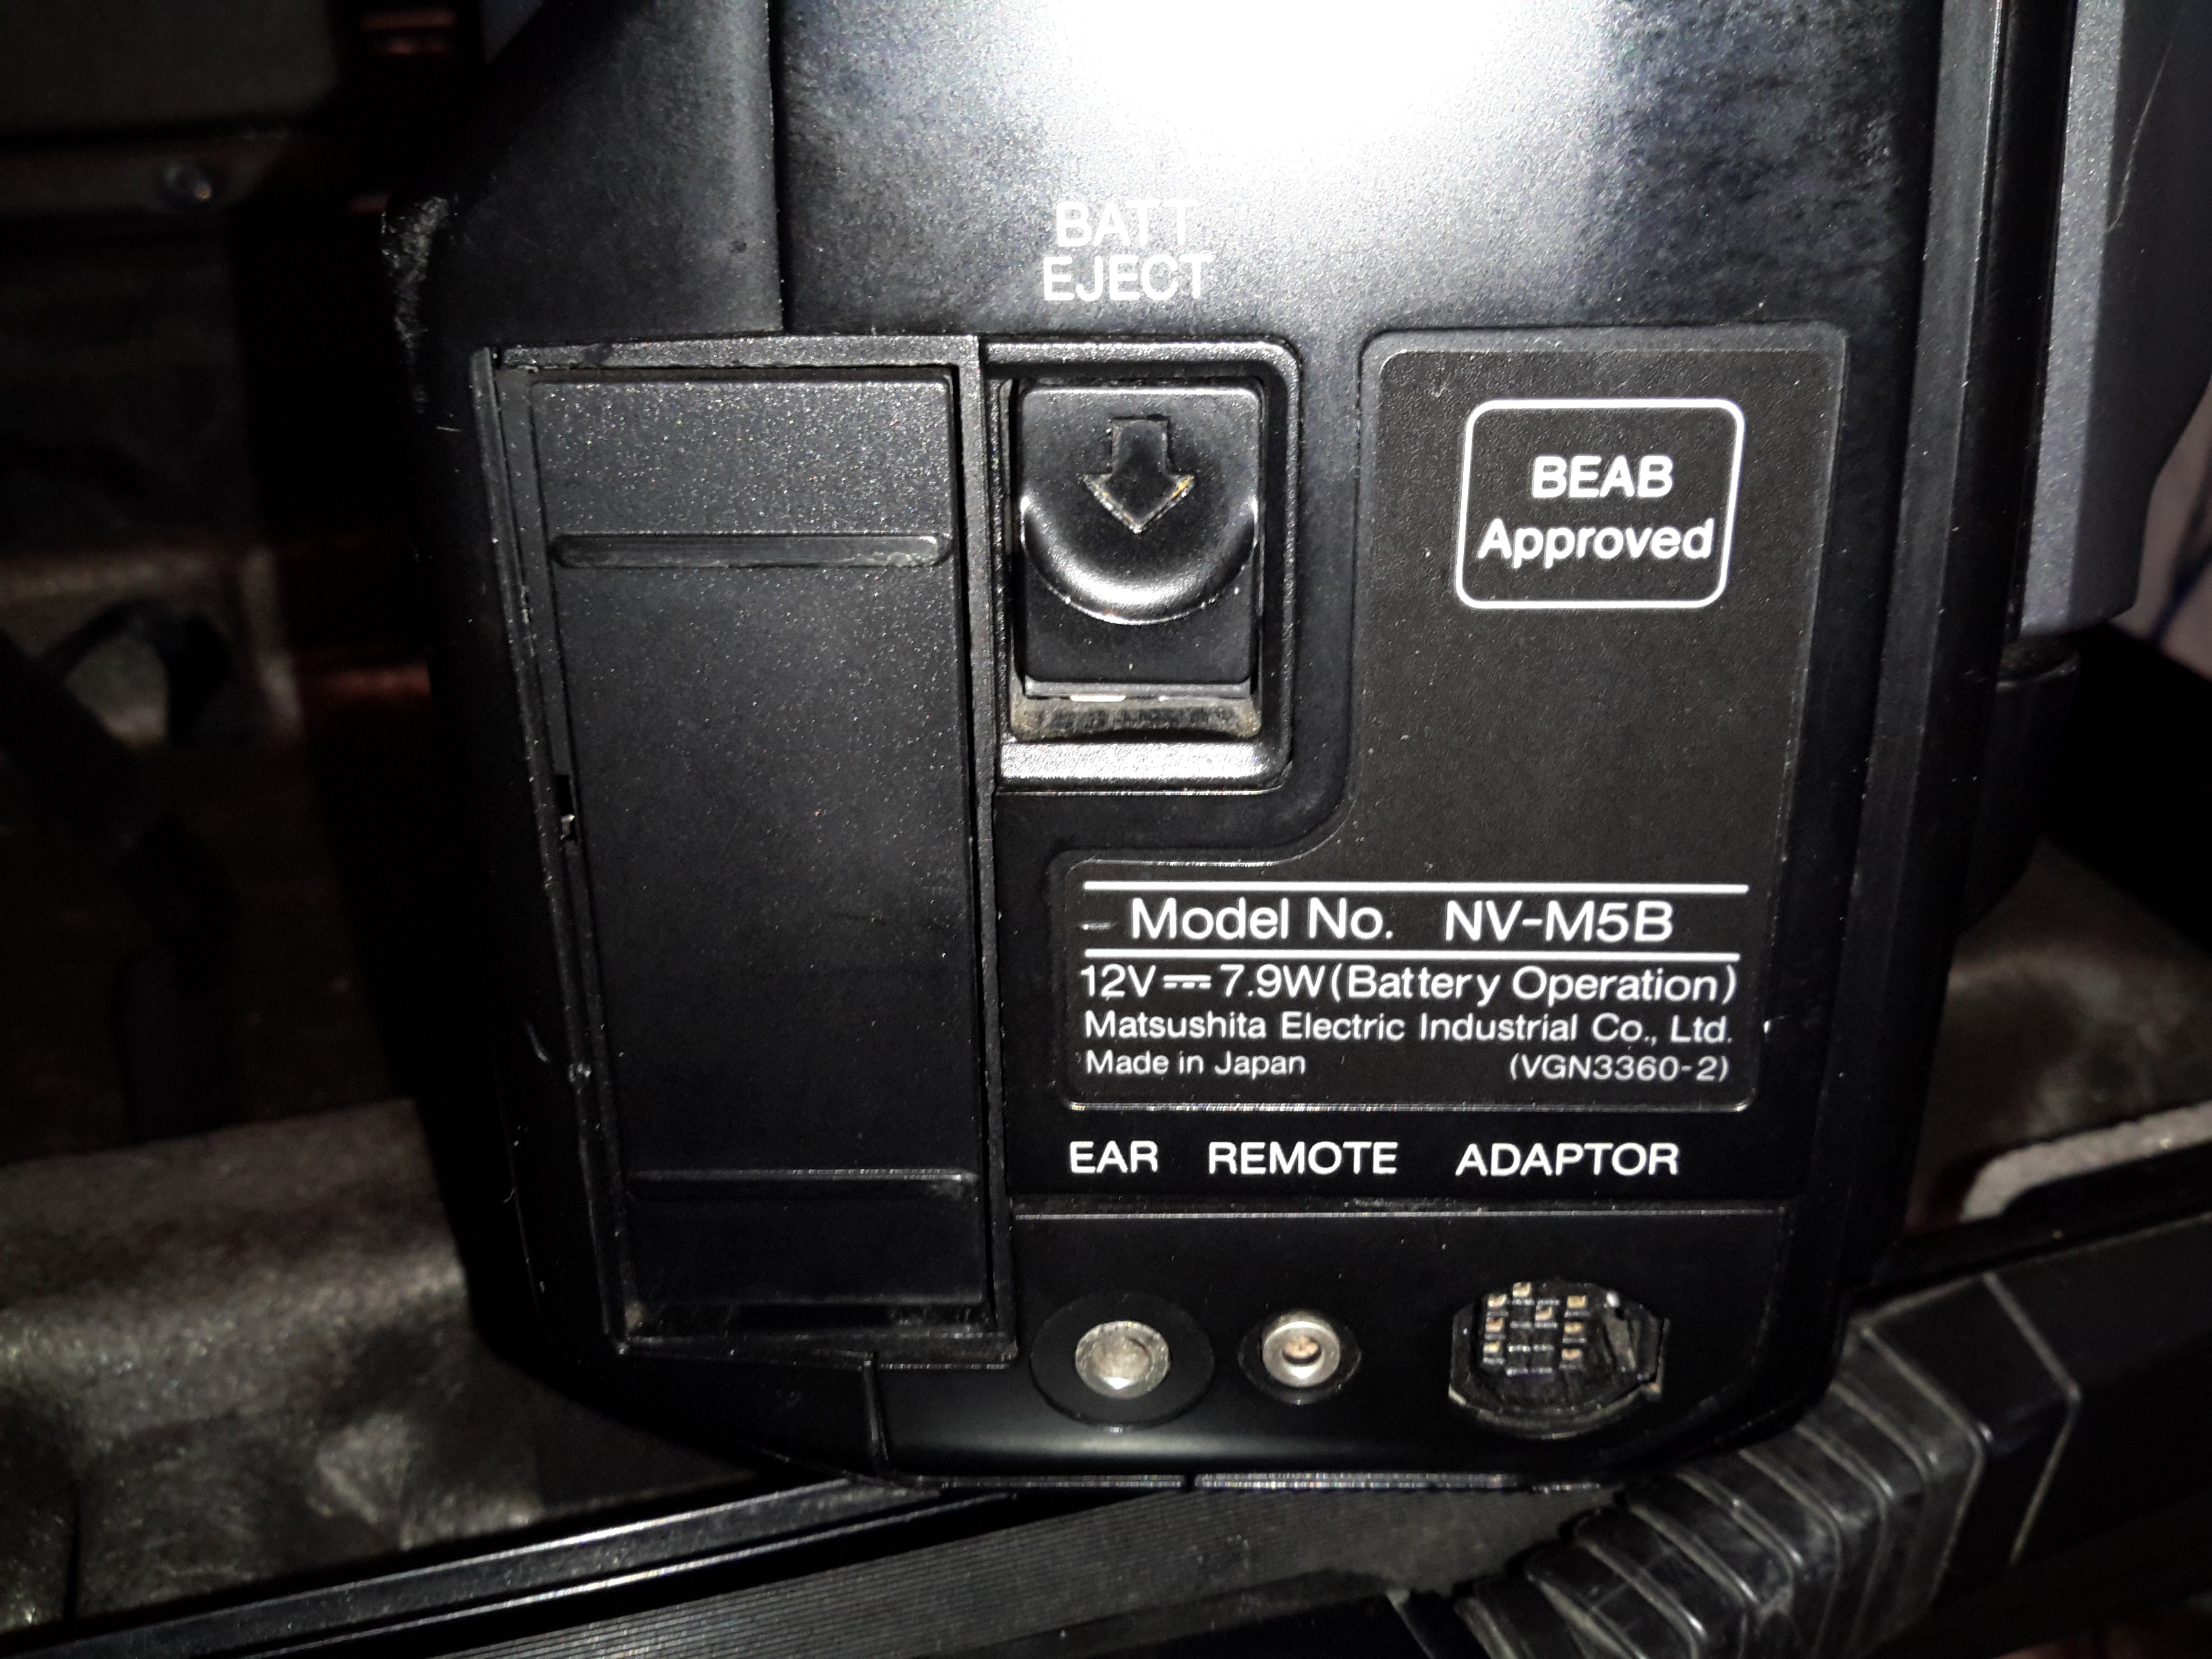
The back panel has the battery slot, a very strange looking DC input connector, remote control connector & the earphone jack.
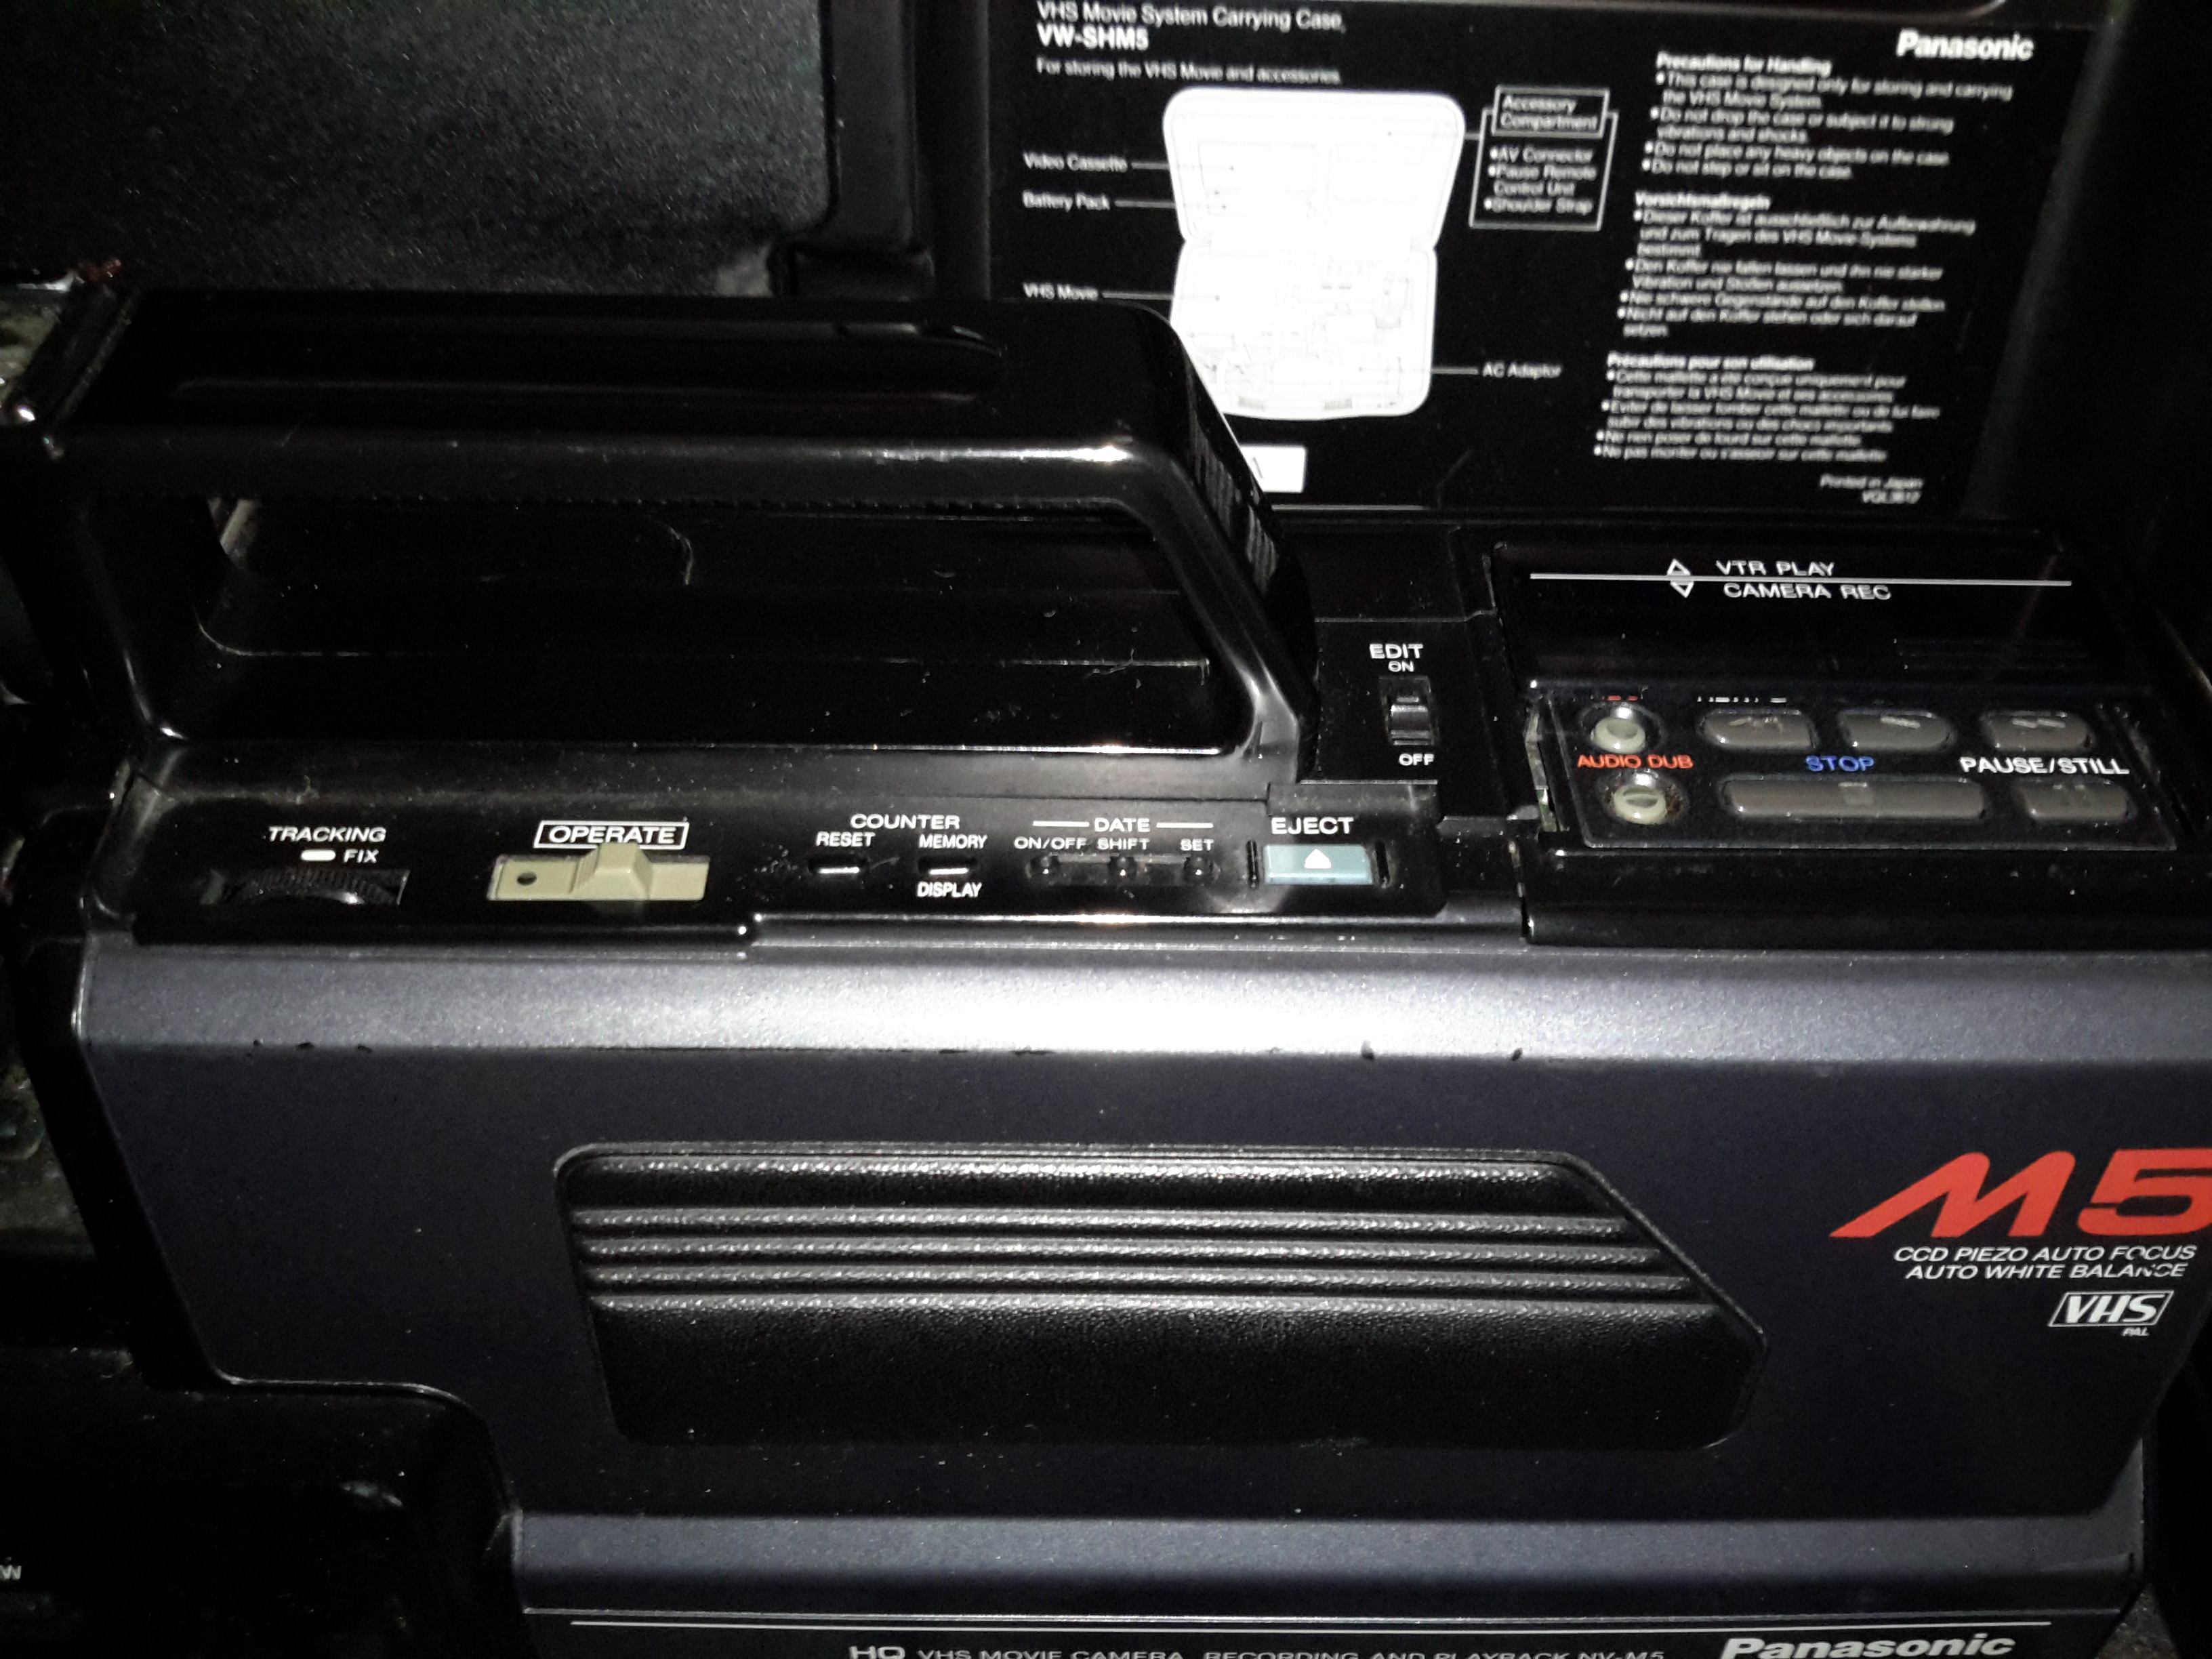
The top panel of the camera holds the main power controls, manual tape tracking & the tape transport control panel.
The viewfinder is mounted on a swivel mount. There’s a CRT based composite monitor in here. Hack ahoy!
Camera Section
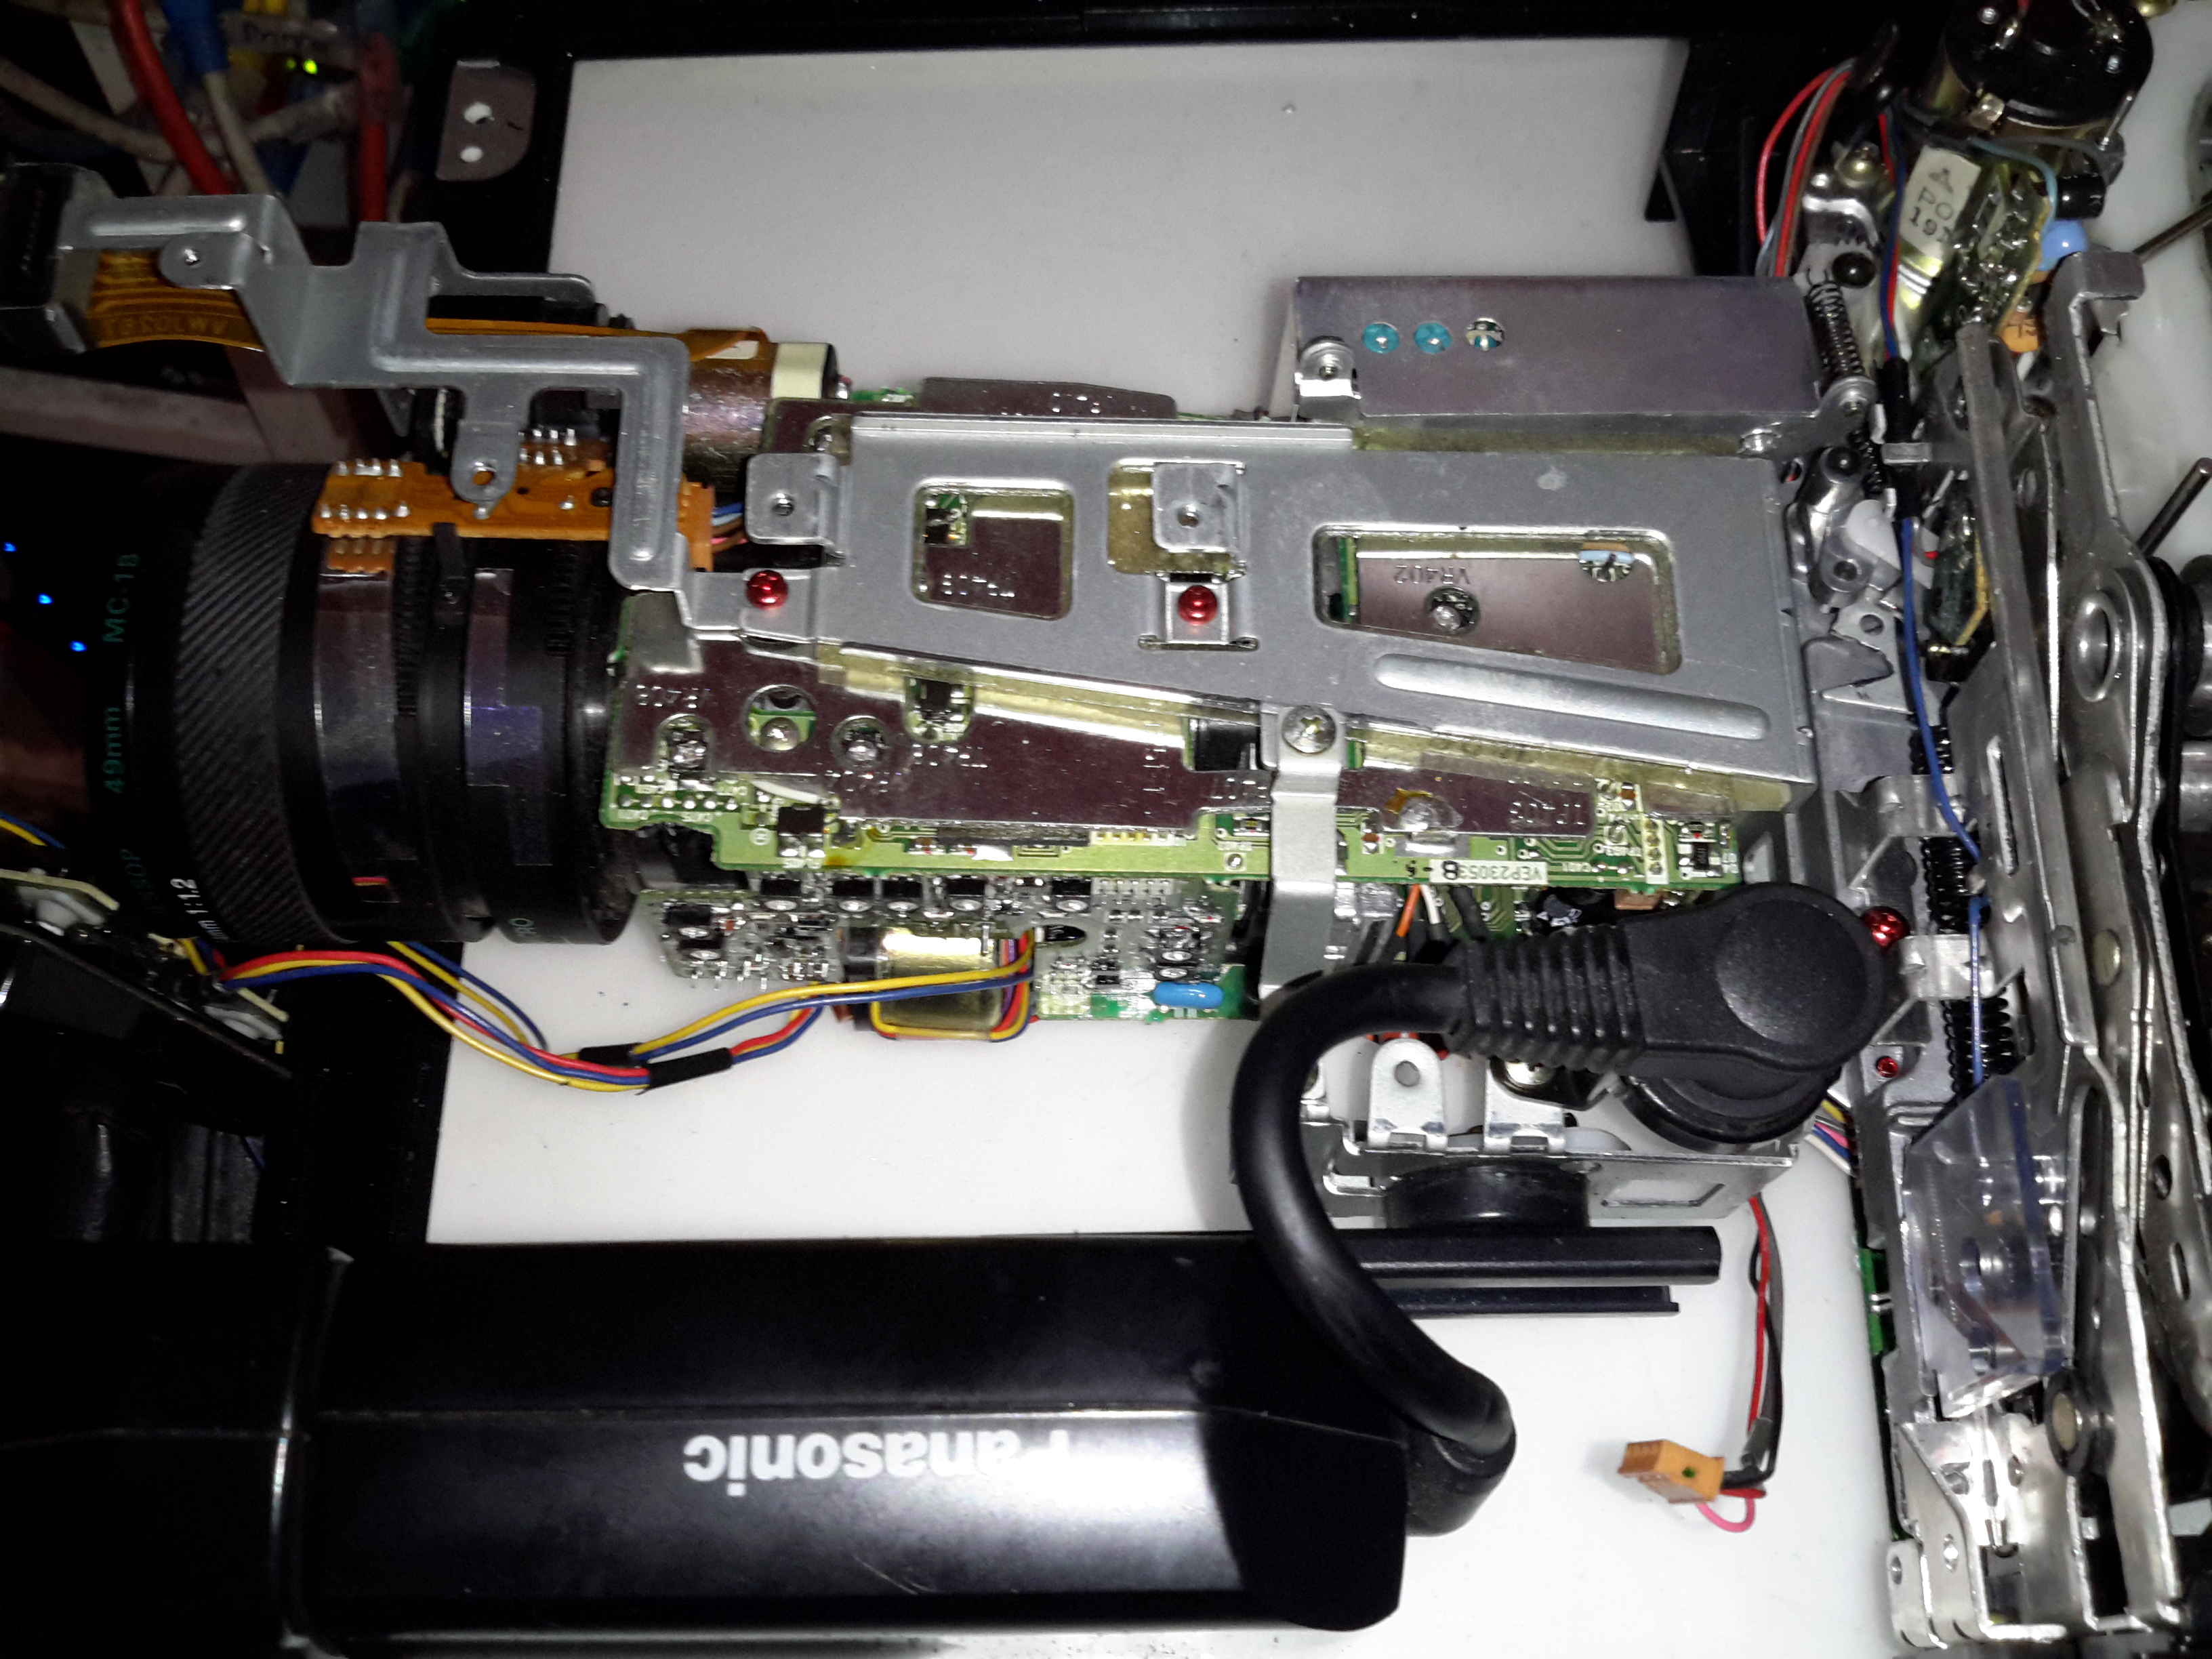
Here’s the camera section of the camcorder, and is totally packed with electronics! There’s at least half a dozen separate boards in here, all fitted together around the optics tube assembly.
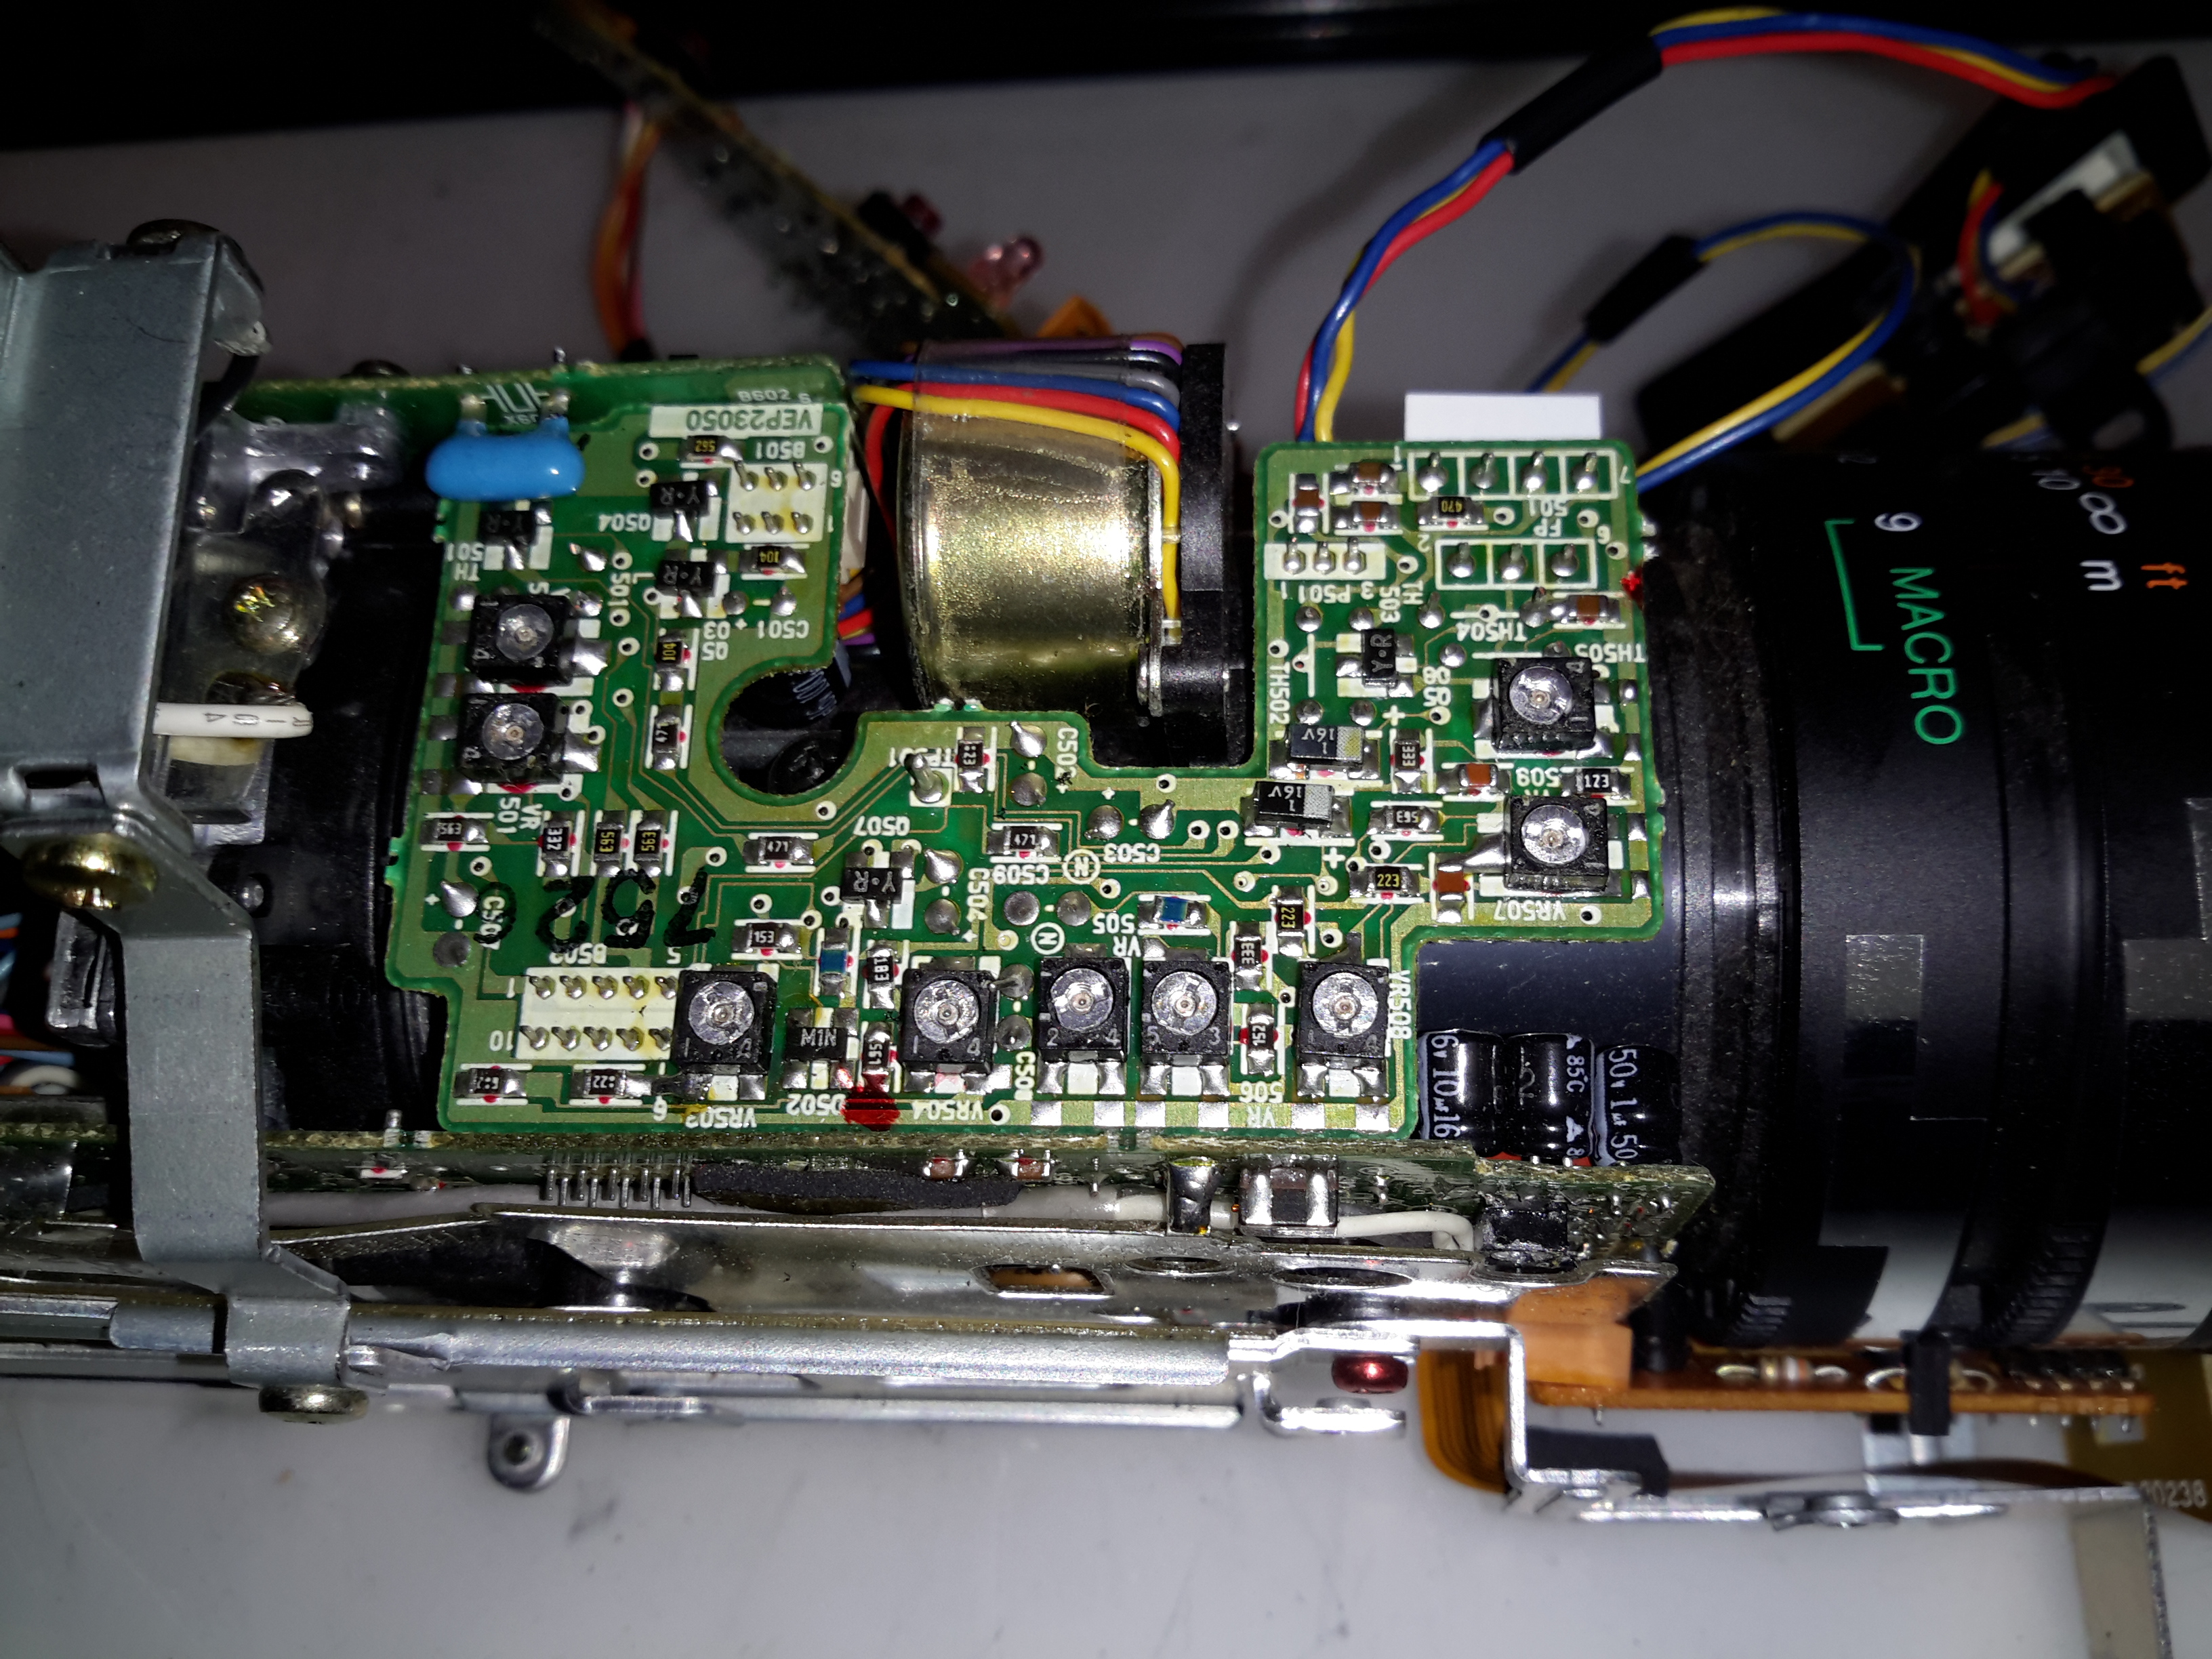
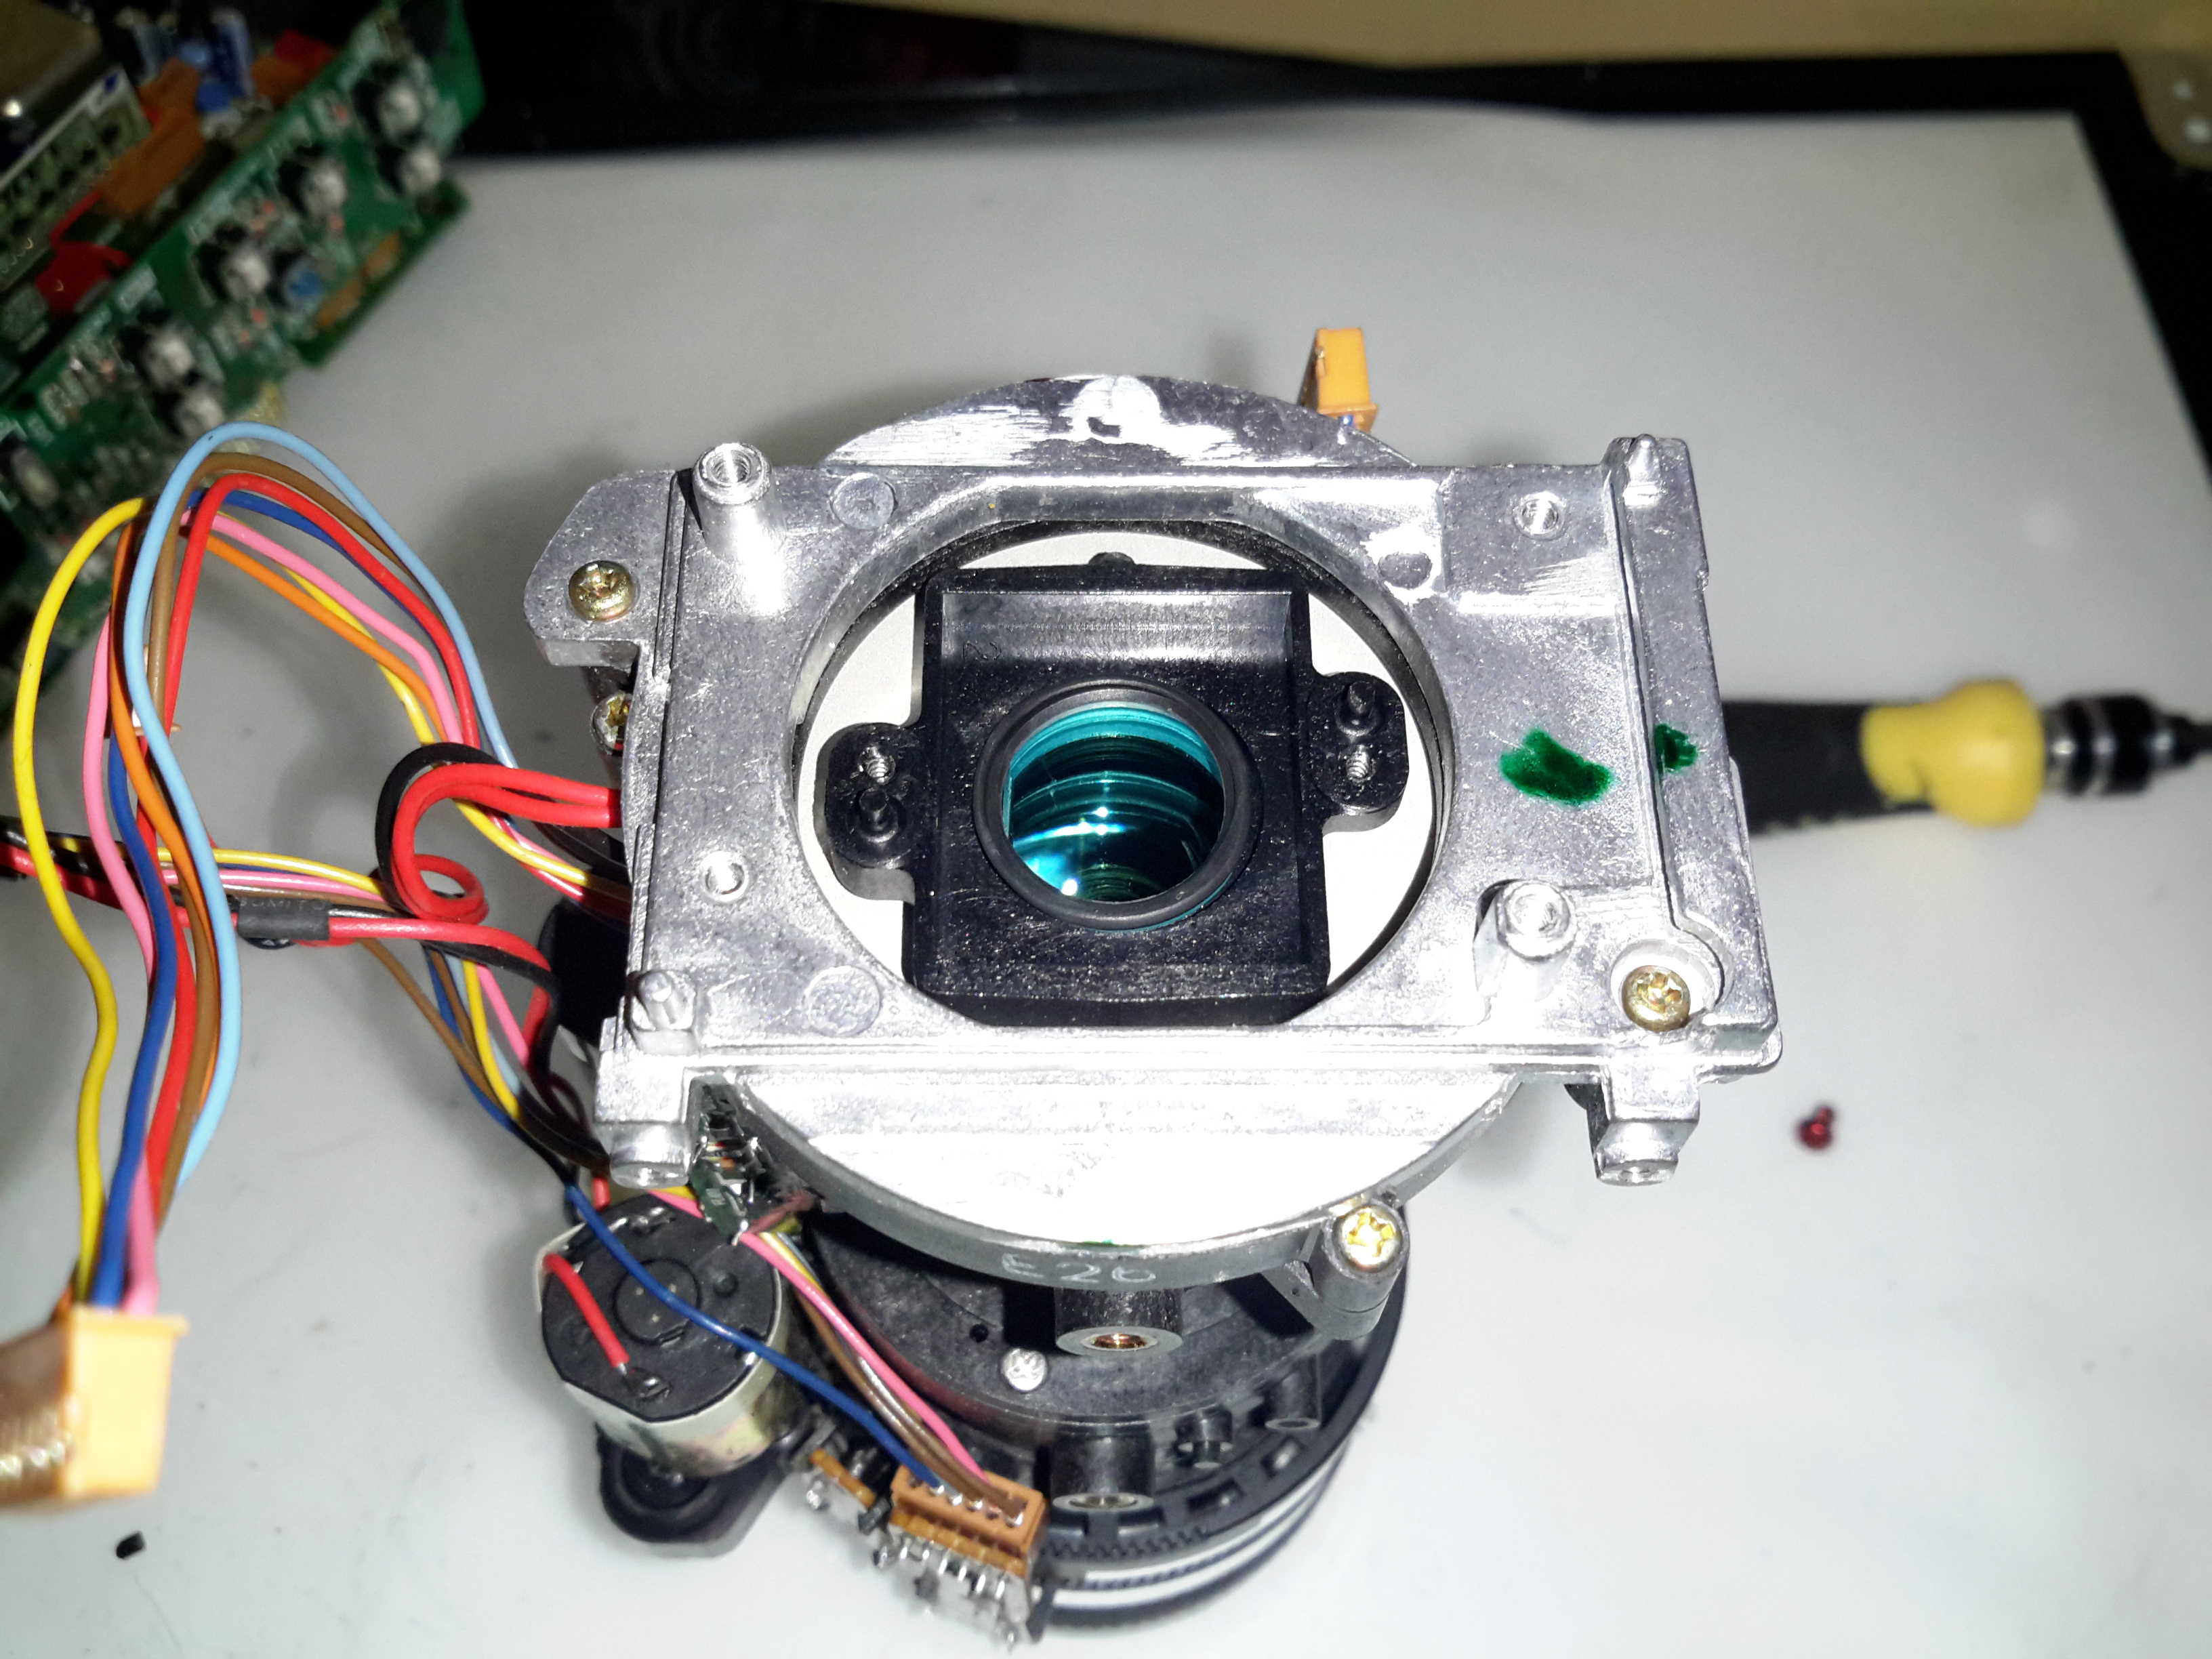
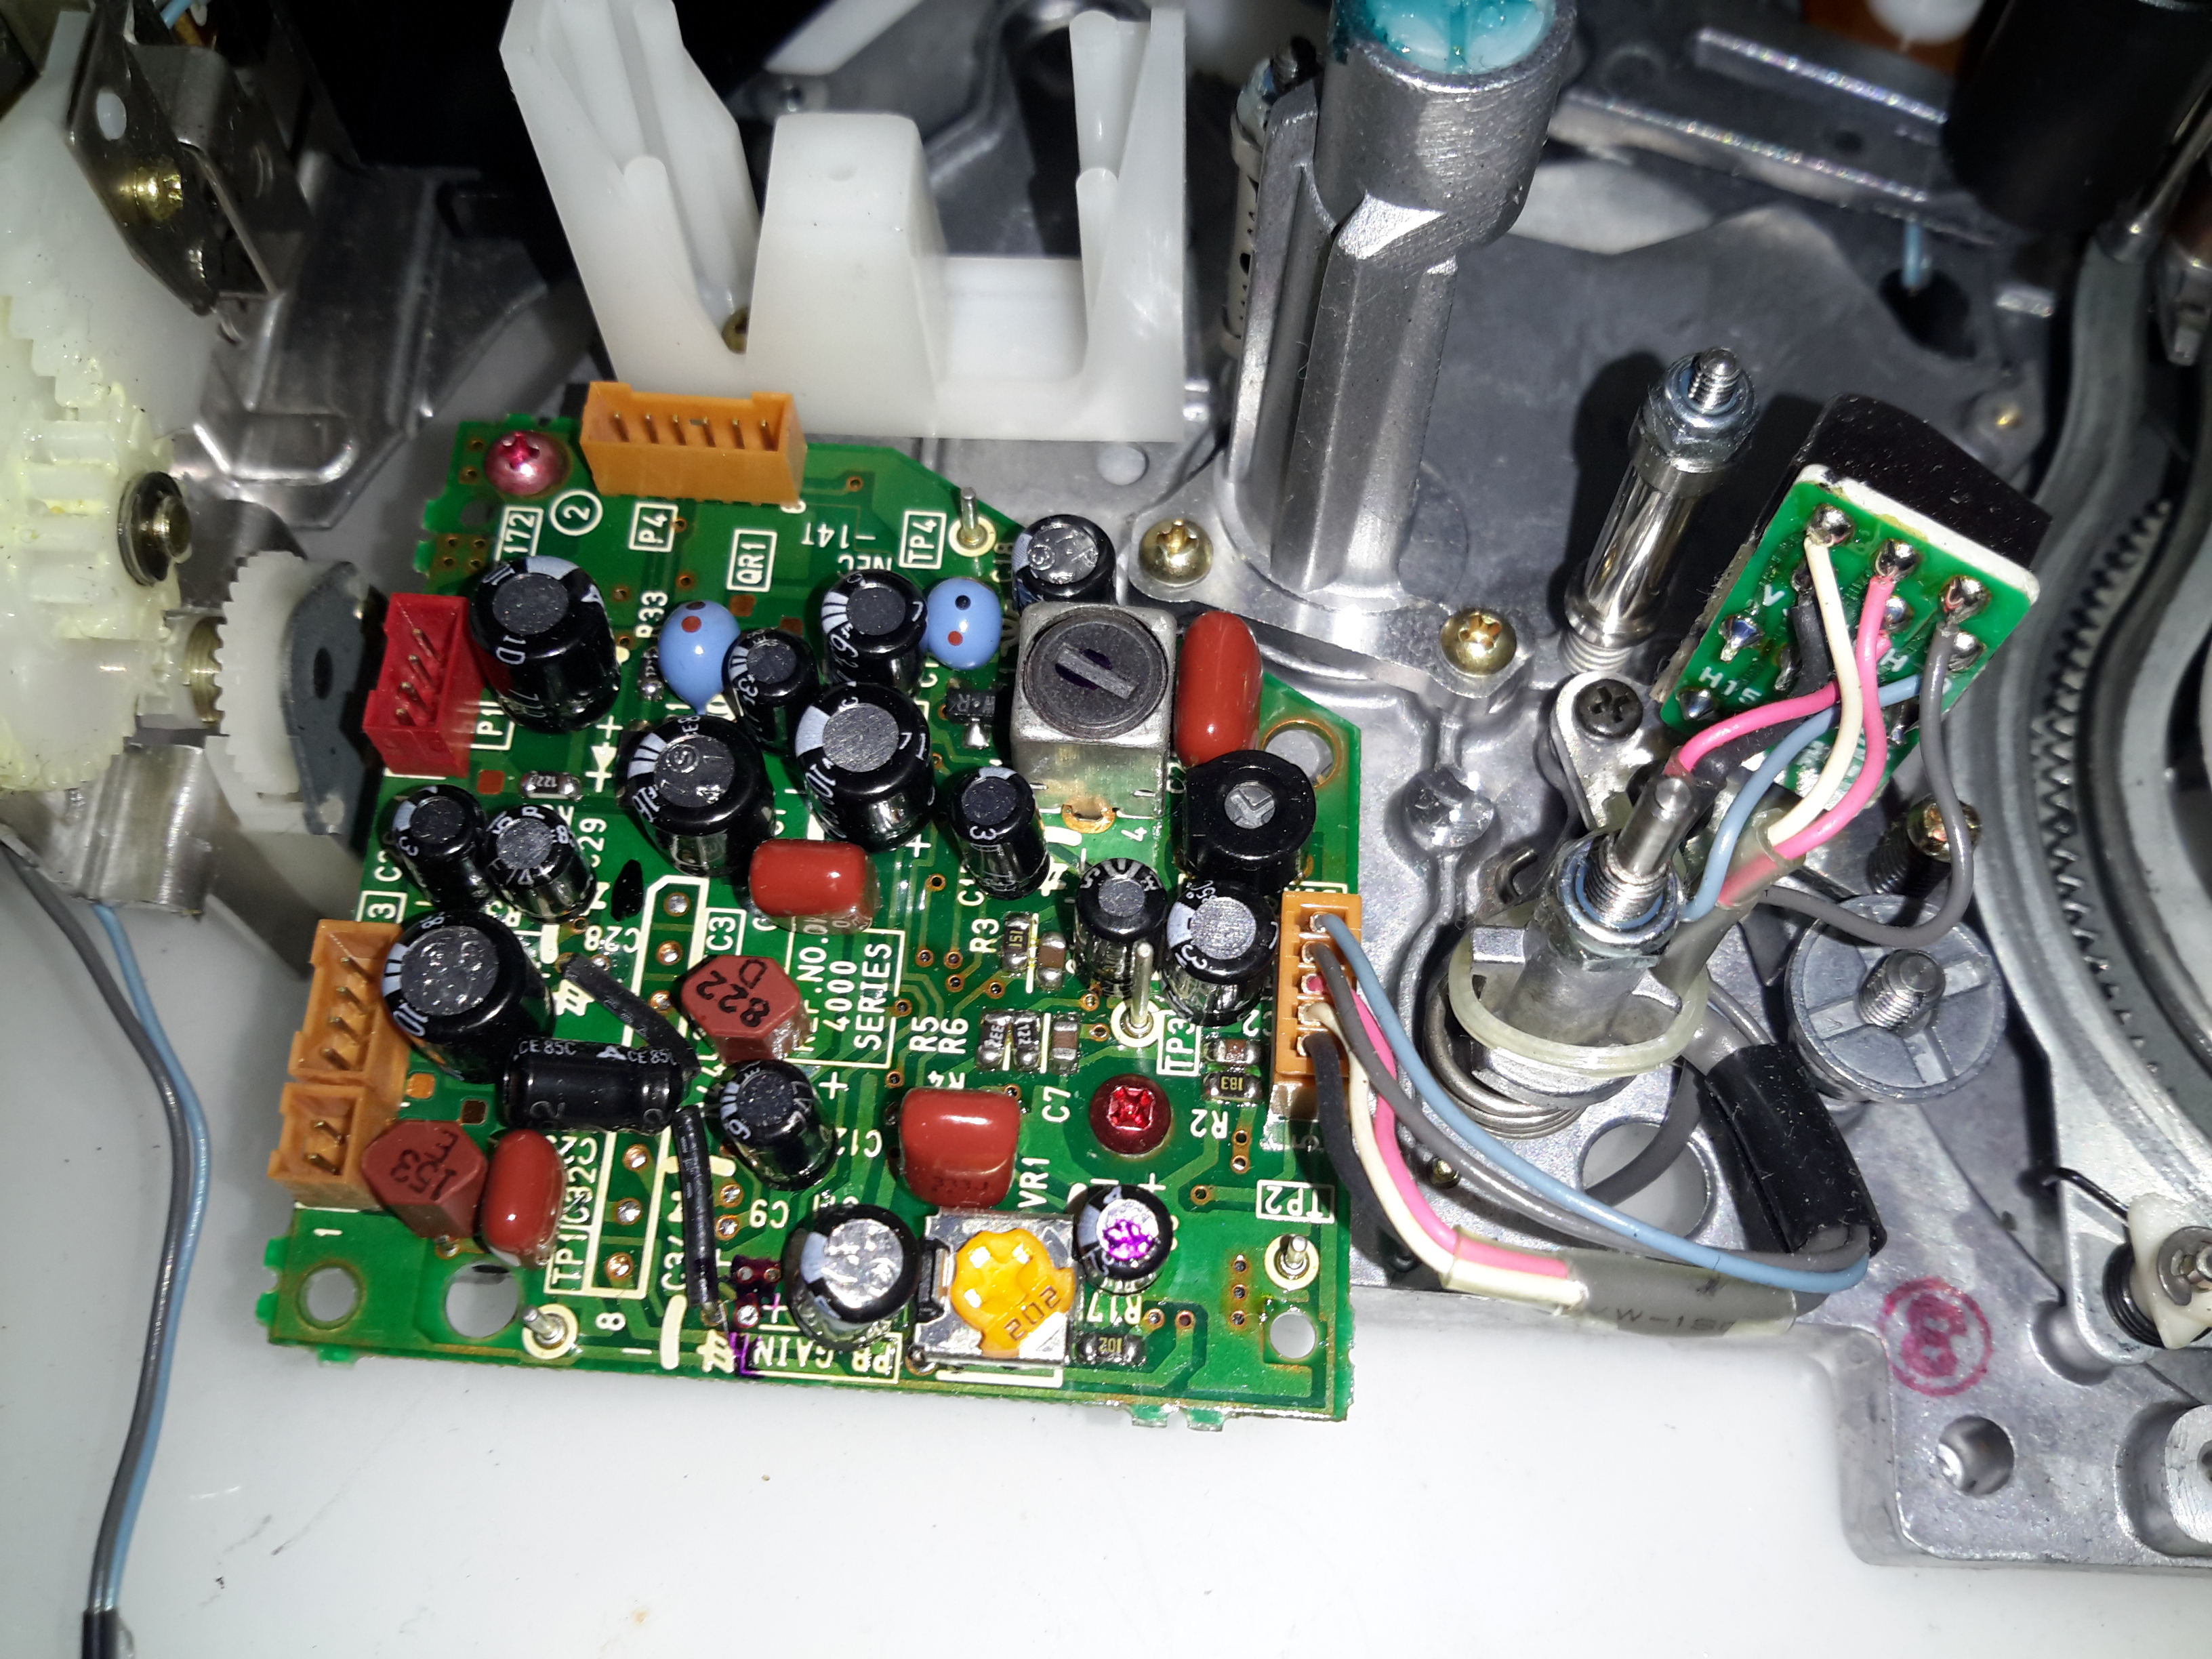
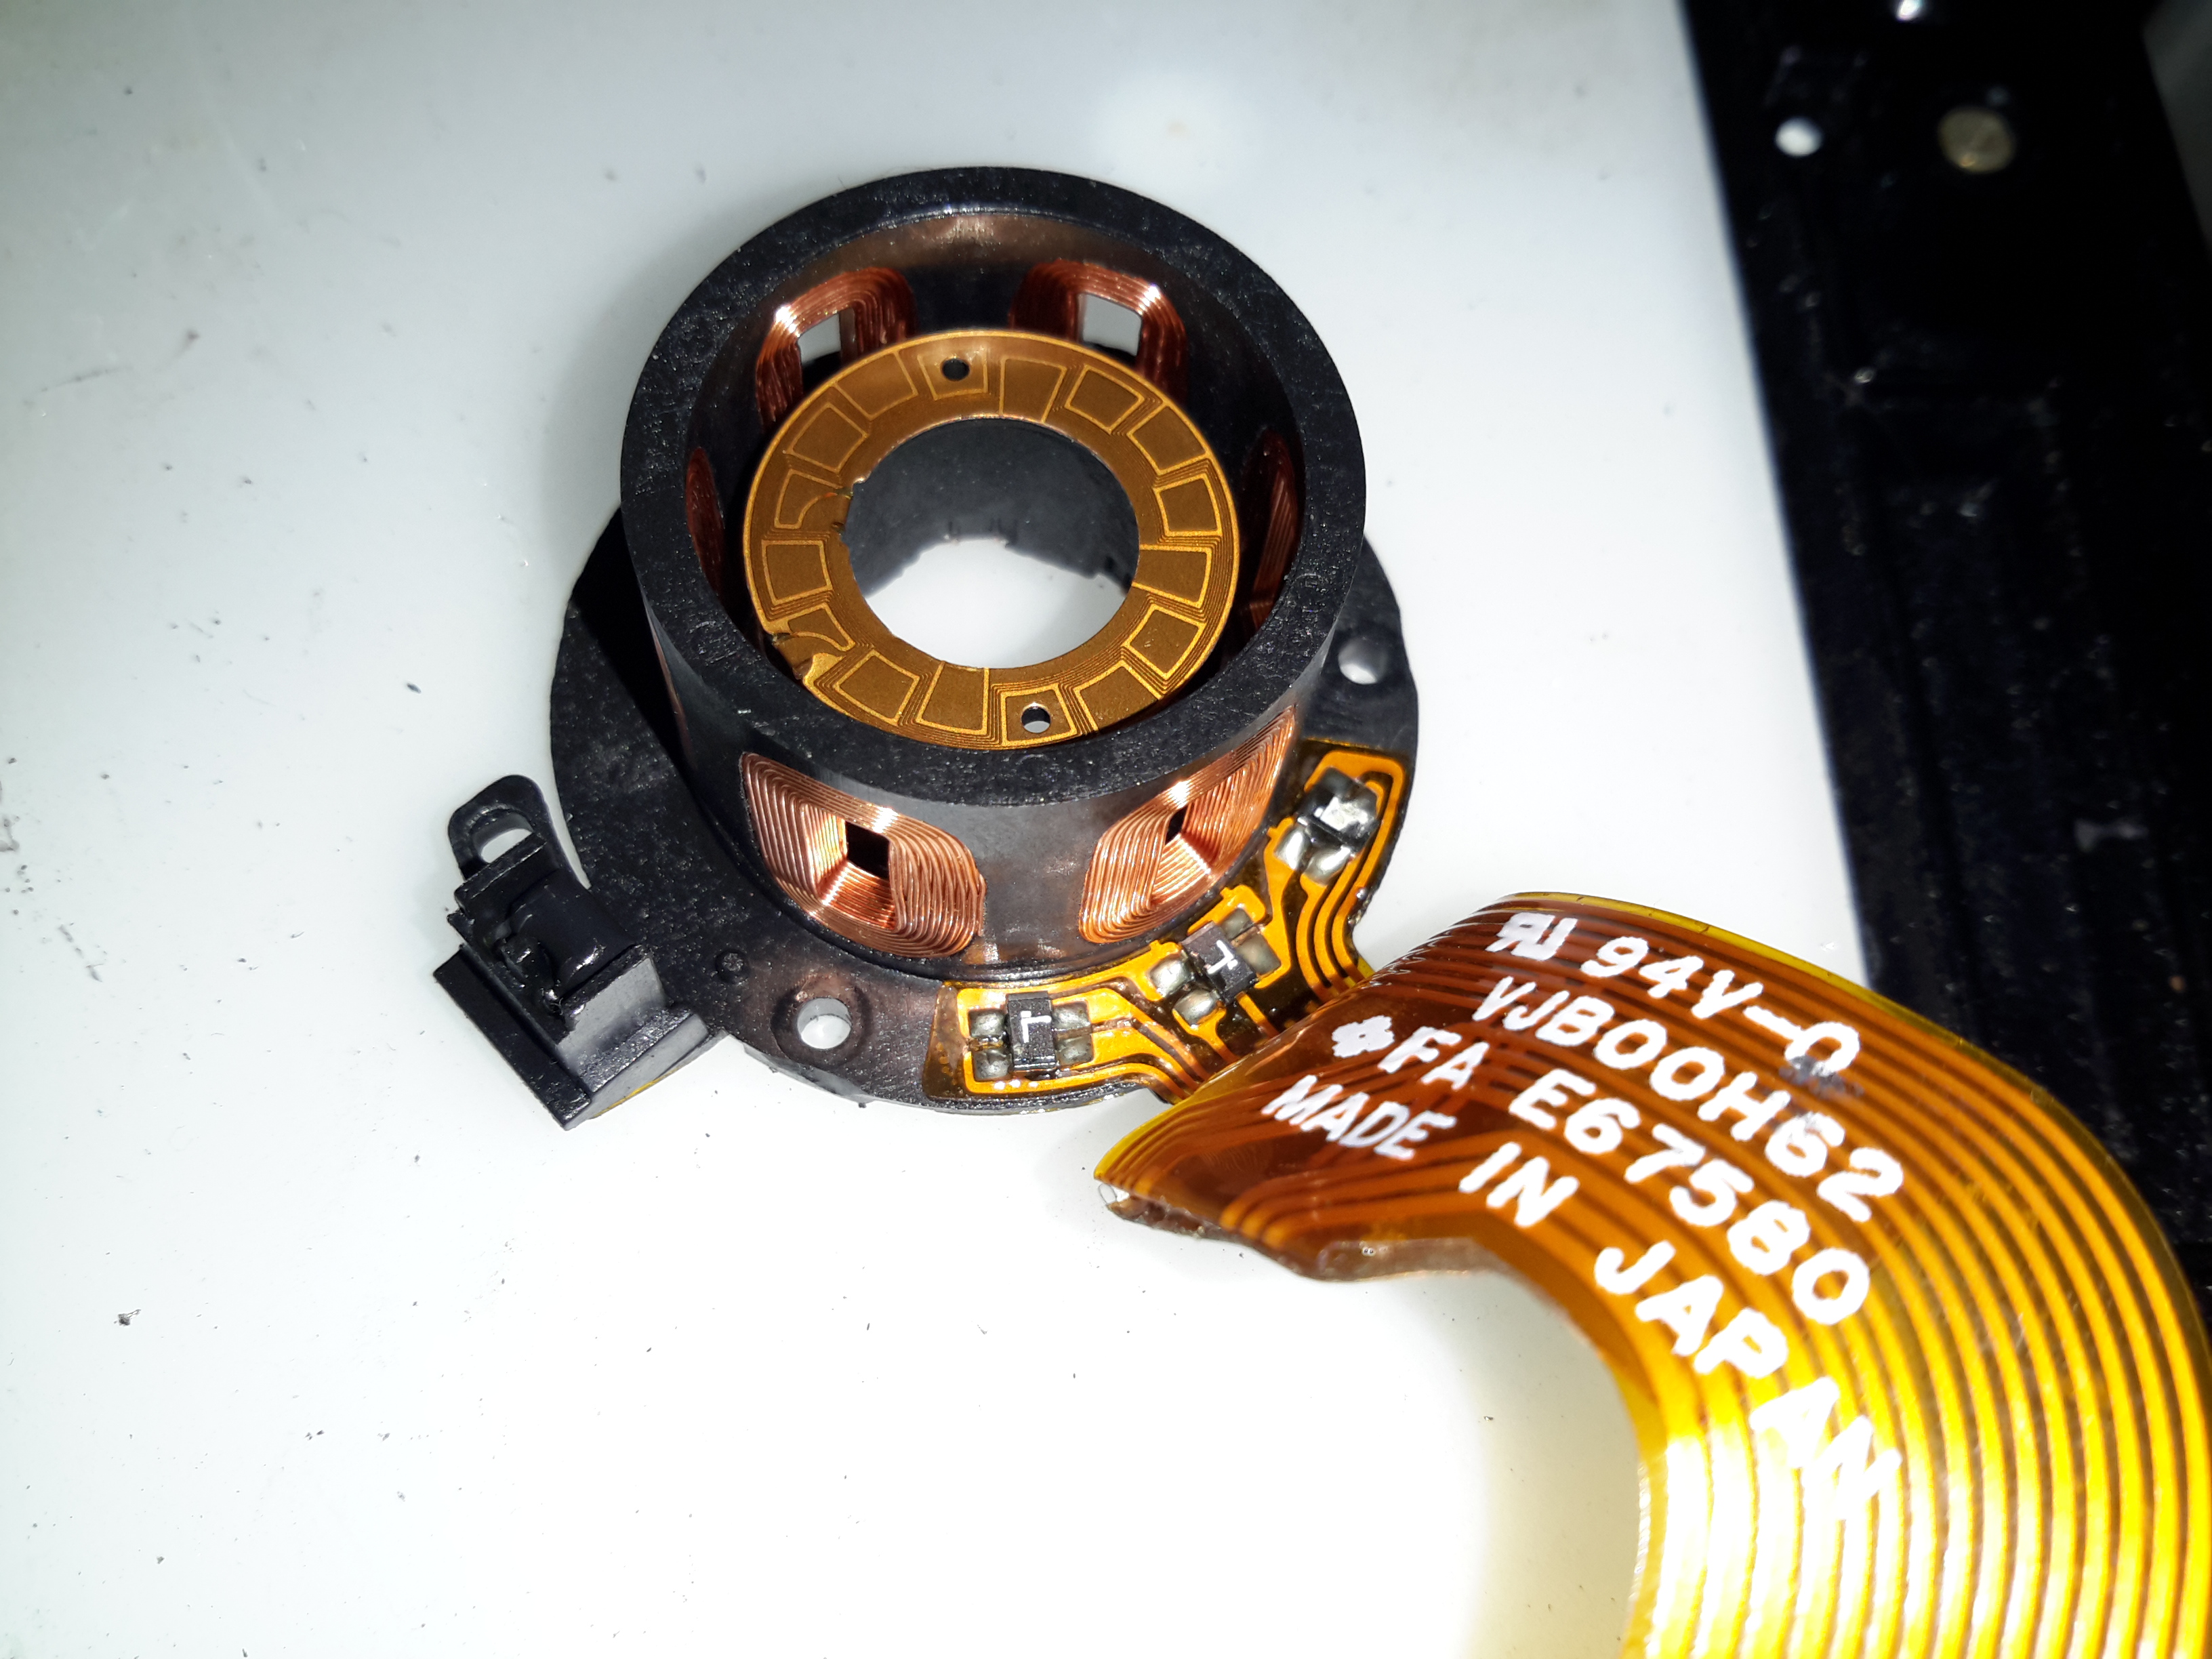
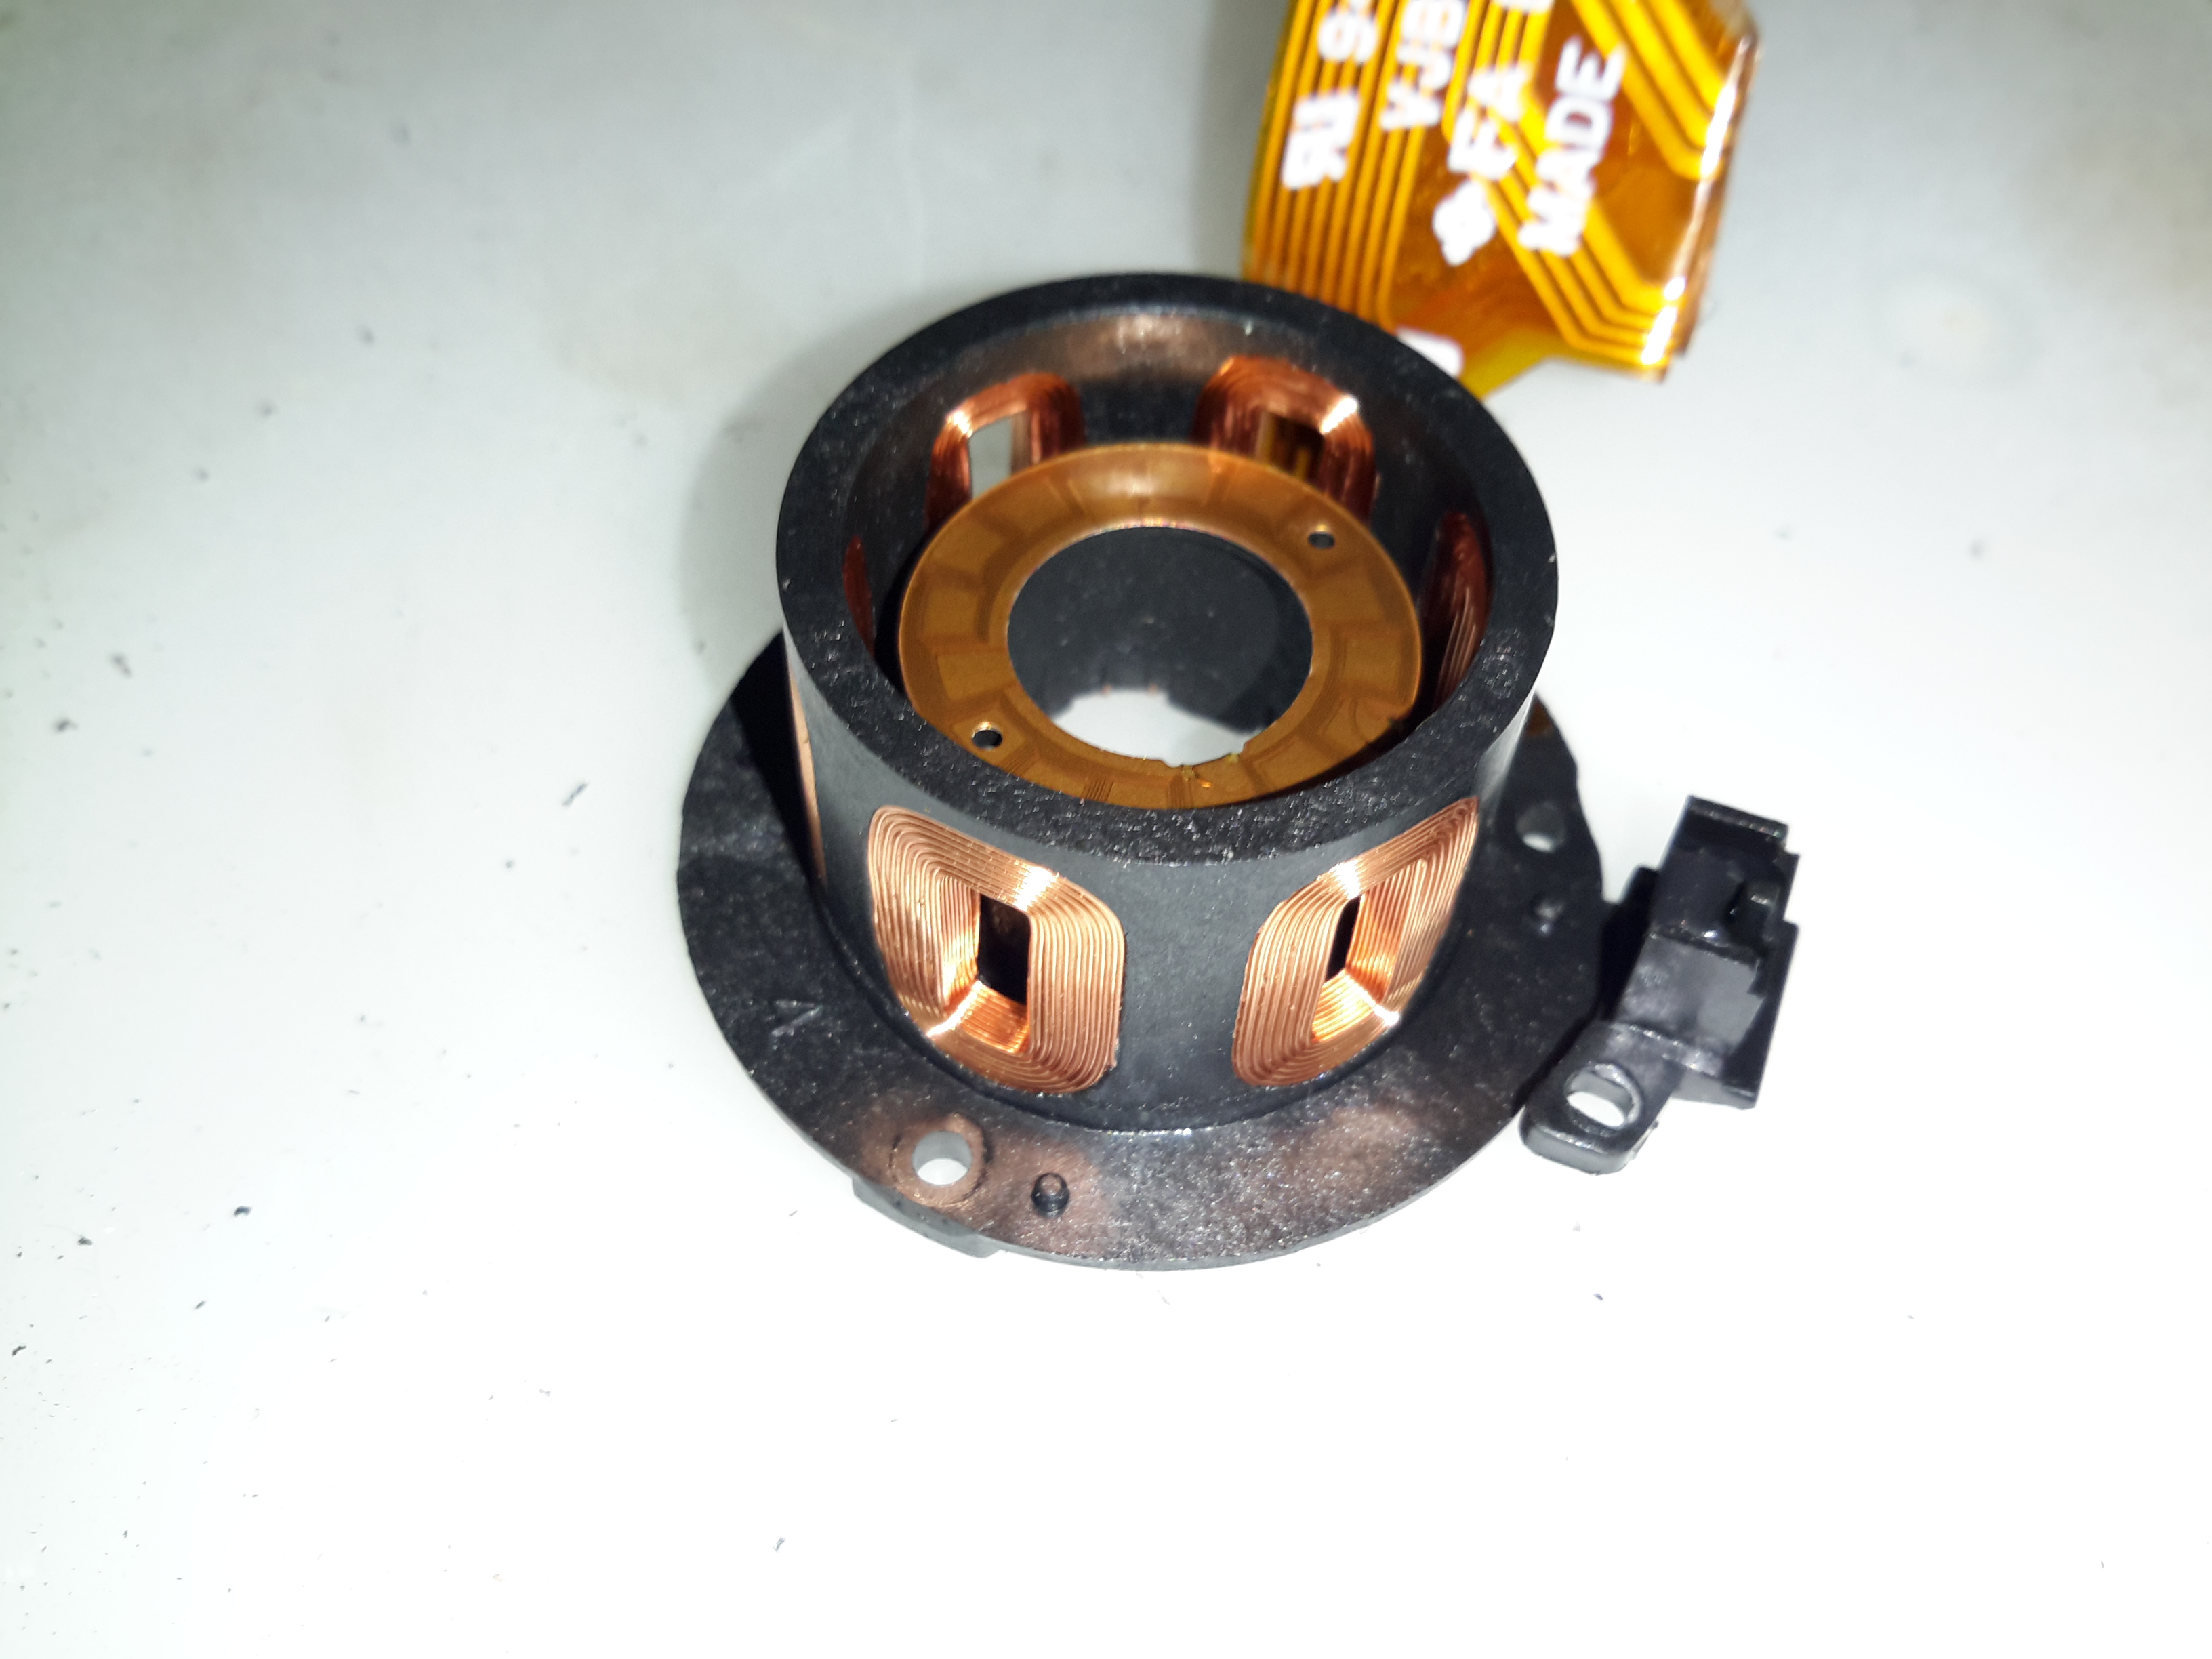
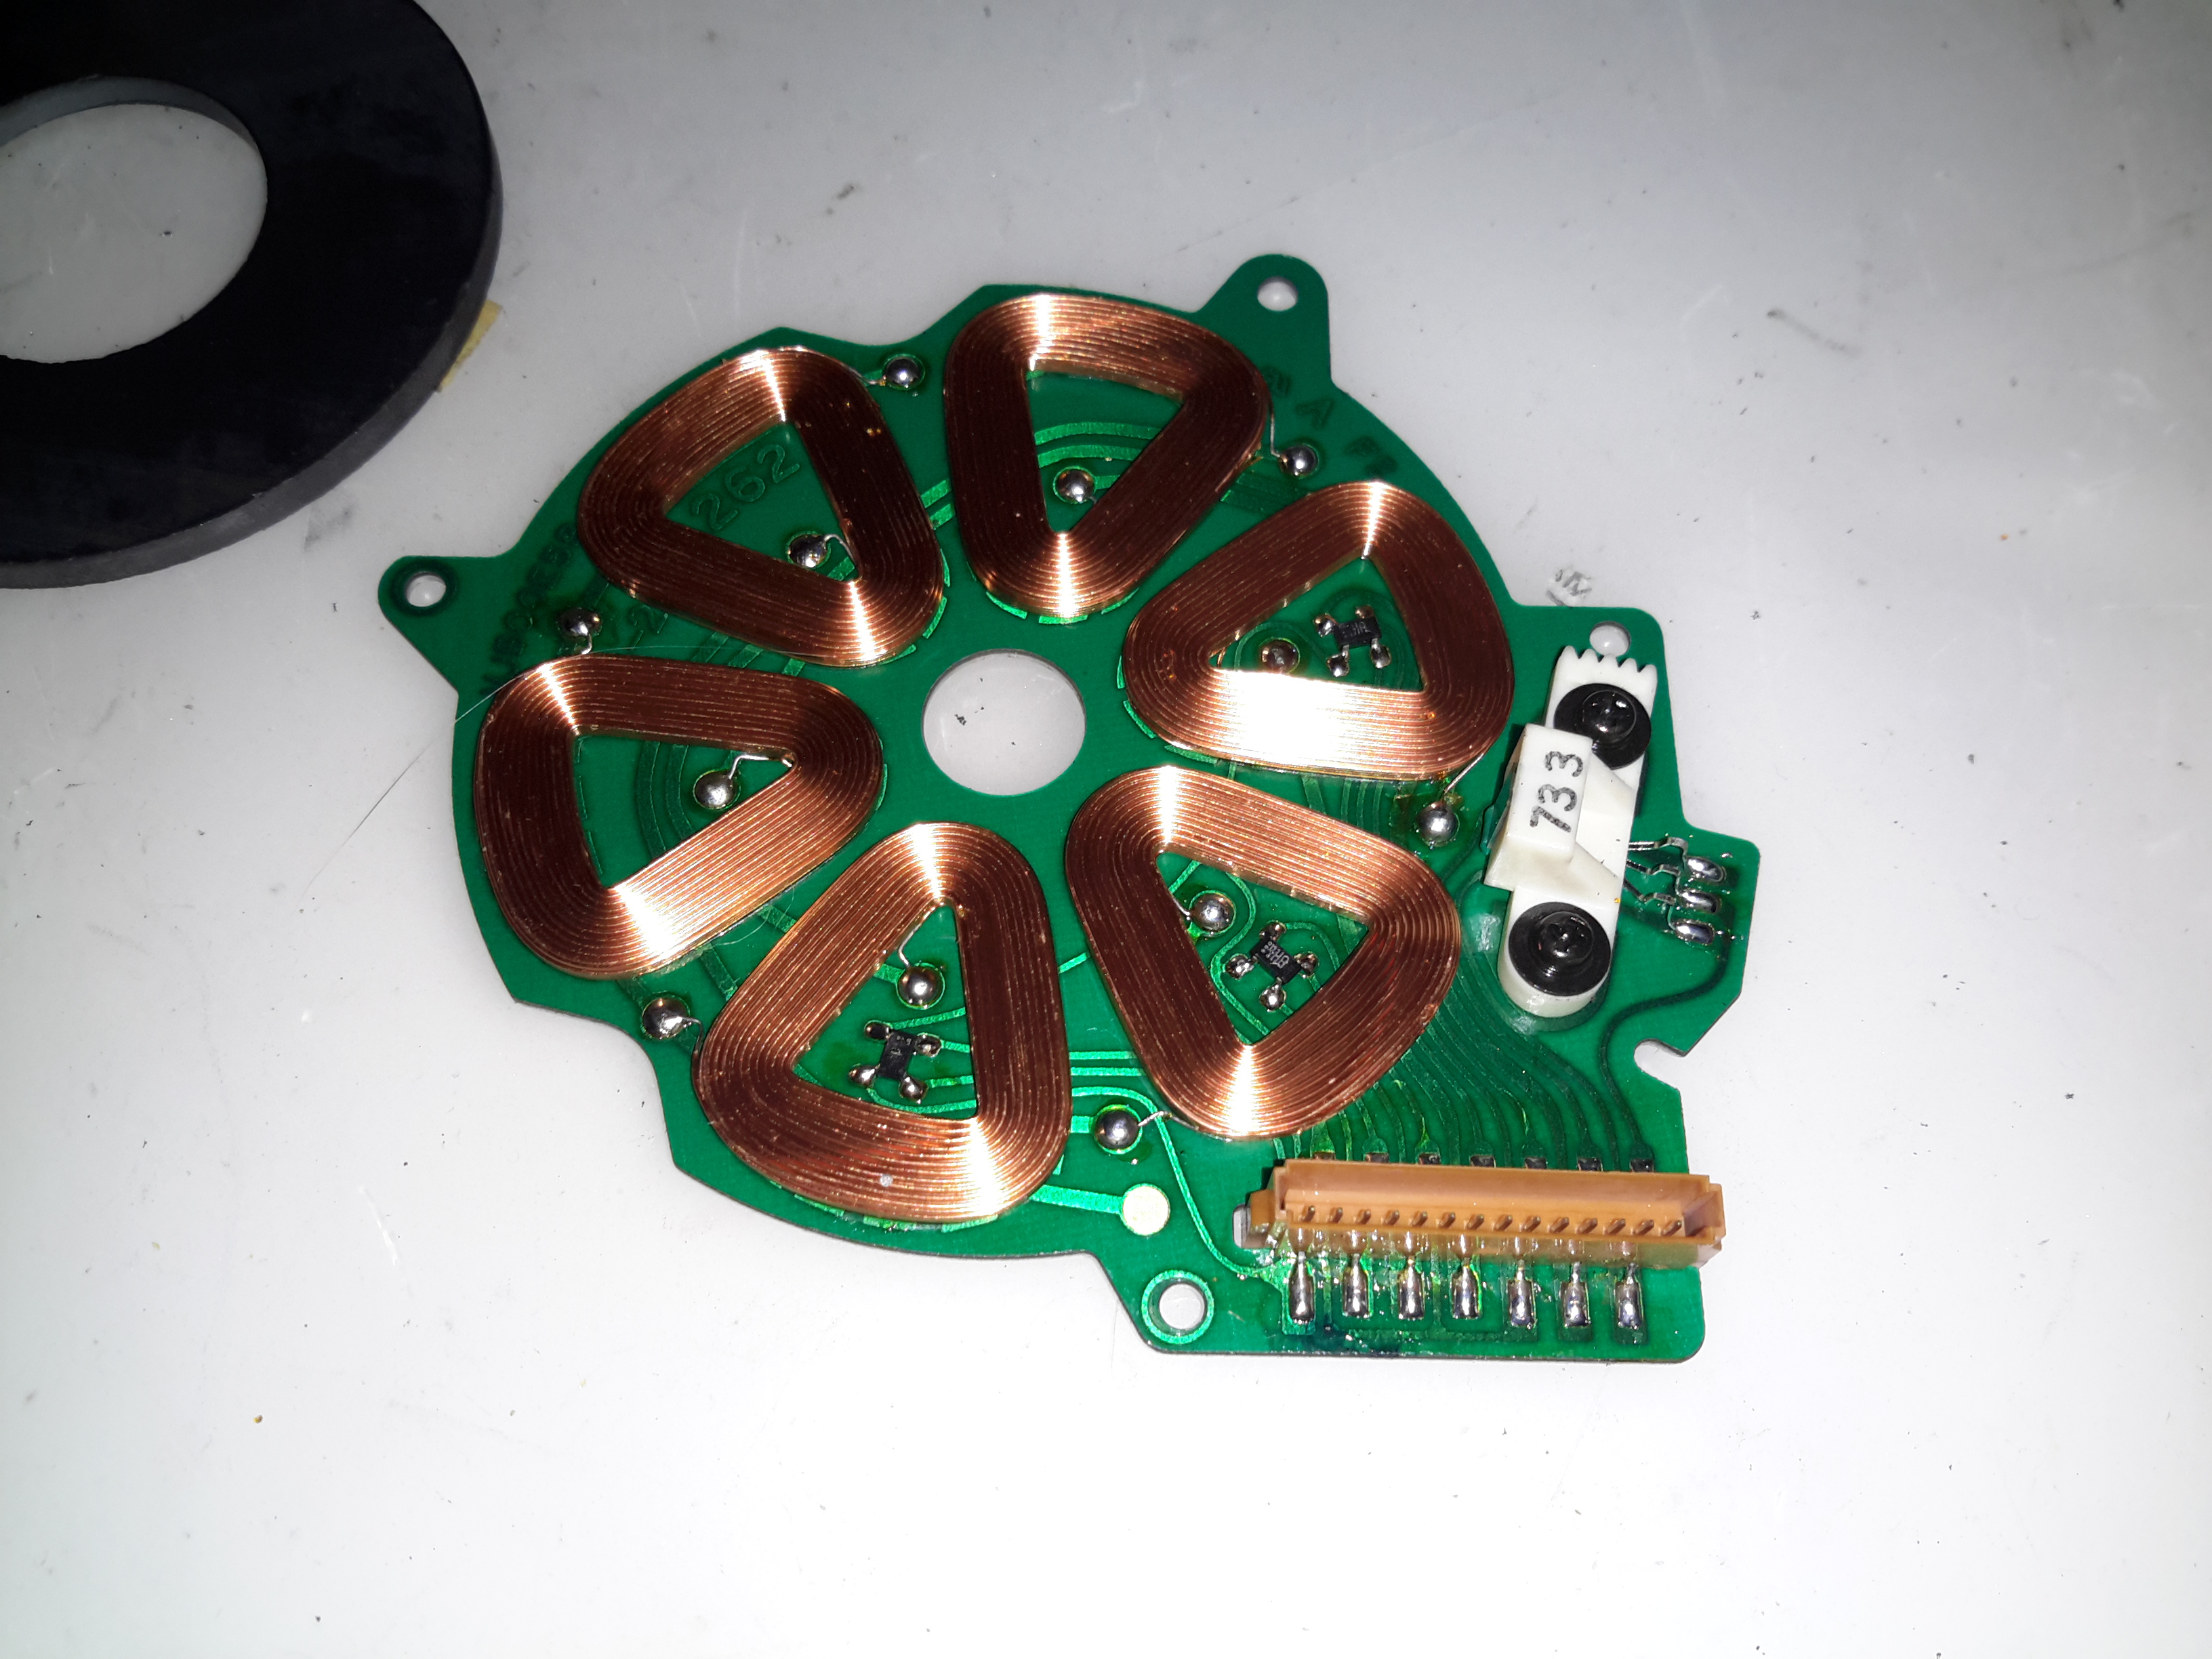
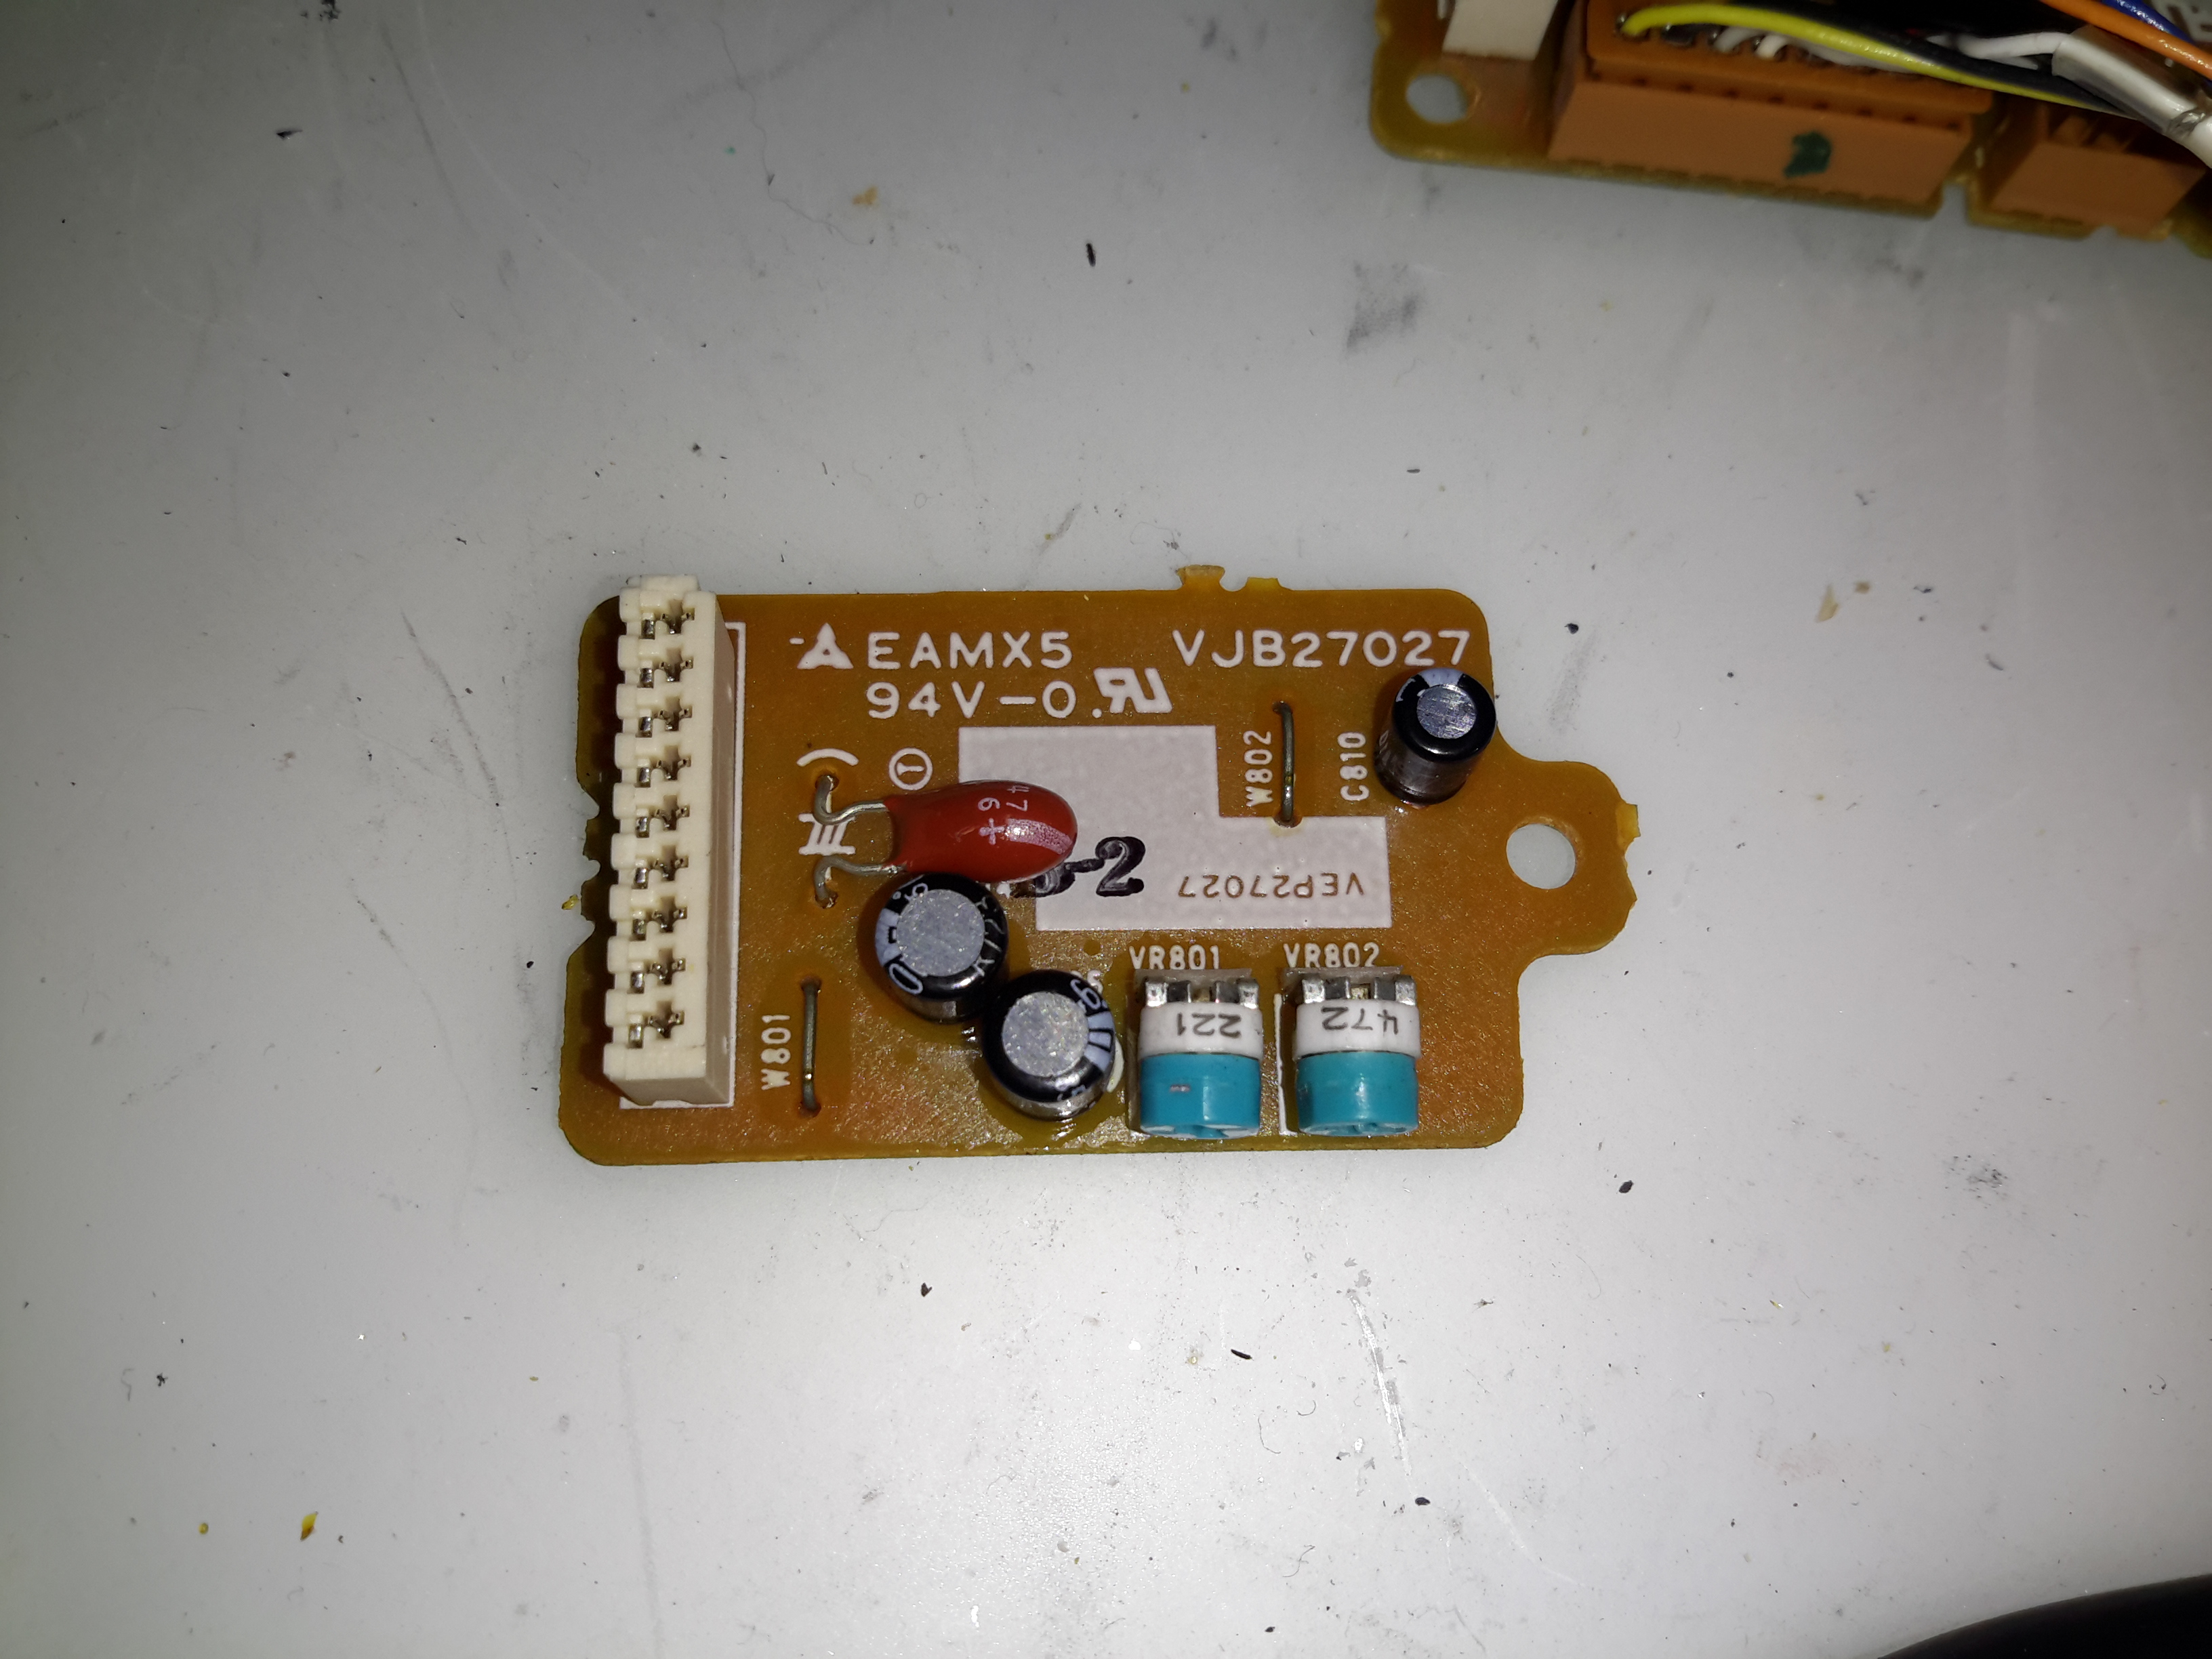
On the top of the assembly is the Automatic White Balance PCB. Many adjustments here to get everything set right. Not much on the other side of this board other than a bunch of Op-Amps. The iris stepper motor is fitted in a milled opening in the PCB, this connects to one of the other PCBs in the camera module.
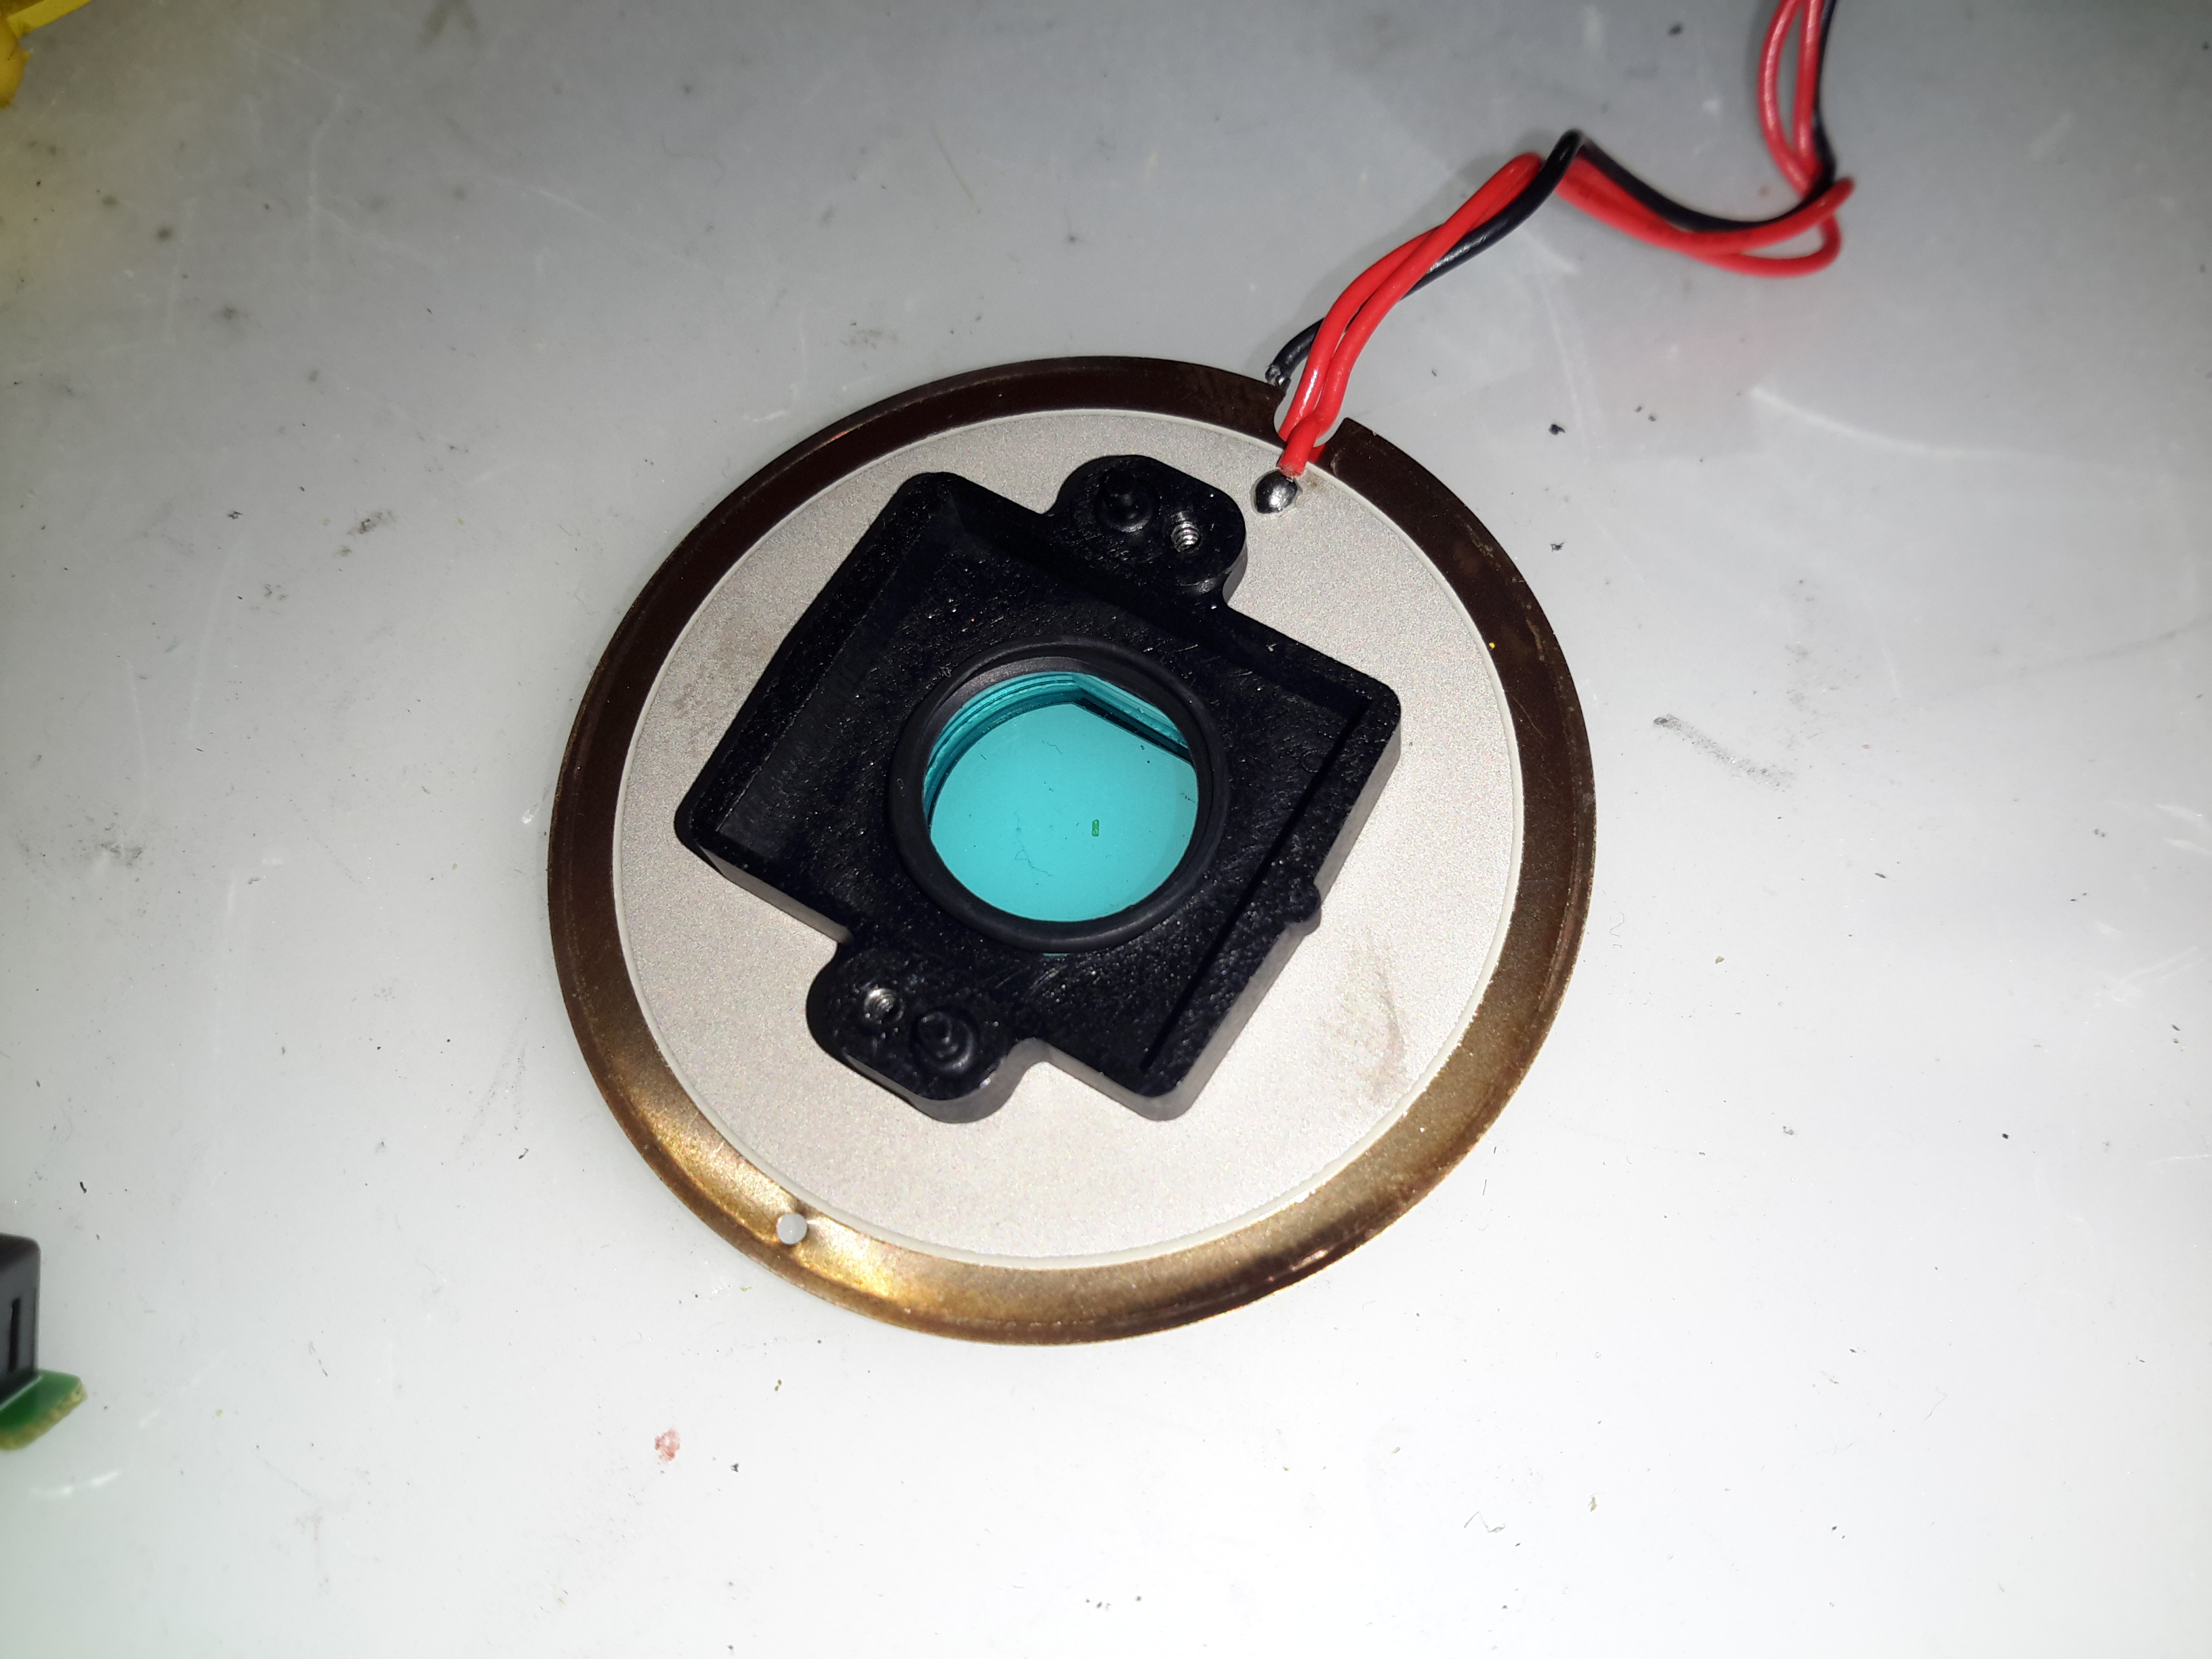
Here’s the AWB sensor, mounted next to the lens. I’m not all to certain how this works, but the service manual has the pinout, and there are outputs for all the colour channels, RGB. So it’s probably a trio of photodiodes with filters.
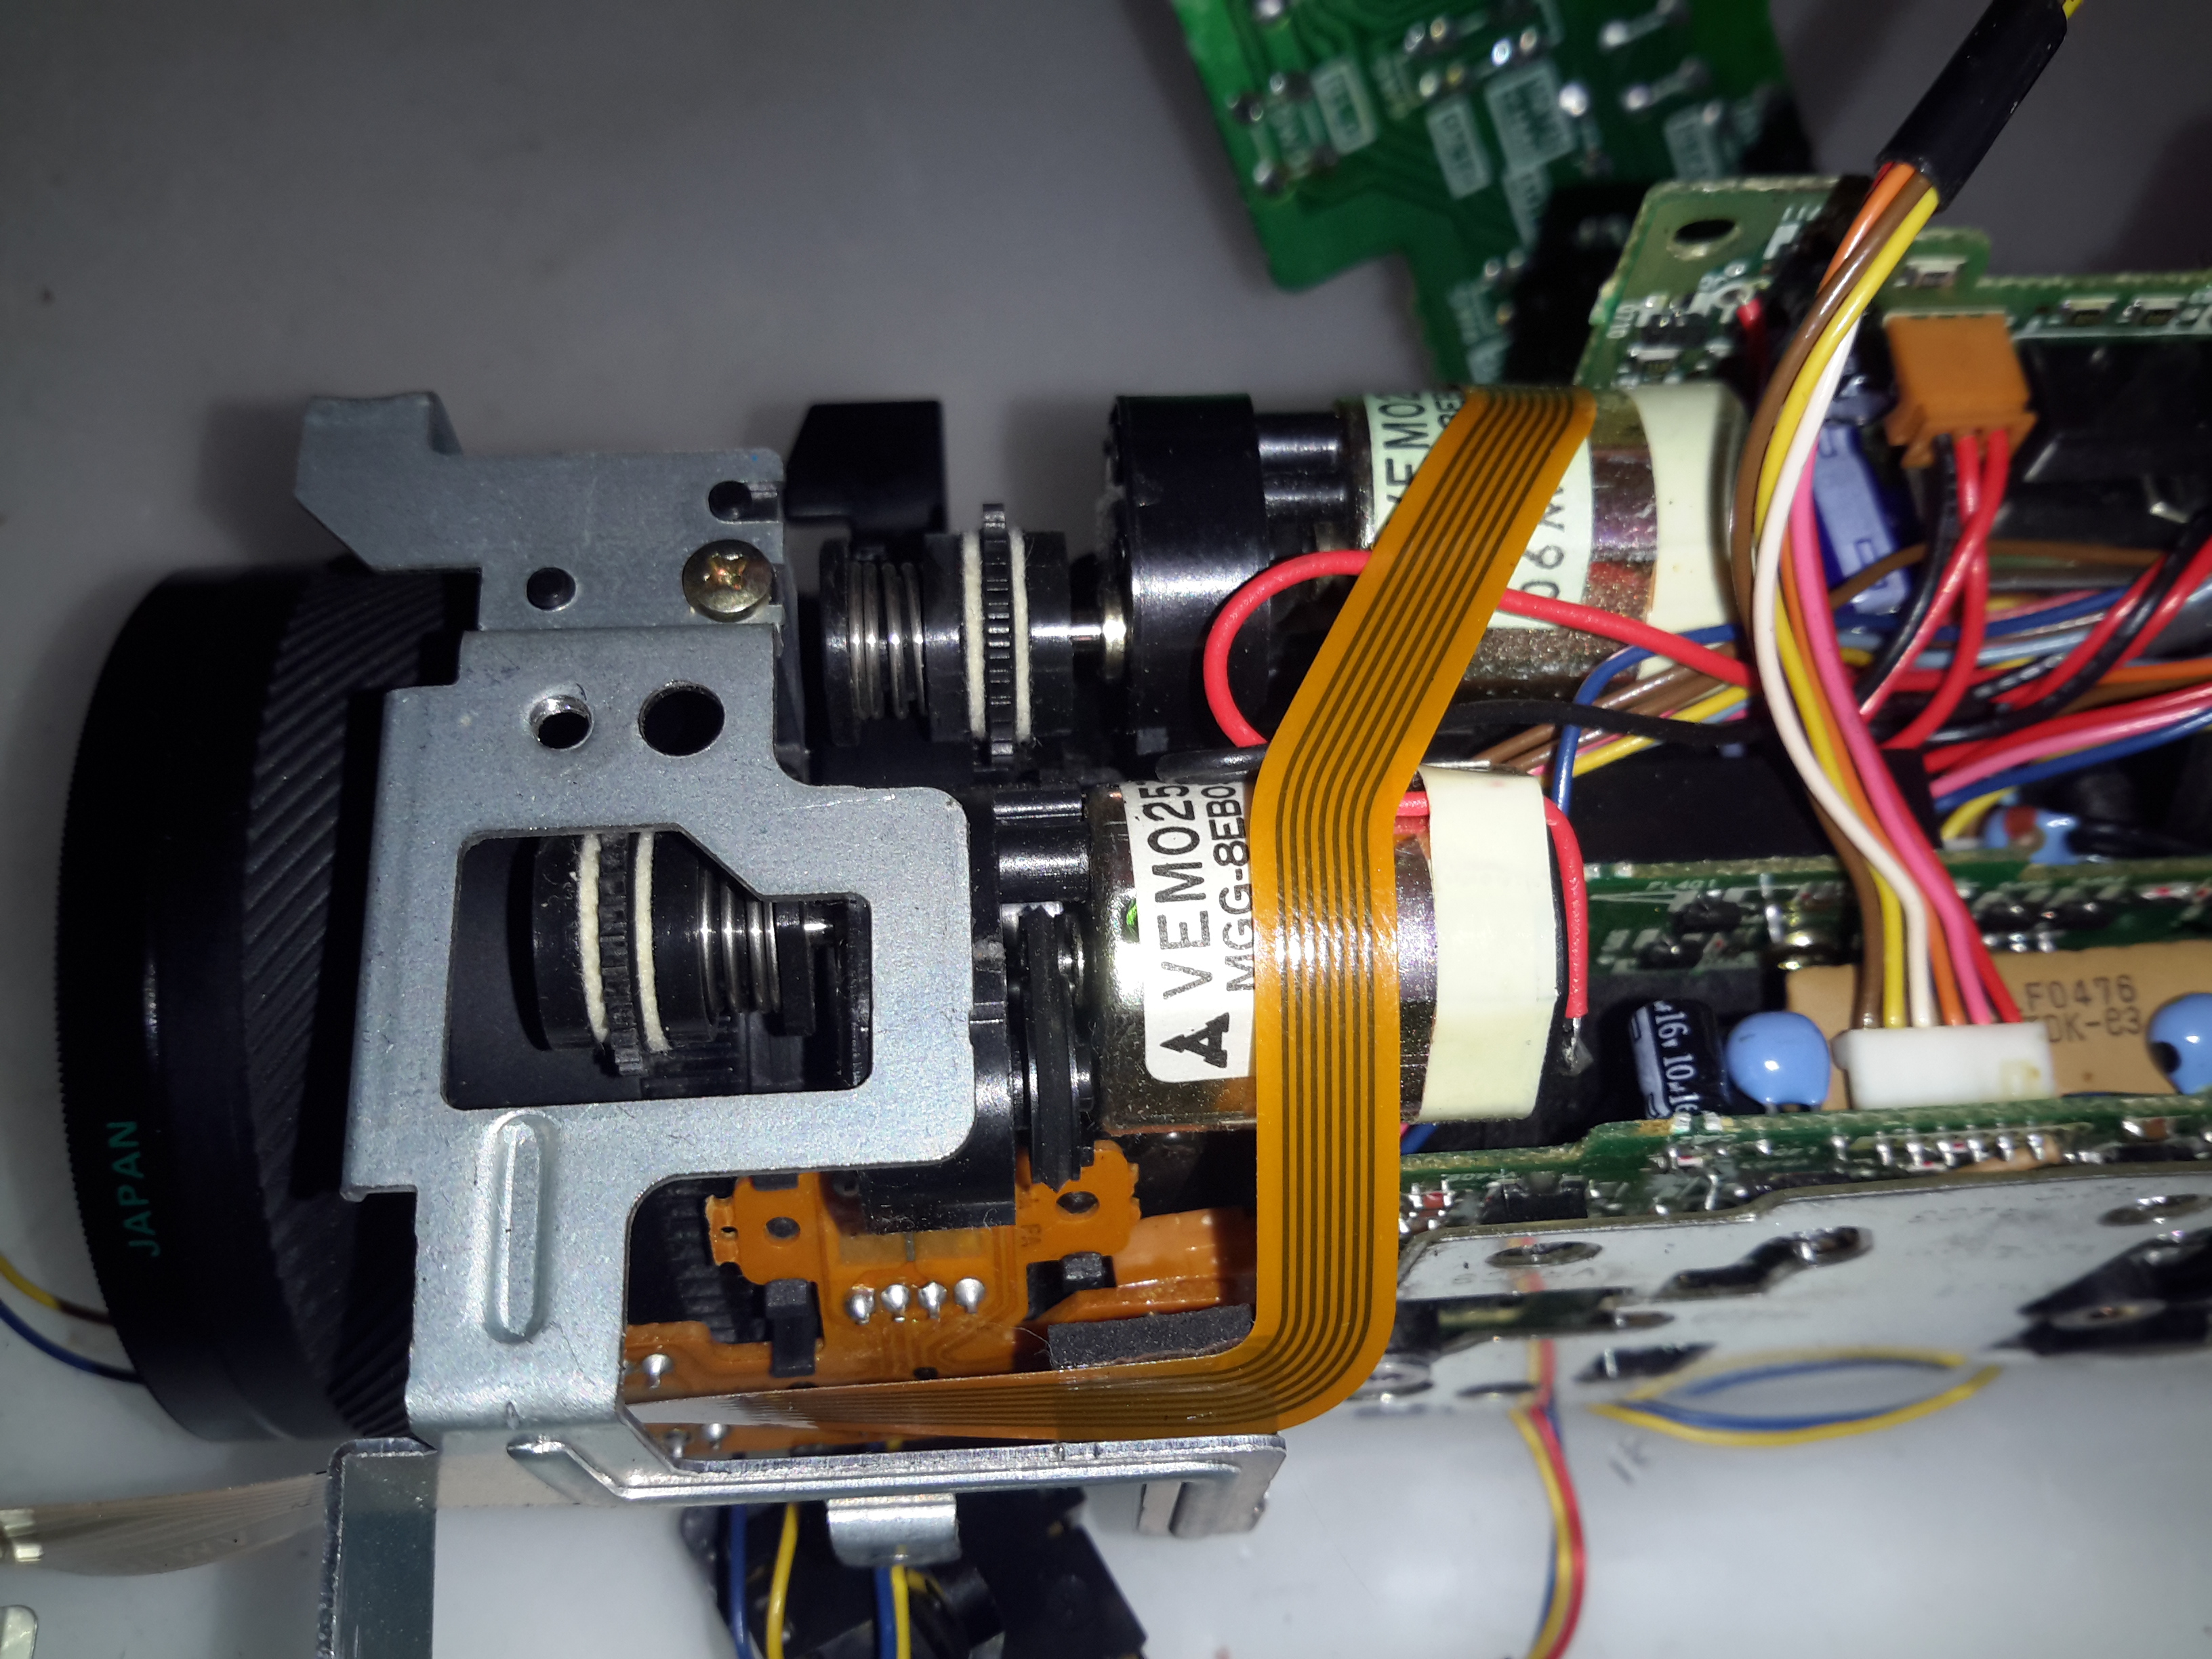
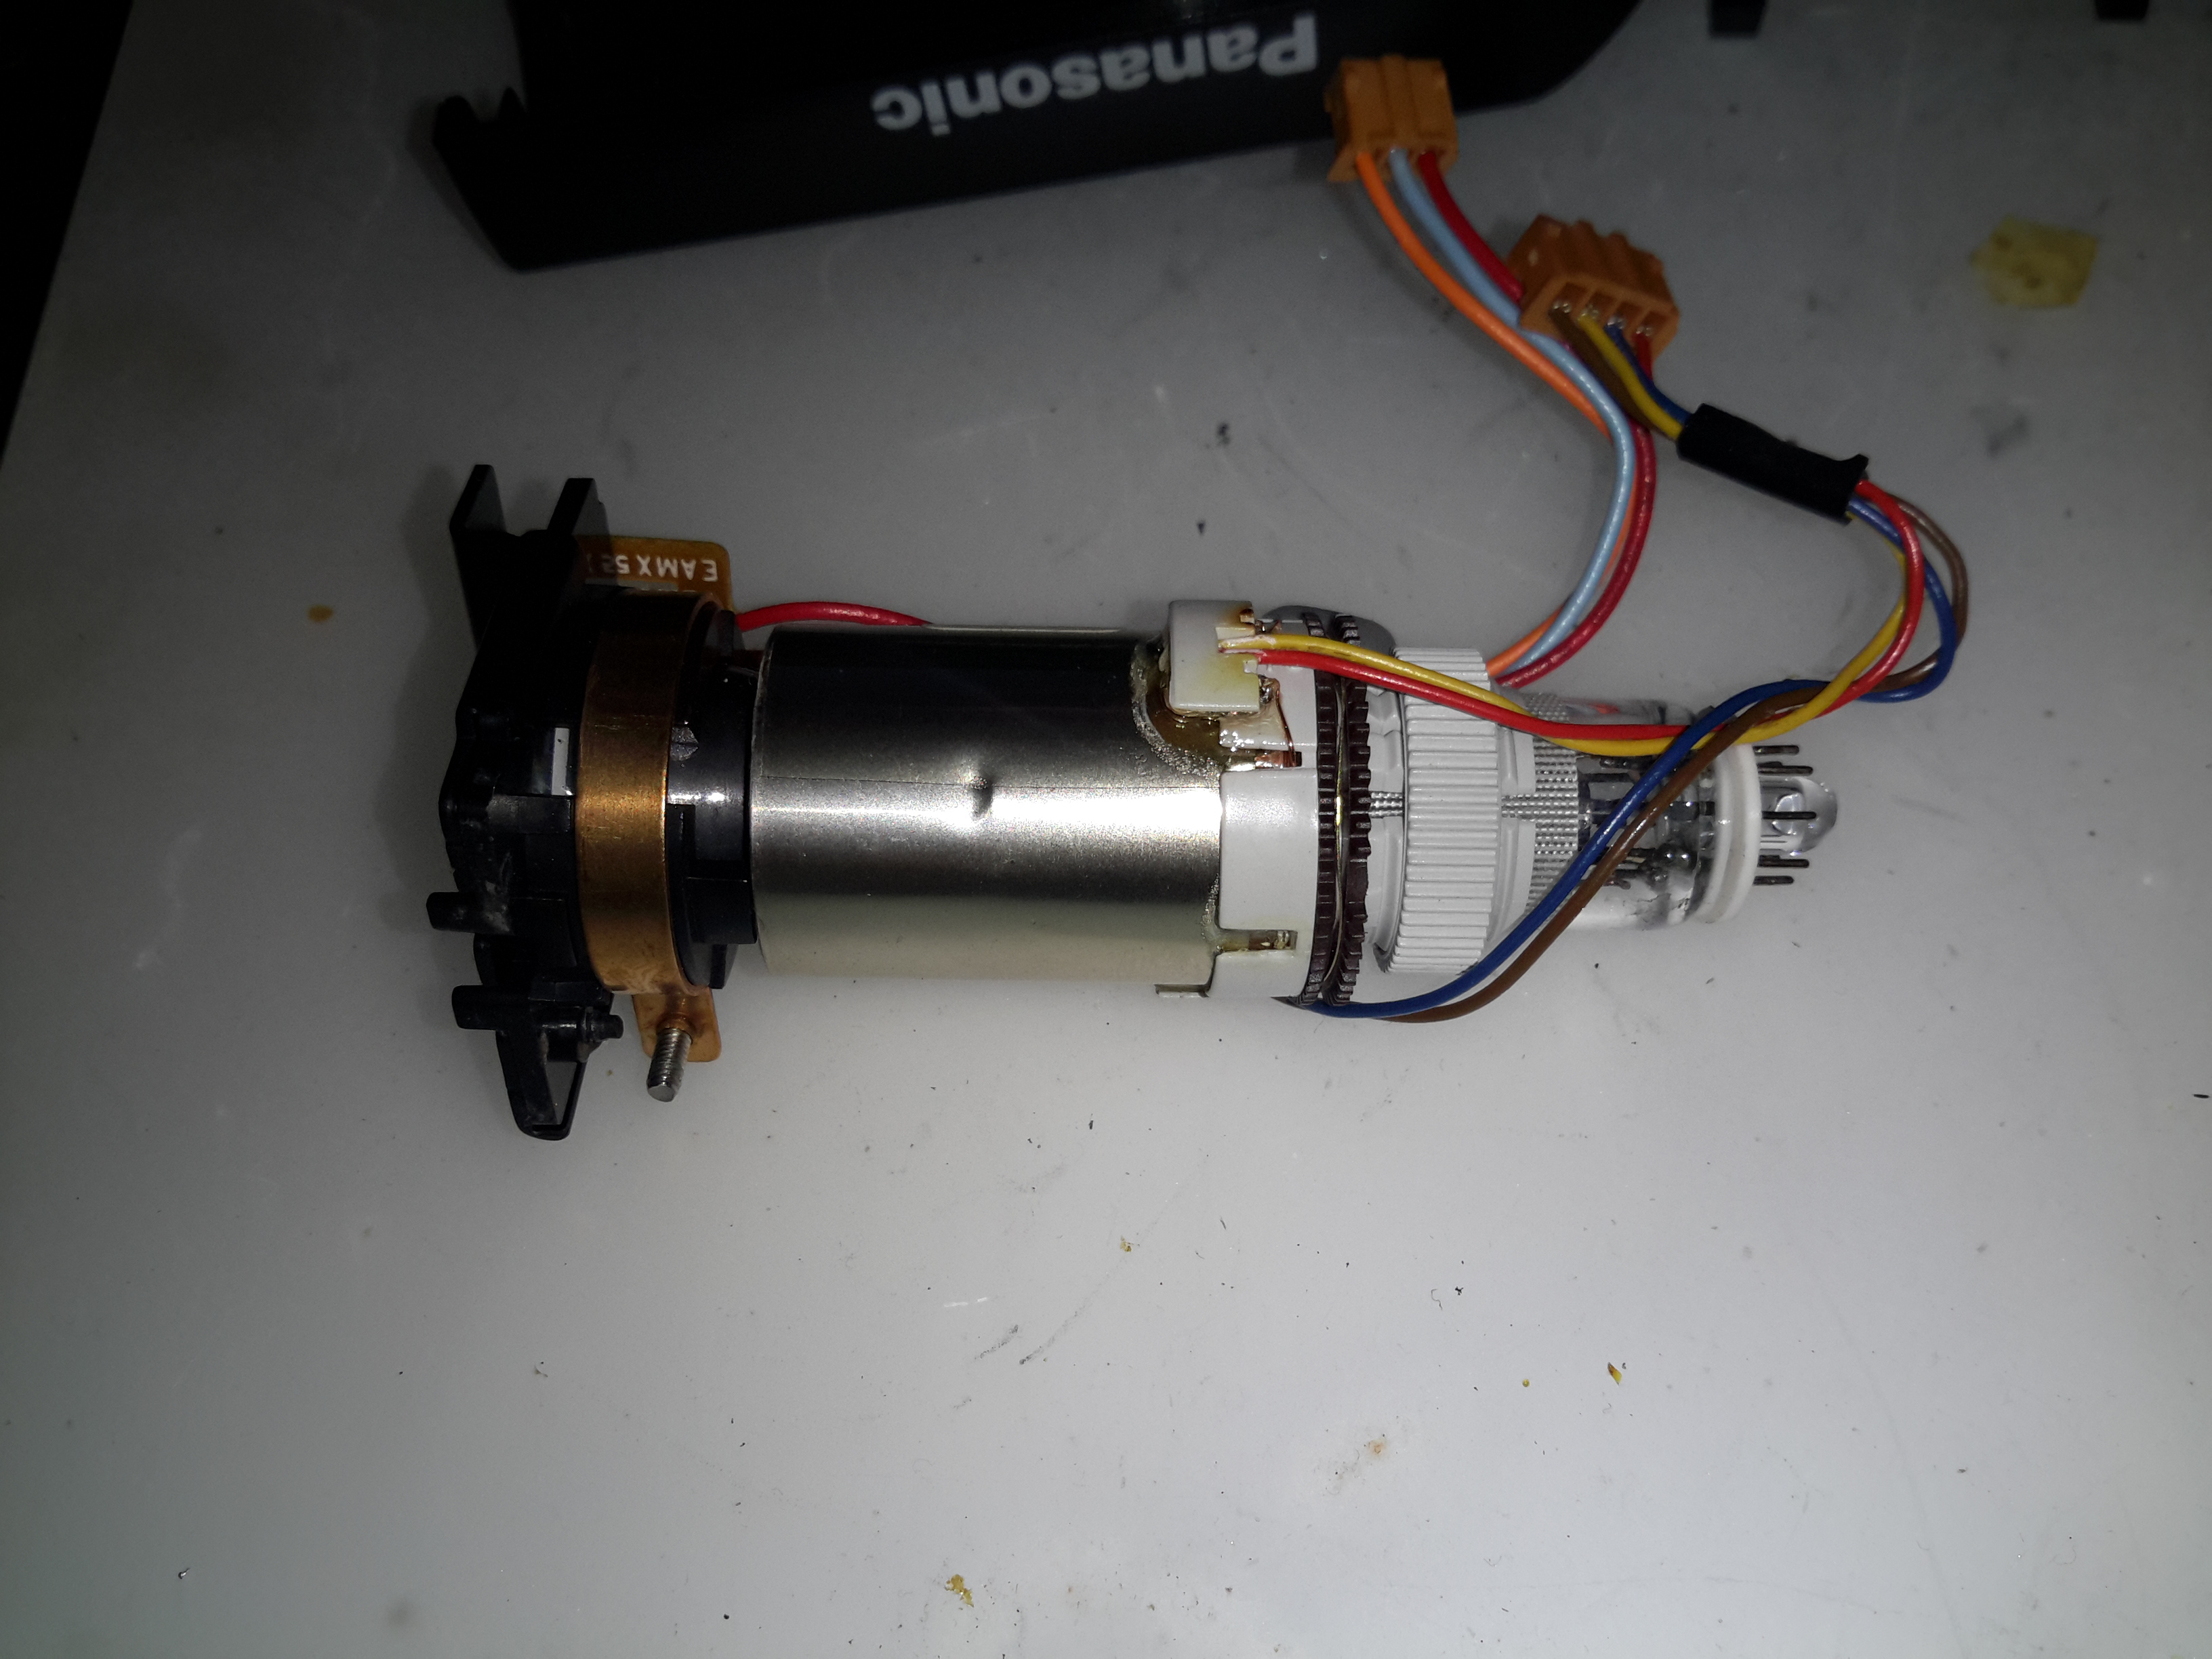
Focus & Zoom are controlled with a pair of DC gear motors. The manual operation is feasible through the use of slip clutches in the final drive pinion onto the lens barrel.
The main camera section process board is above. This board does all the signal processing for the CCD, has the bias voltage supplies and houses the control sections for the motorized parts of the optics assembly. There are quite a few dipped Tantalum capacitors on pigtails, instead of being directly board mounted. This was probably done due to space requirements on the PCB itself.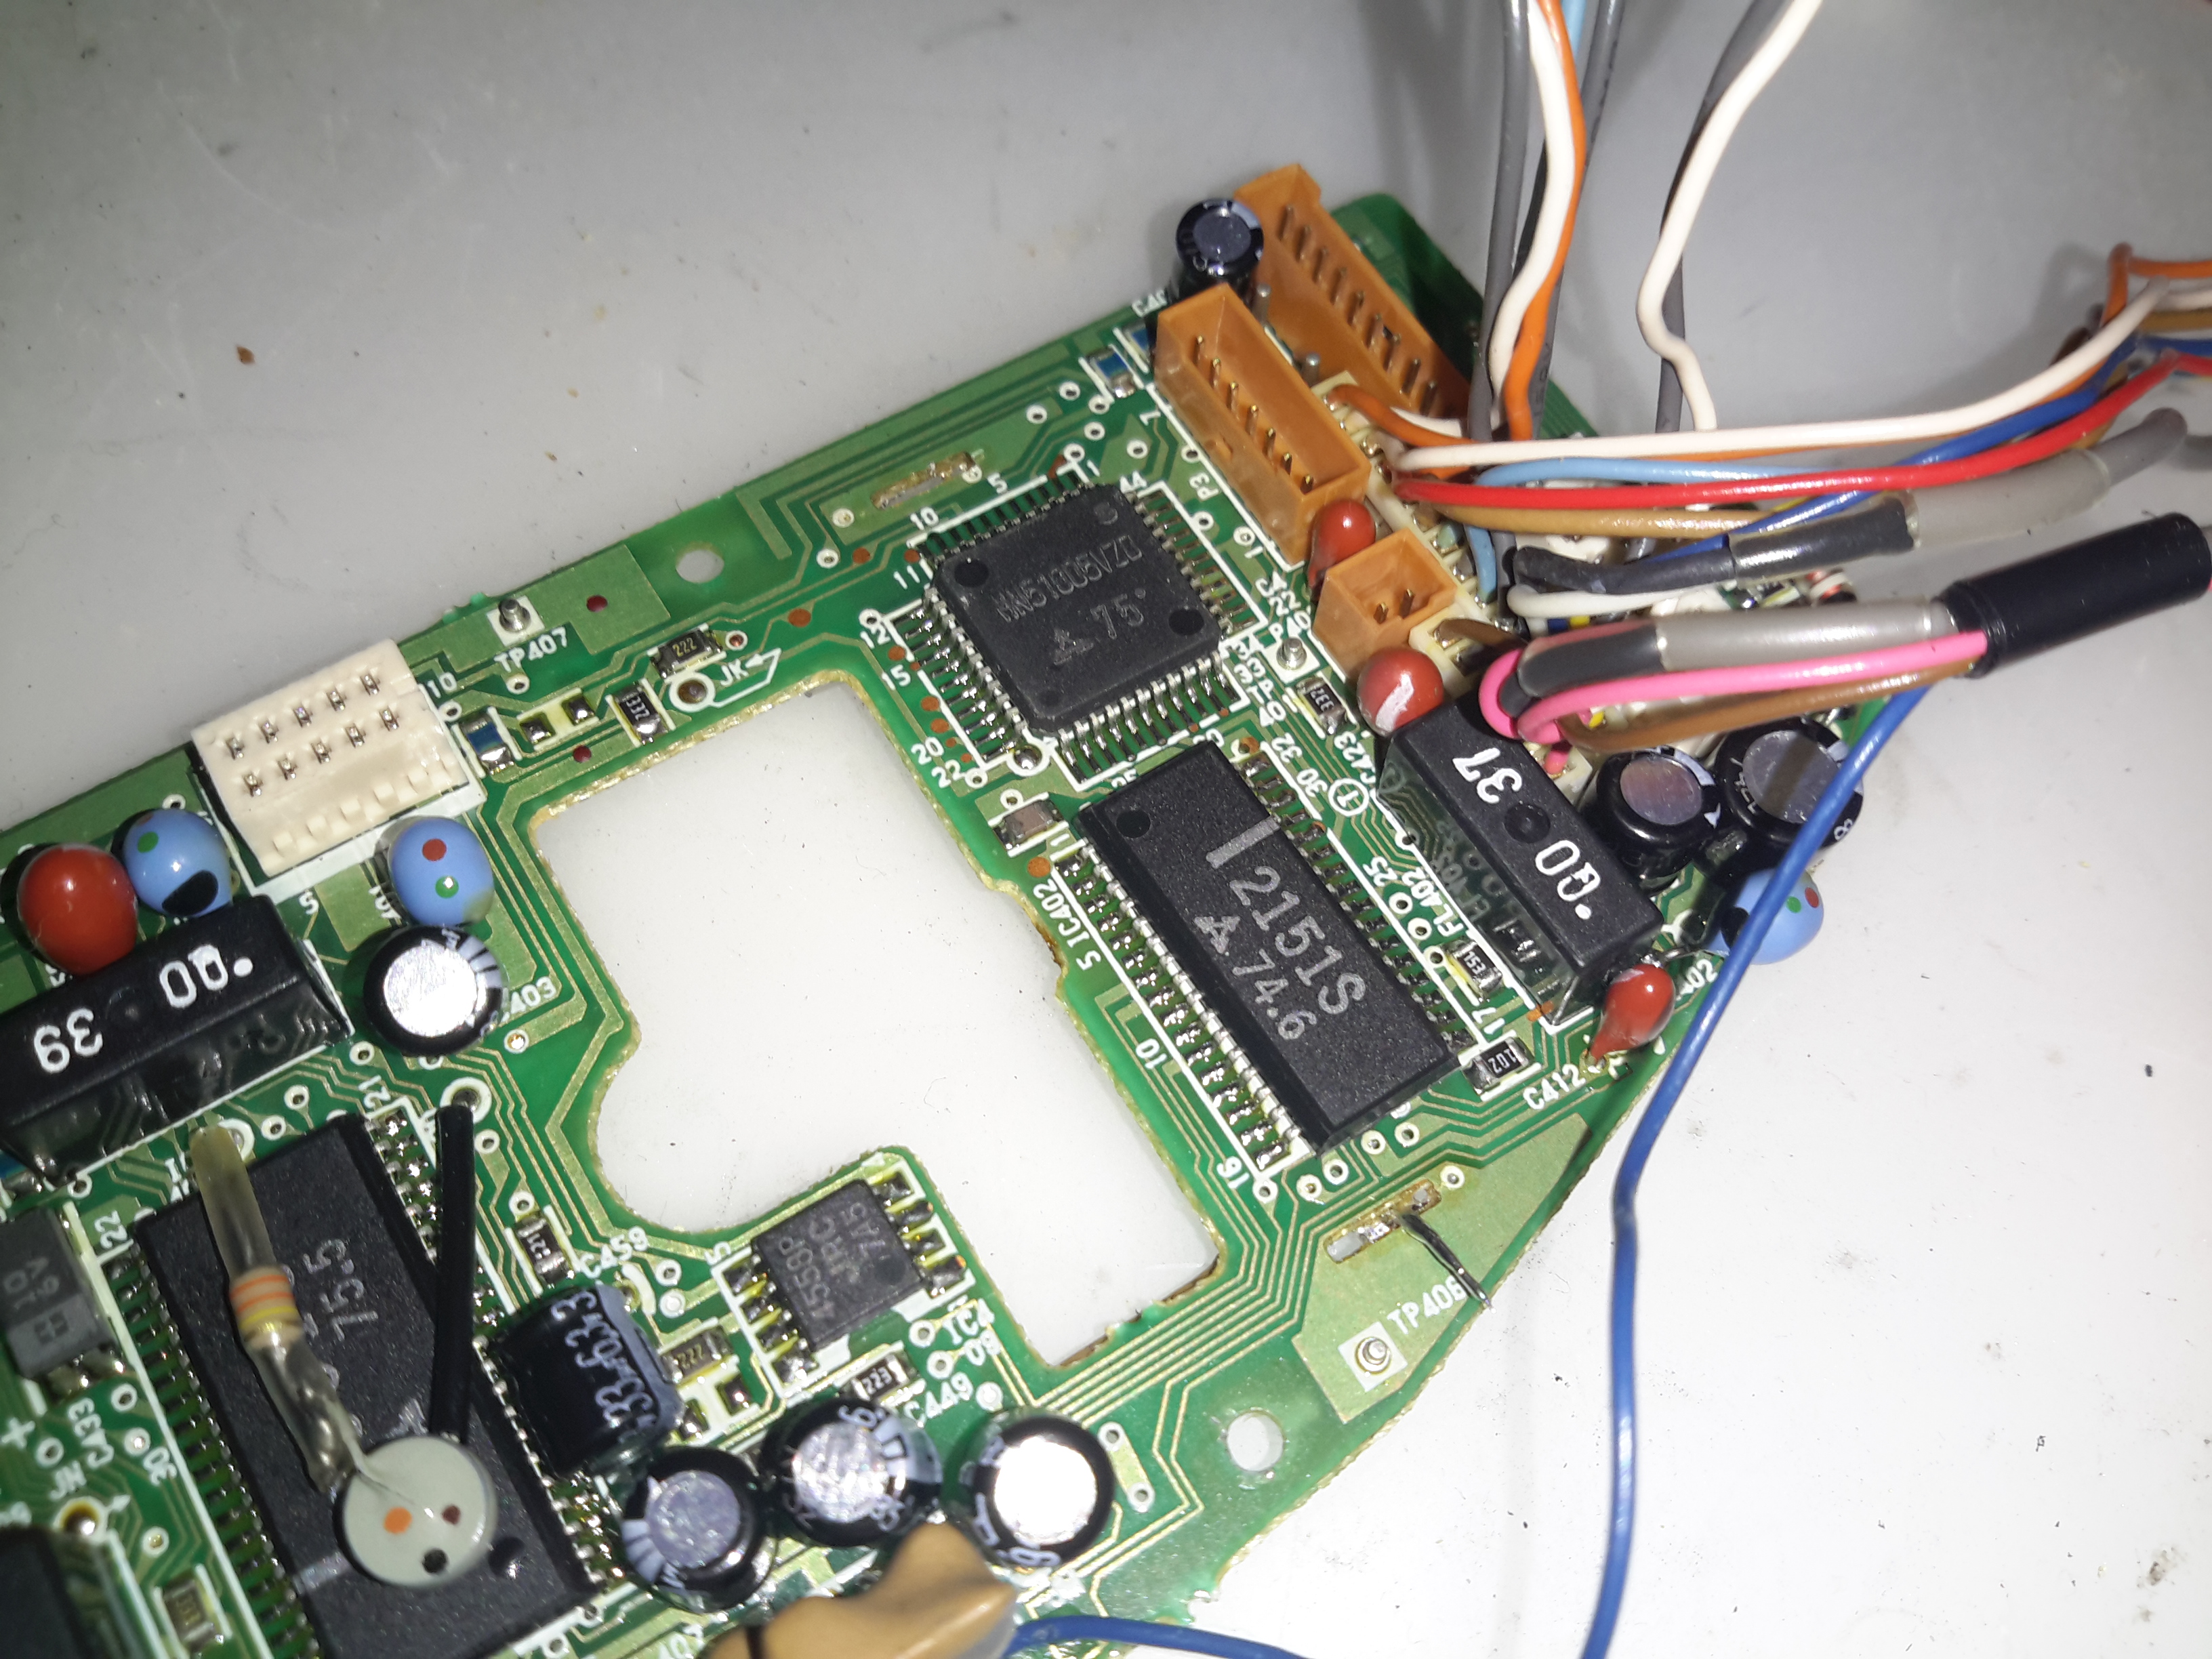
Under the steel shield on this board is some of the main signal processing for the CCD.
The back of the optics tube is a heavy casting, to supress vibration. This will be more clear later on.

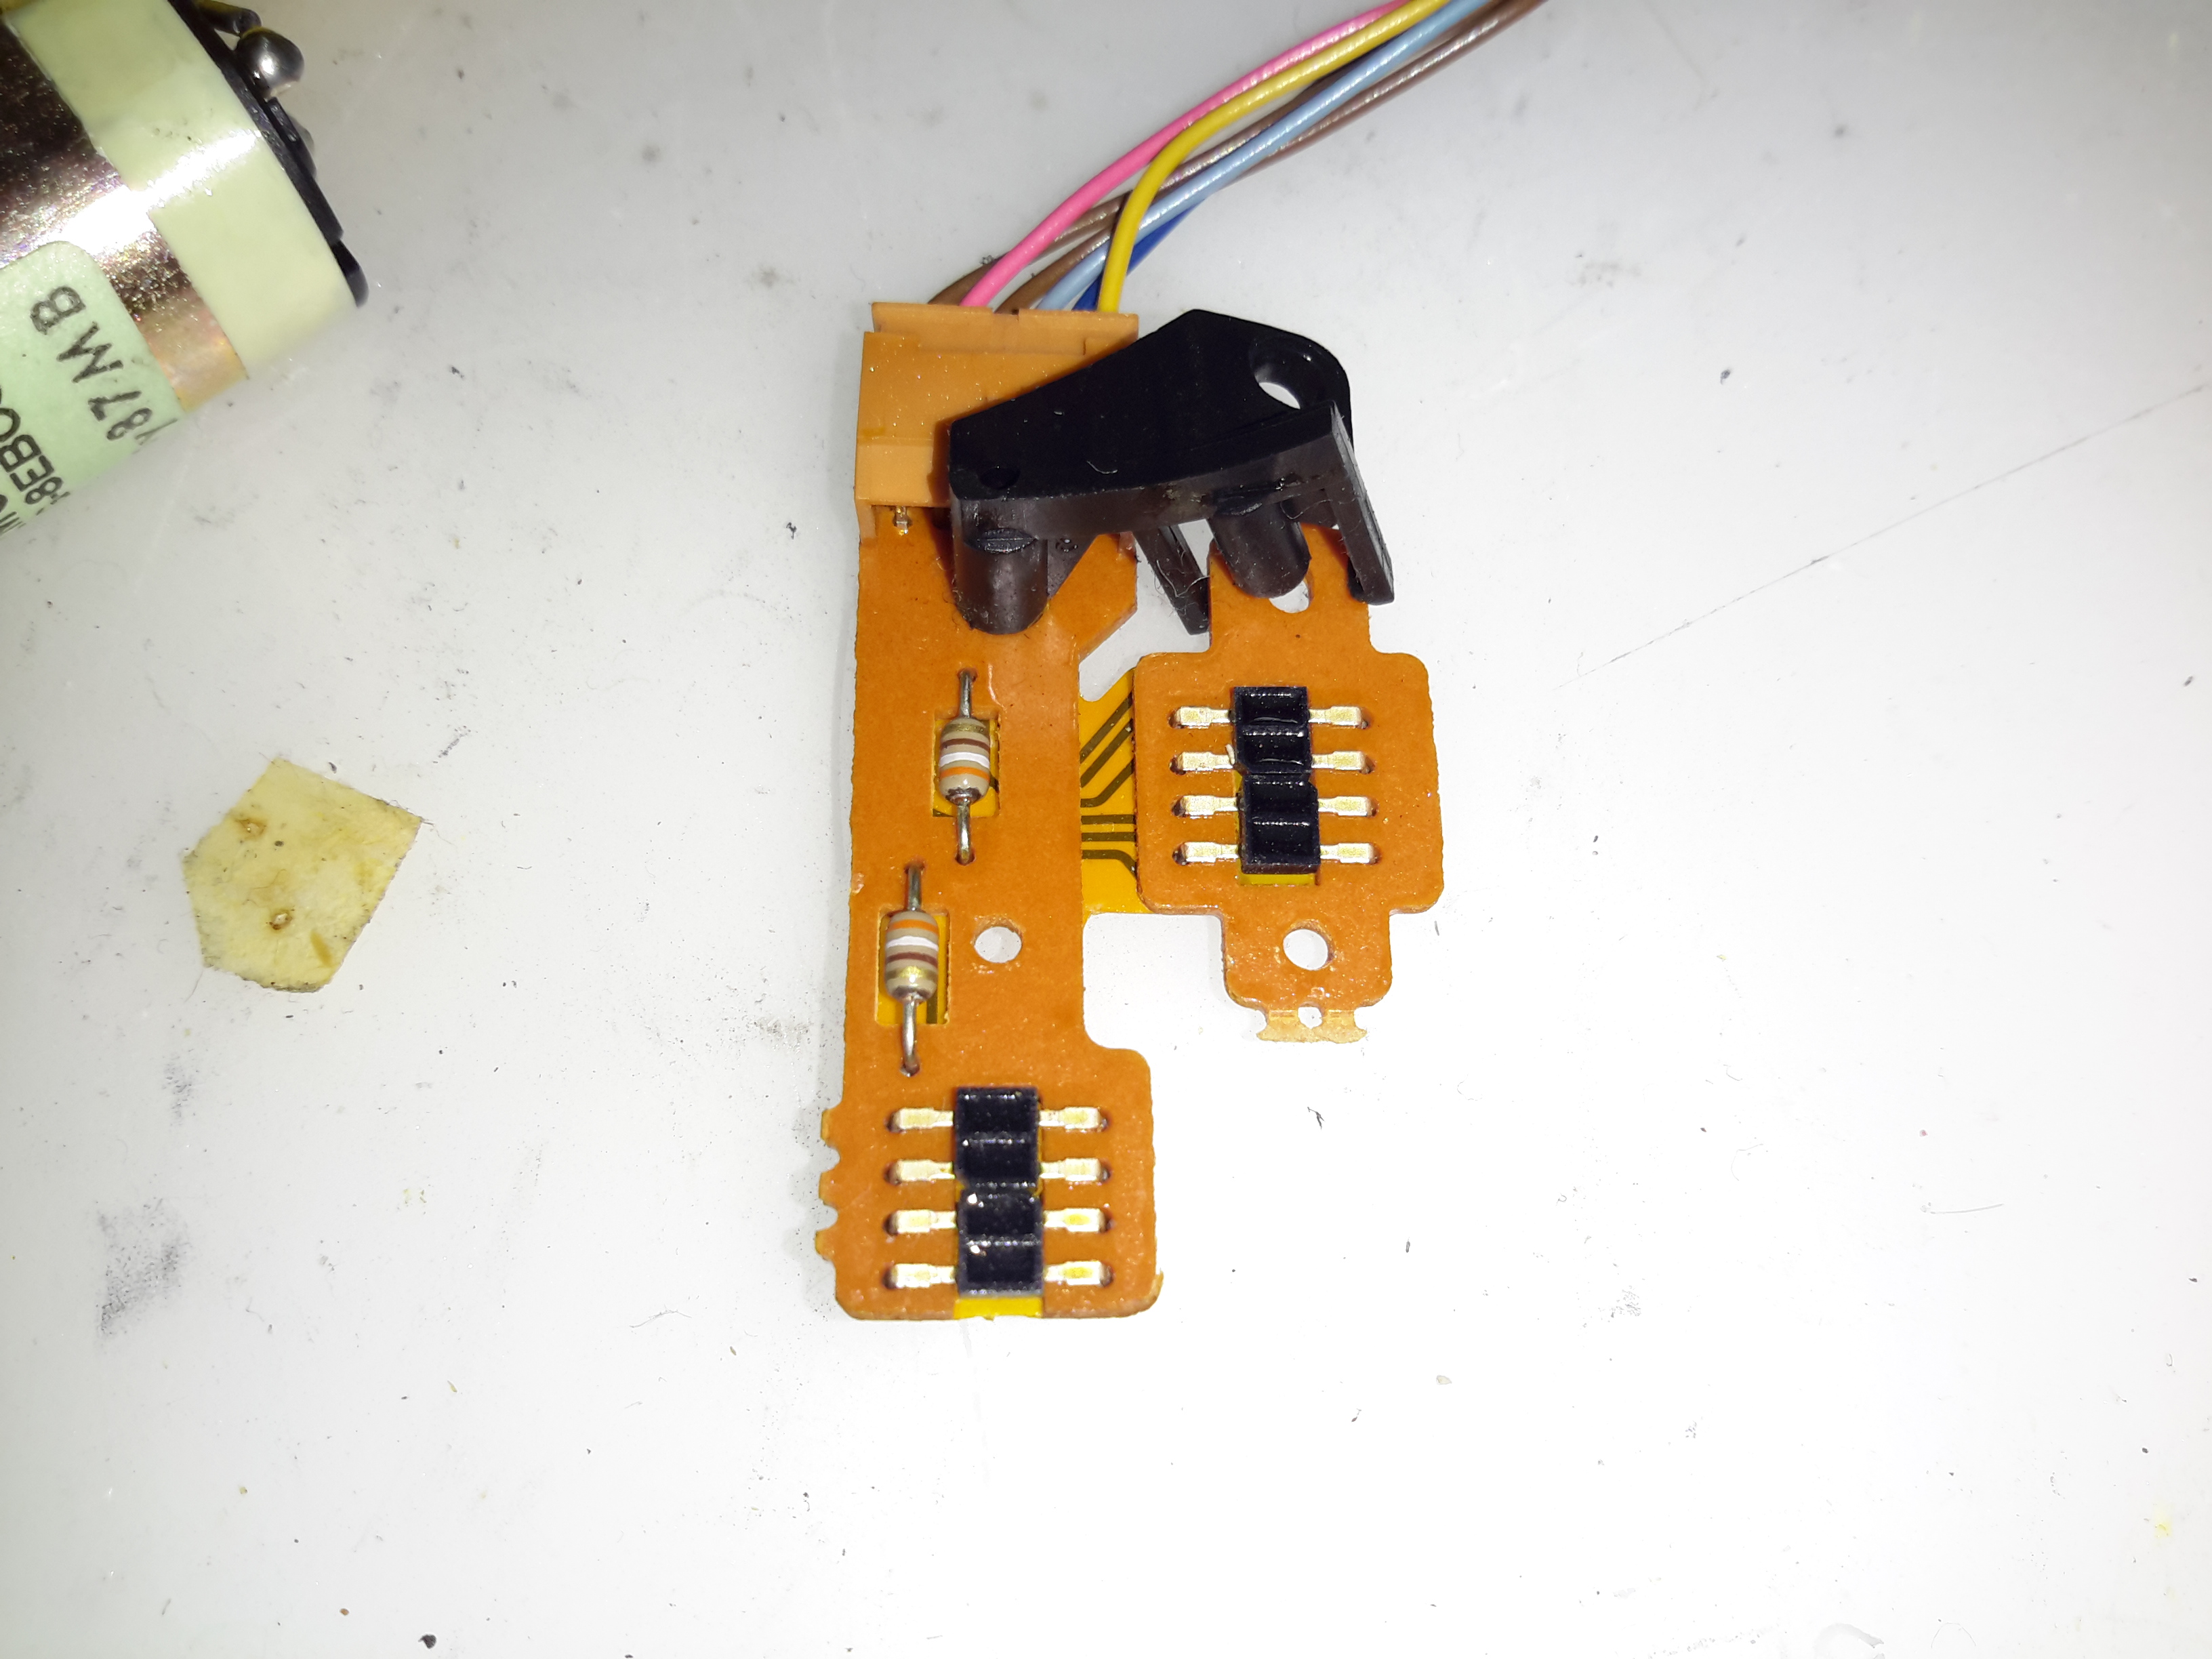
The position of the lens elements is determined by reflective strips on the barrel & sensors on this flex PCB.
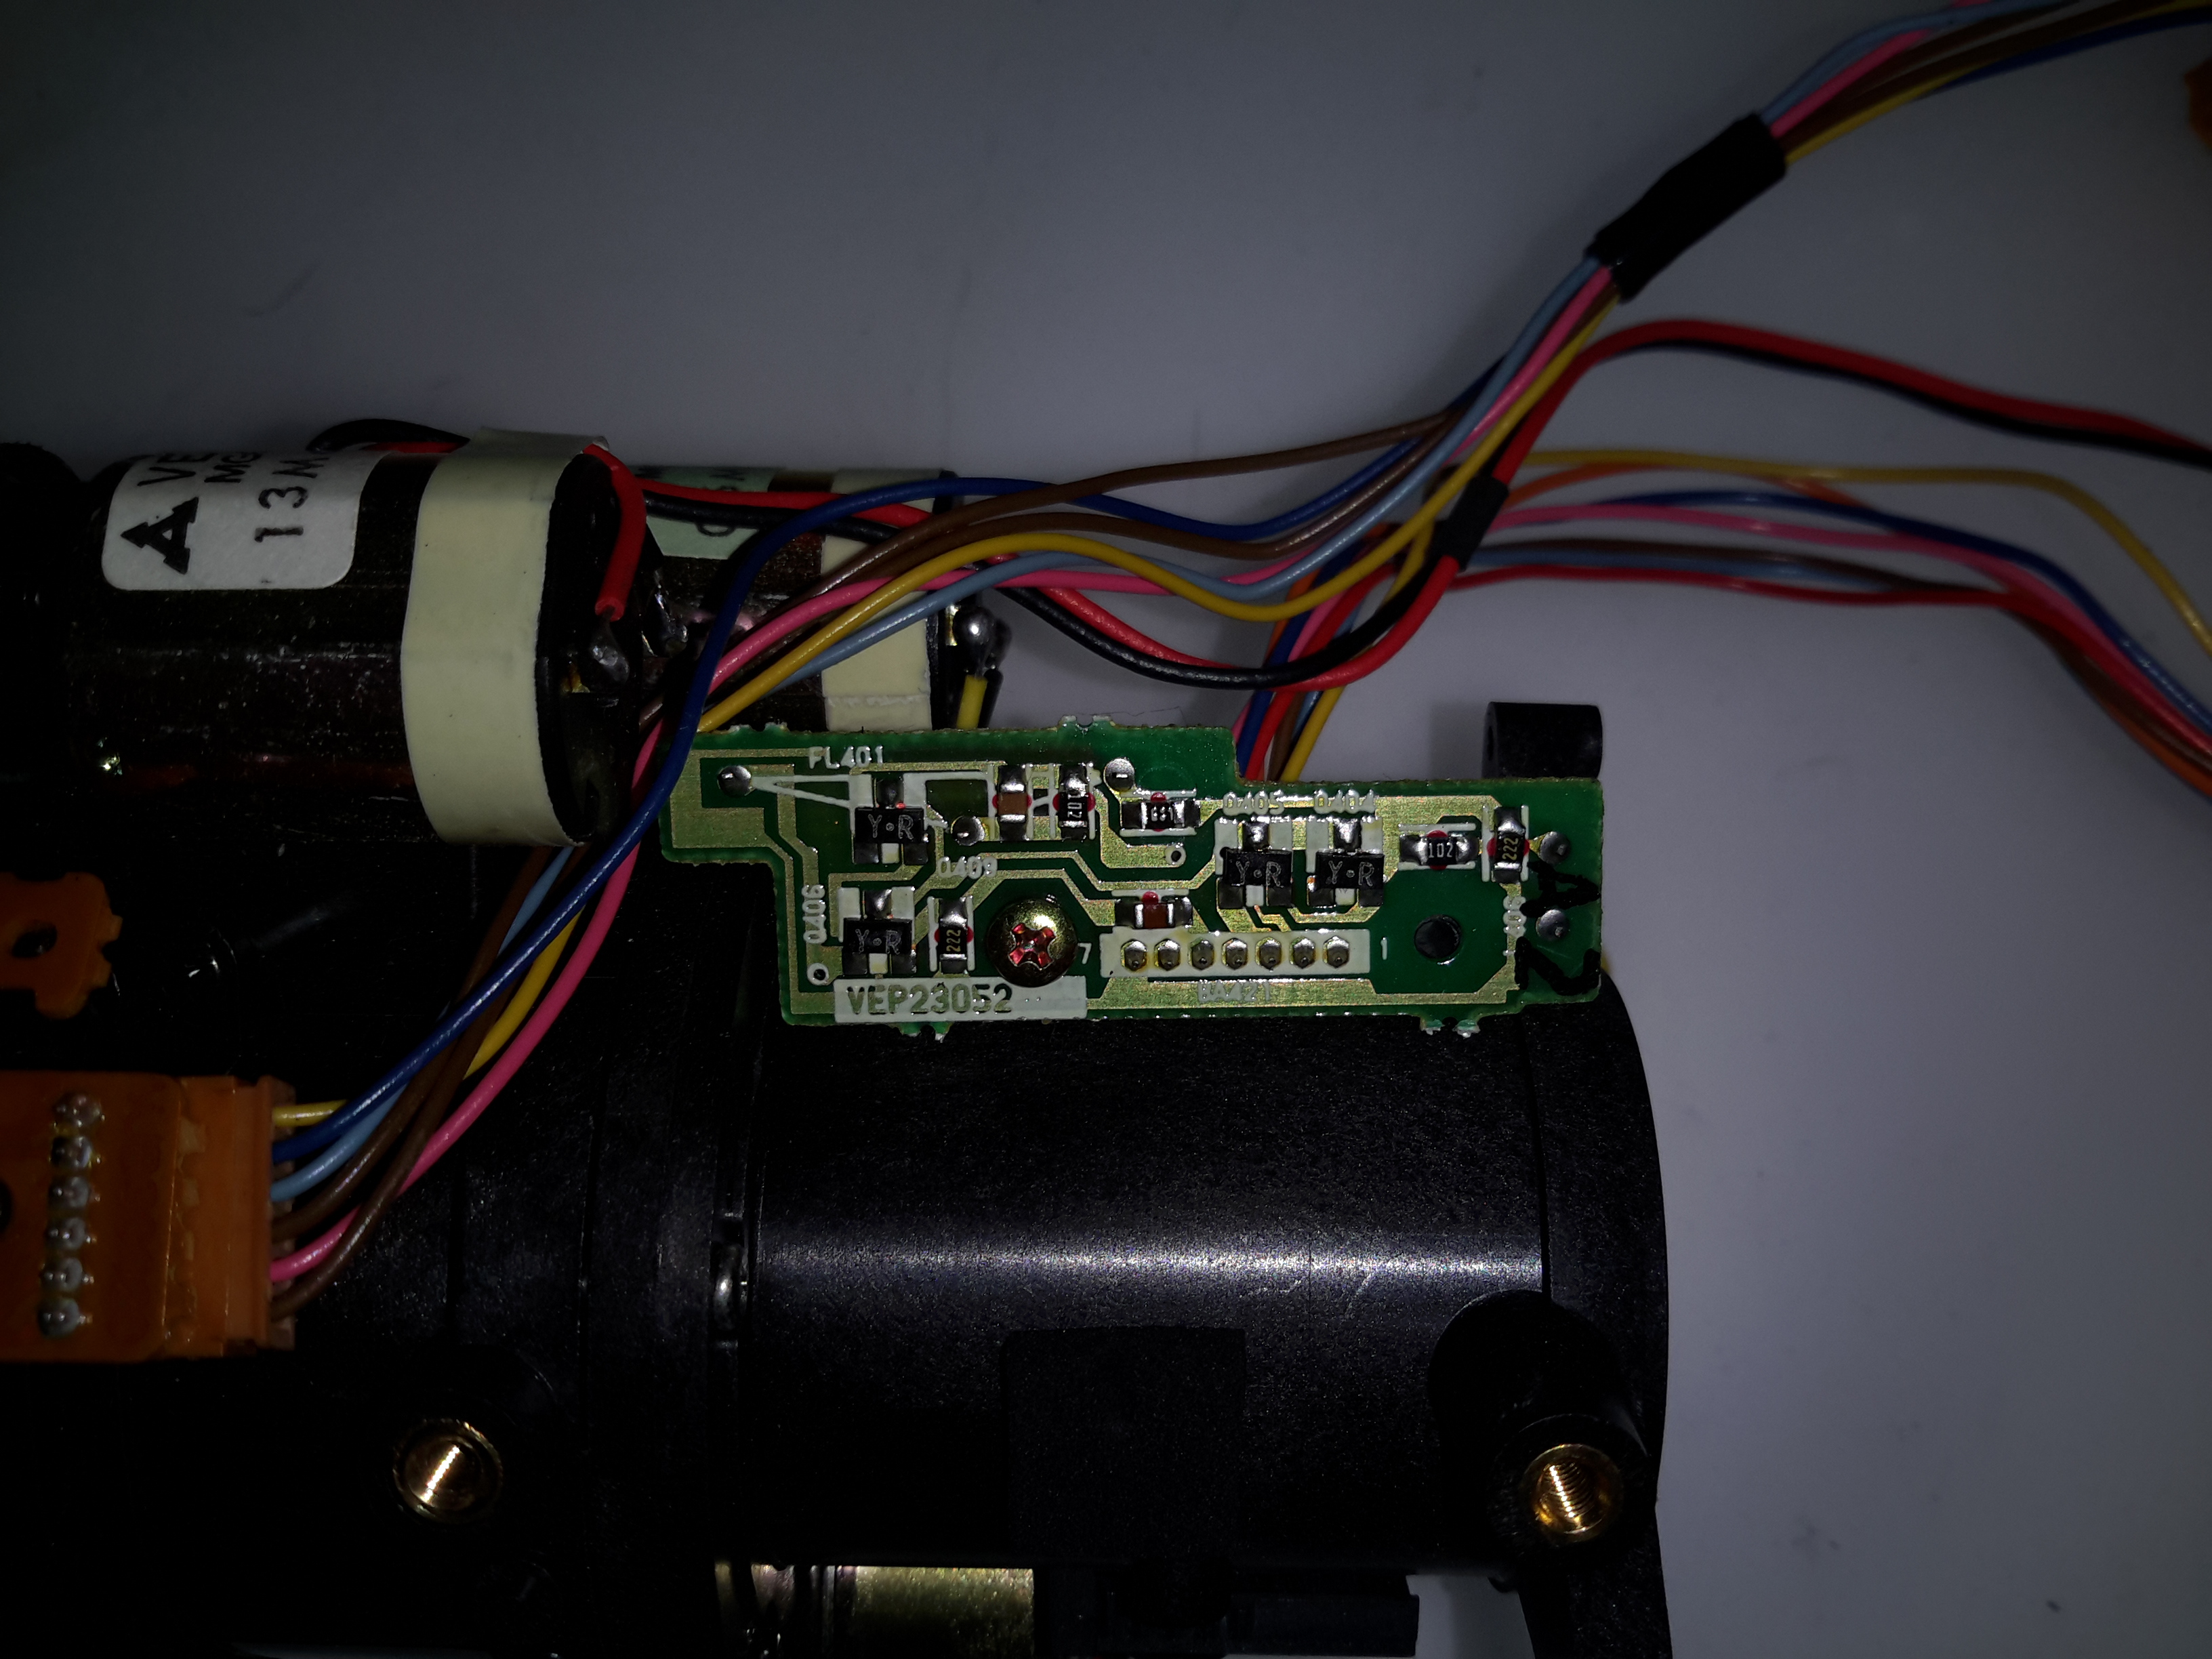
There’s another small board tucked into the side of the tube, this hooks into the process PCB.
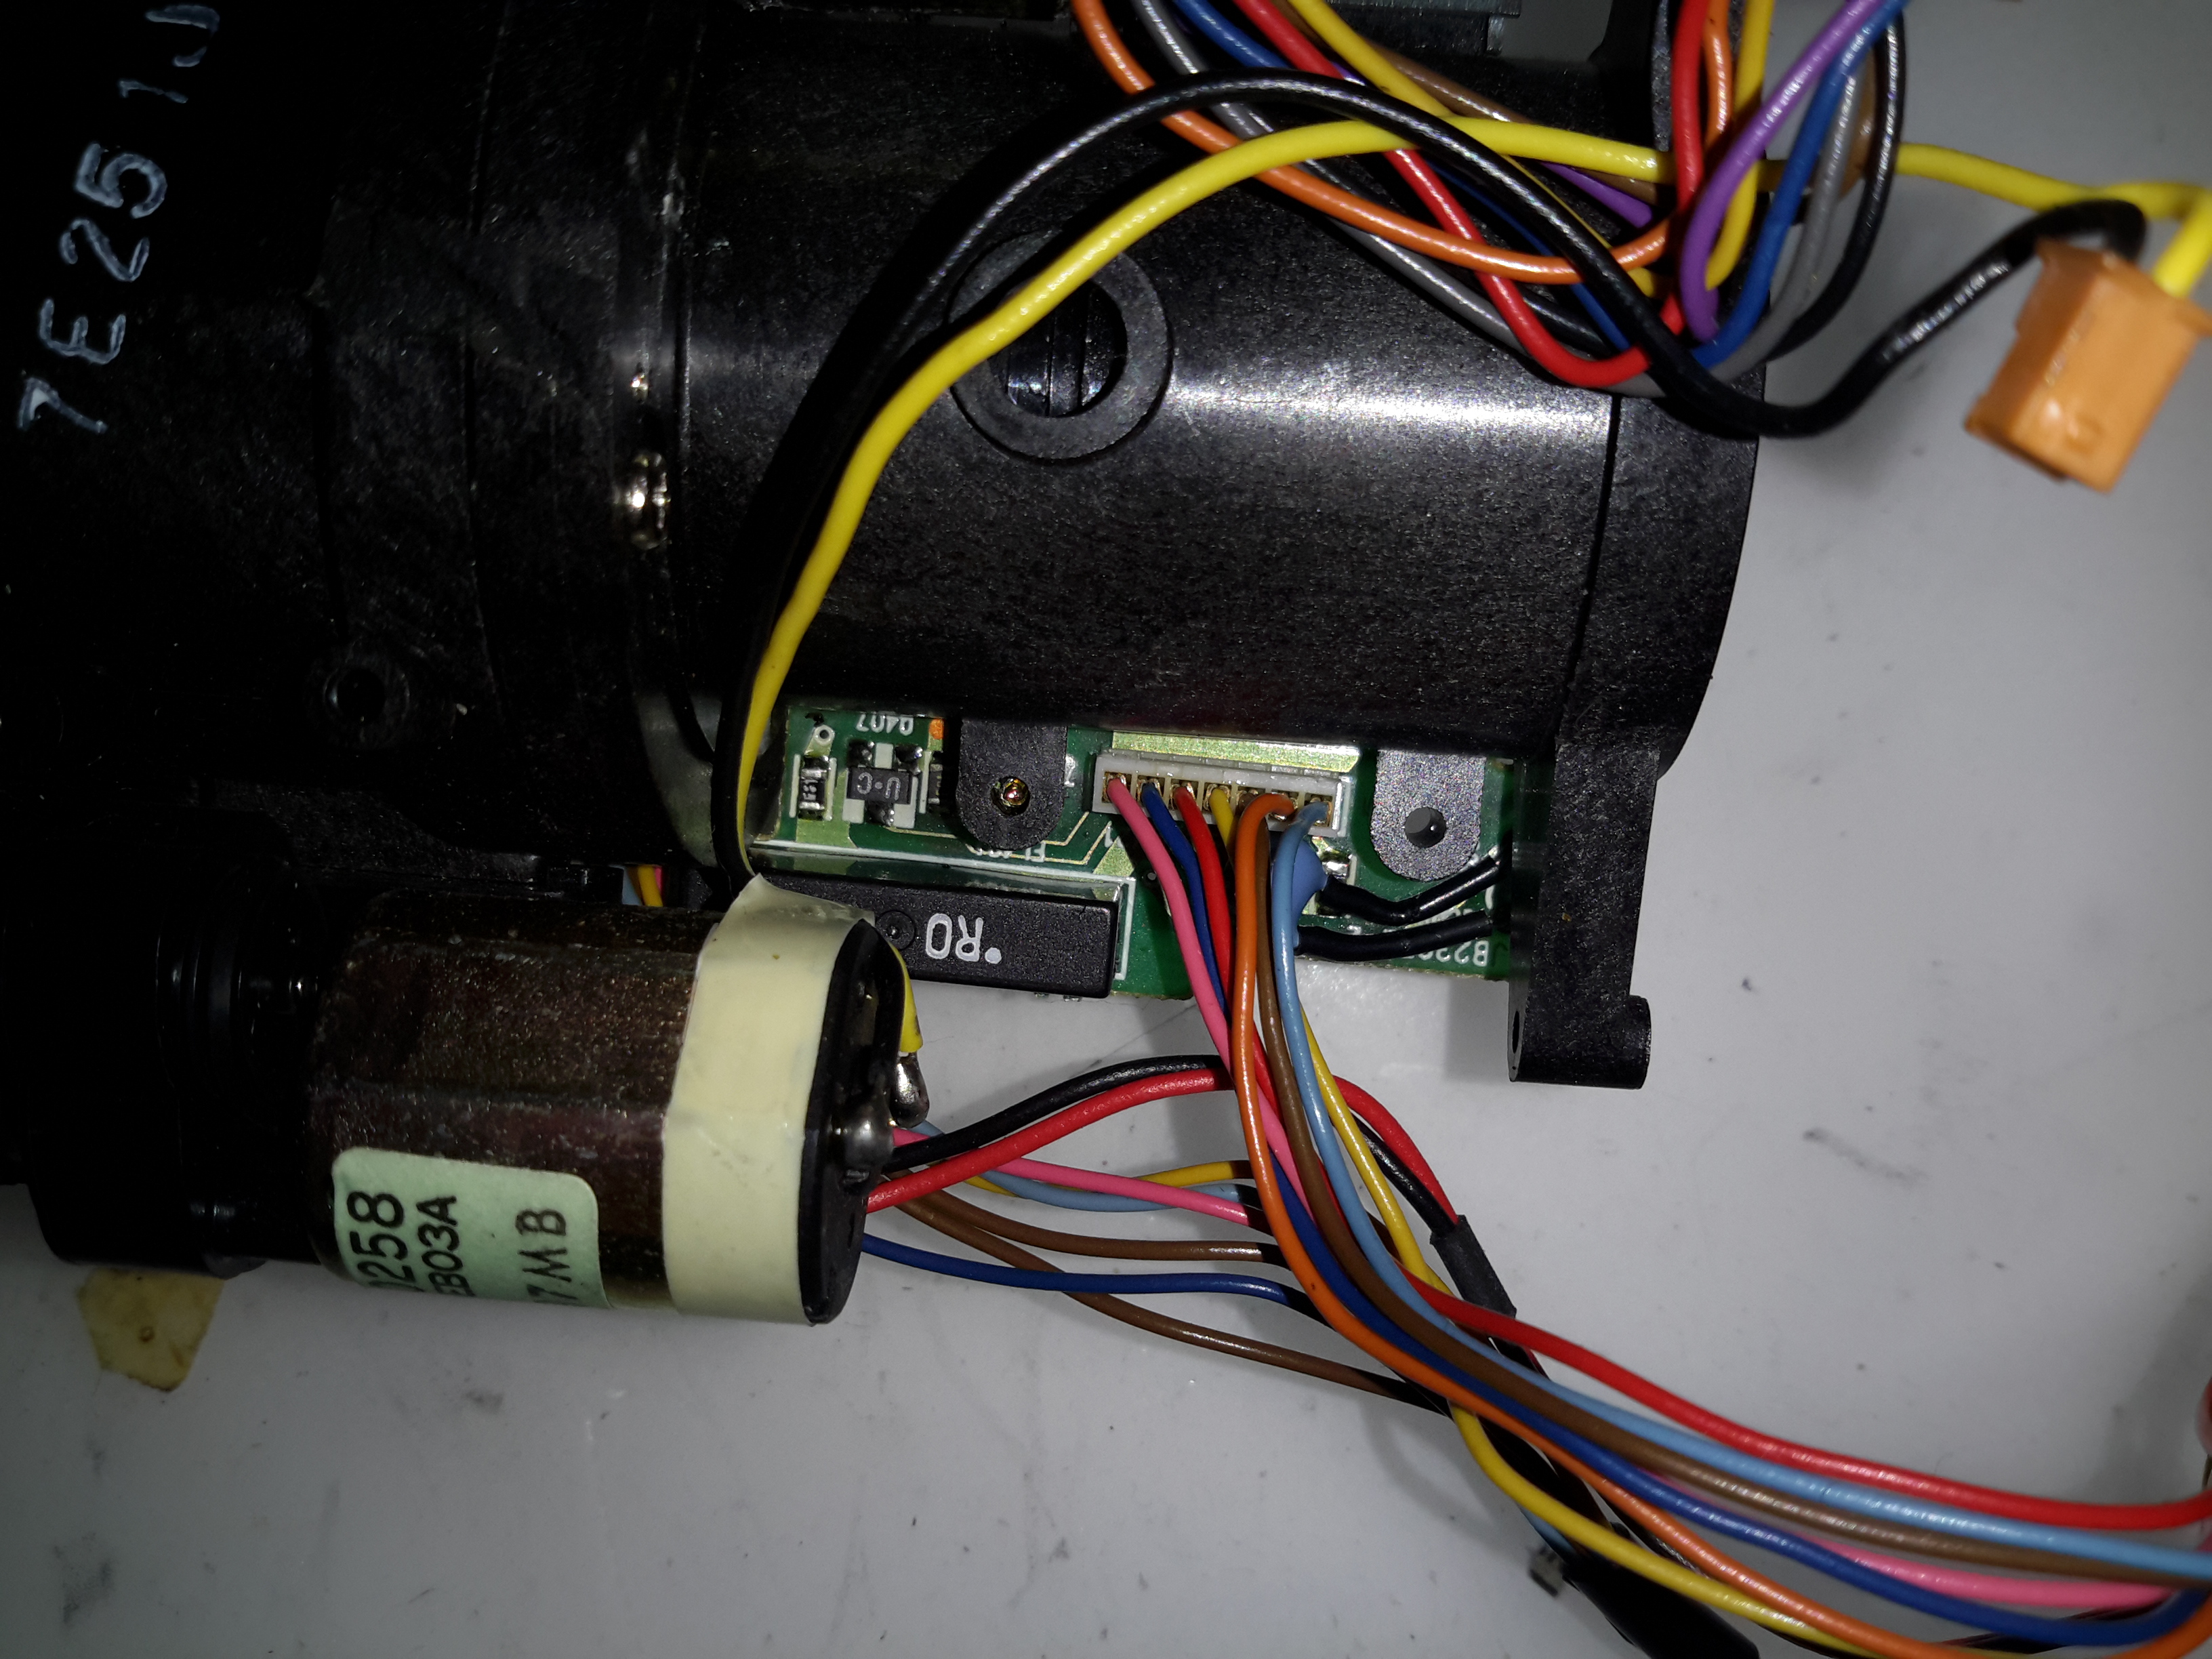
According to the schematic, there’s nothing much on this board, just a delay line & a few transistors.
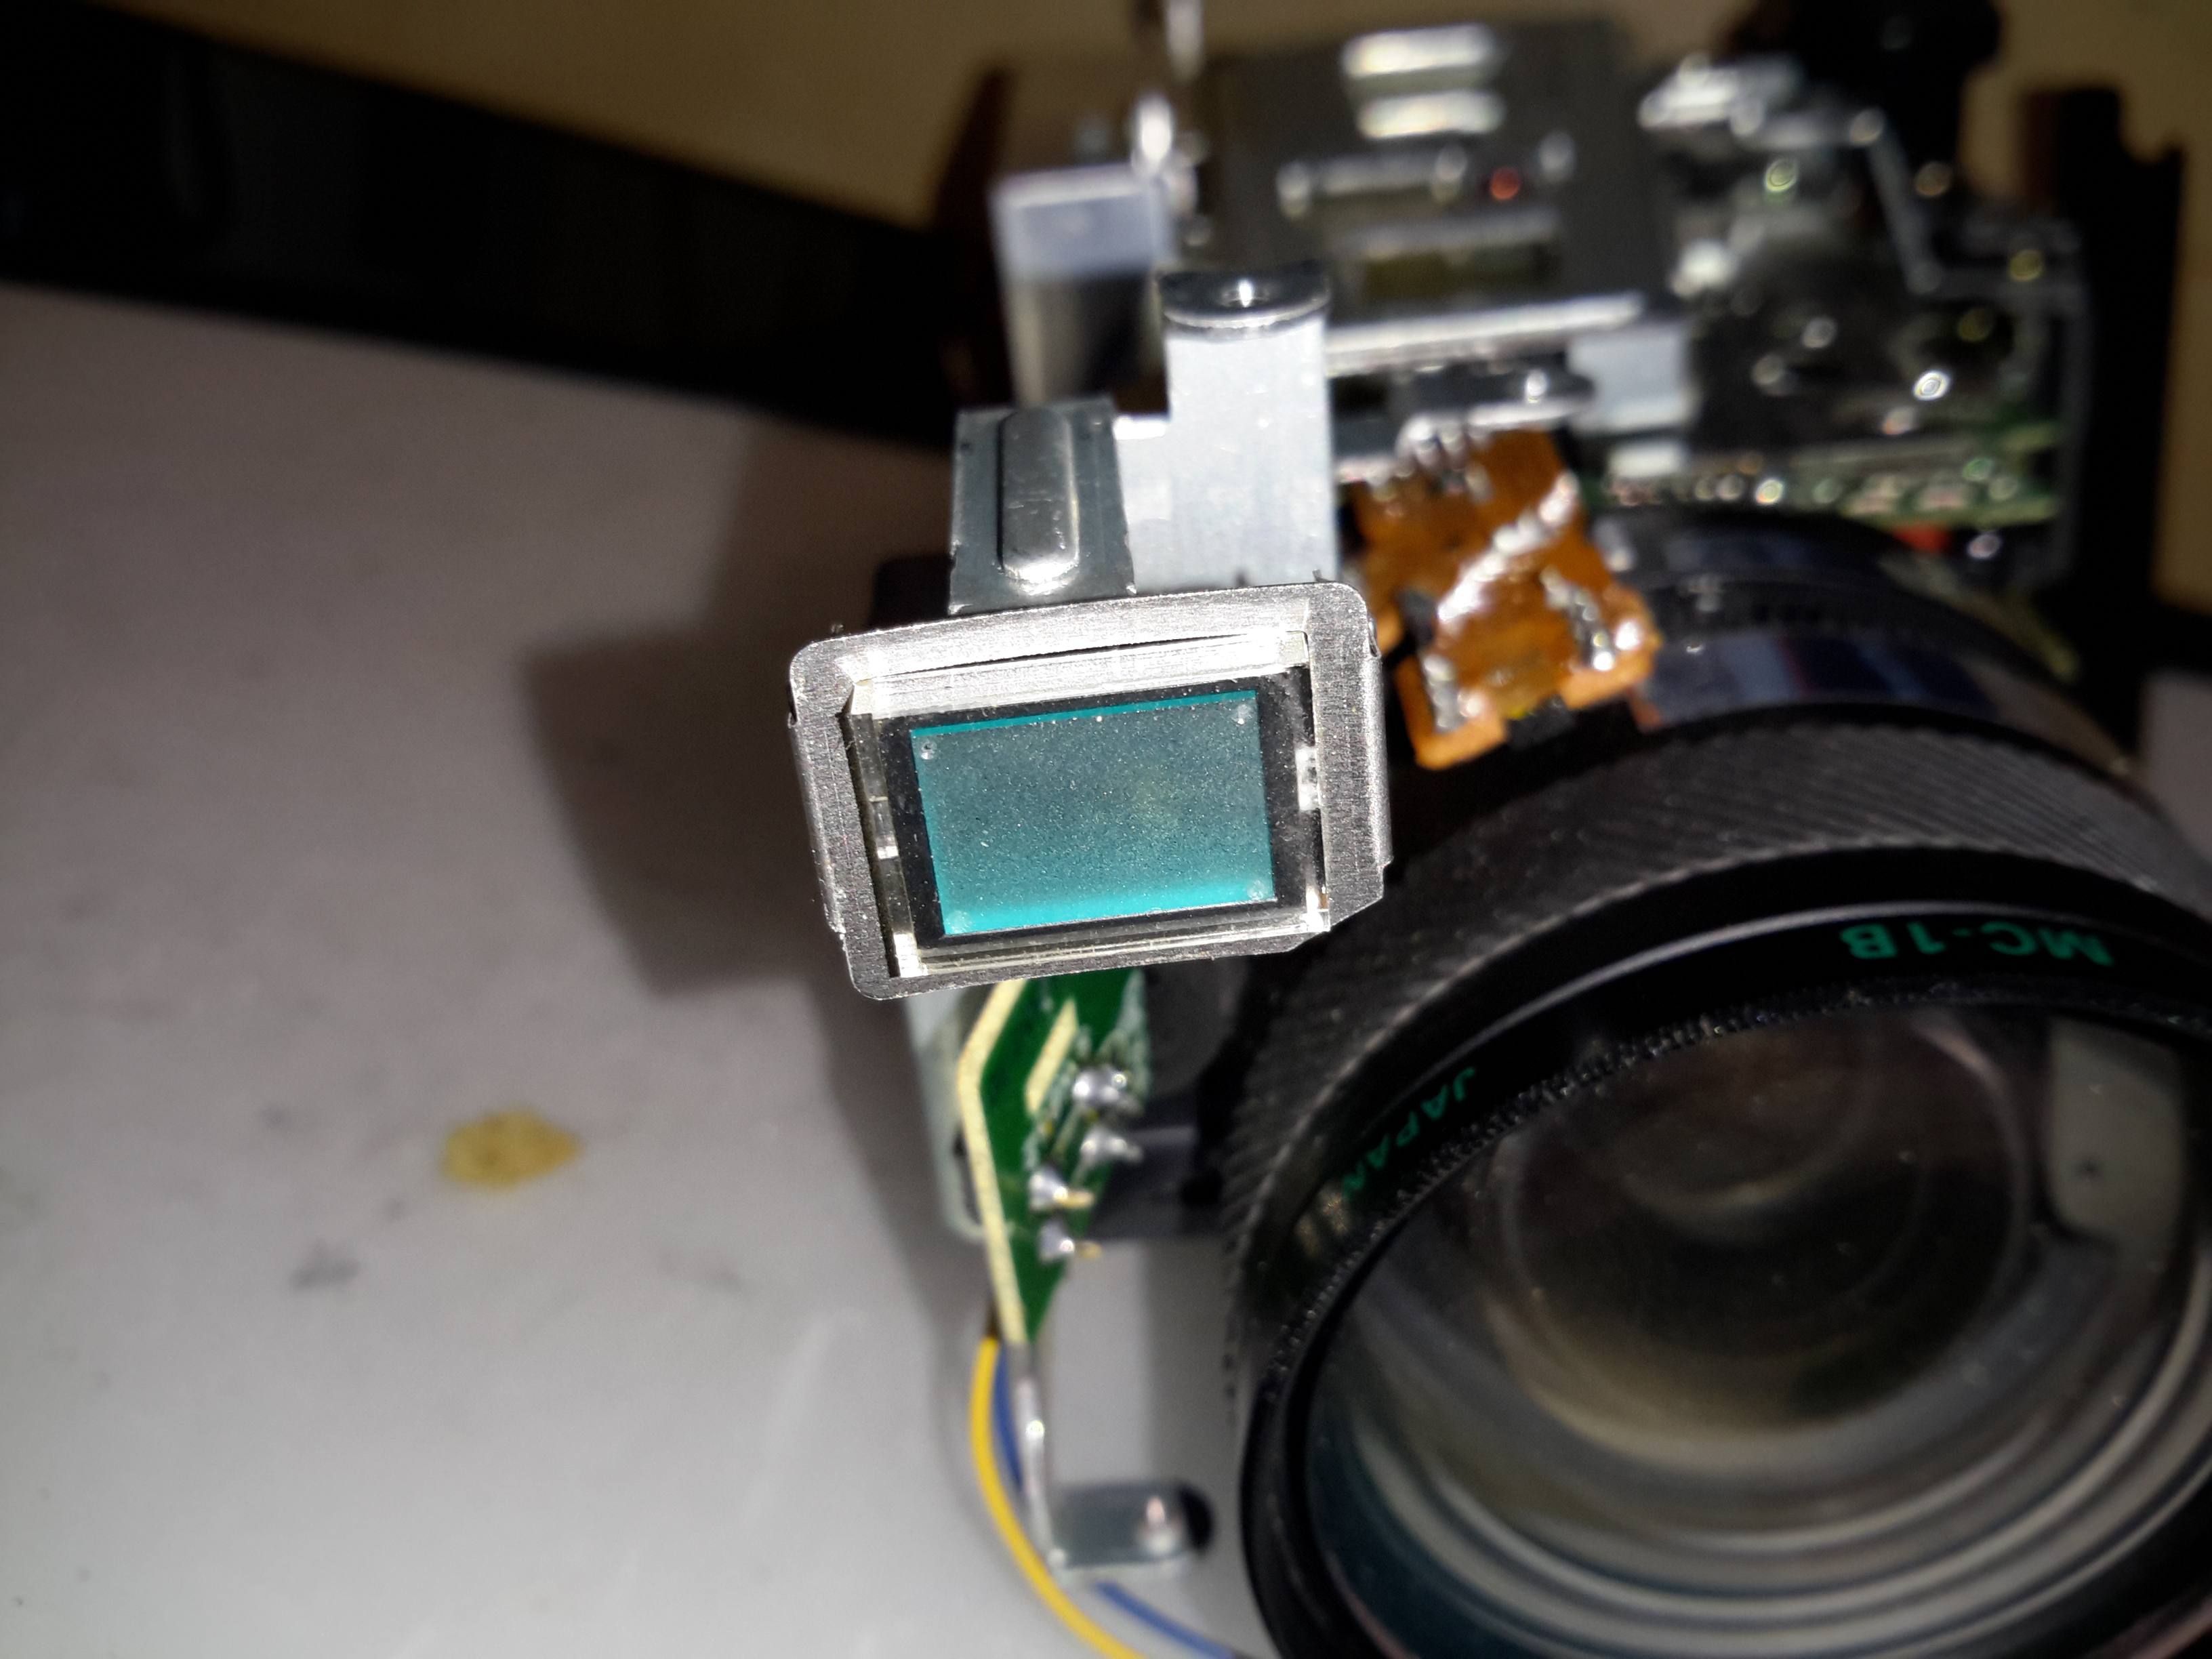
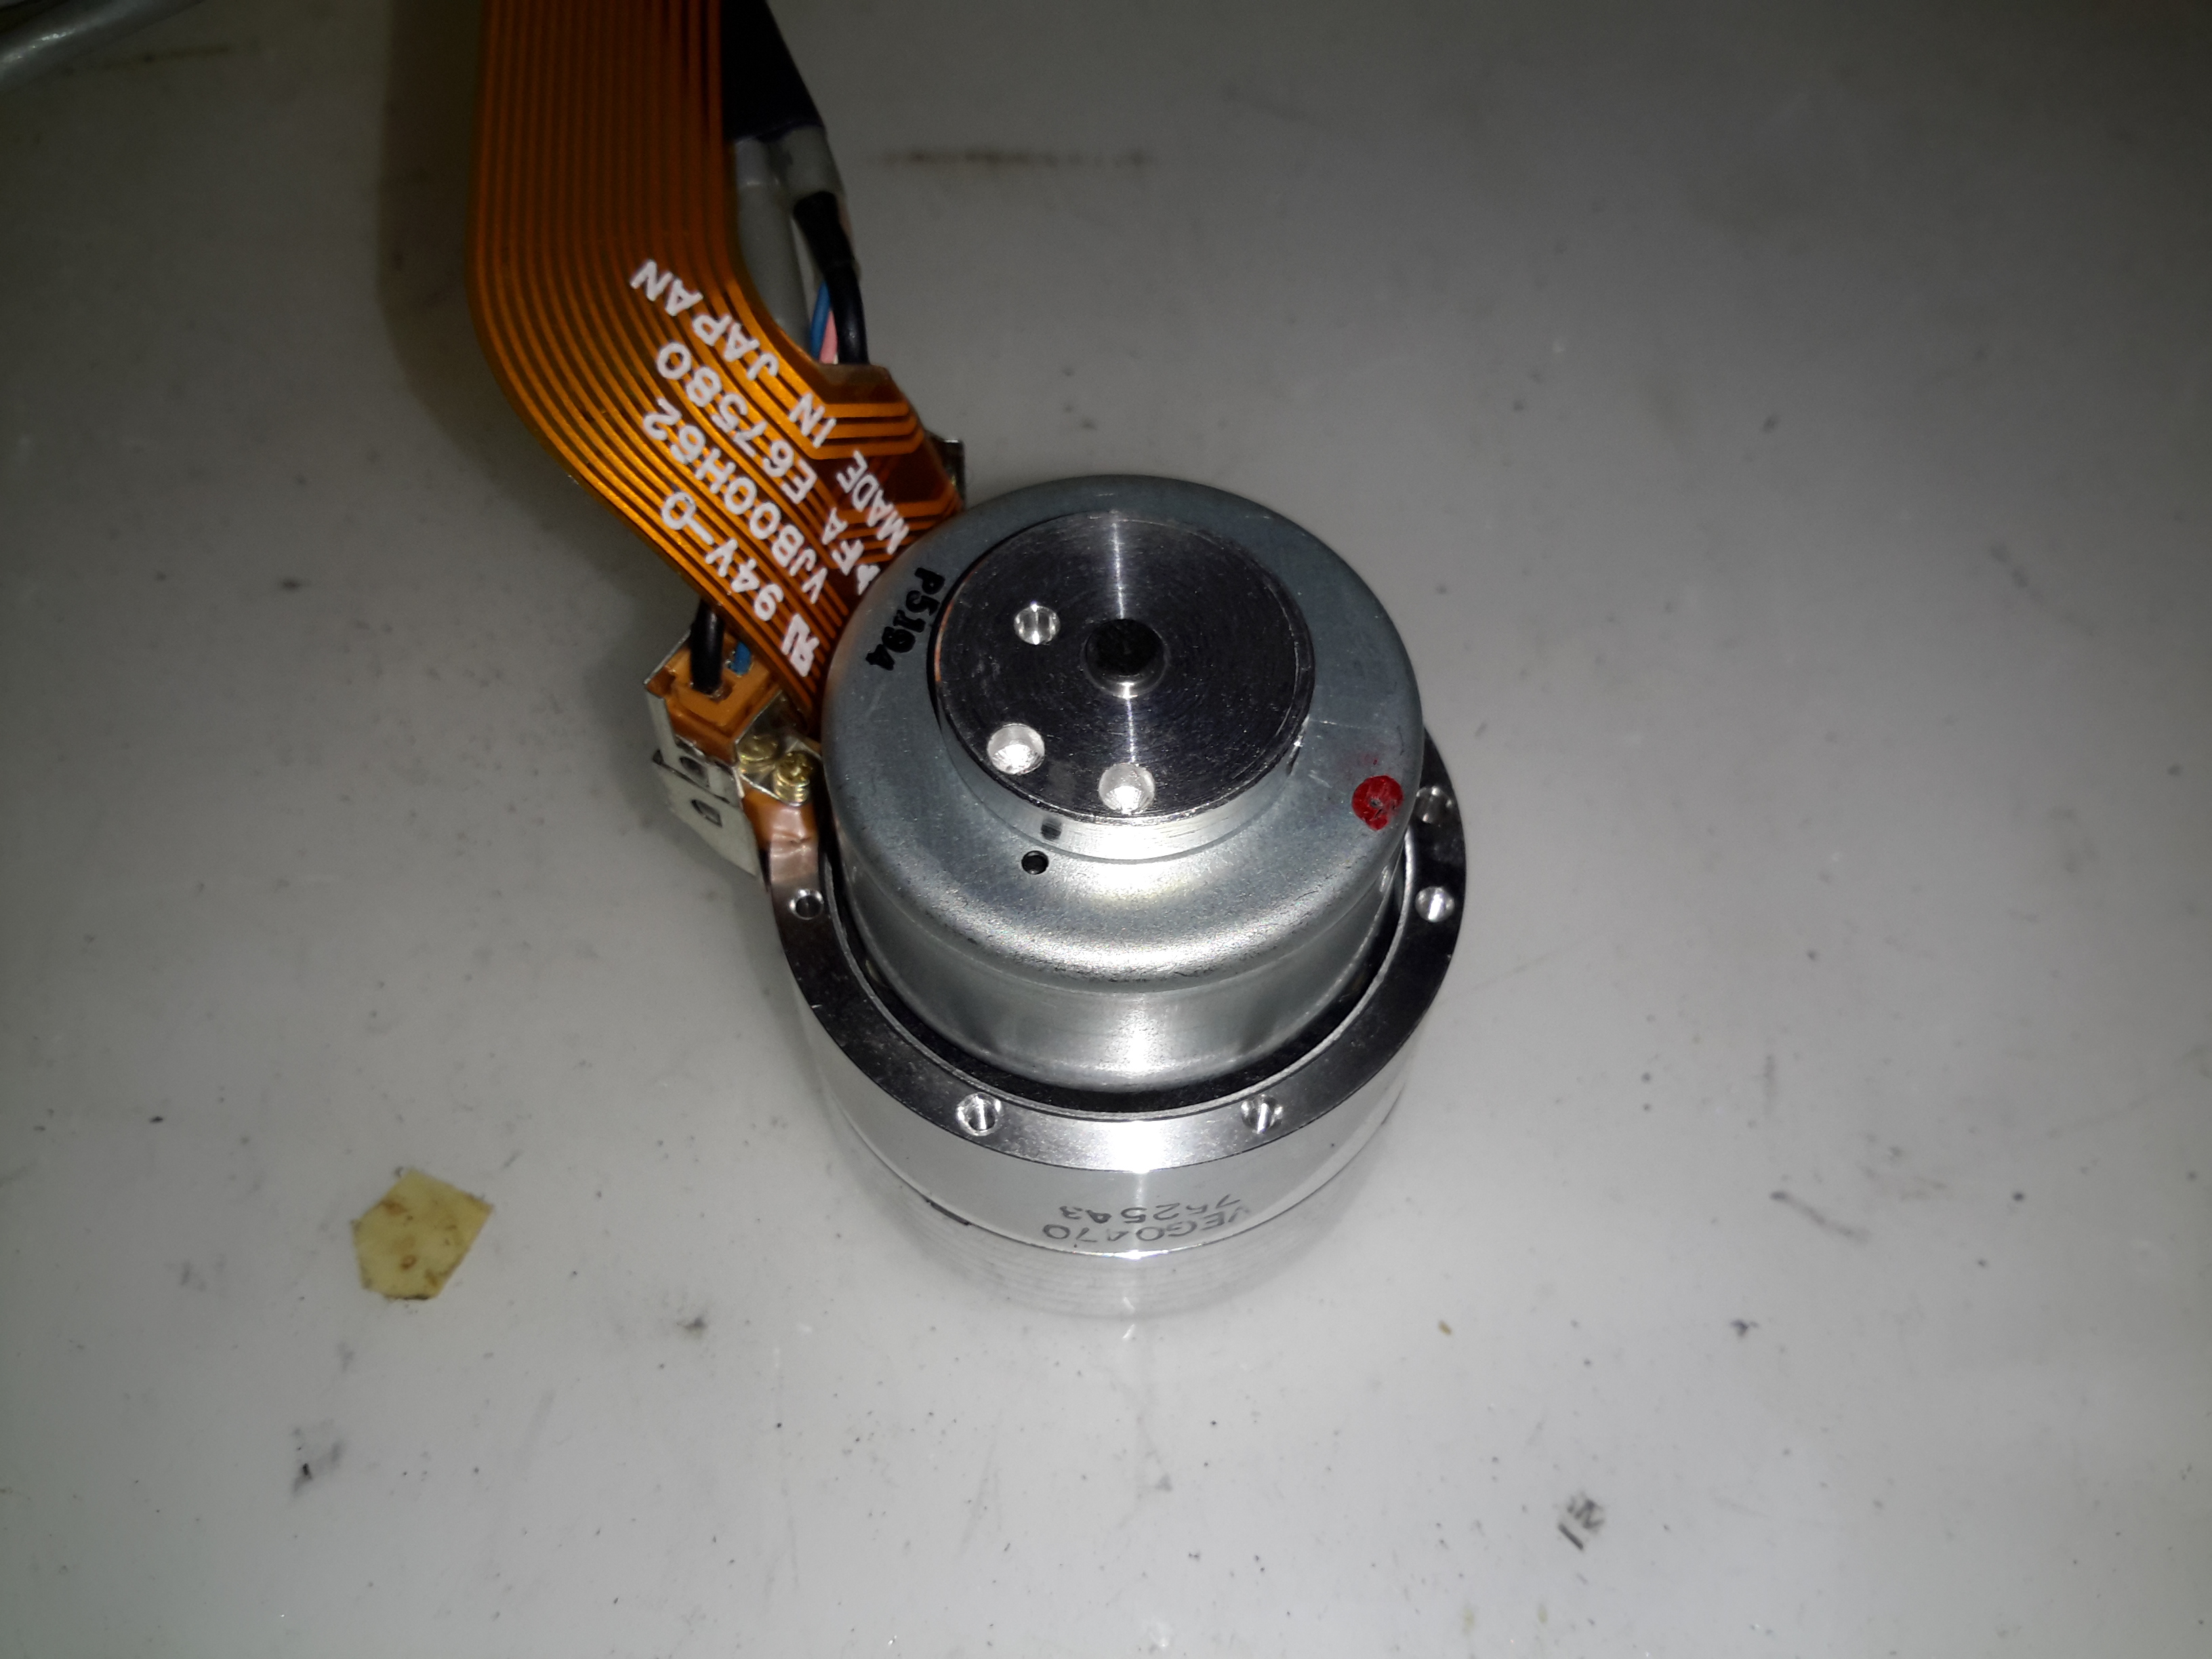
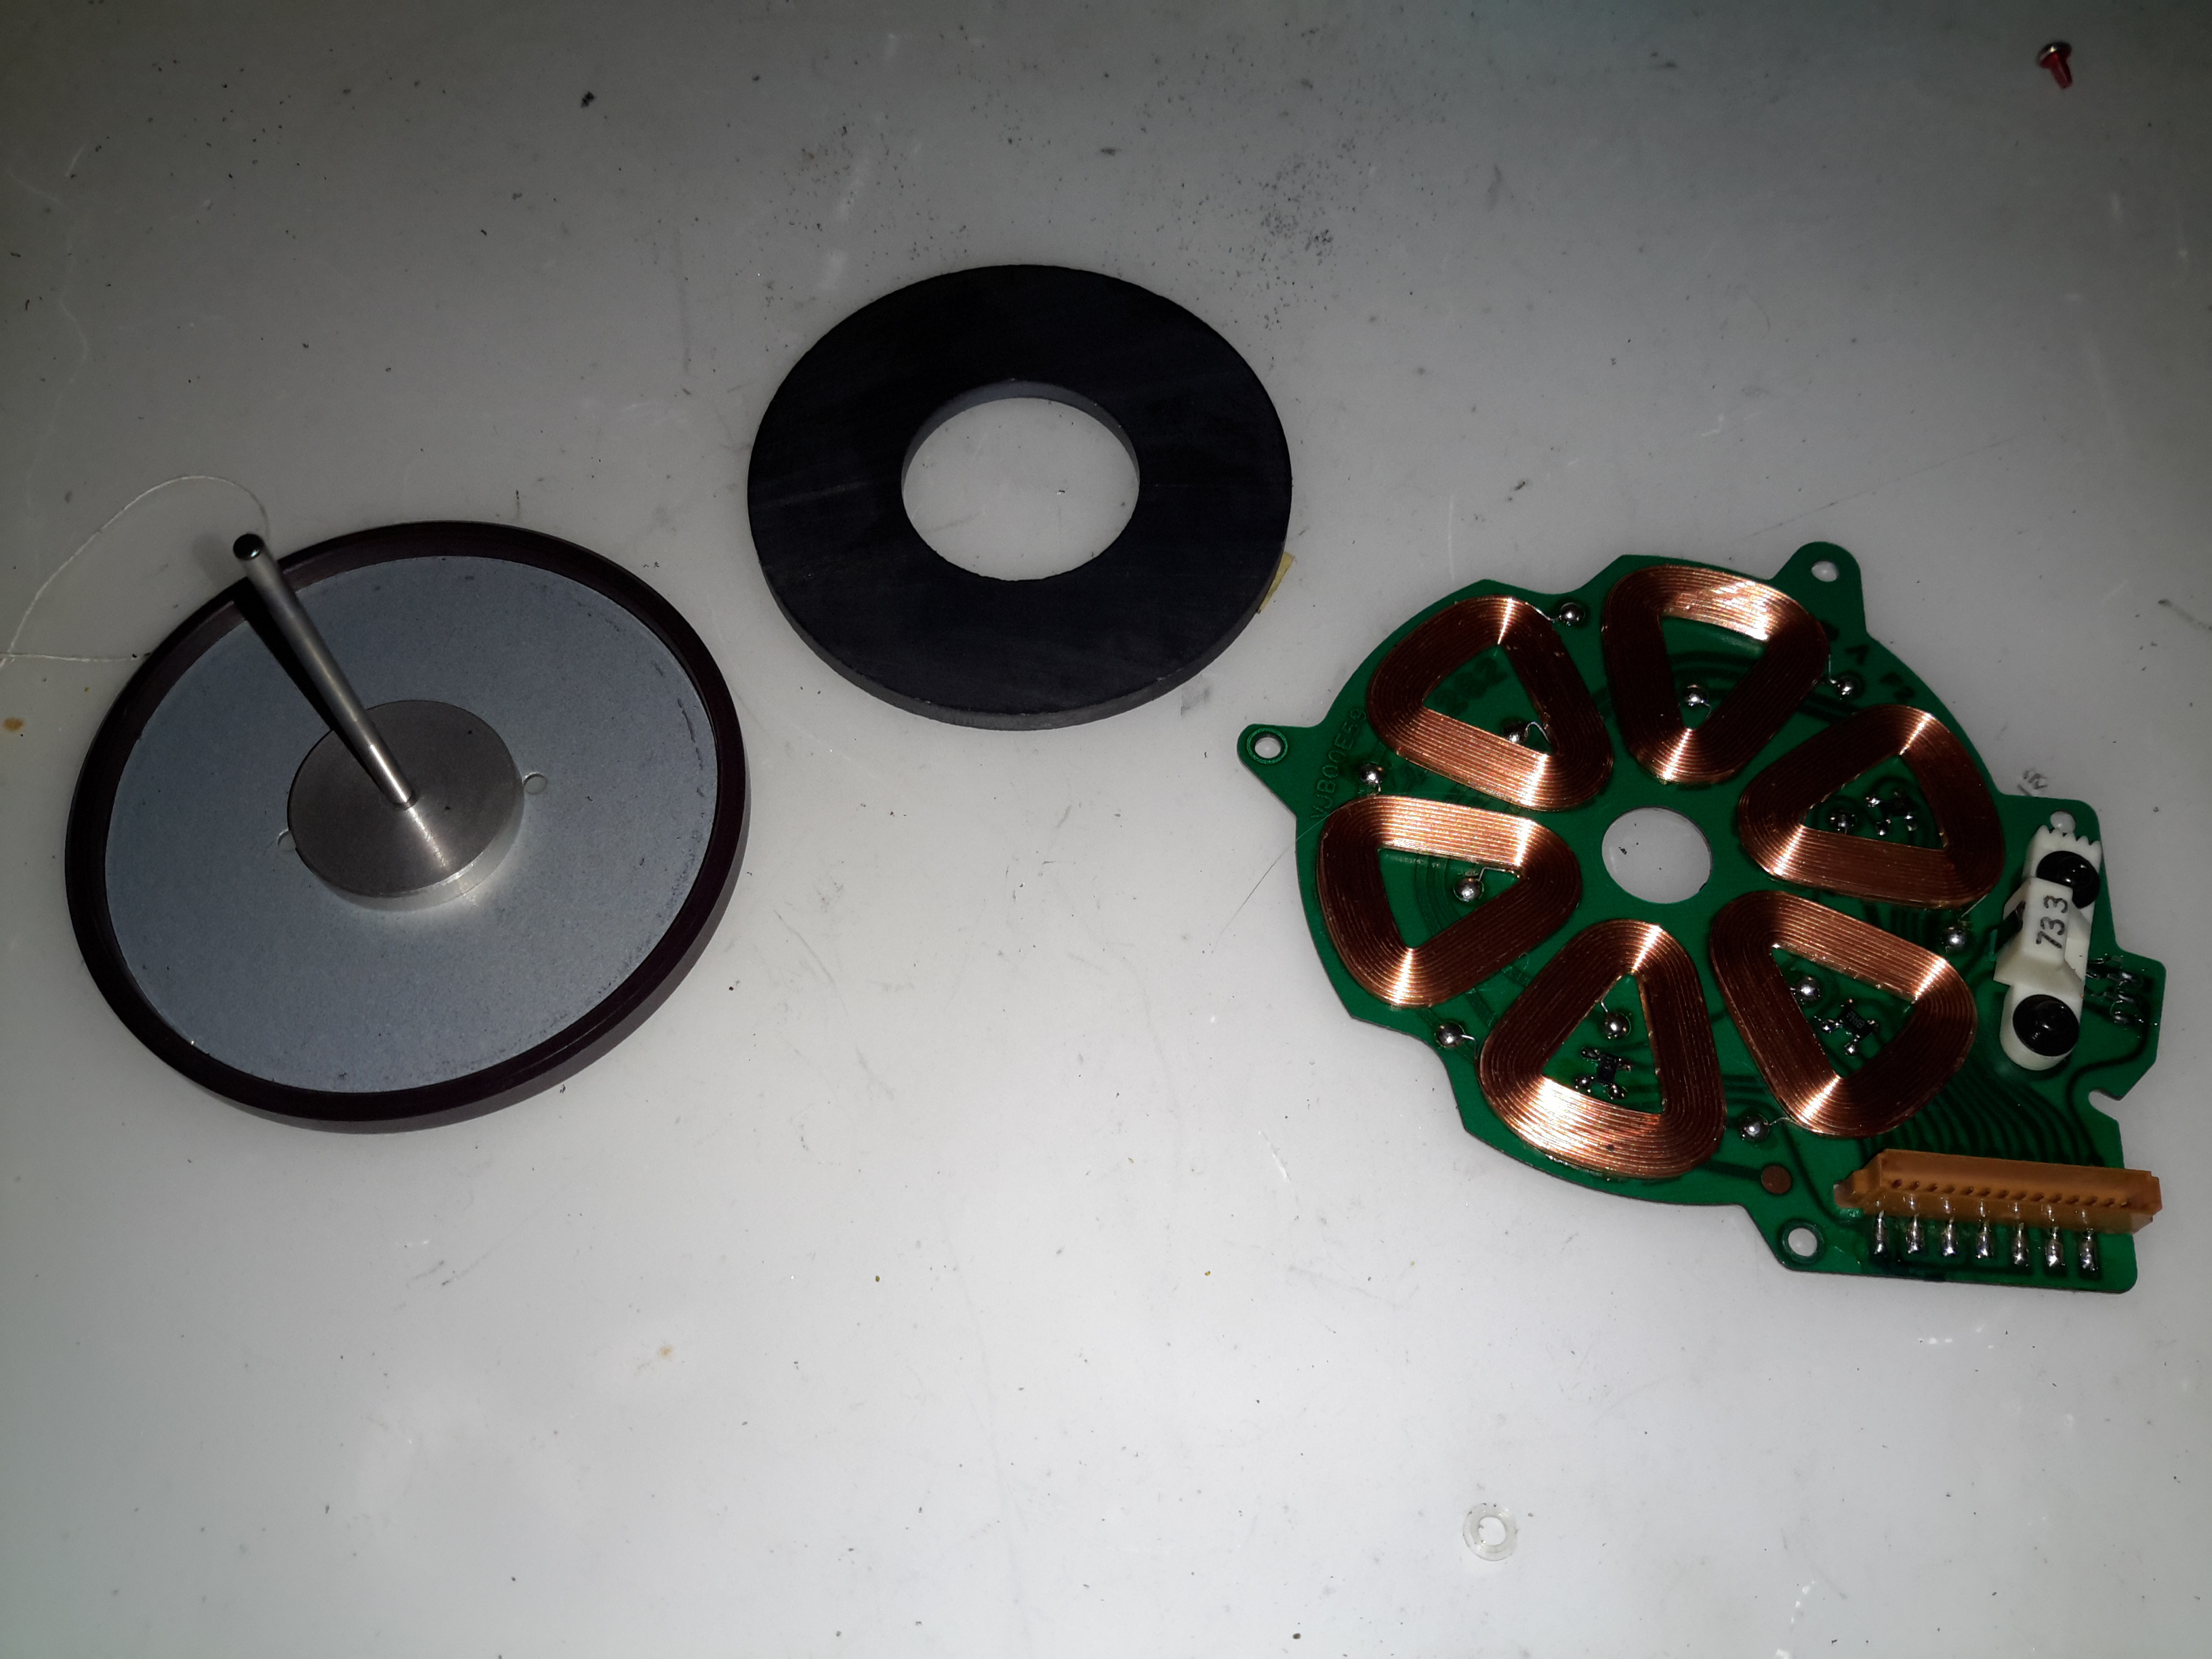
Here’s the reason for the heavy alloy casing at the CCD mounting end of the optics: the fine focus adjustment is done with a piezoelectric disc, the entire CCD assembly is mounted to this board. Applying voltage to the electrodes moves the assembly slightly to alter the position of the CCD. The blue glass in the centre of the unit is the IR filter.
The barrel position sensors are these IR-reflective type.
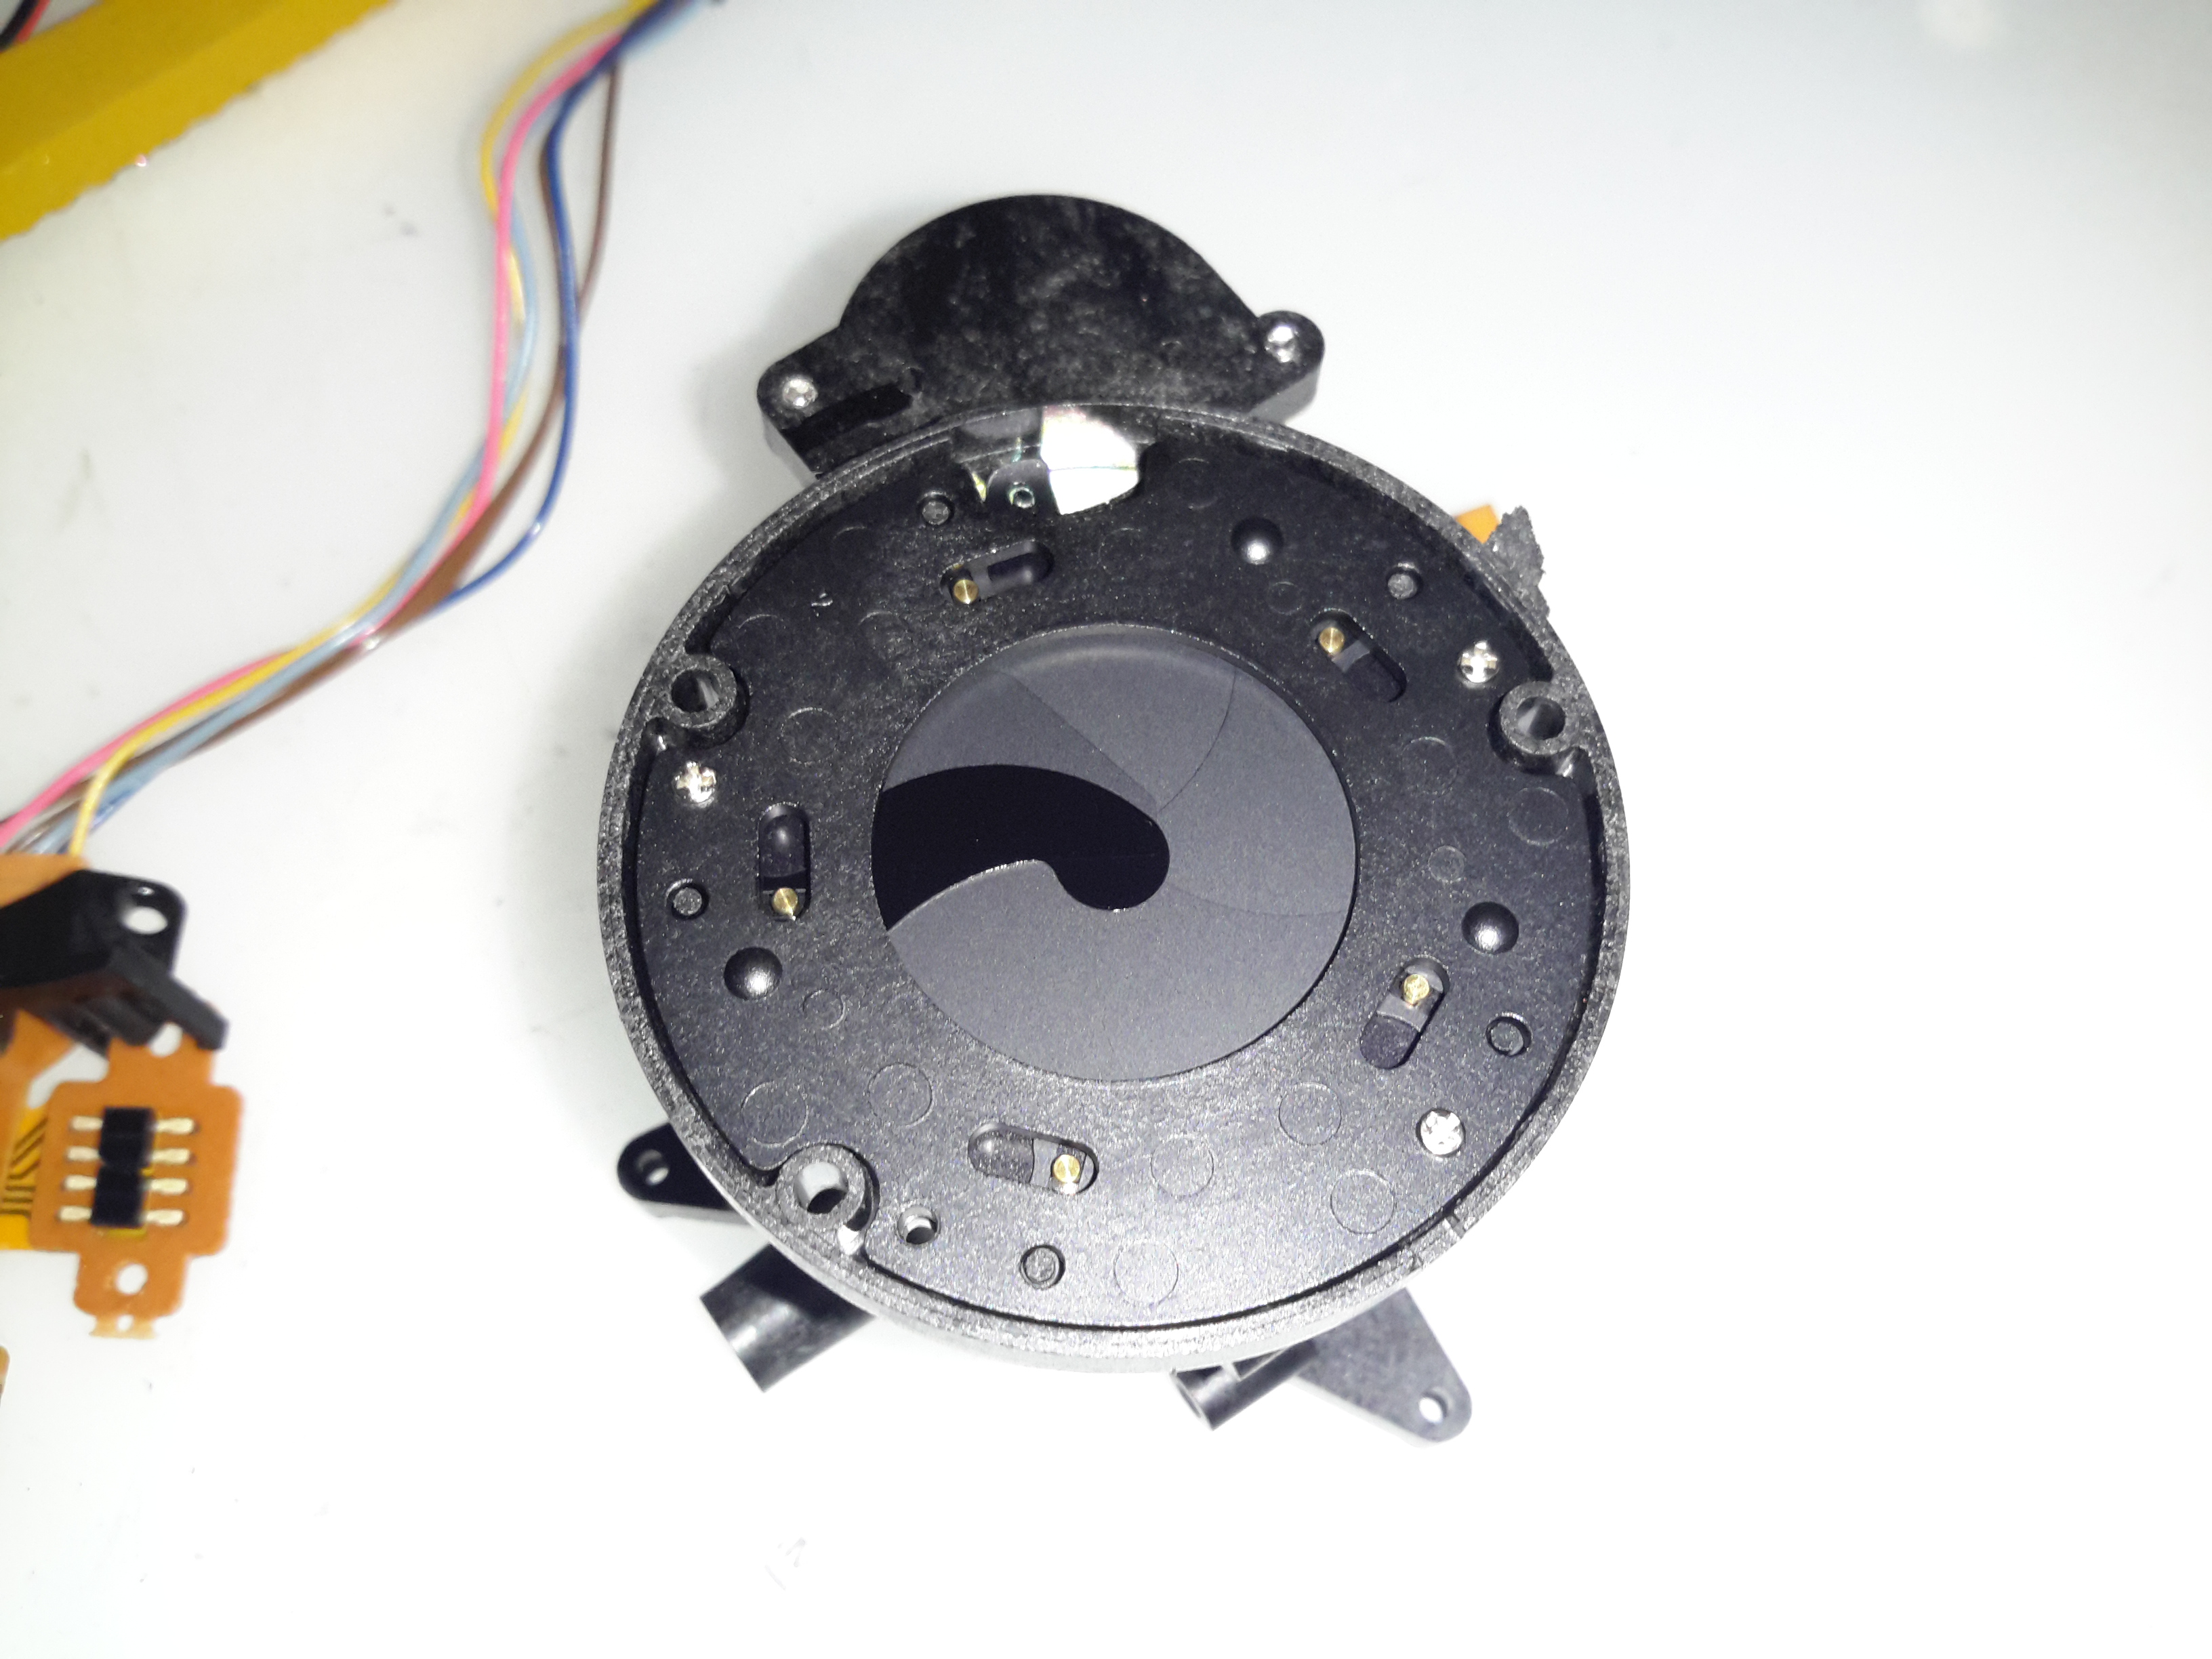
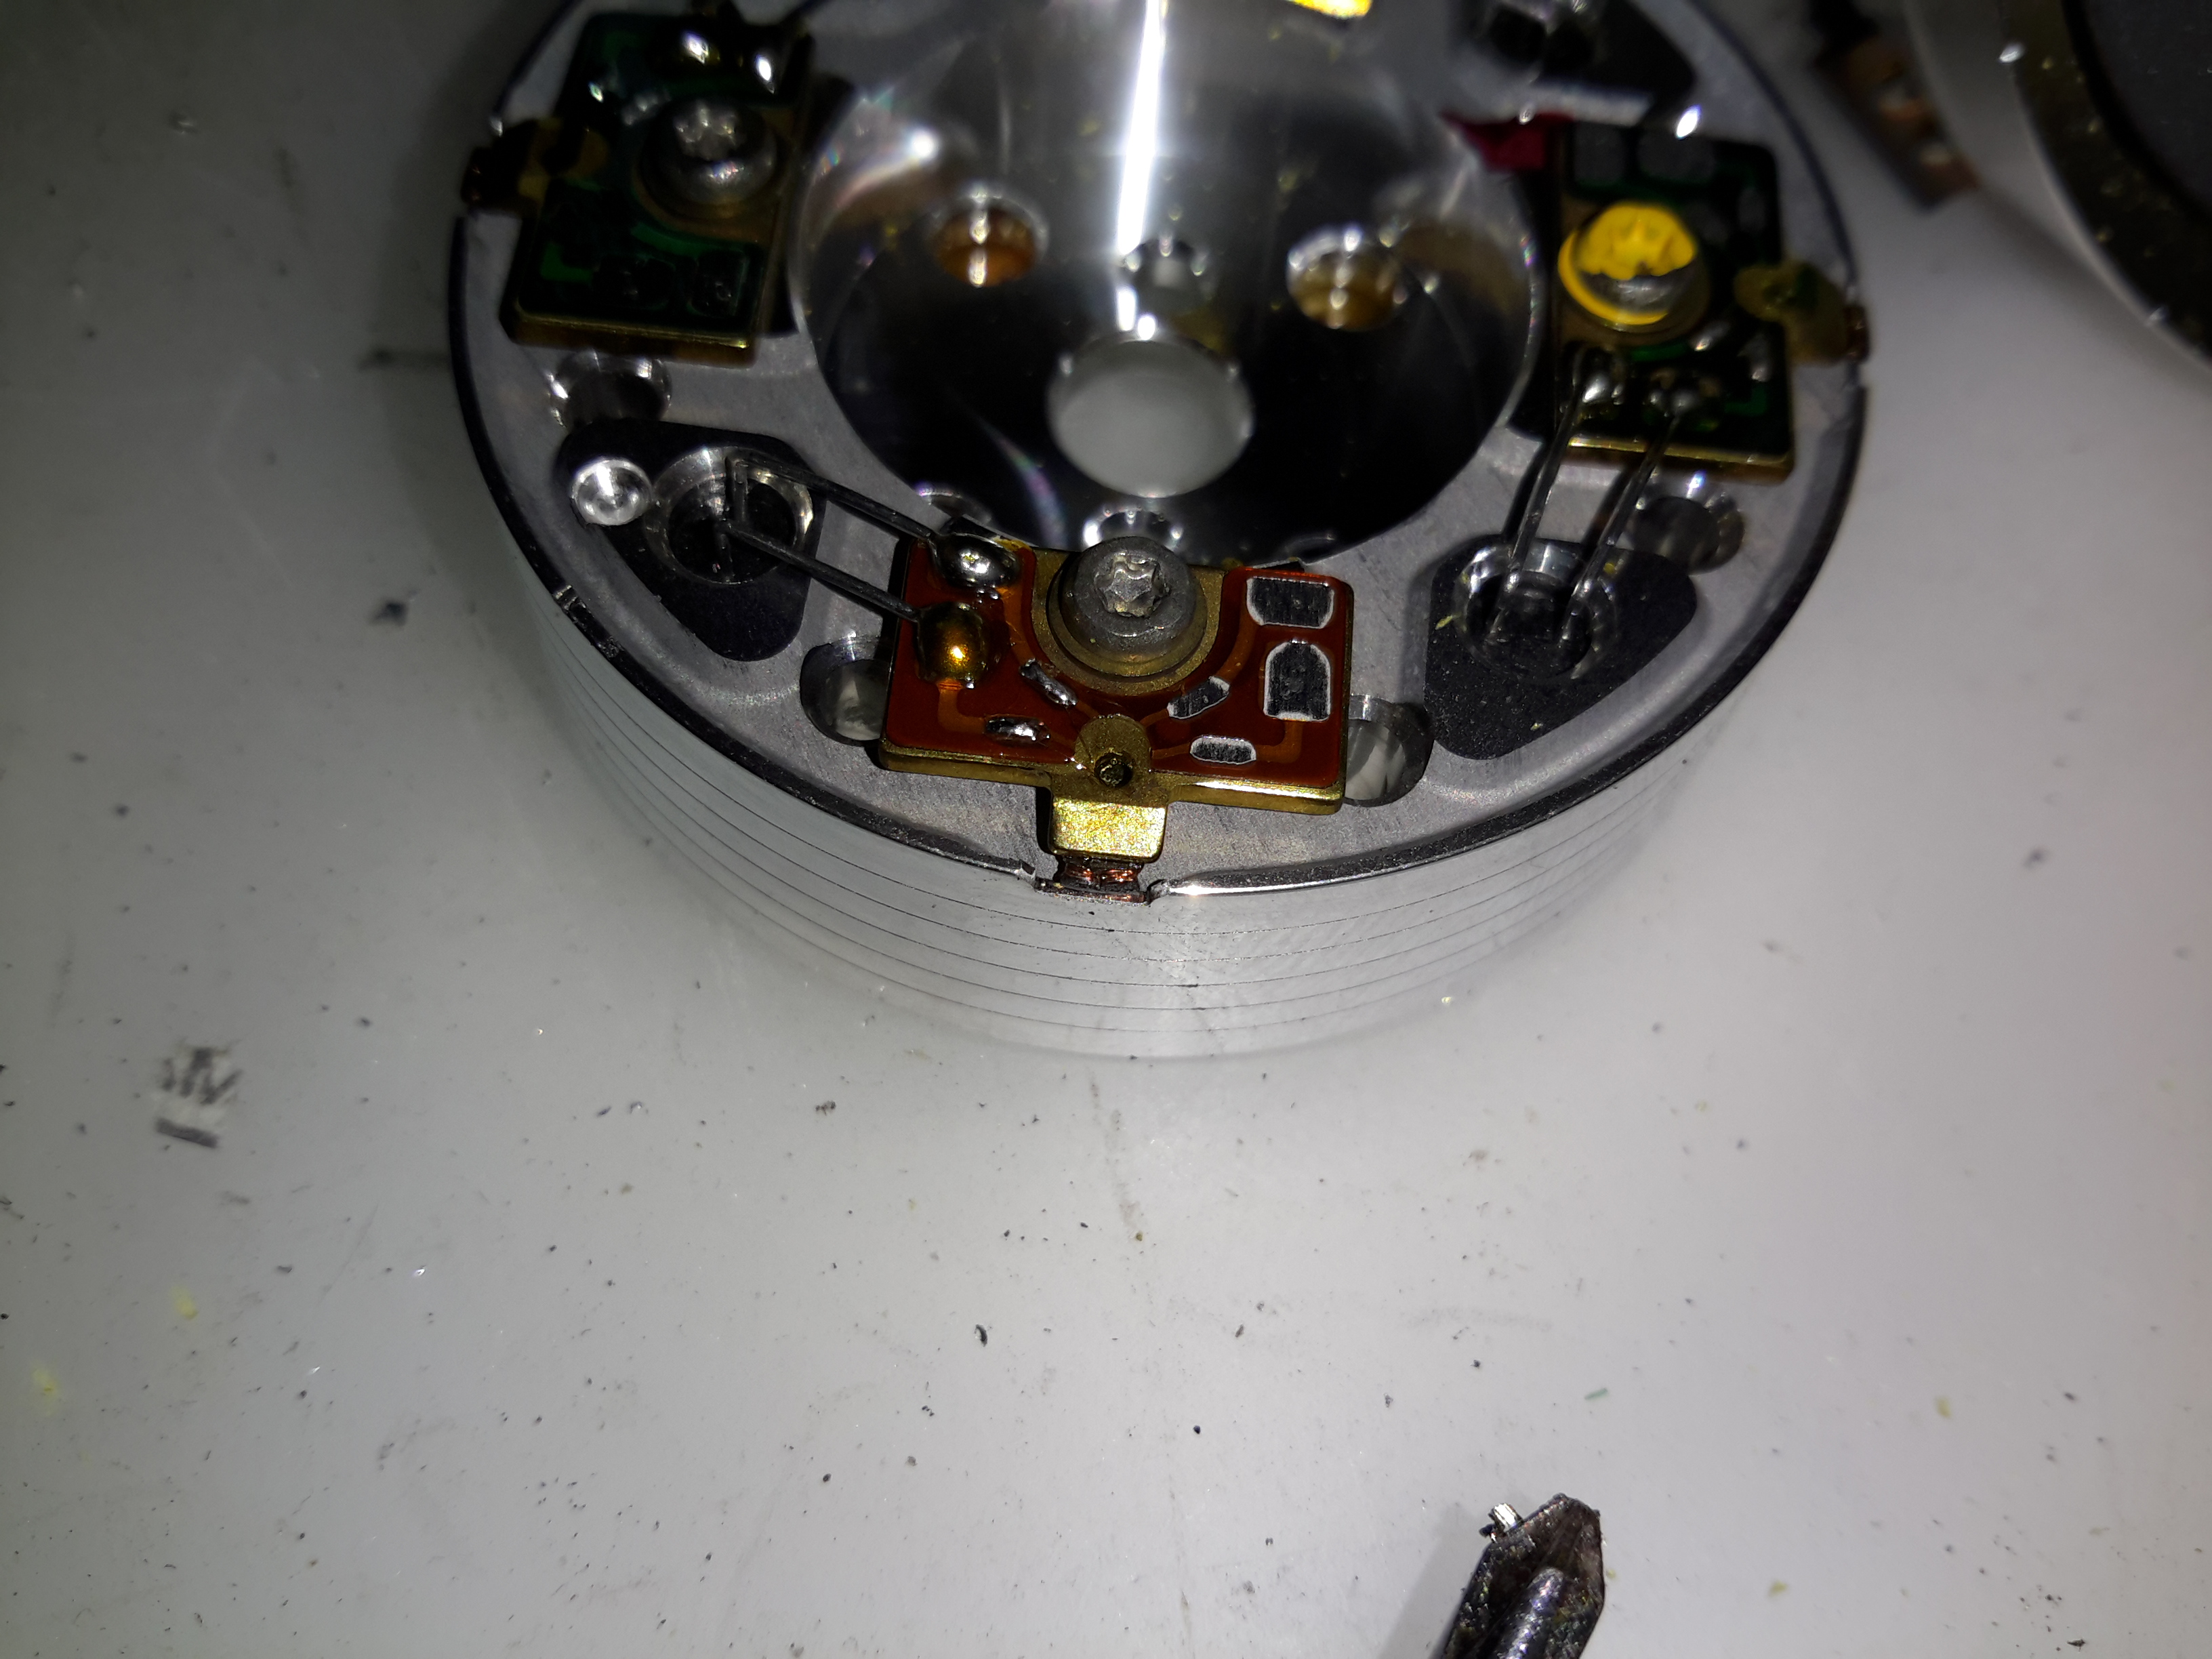
The iris is mounted just before the CCD, this is controlled with a galvanometer-type device with position sensors incorporated.
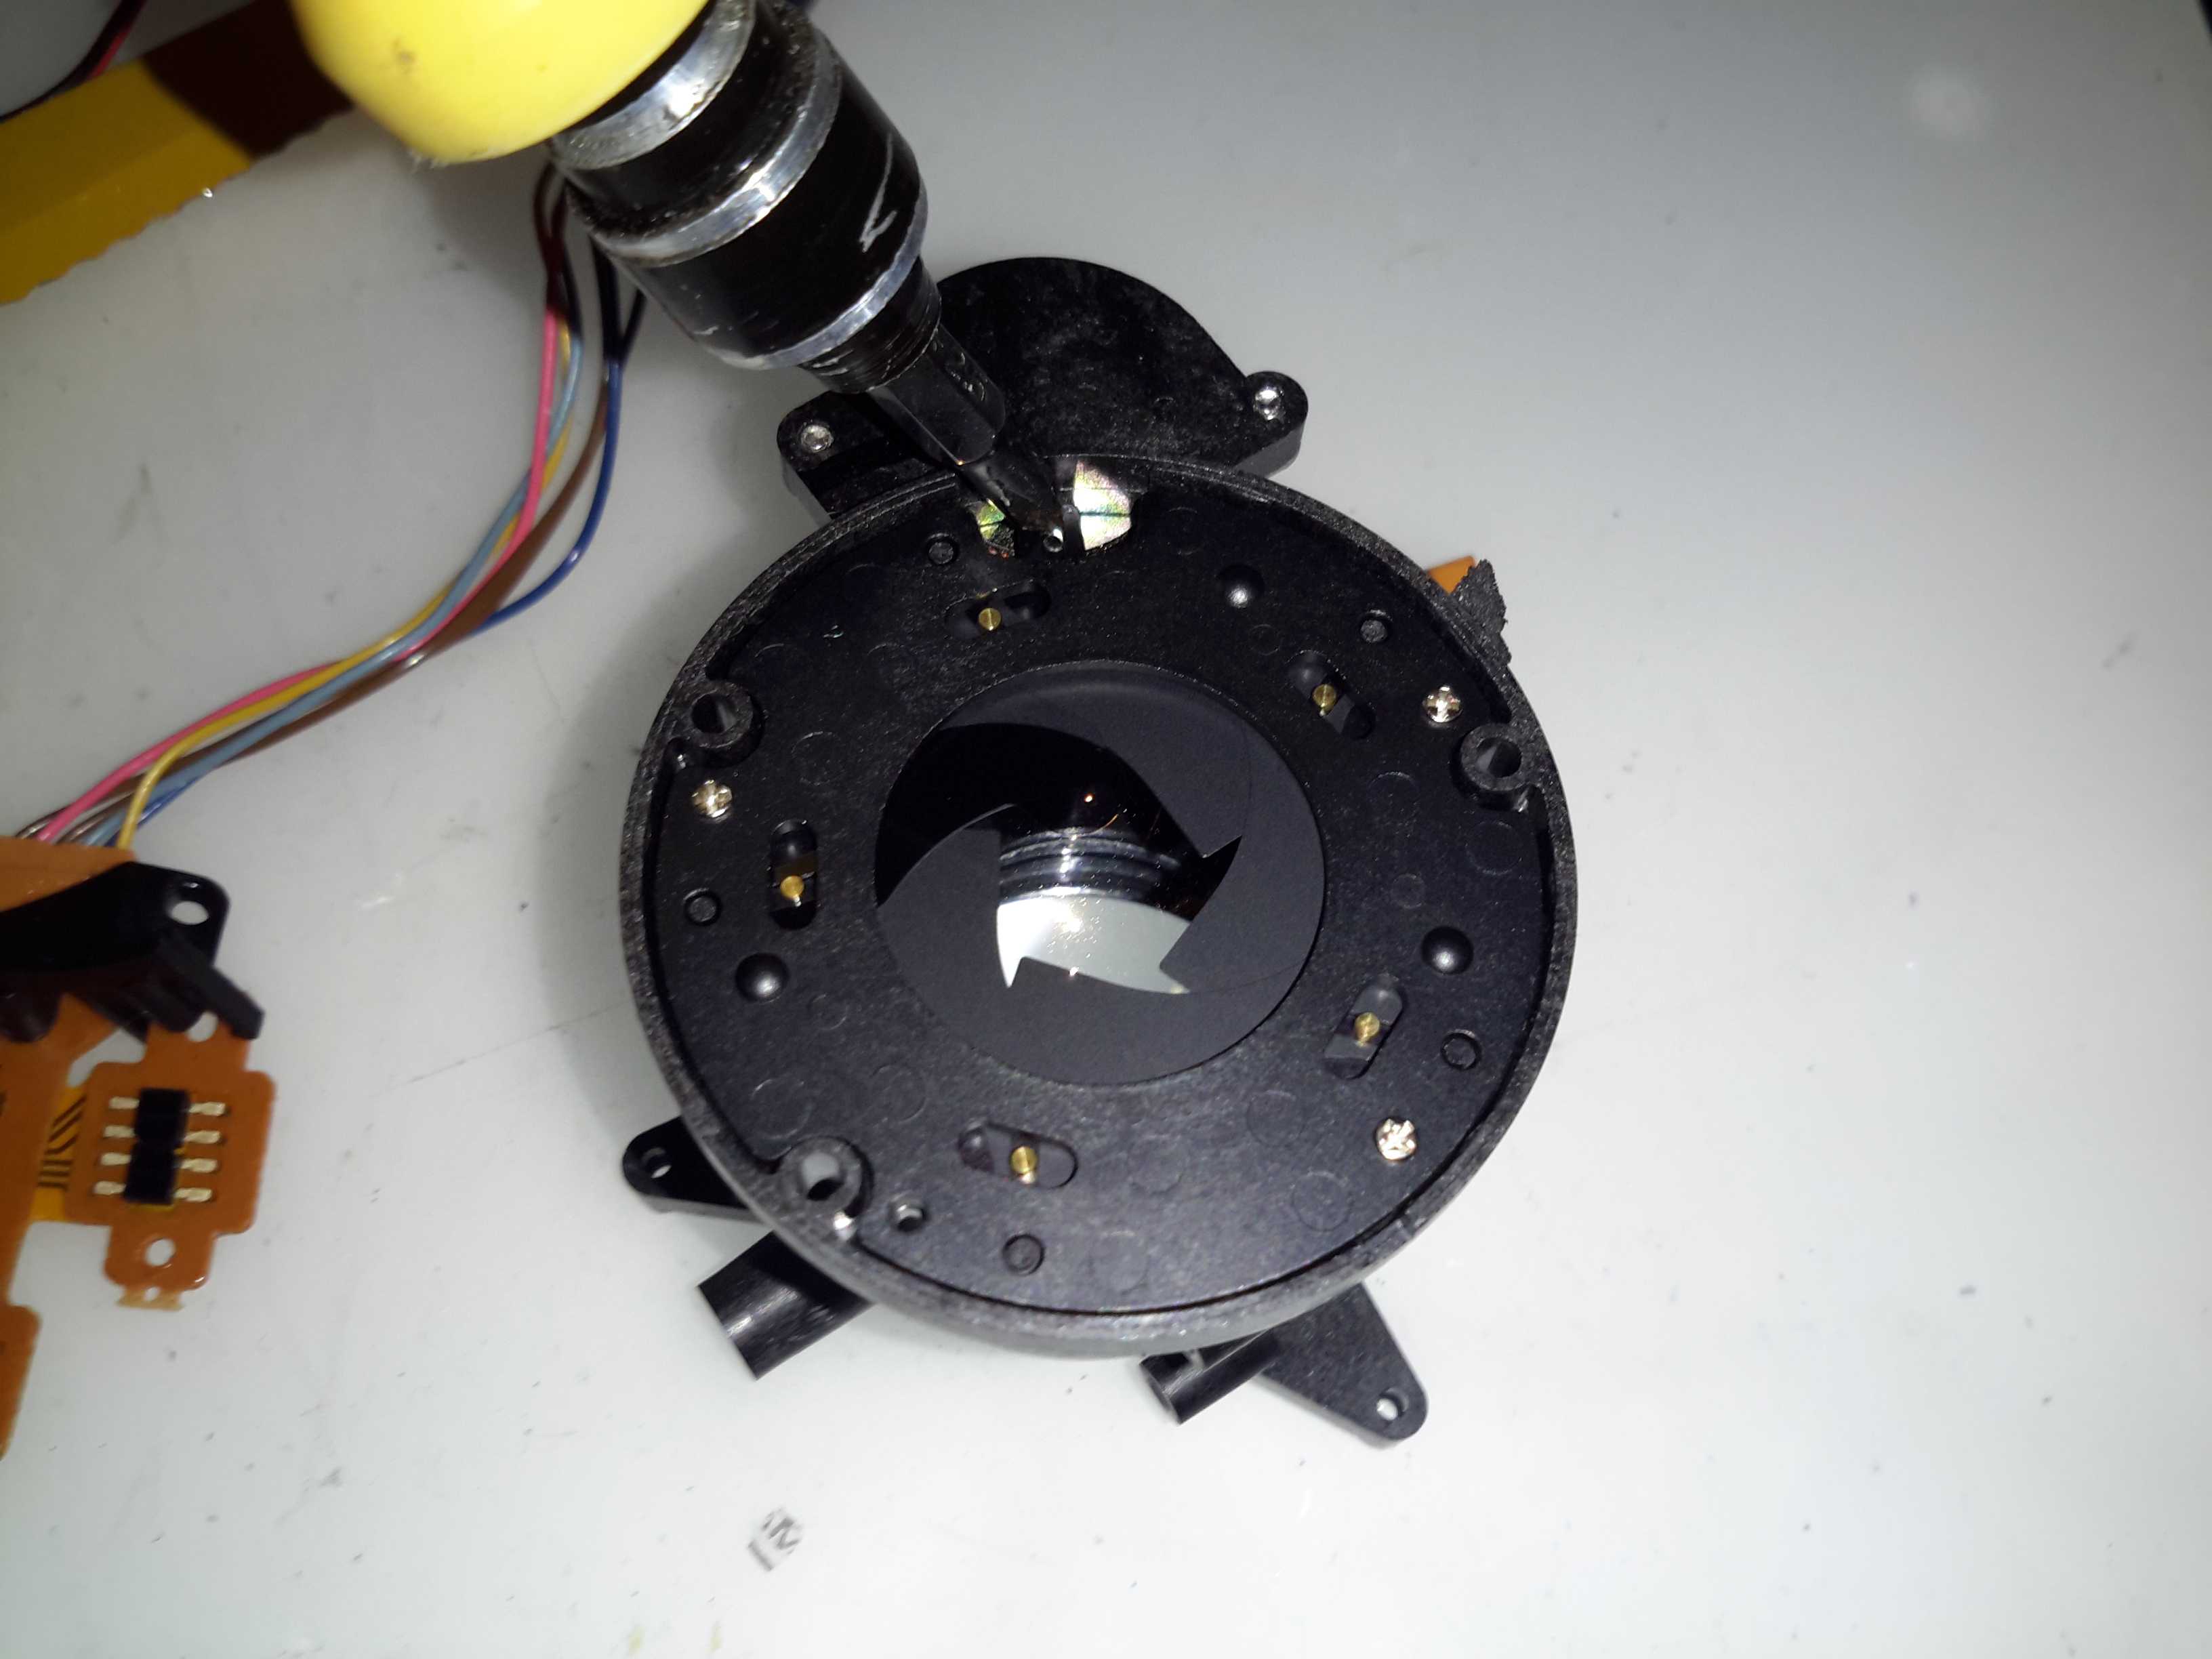
Pushing on the operating lever with the end of my screwdriver opens the leaves of the iris against the return spring.
Tape Transport & Main Control
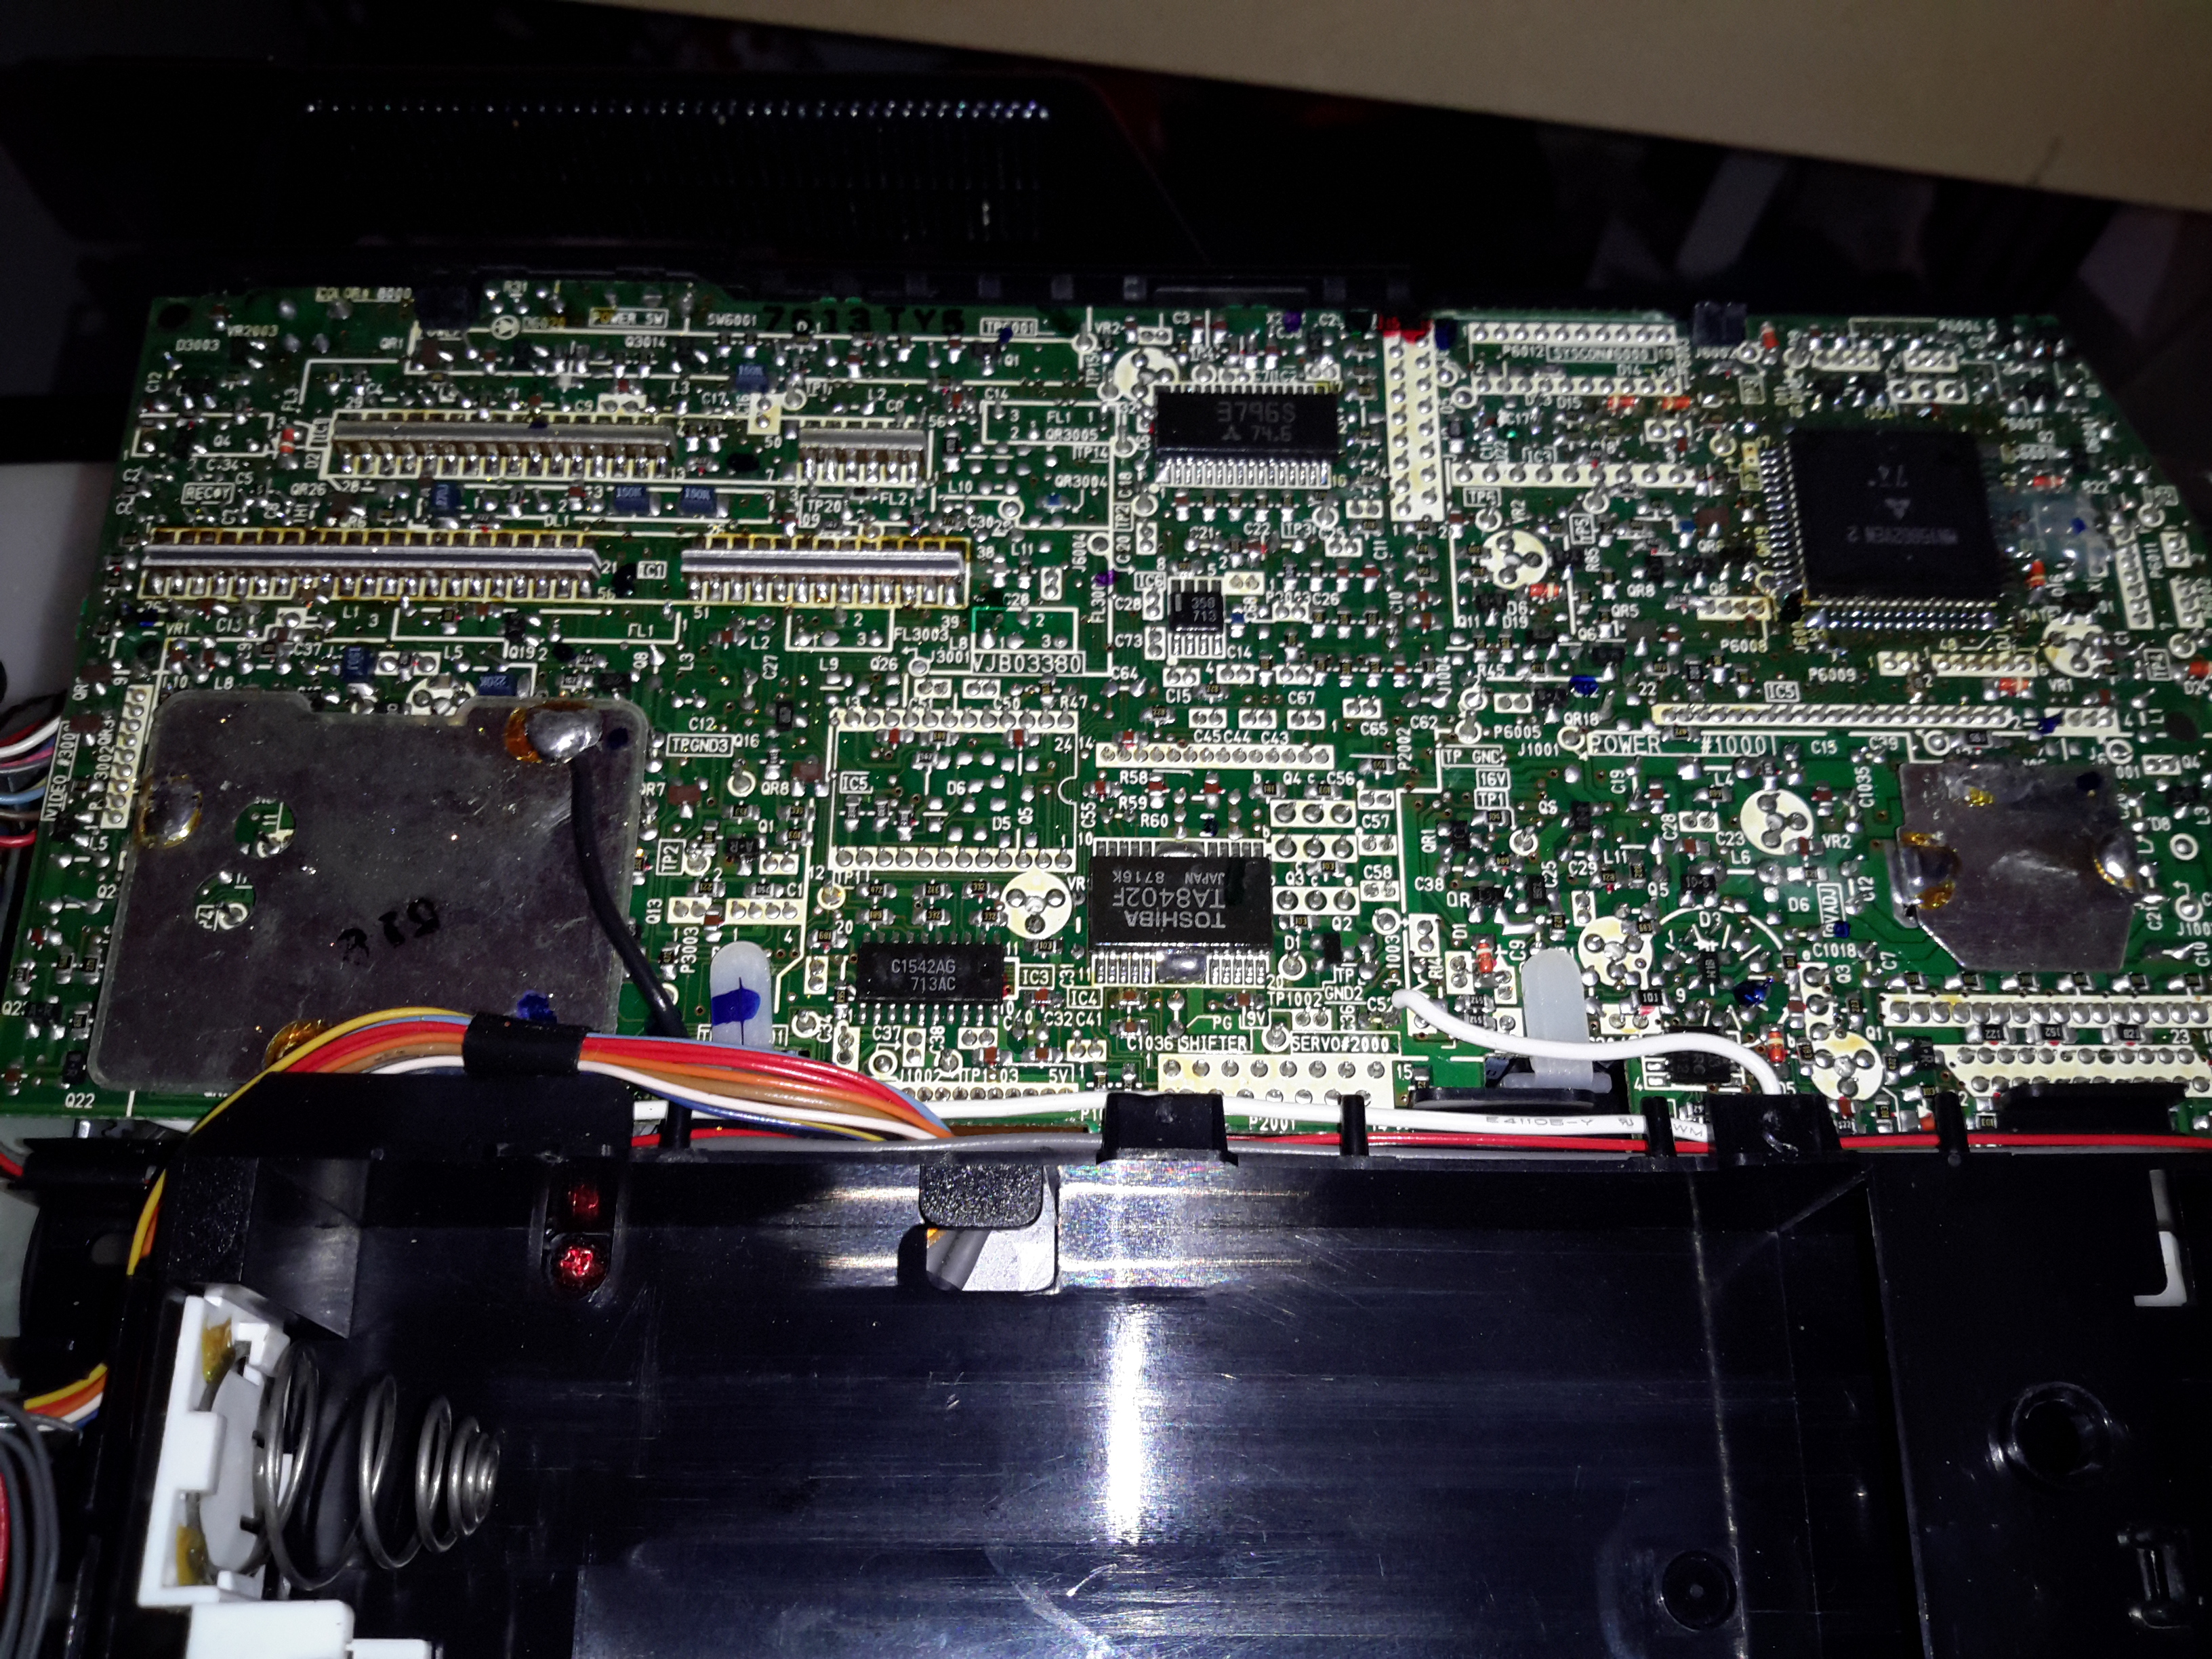
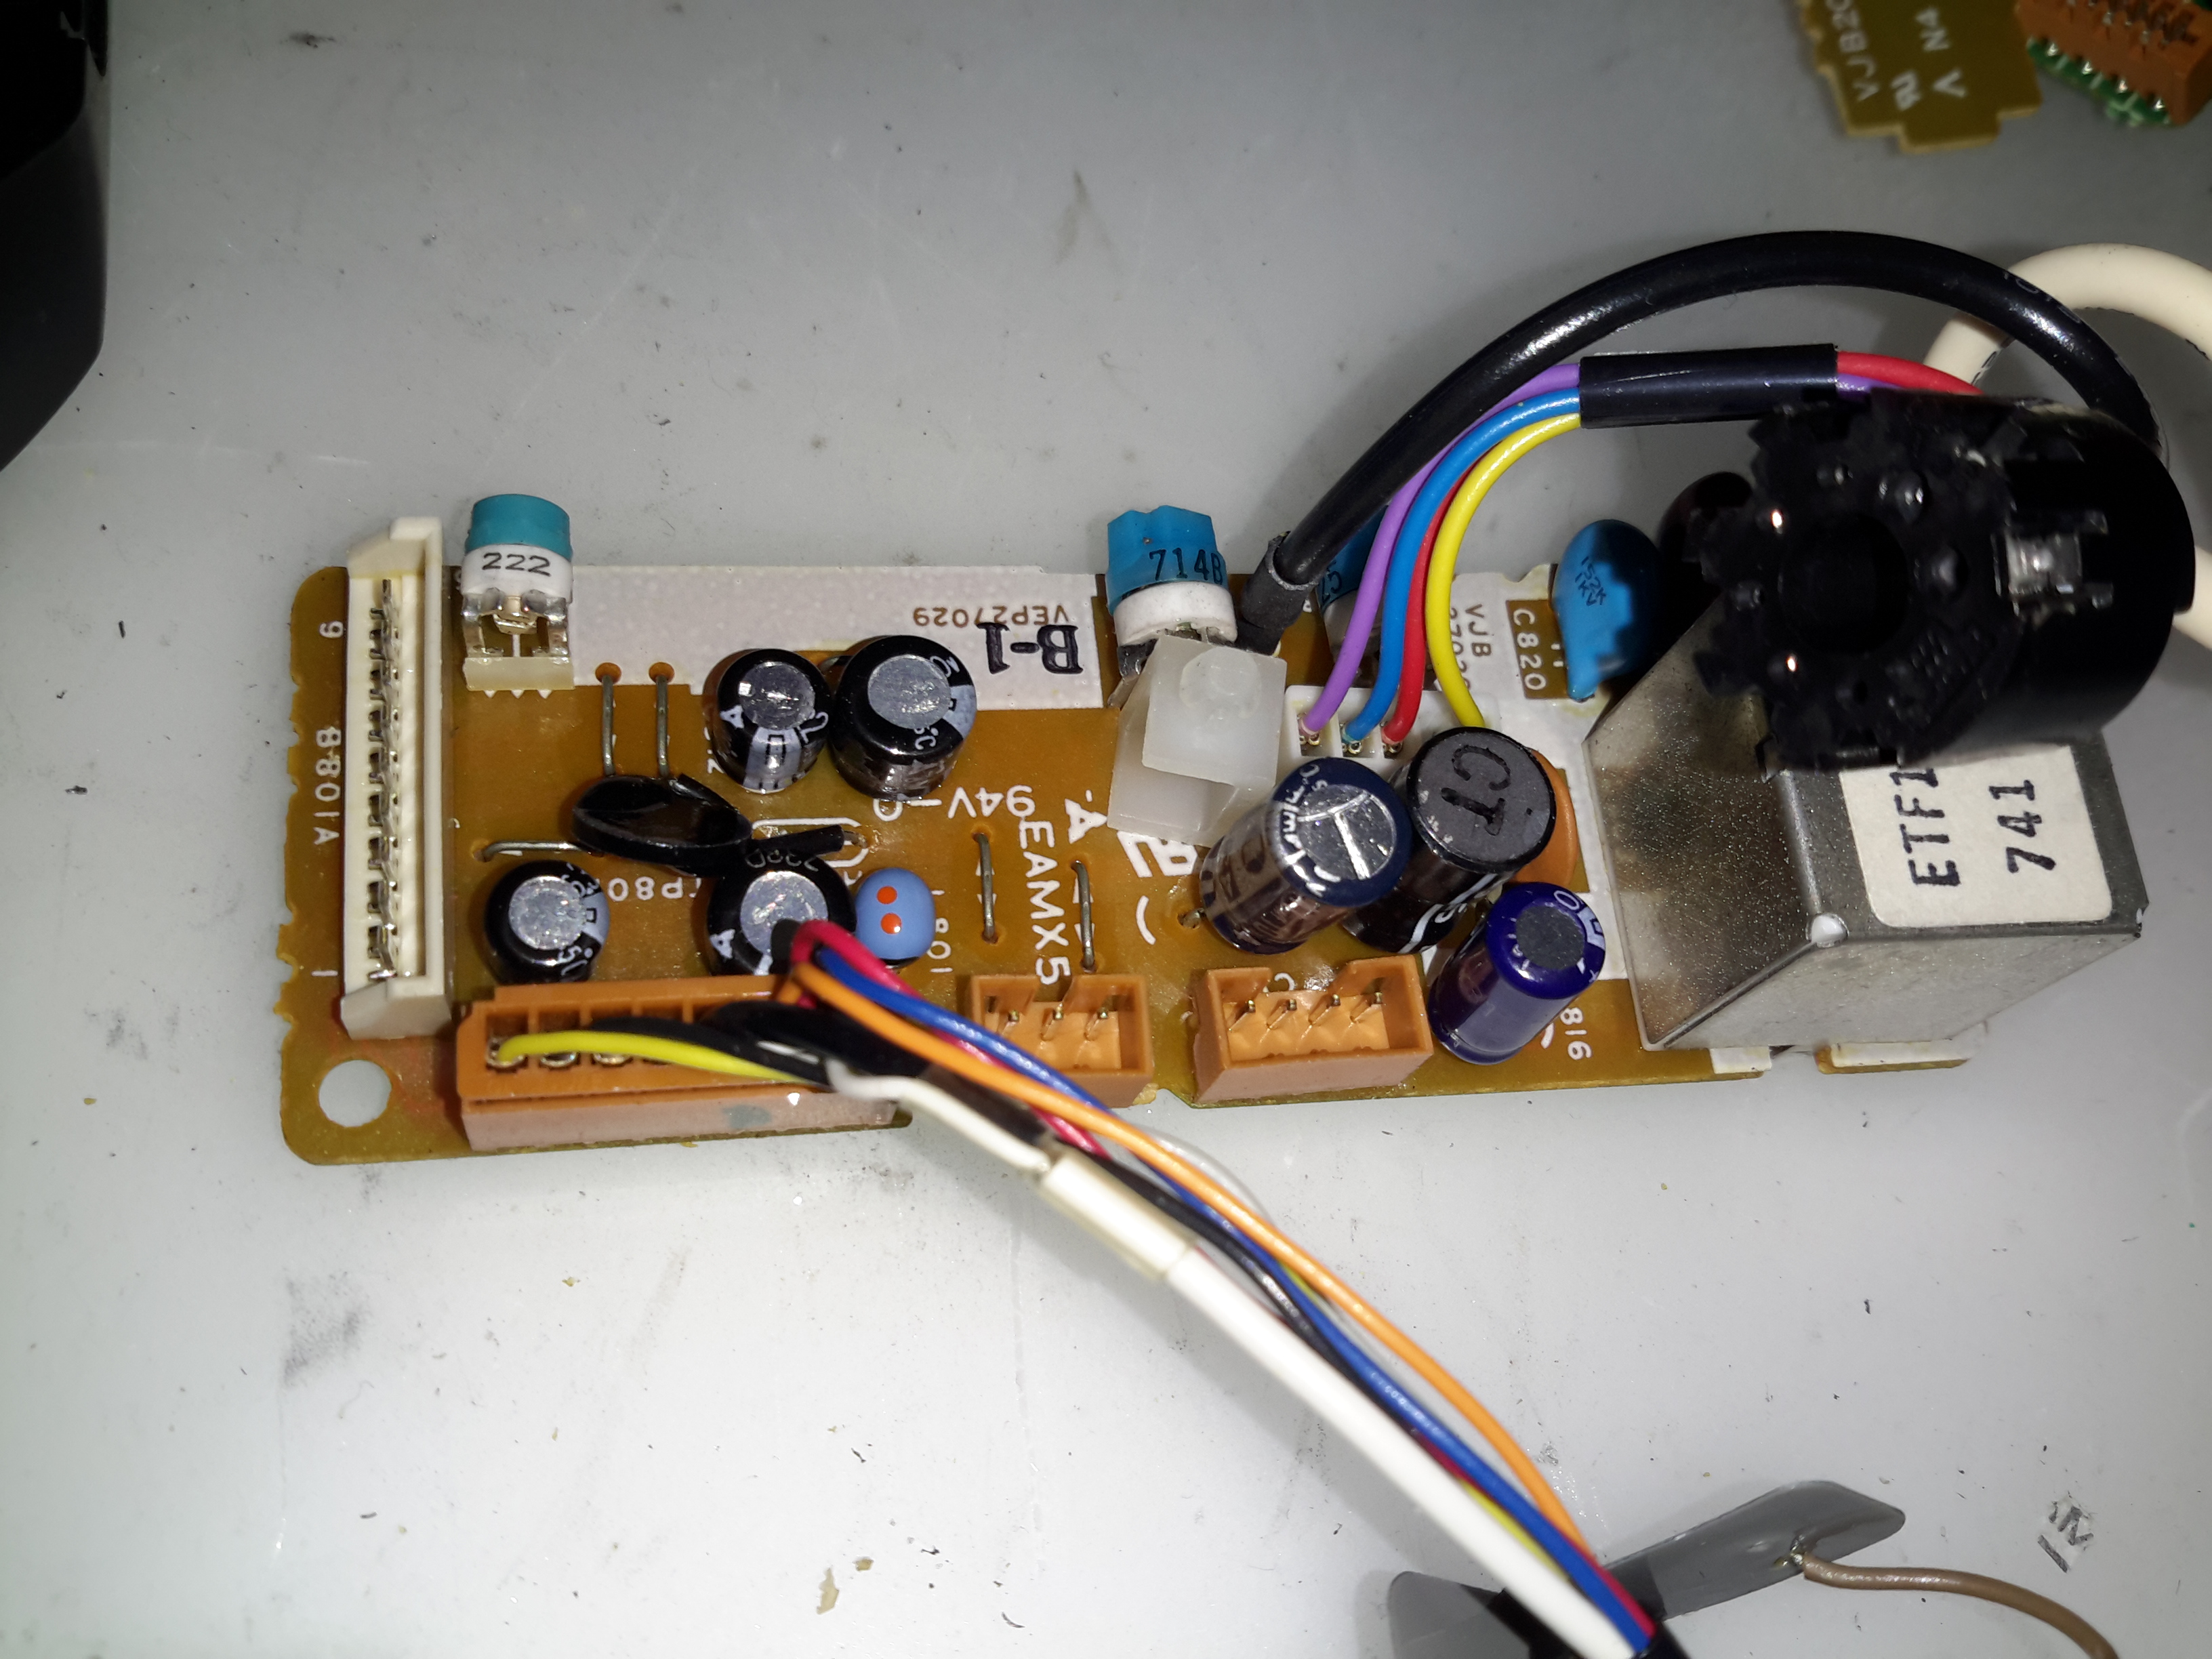
Tucked into the side of the main body of the unit is the main system control board. This PCB houses all the vital functions of the camera: Power Supply, Servo Control, Colour Control,Video Amplifiers, etc.
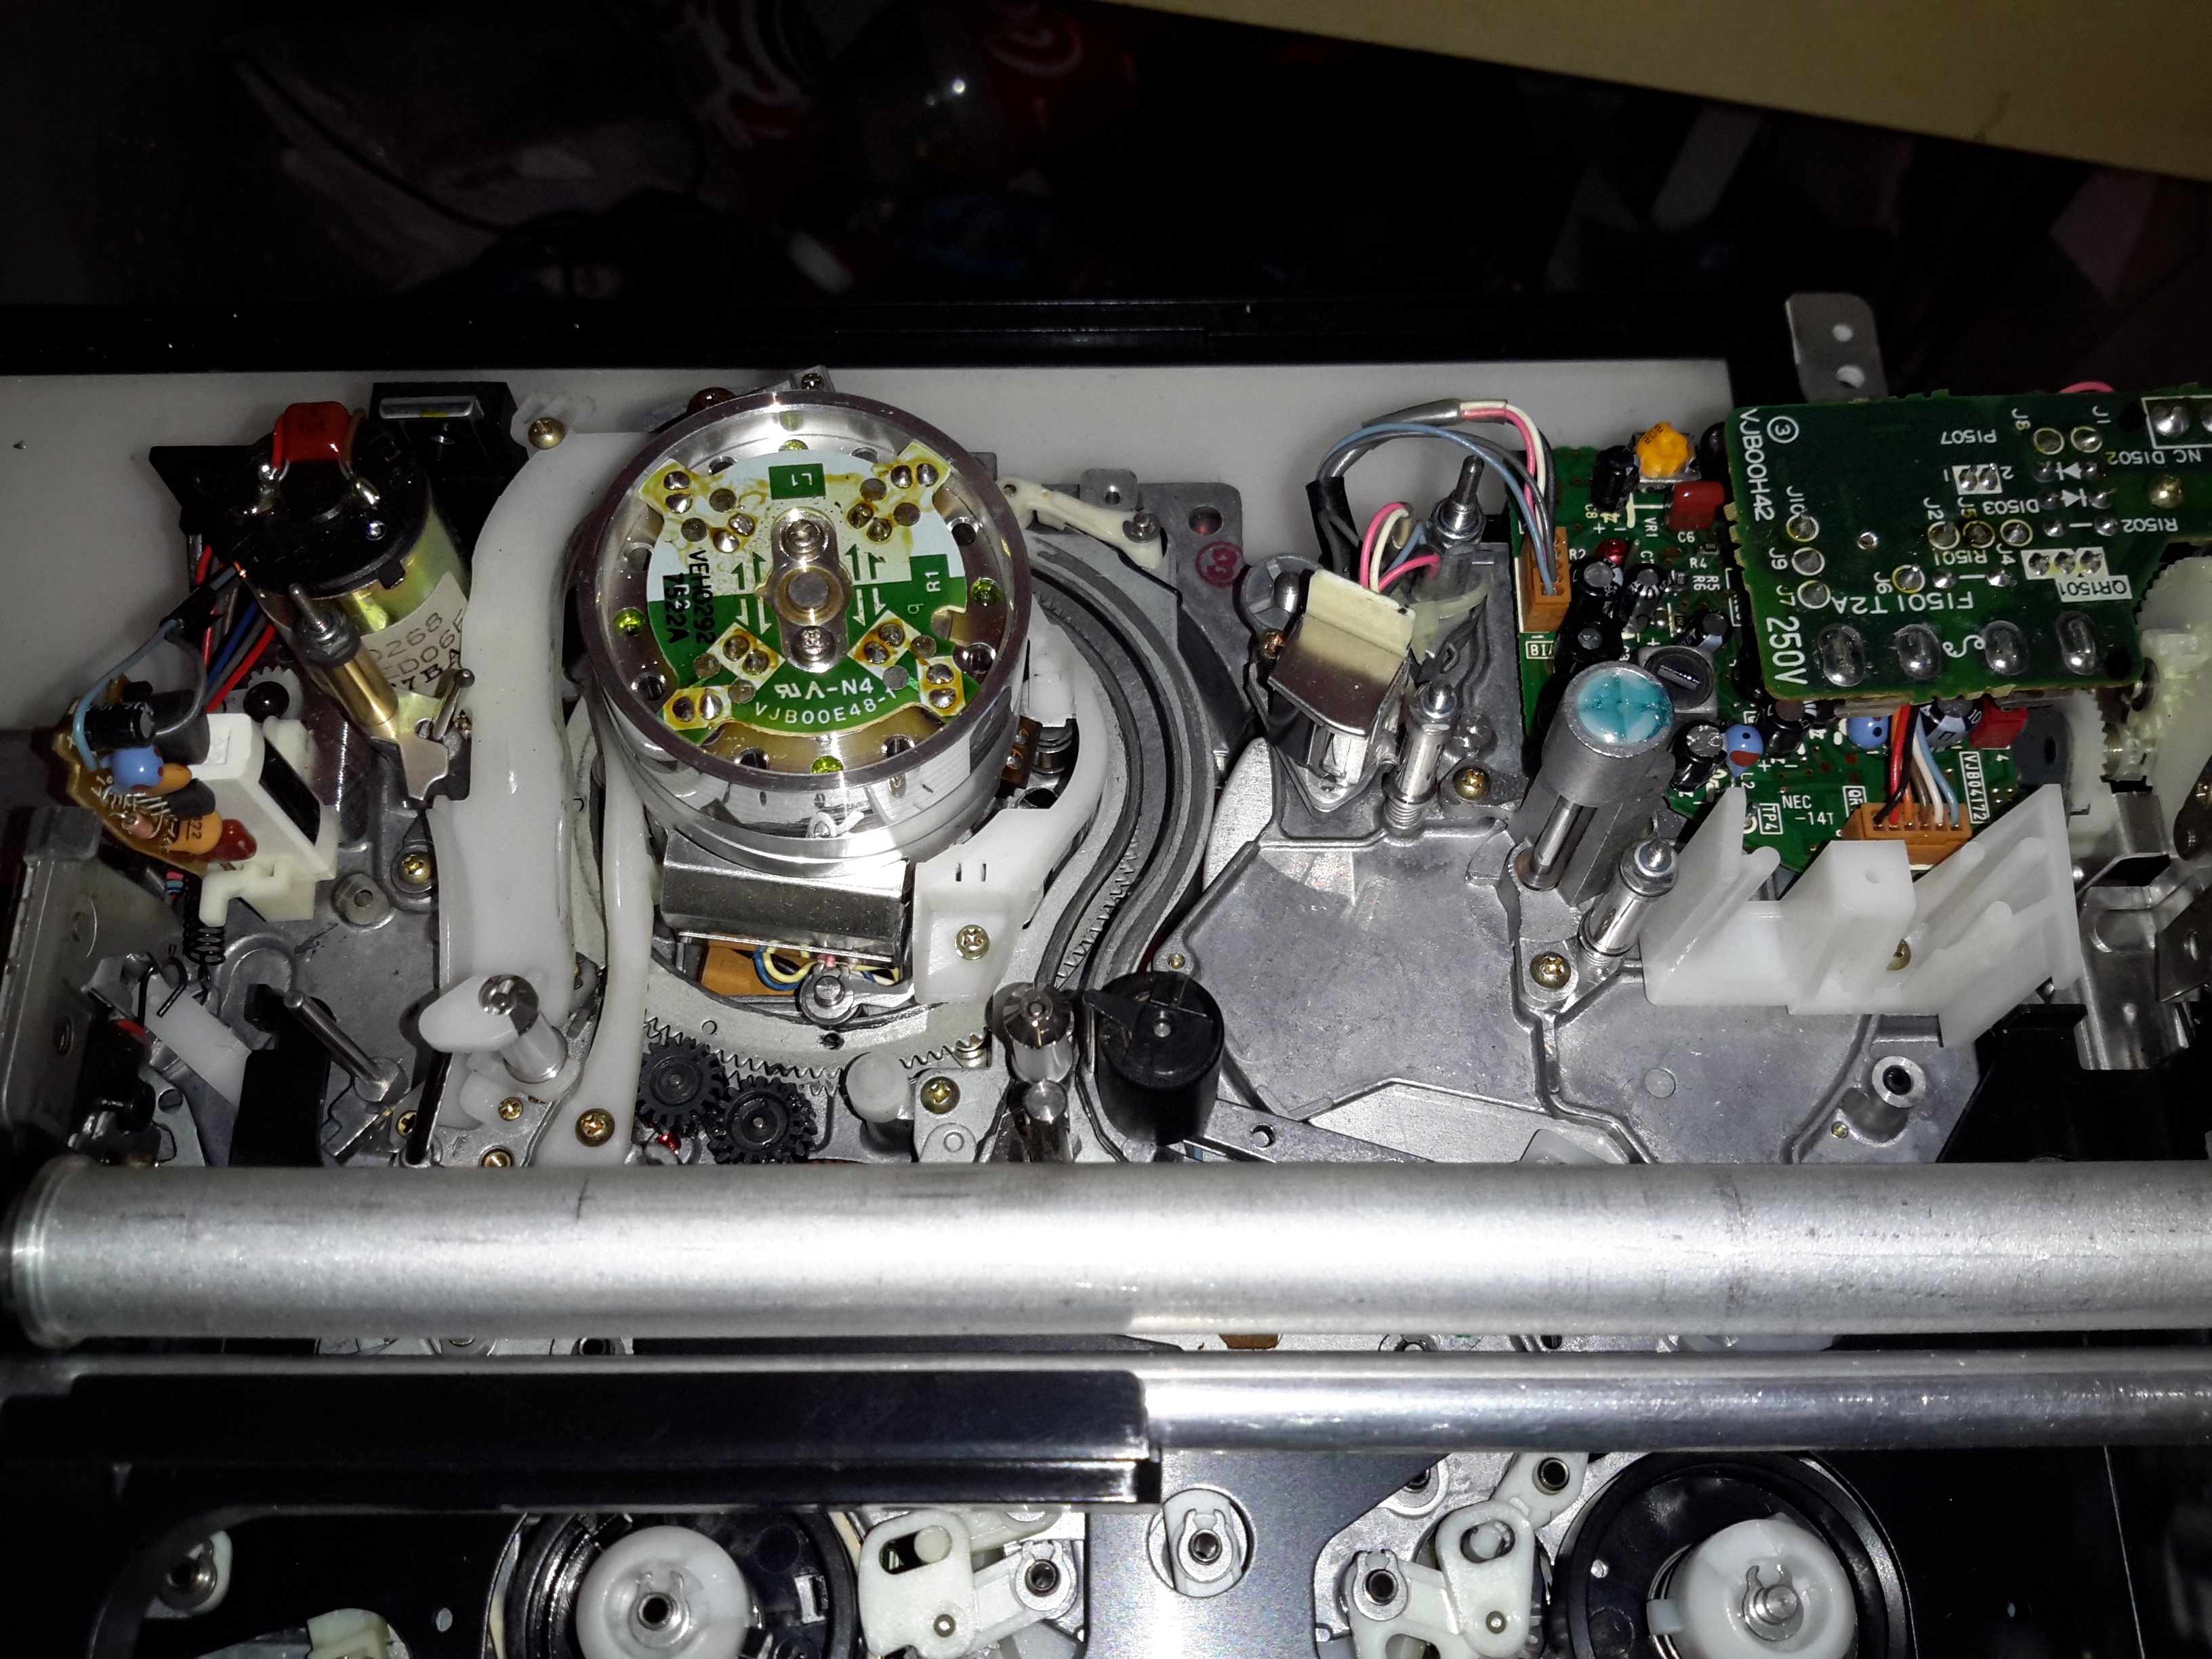
Here’s the main tape transport mechanism, this is made of steel & aluminium stampings for structural support. The drum used in this transport is noticeably smaller than a standard VHS drum, the tape is wrapped around more of the drum surface to compensate.
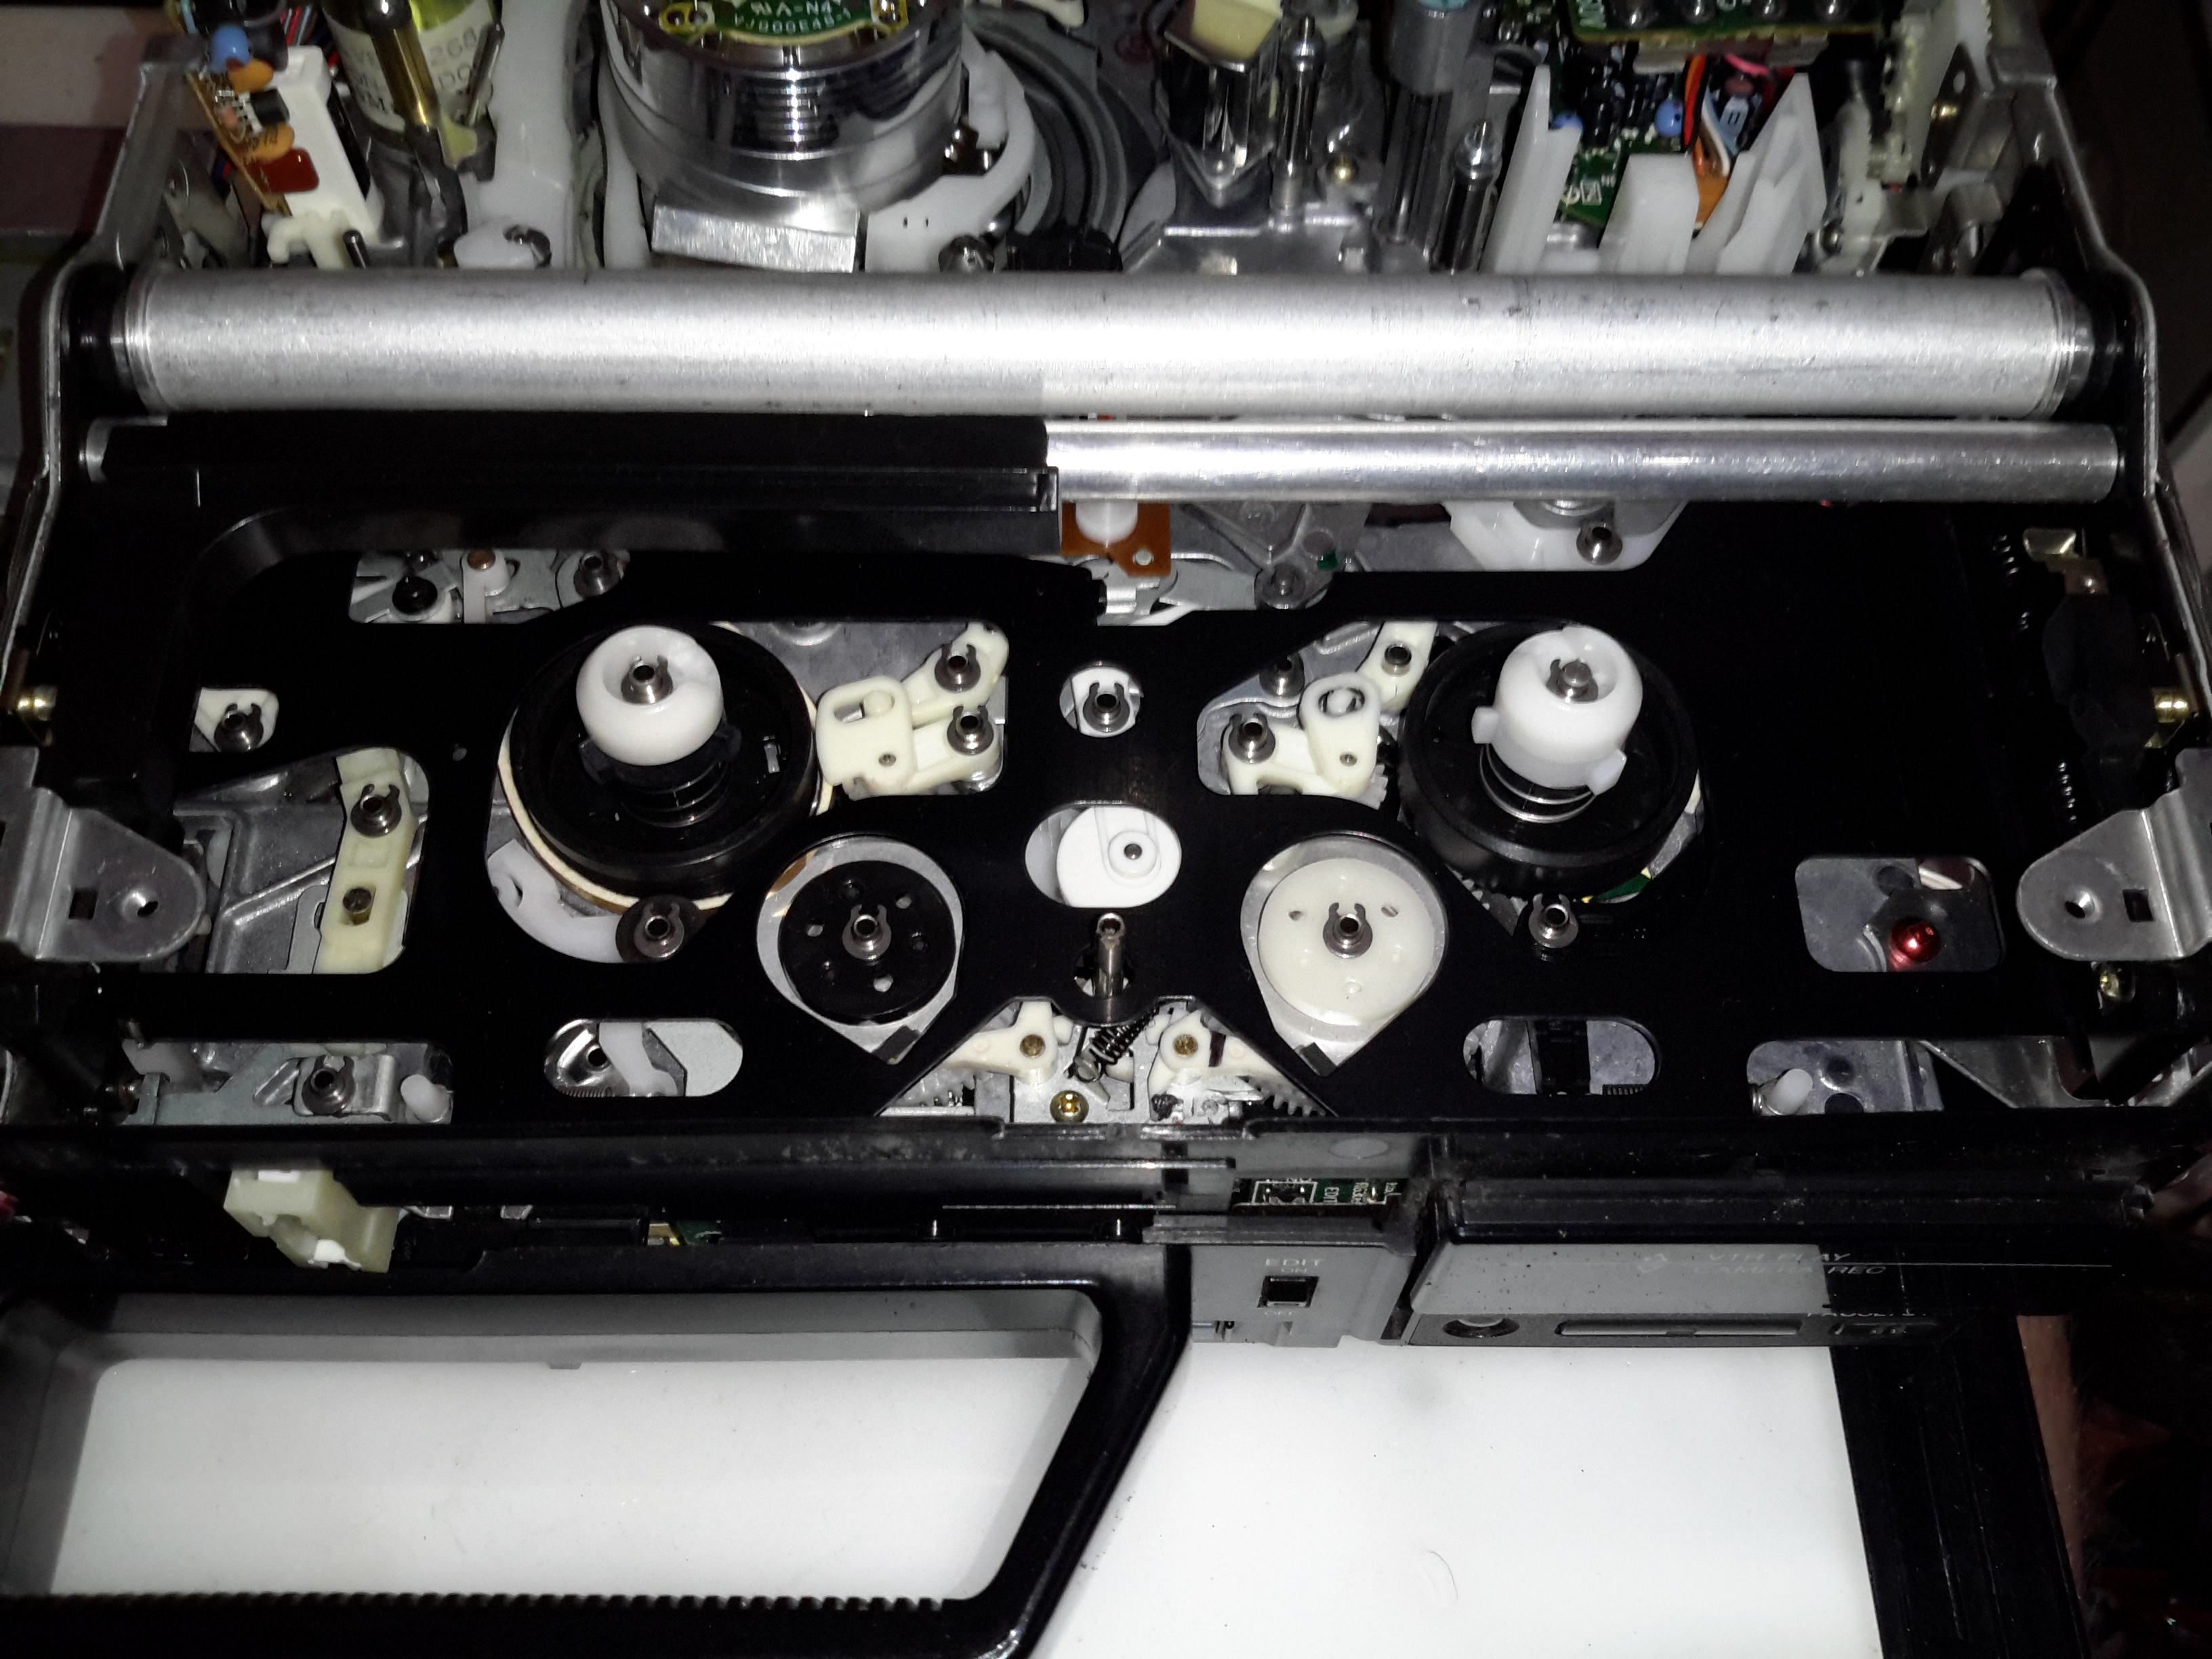
The VHS tape sits in this carriage & the spools drive the supply & take up reels in the cartridge.
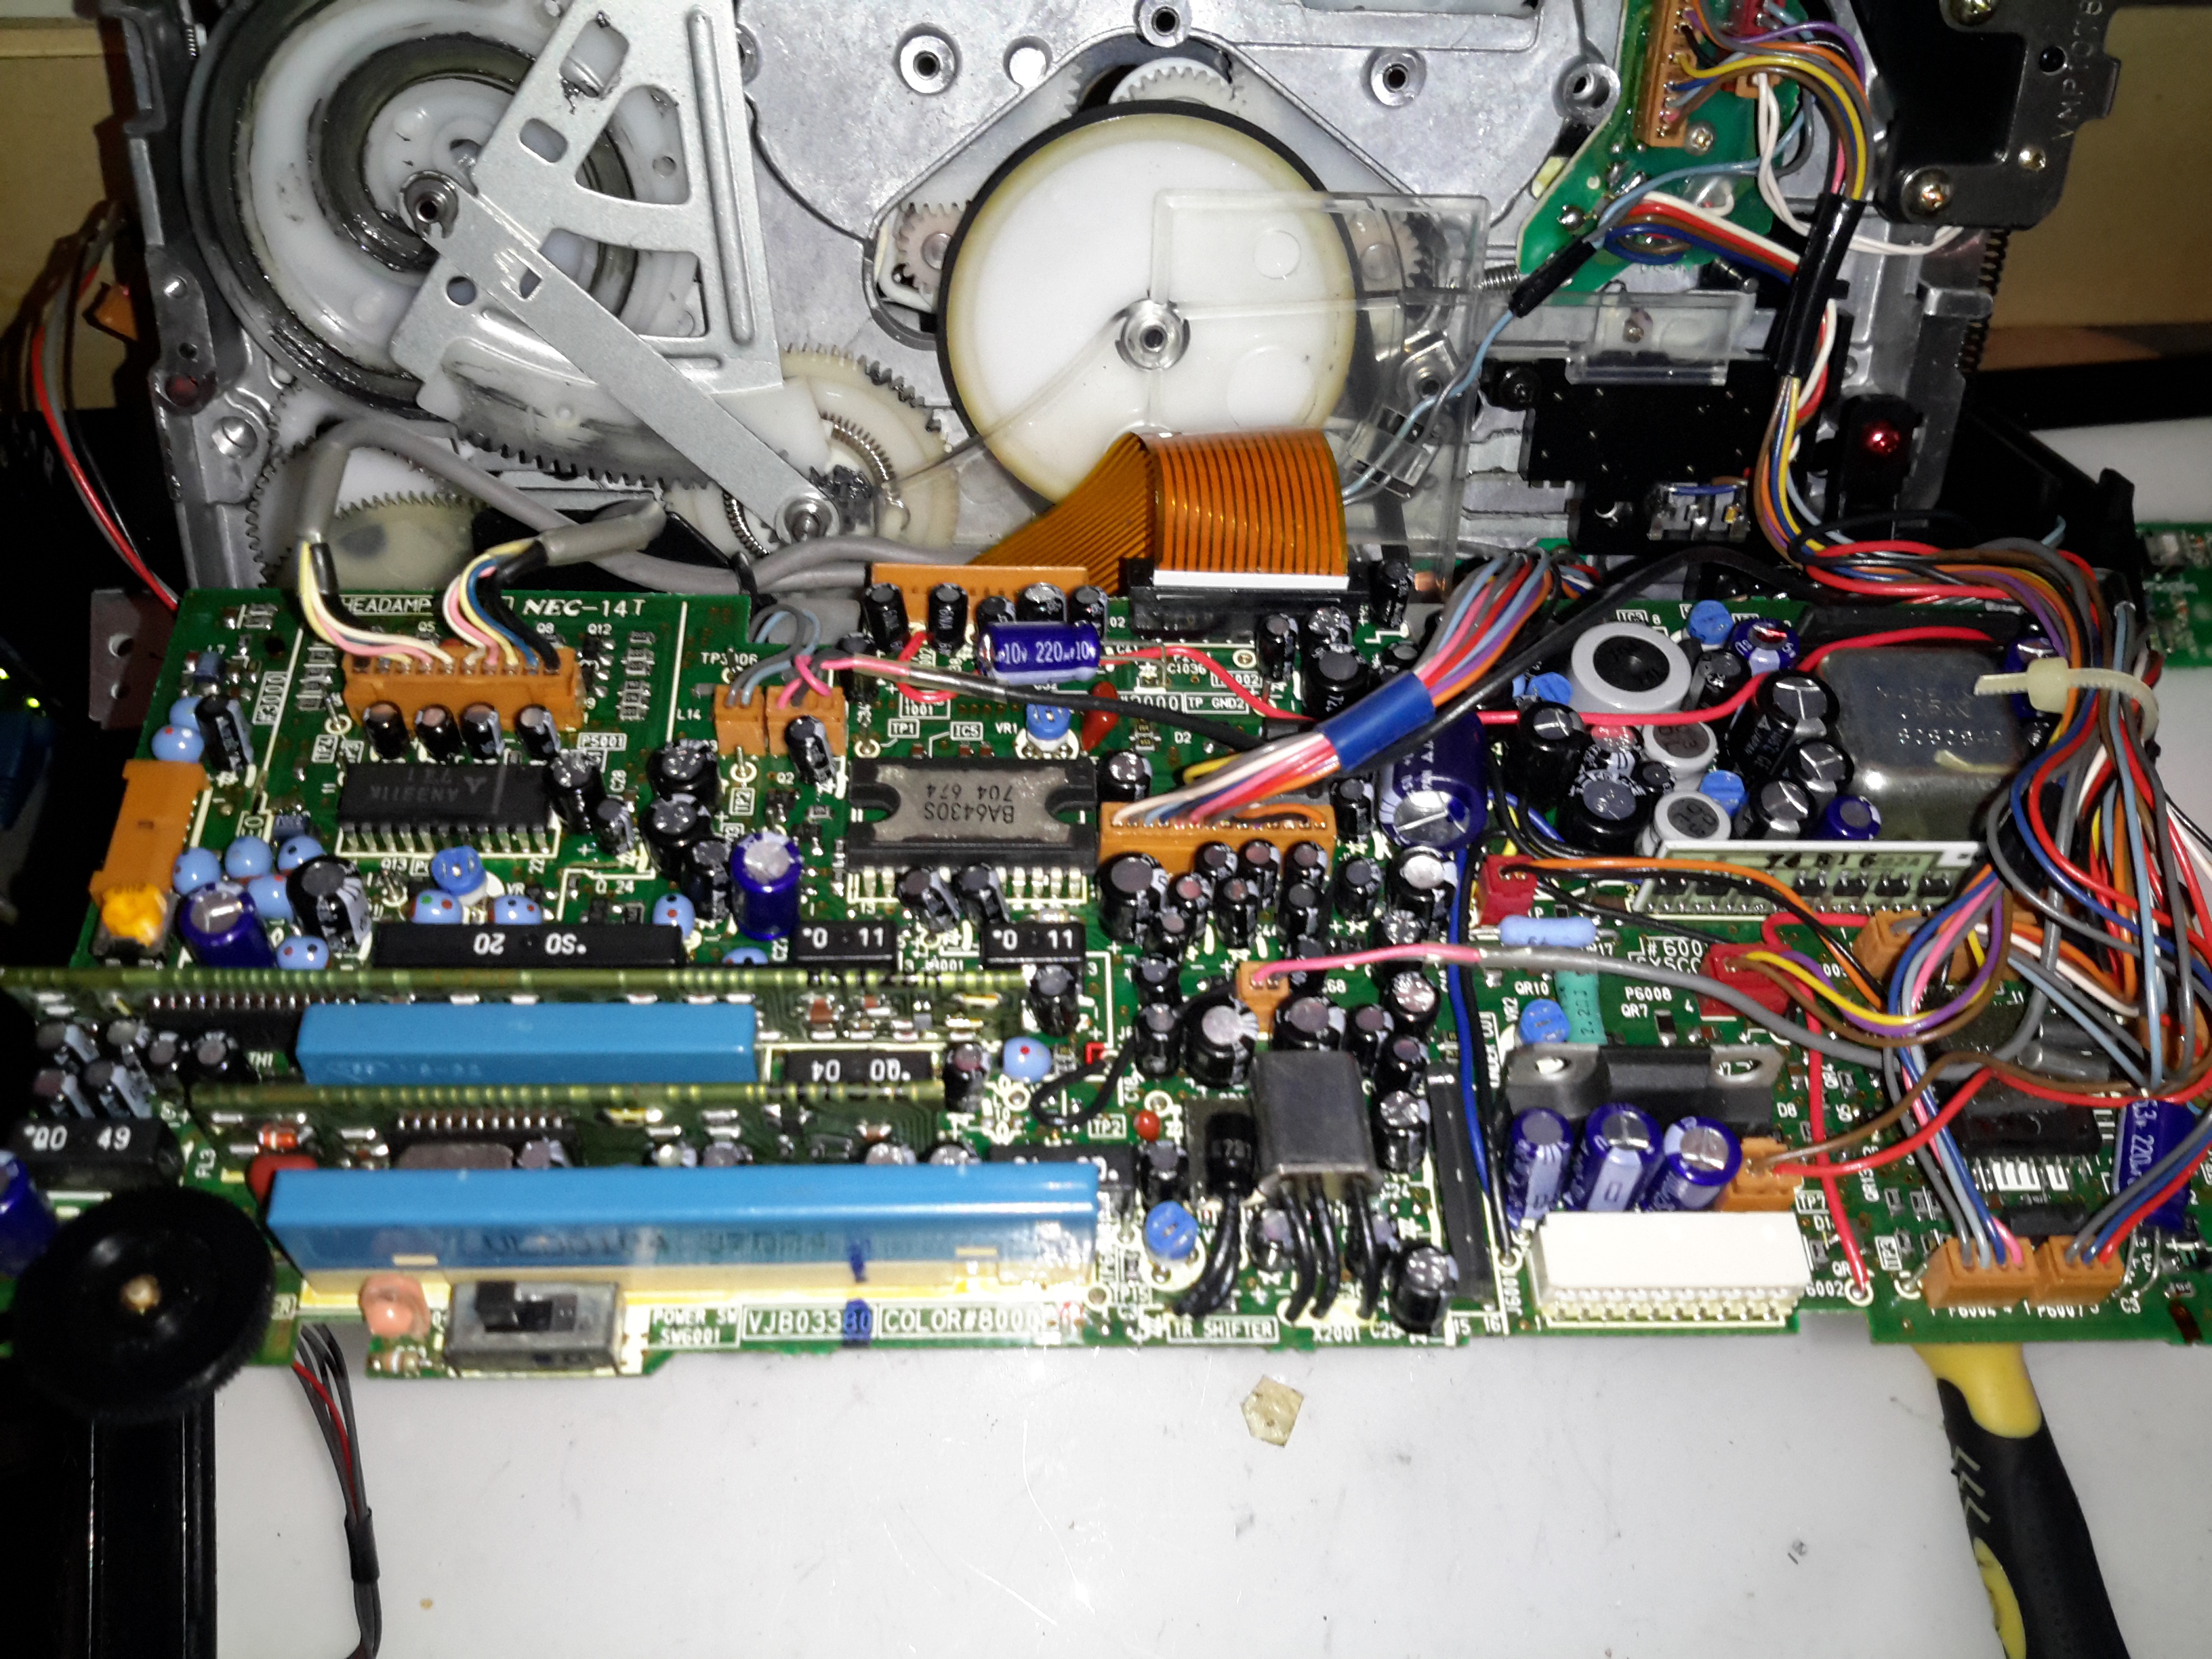
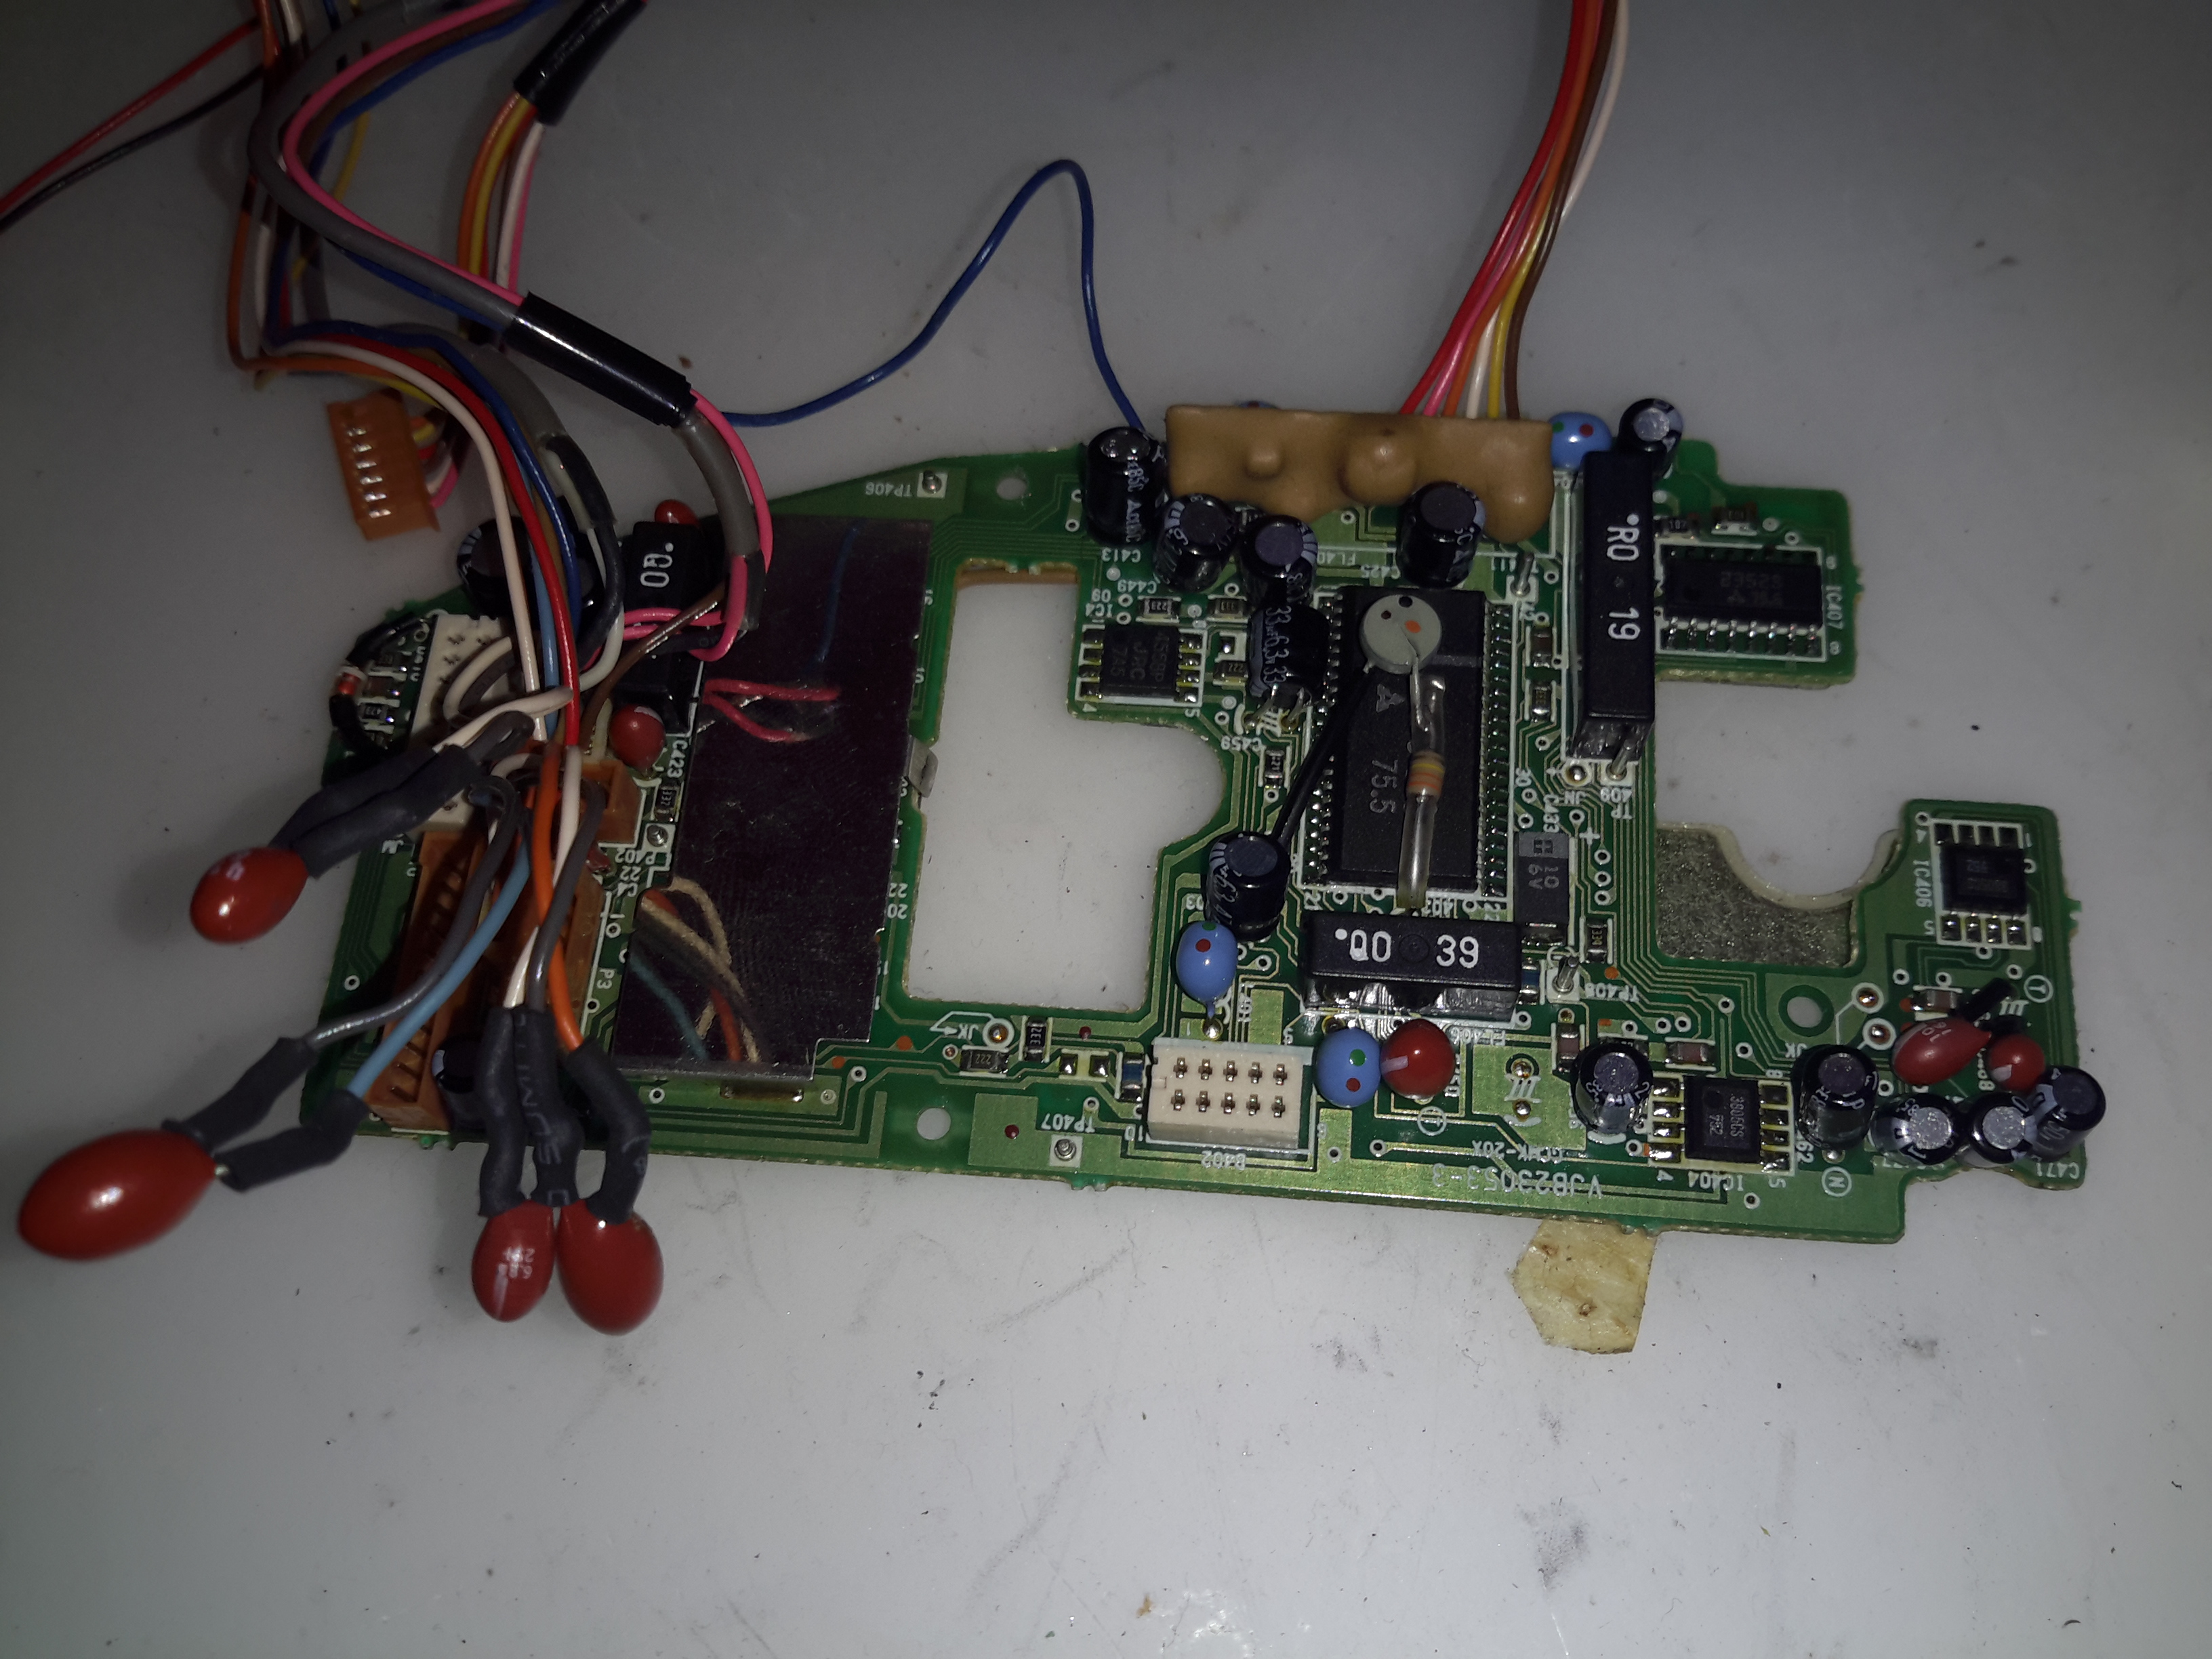
Here’s the component side of the main control PCB. This one is very densely packed with parts, I wouldn’t like to try & troubleshoot something like this!
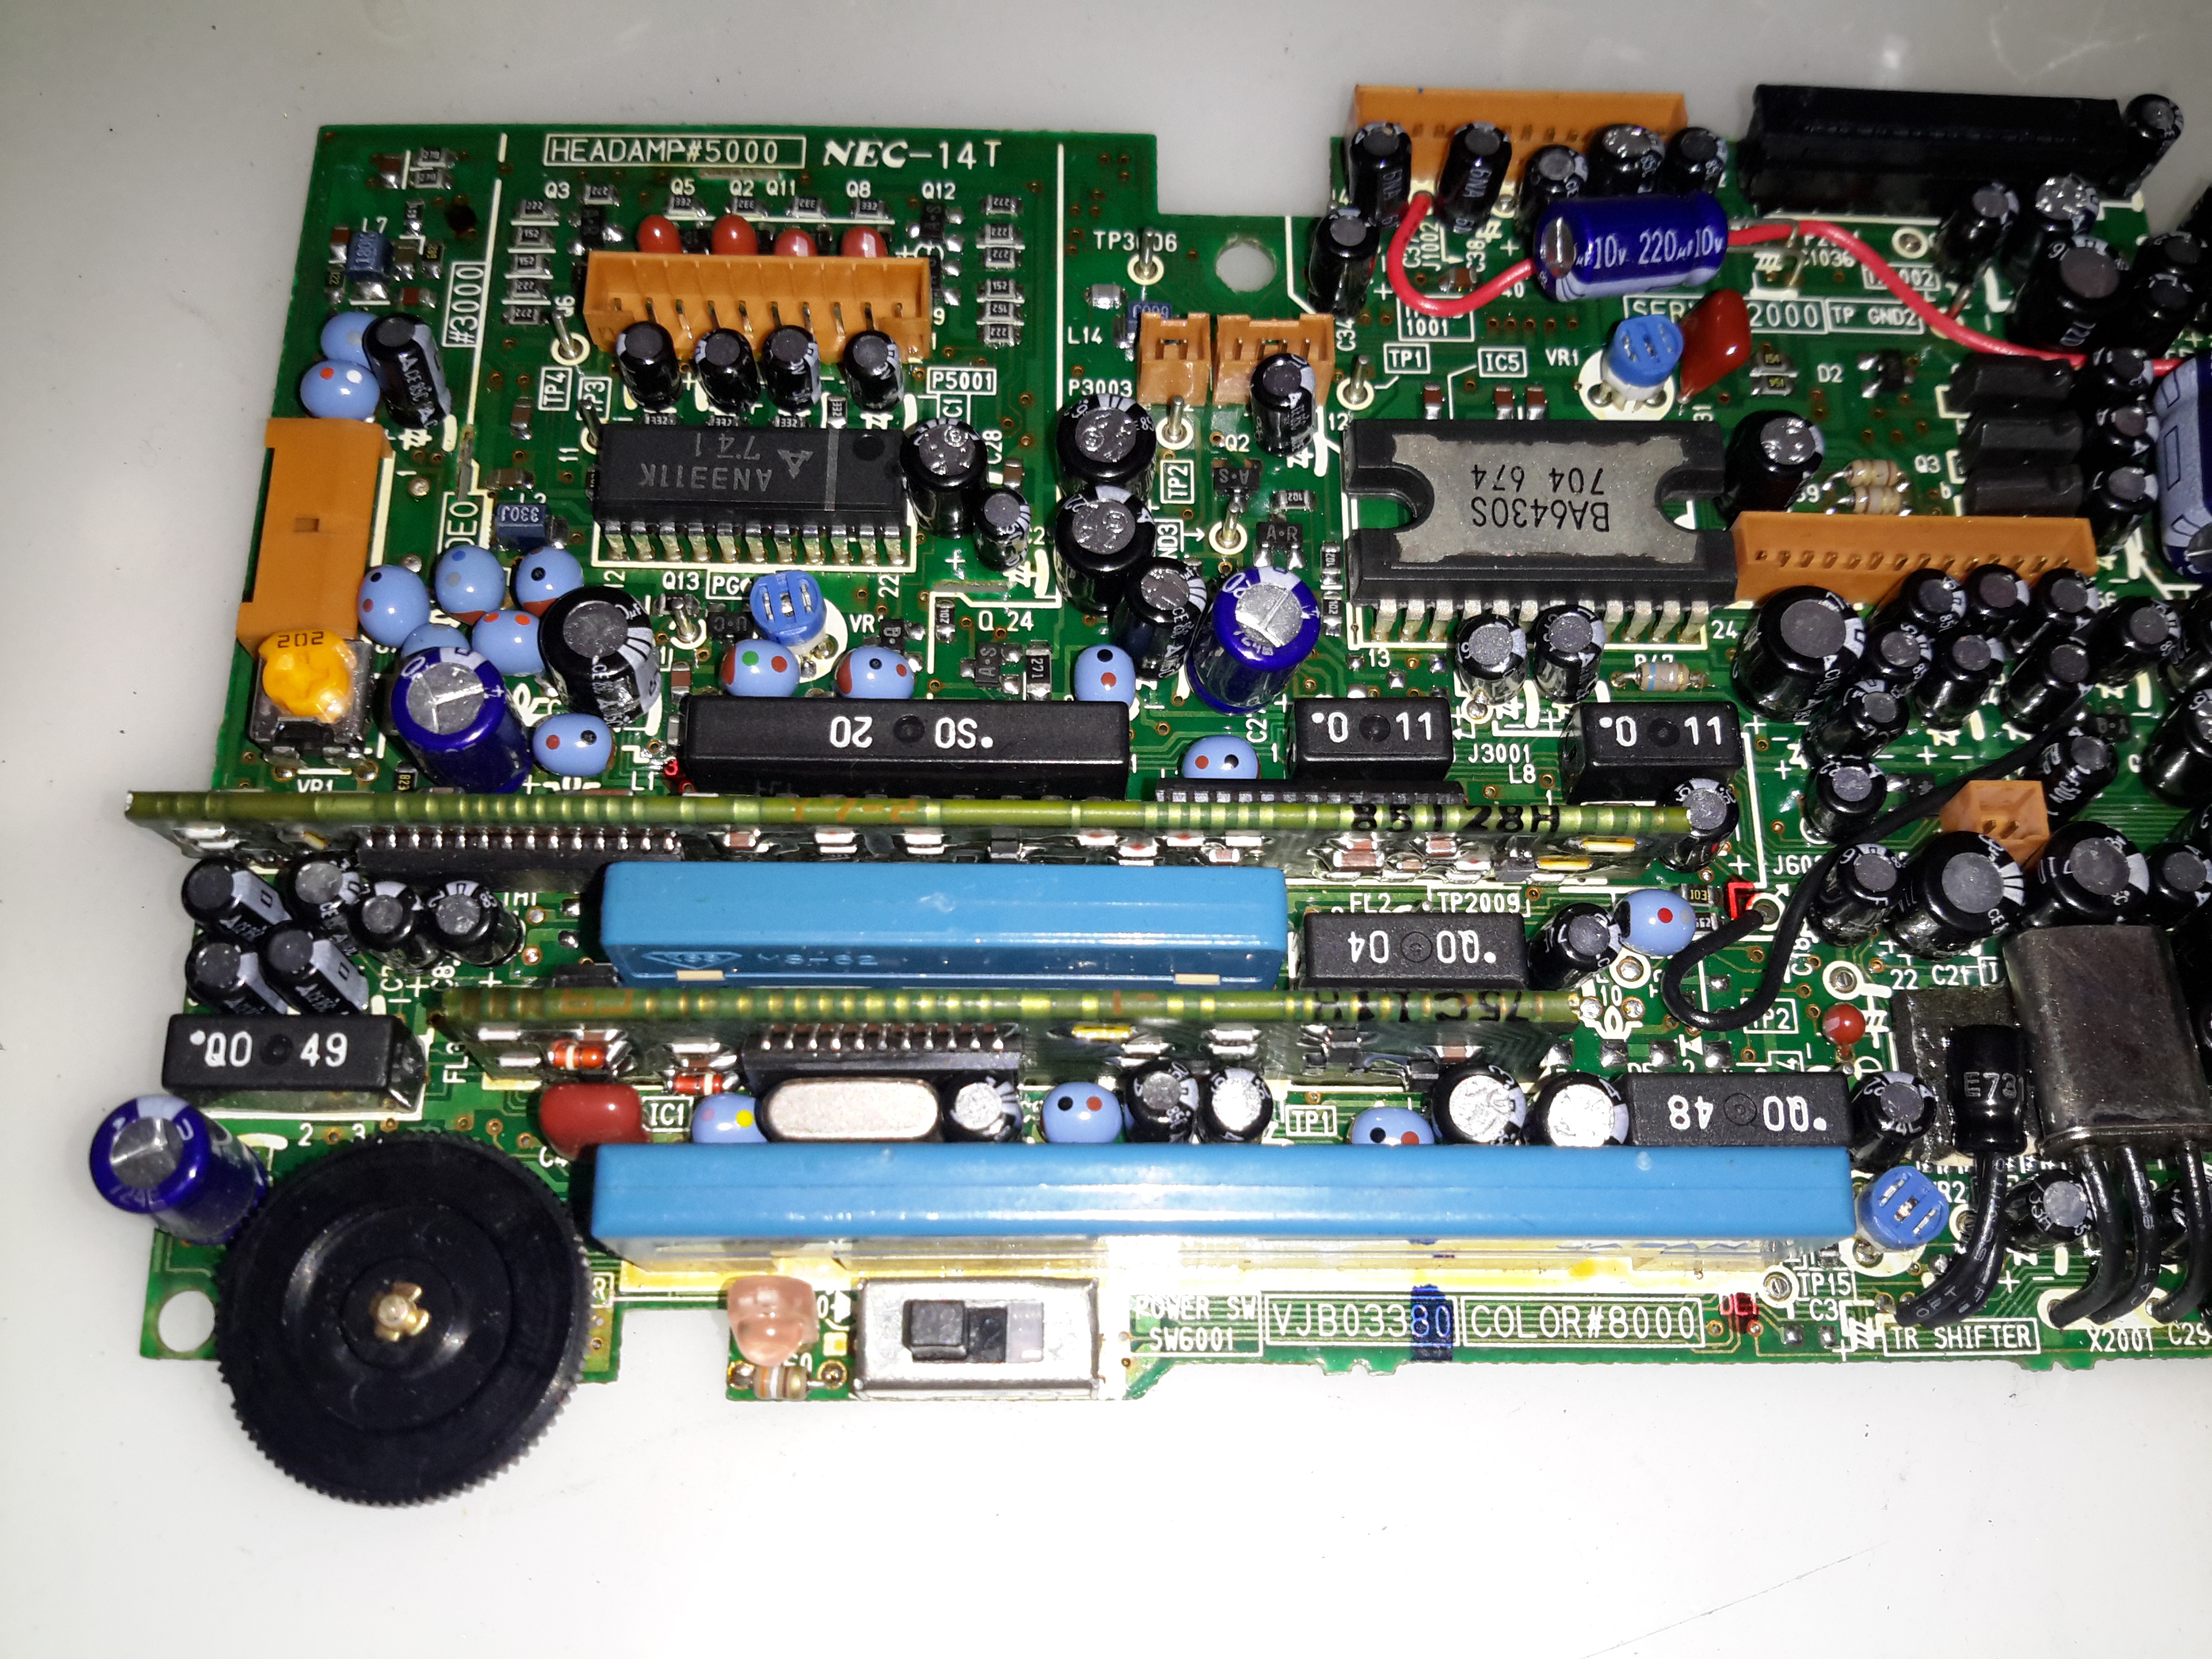
The left side has the video head amp at the top, a Panasonic AN3311K 4-head video amp. Below that is video processing, the blue components are the analogue delay lines. There are a couple of hybrid flat-flex PCBs tucked in between with a couple of ICs & many passives. These hybrids handle the luma & chroma signals.
Top left is the capstan motor driver a Rohm BA6430S. The transport motors are all 3-phase brushless, with exception of the loading motor, which is a brushed DC type.
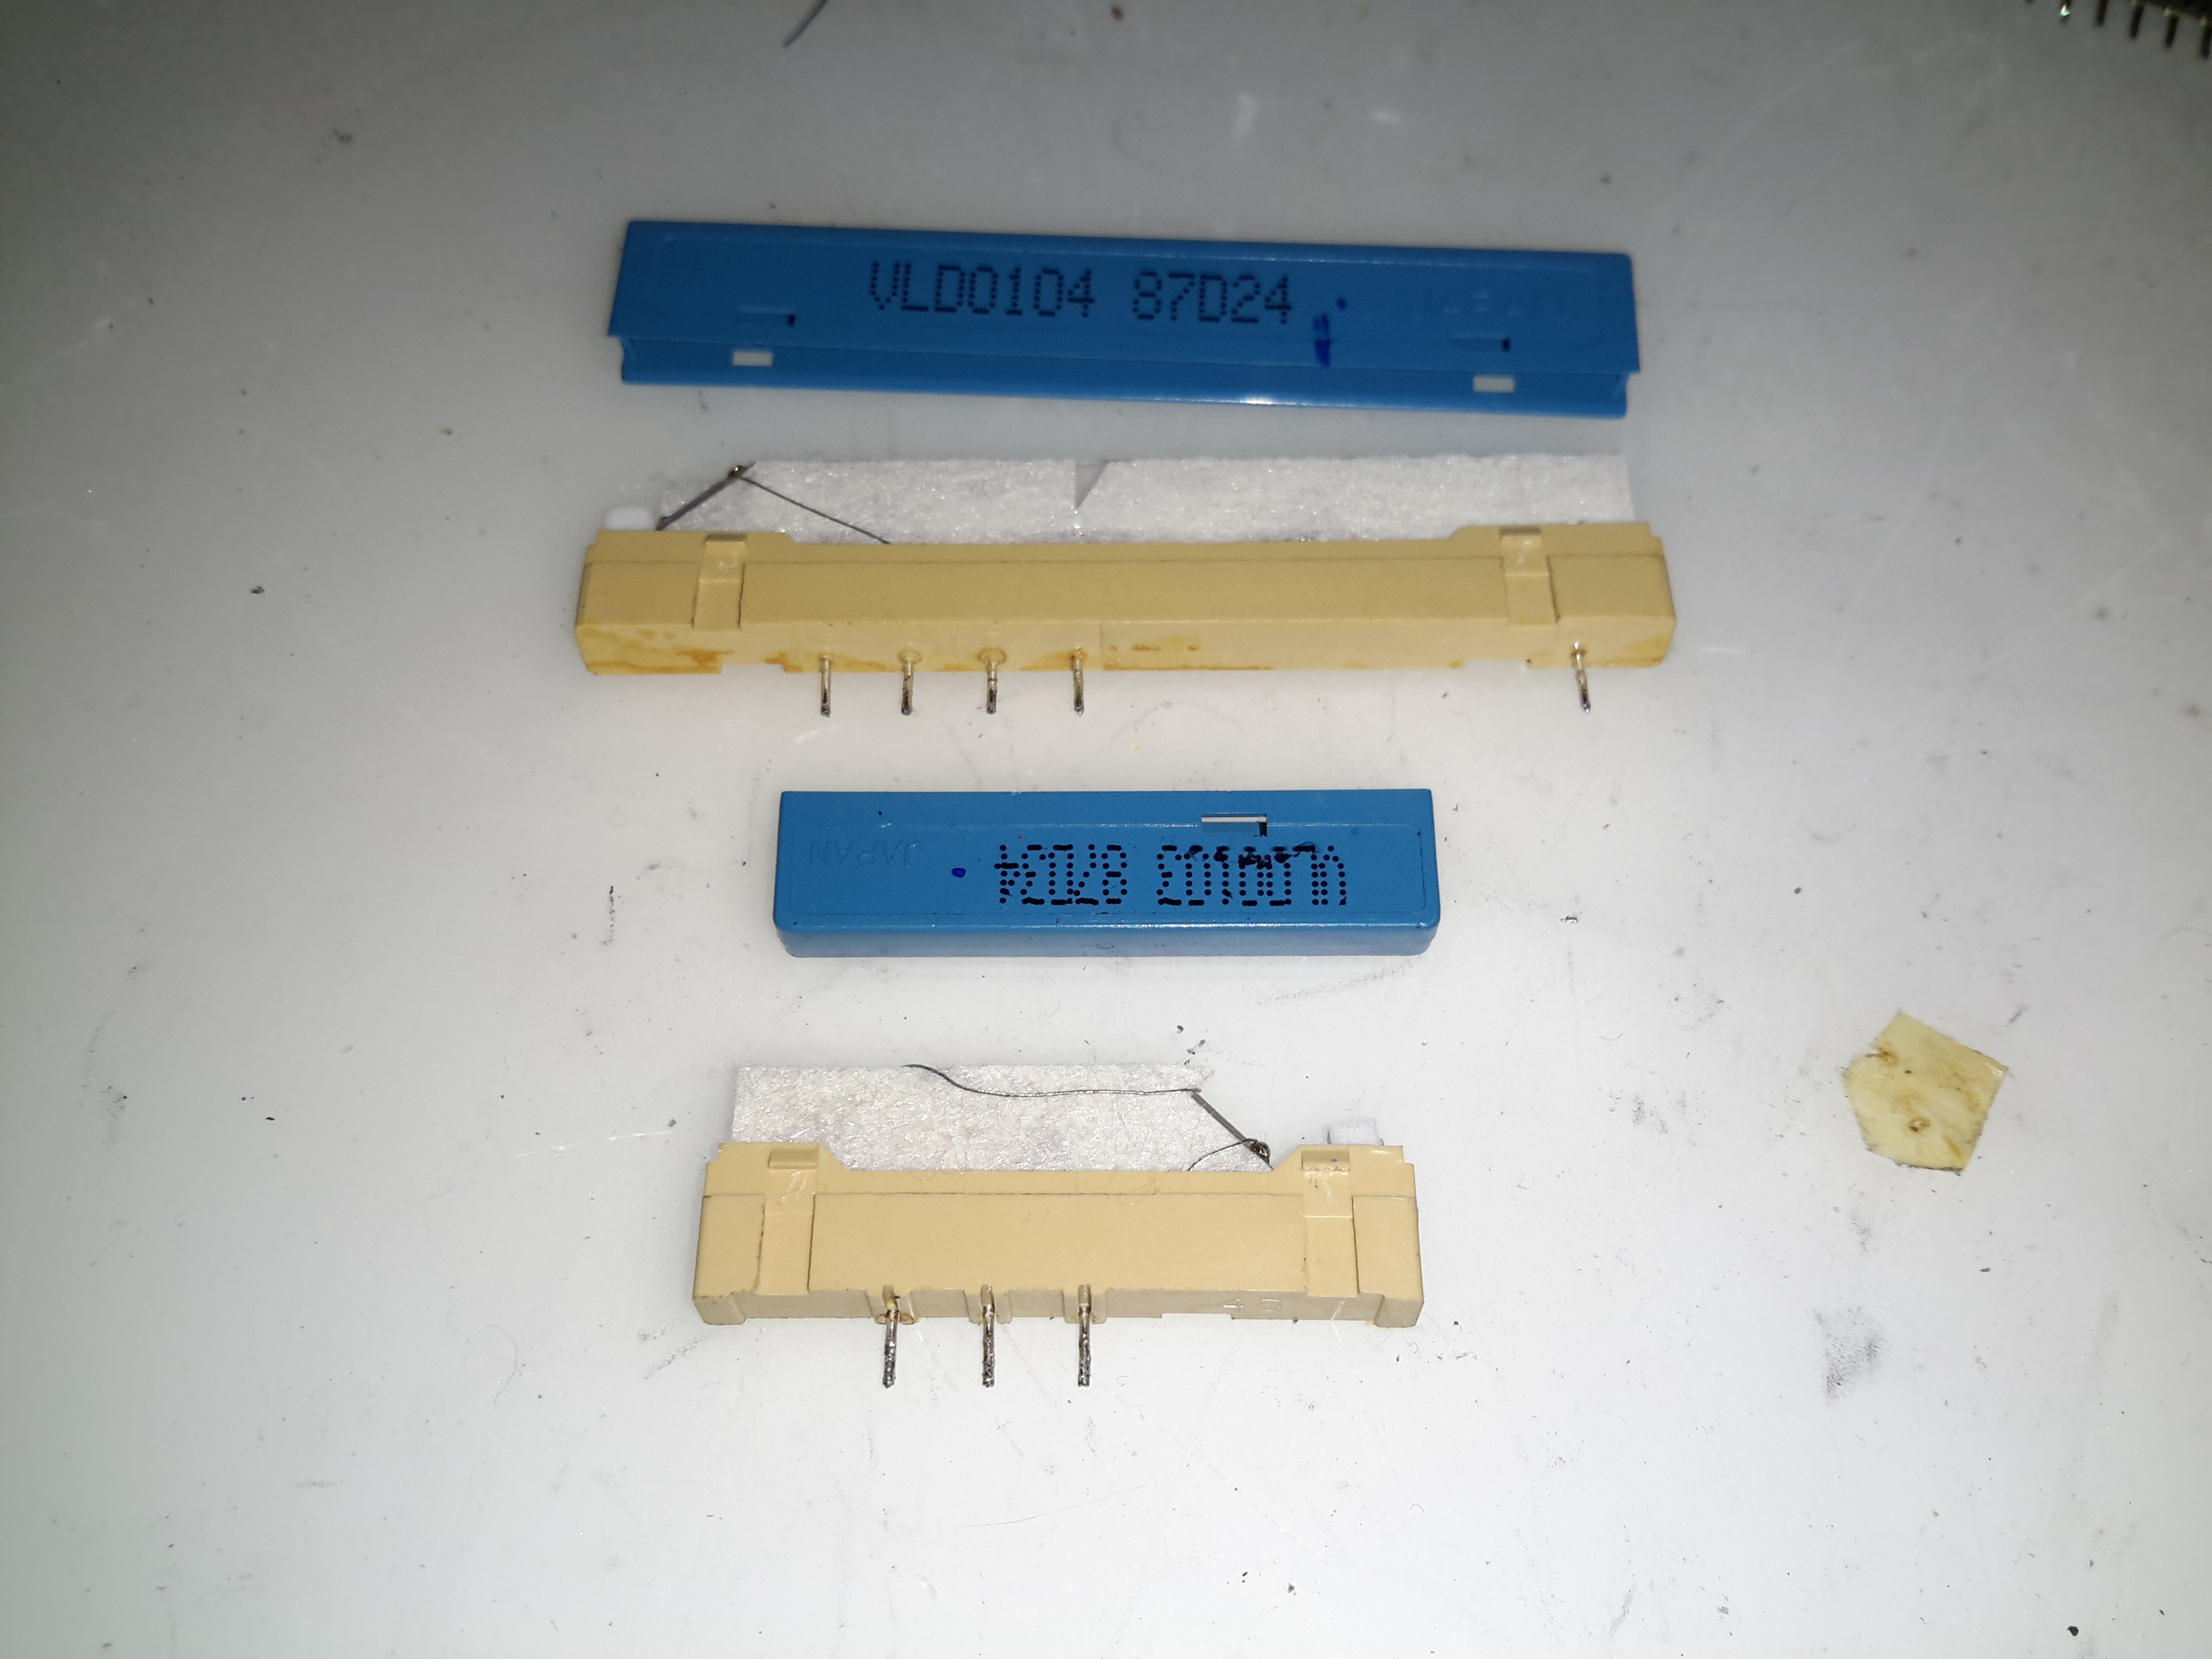
Here’s what is inside the delay lines for the analogue video circuits. The plastic casing holds a felt liner, inside which is the delay line itself.
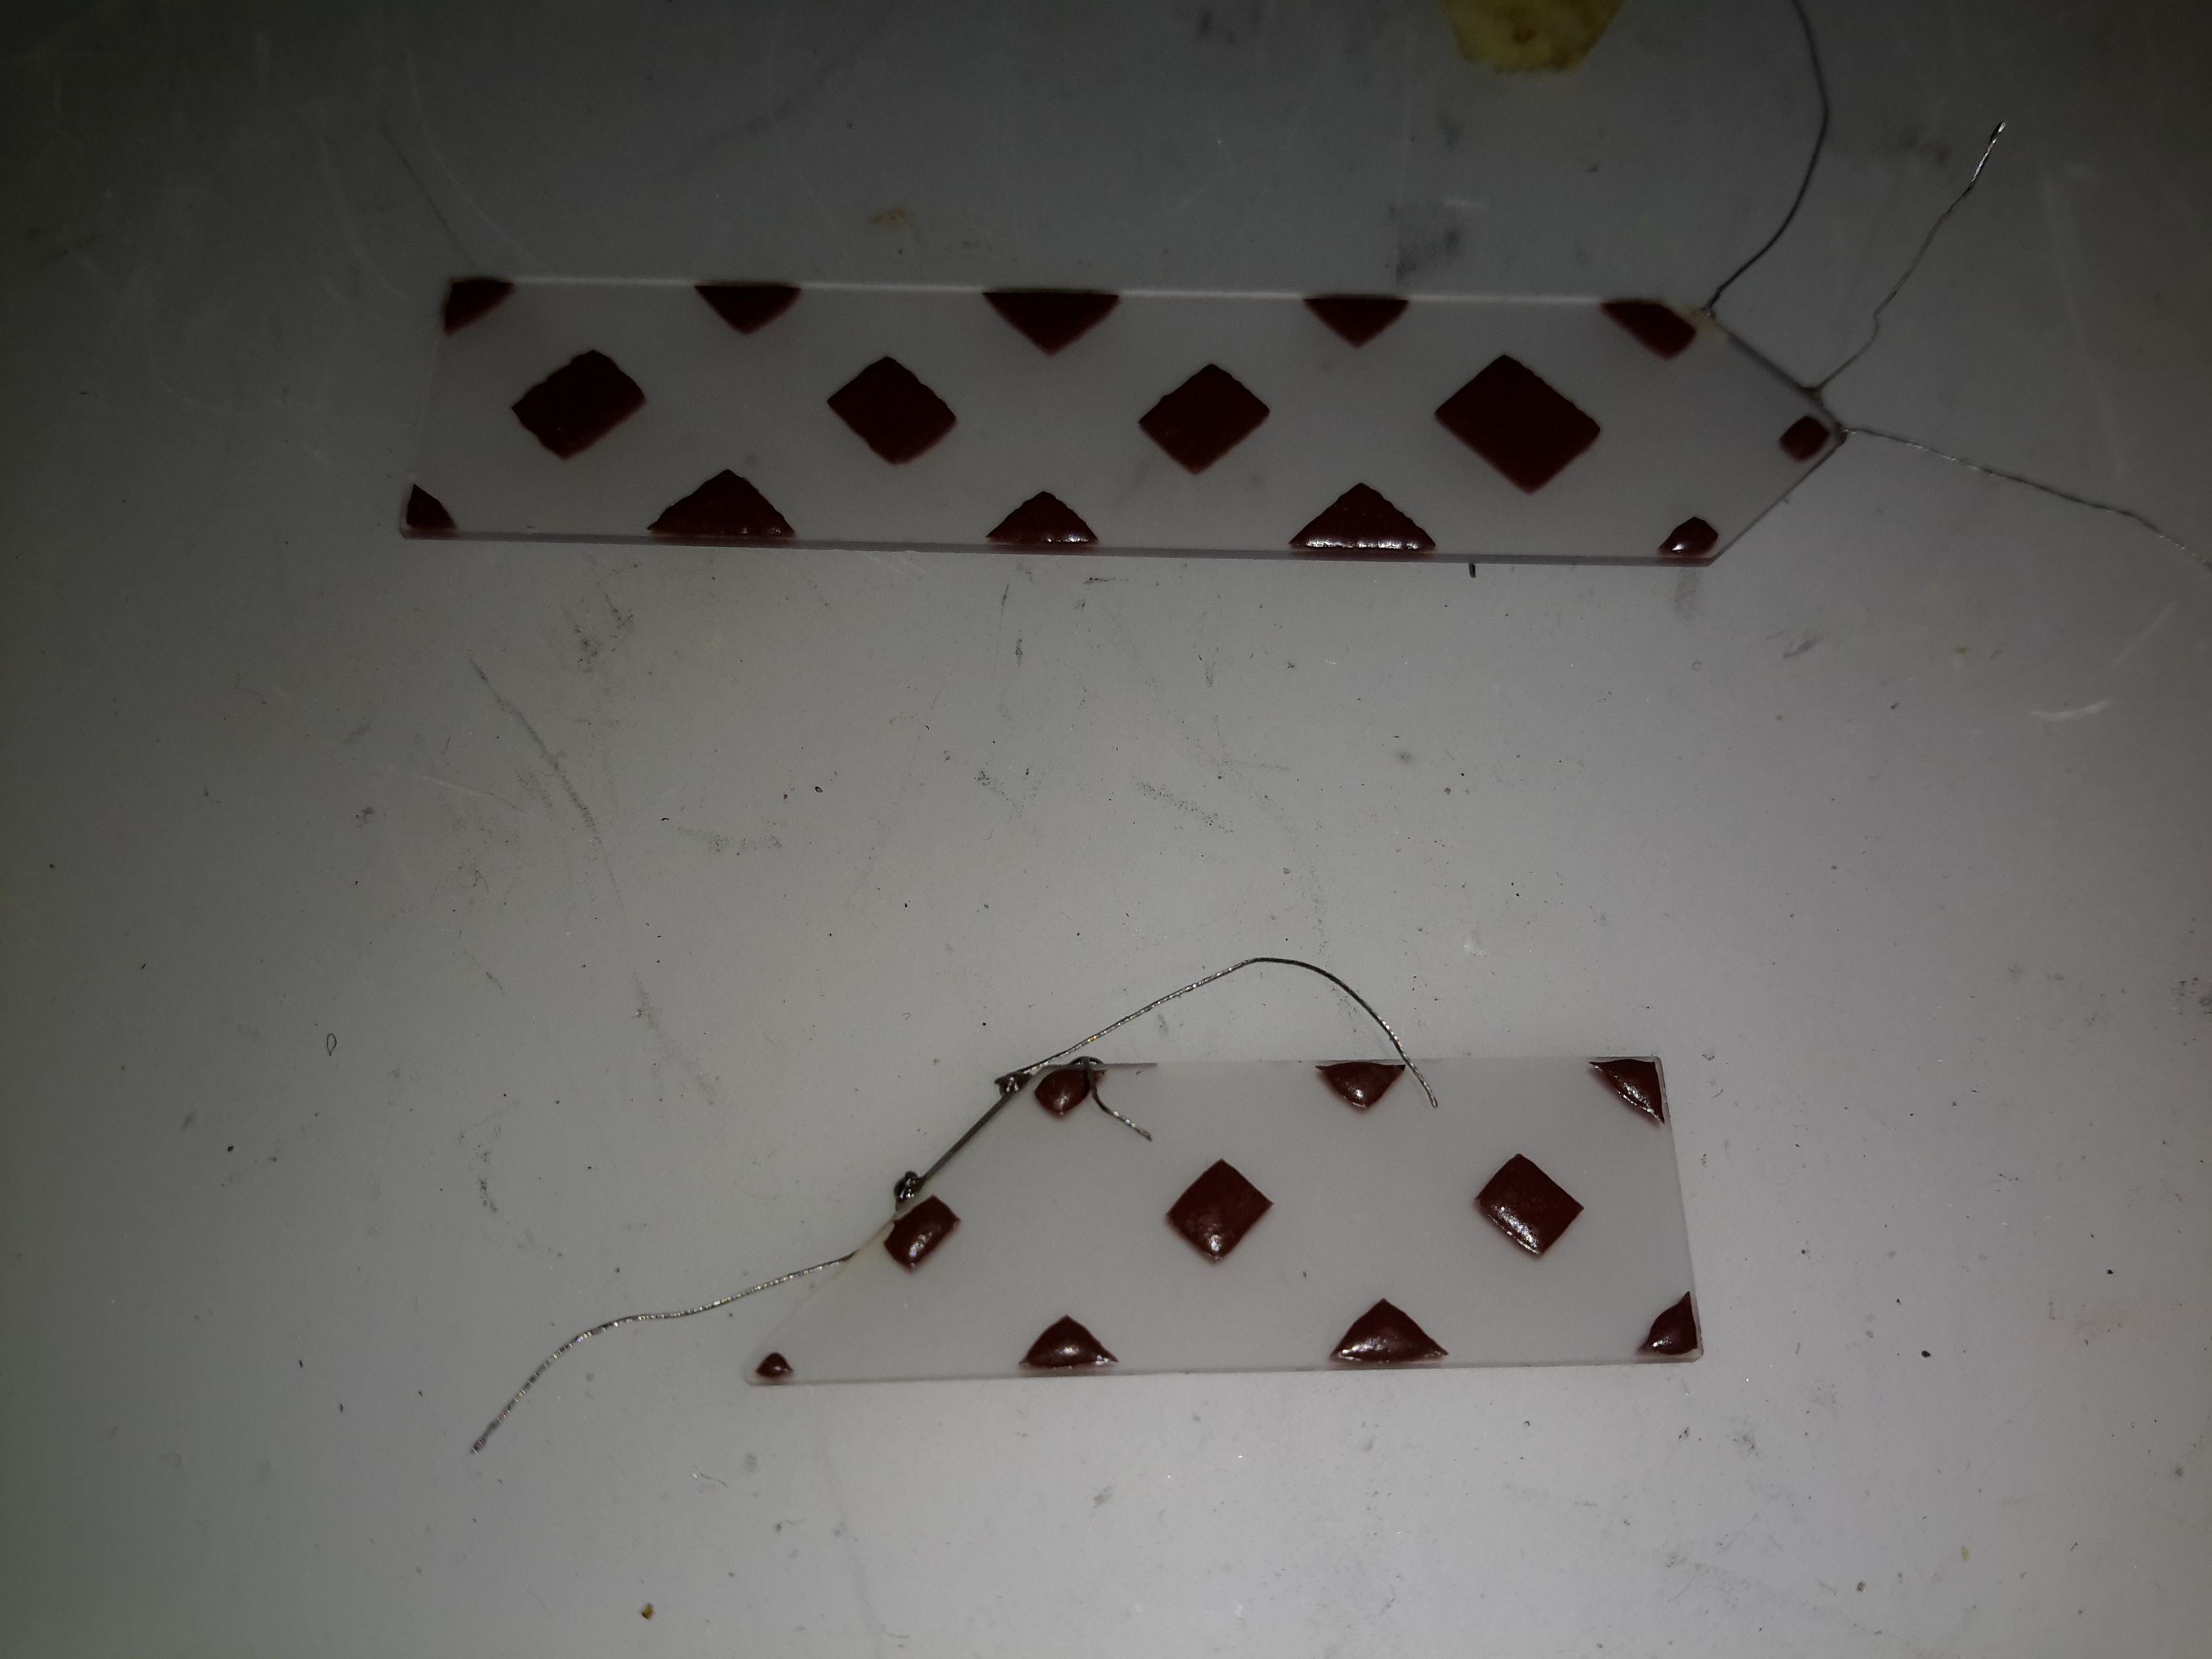
The delay is created by sending an acoustic signal through the quartz crystal inside the device by a piezoelectric transducer, bouncing it off the walls of the crystal before returning it to a similar transducer.
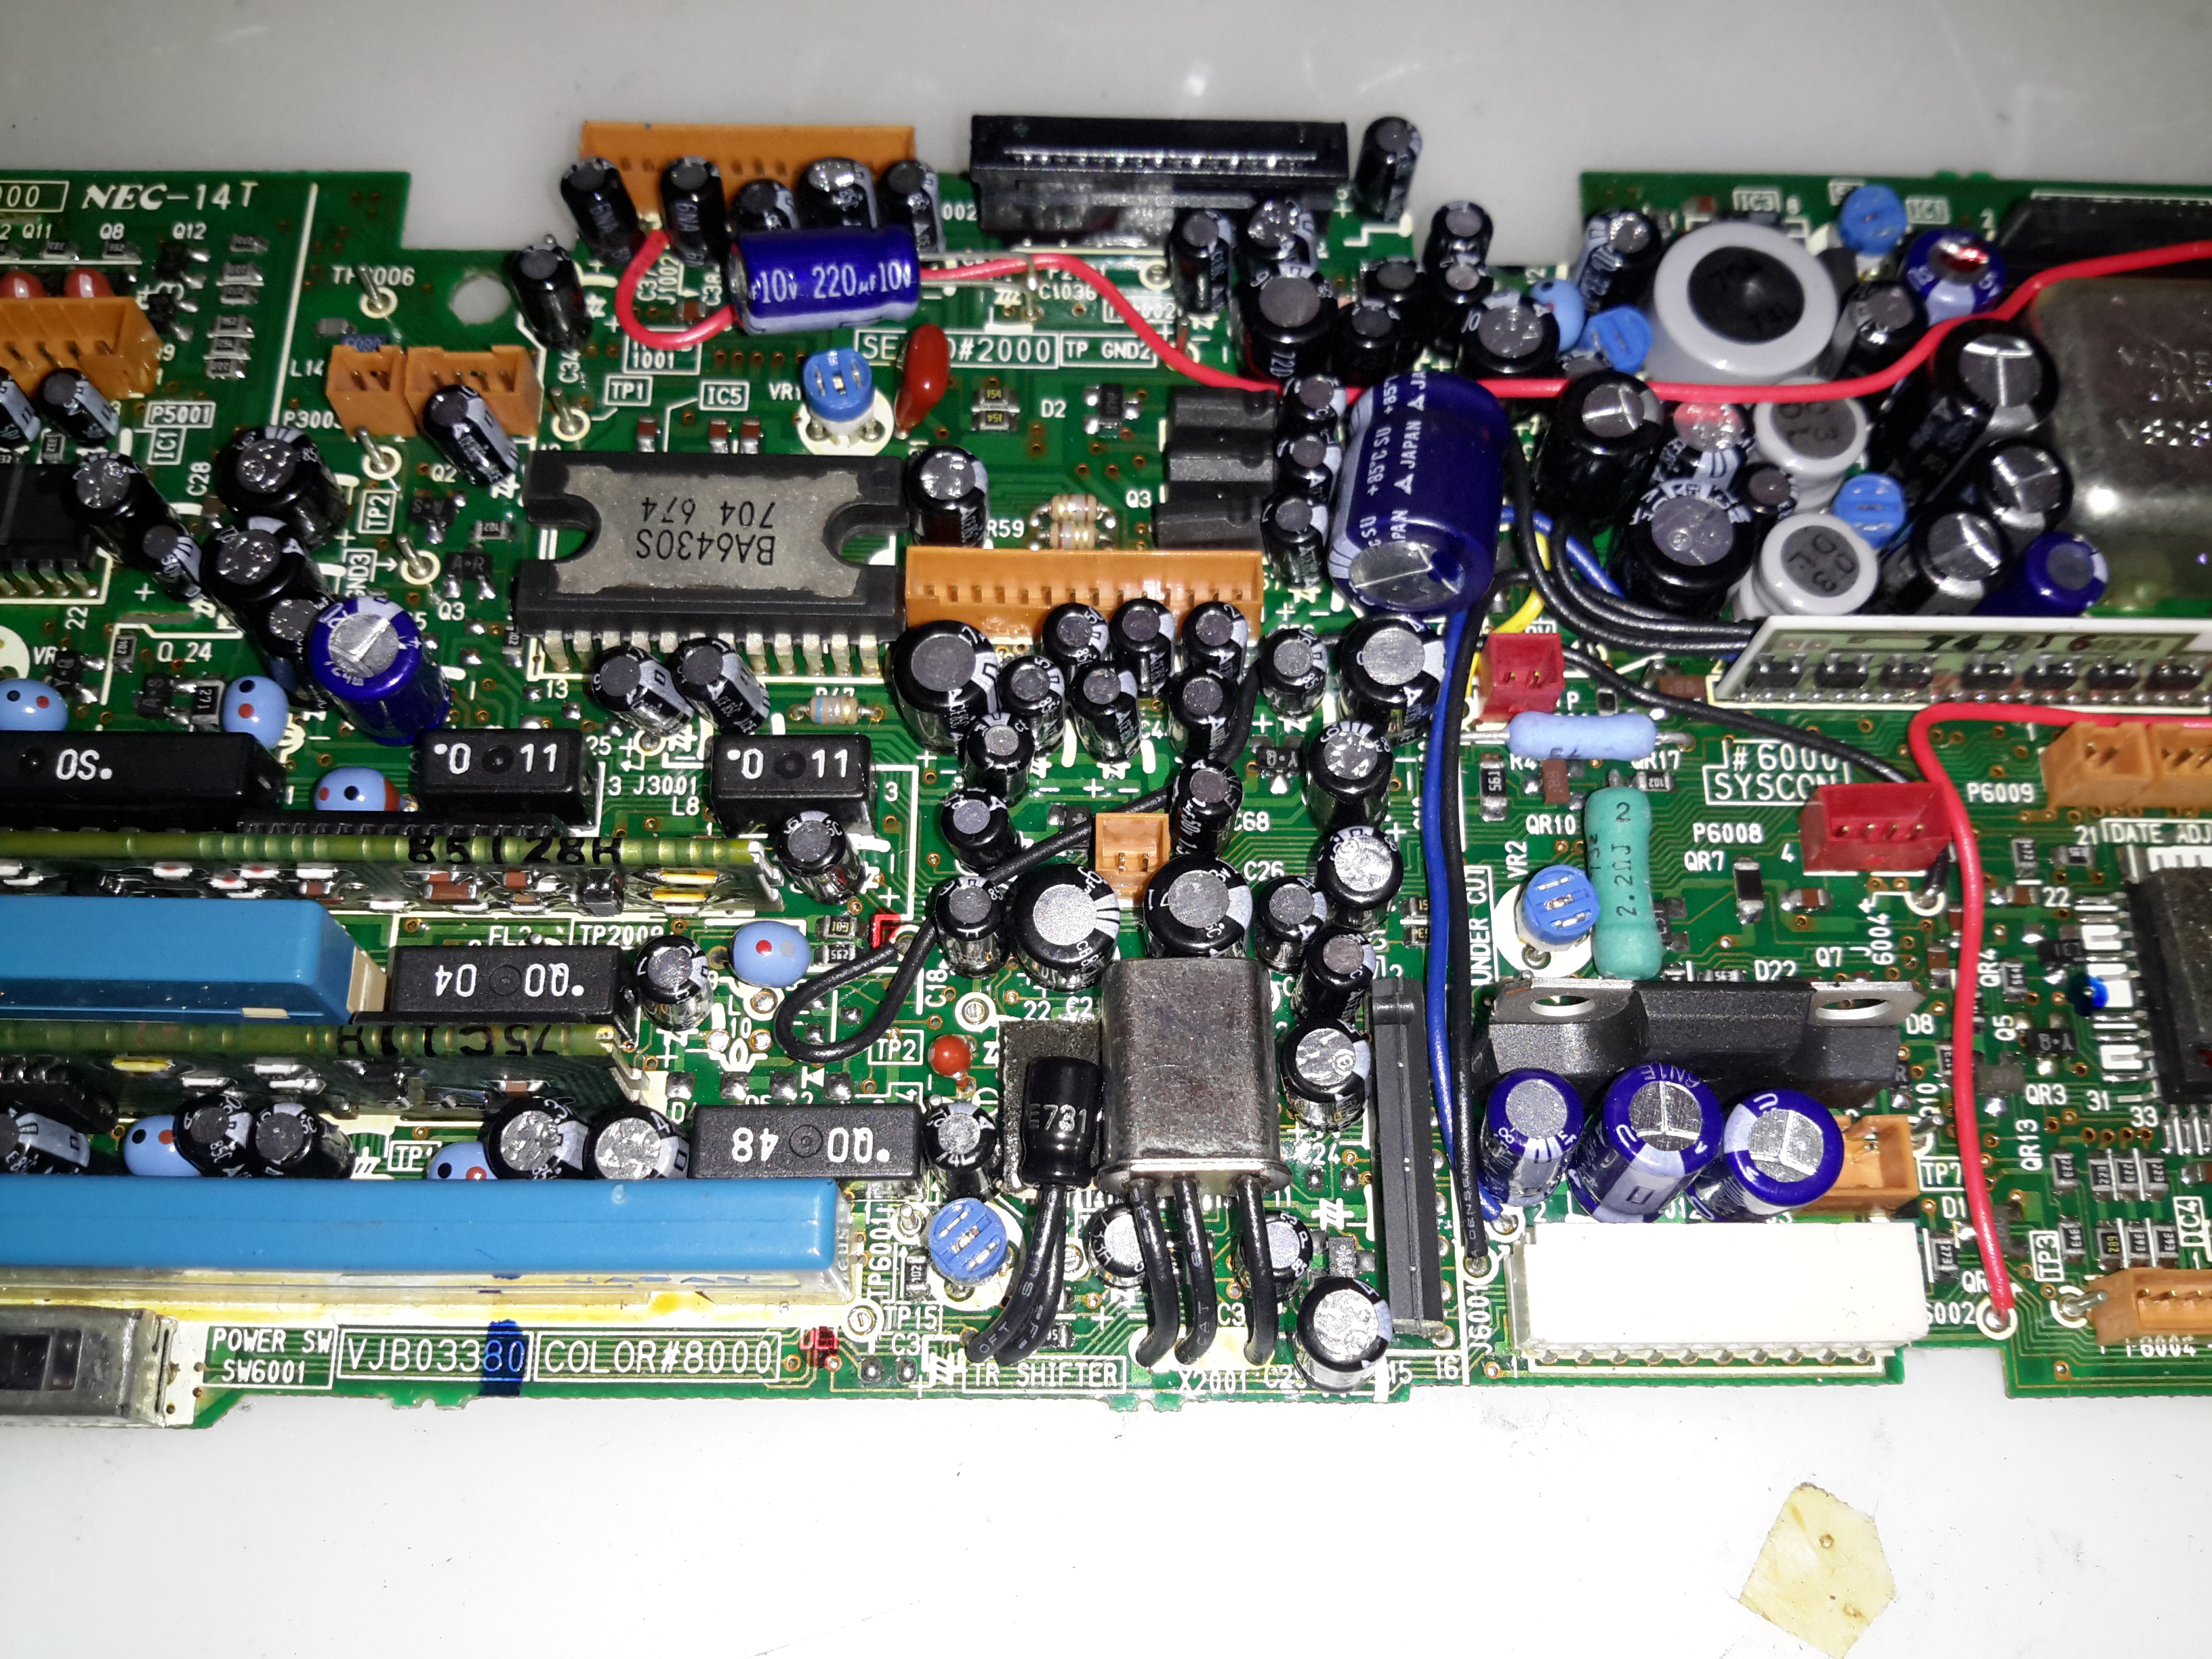
Here’s the centre of the board, the strange crystal at bottom centre is the clock crystal for the head drum servo. Why it has 3 pins I’m not sure, only the two pins to the crystal inside are shown connected on the schematic. Maybe grounding the case?
The main servo controls for the head drum & the capstan motor are top centre, these get a control signal from the tape to lock the speed of the relative components.
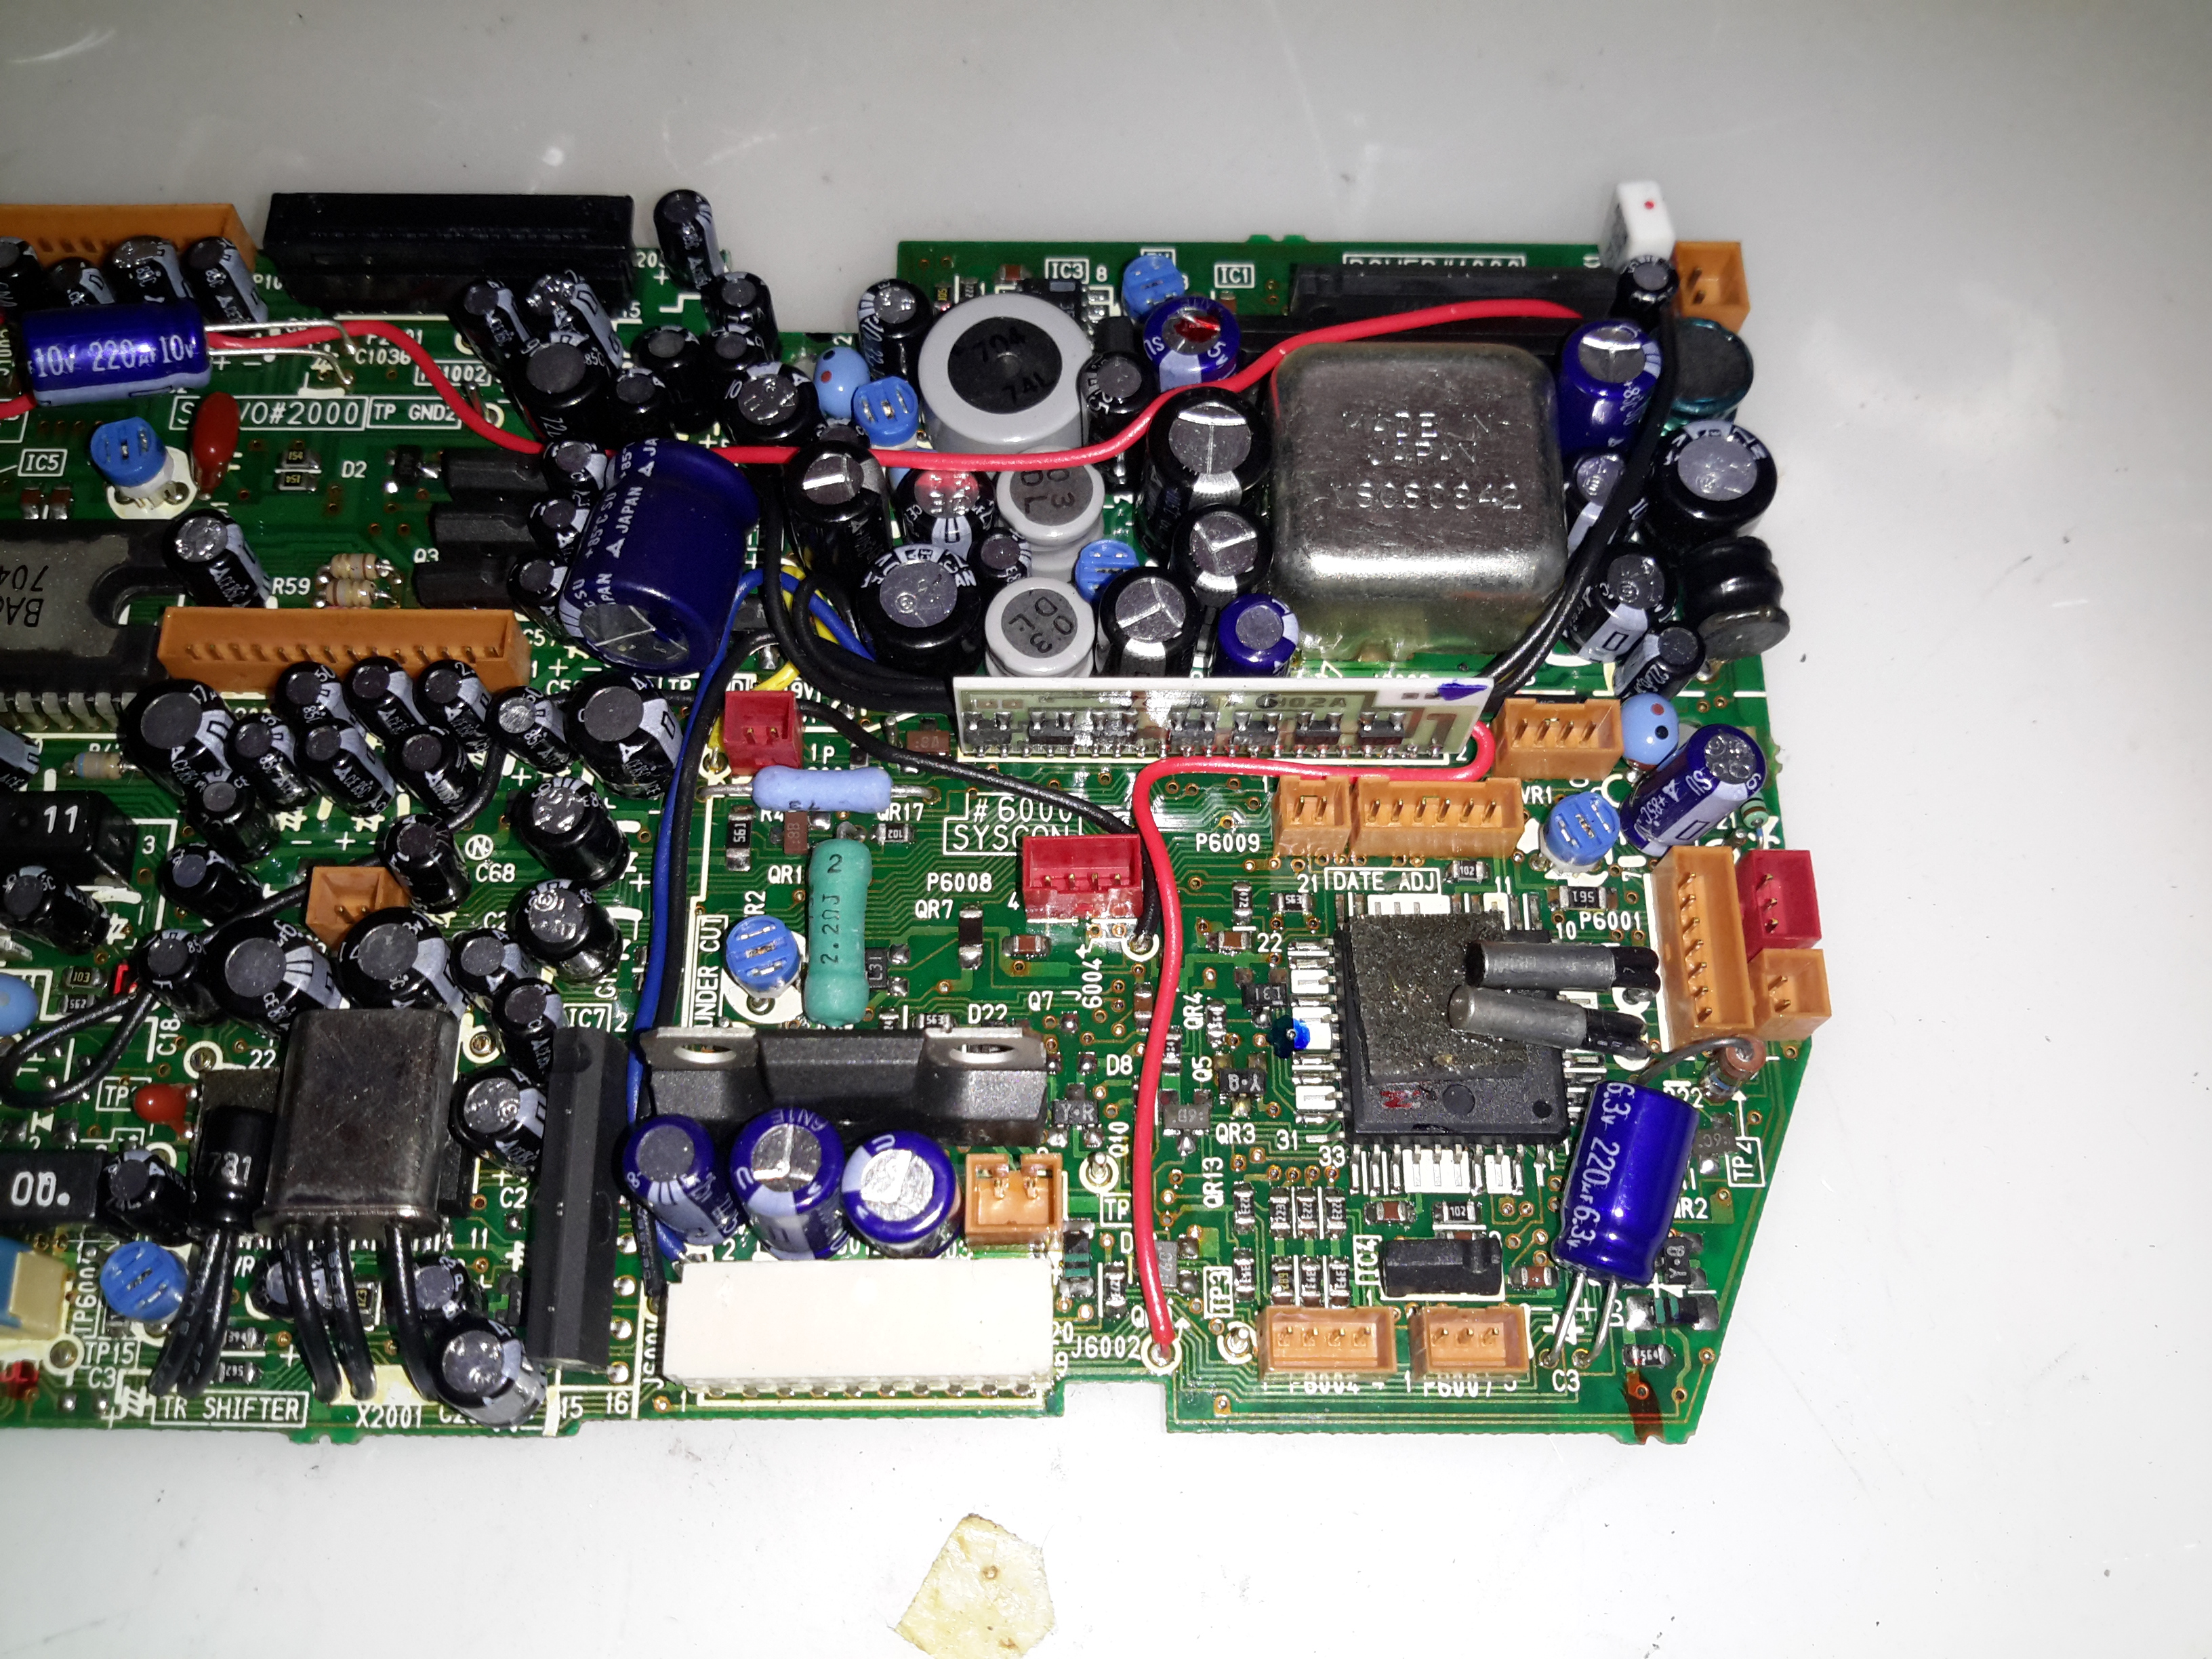
Here’s the right hand side. The main power supply circuitry is at top right, with a large can containing 4 switching inductors & a ferrite pot core transformer. All these converters are controlled by a single BA6149 6-channel DC-DC converter controller IC via a ULN2003 transistor array.
The ceramic hybrid board next to the PSU has 7 switch transistors for driving various indicator LEDs.
The large tabbed IC bottom centre is the loading motor drive, an IC from Mitsubishi, the M54543. This has bidirectional DC control of the motor & built in braking functions. The large quad flat pack IC on the right is the MN1237A on-screen character generator, with the two clock crystals for the main microcontroller.
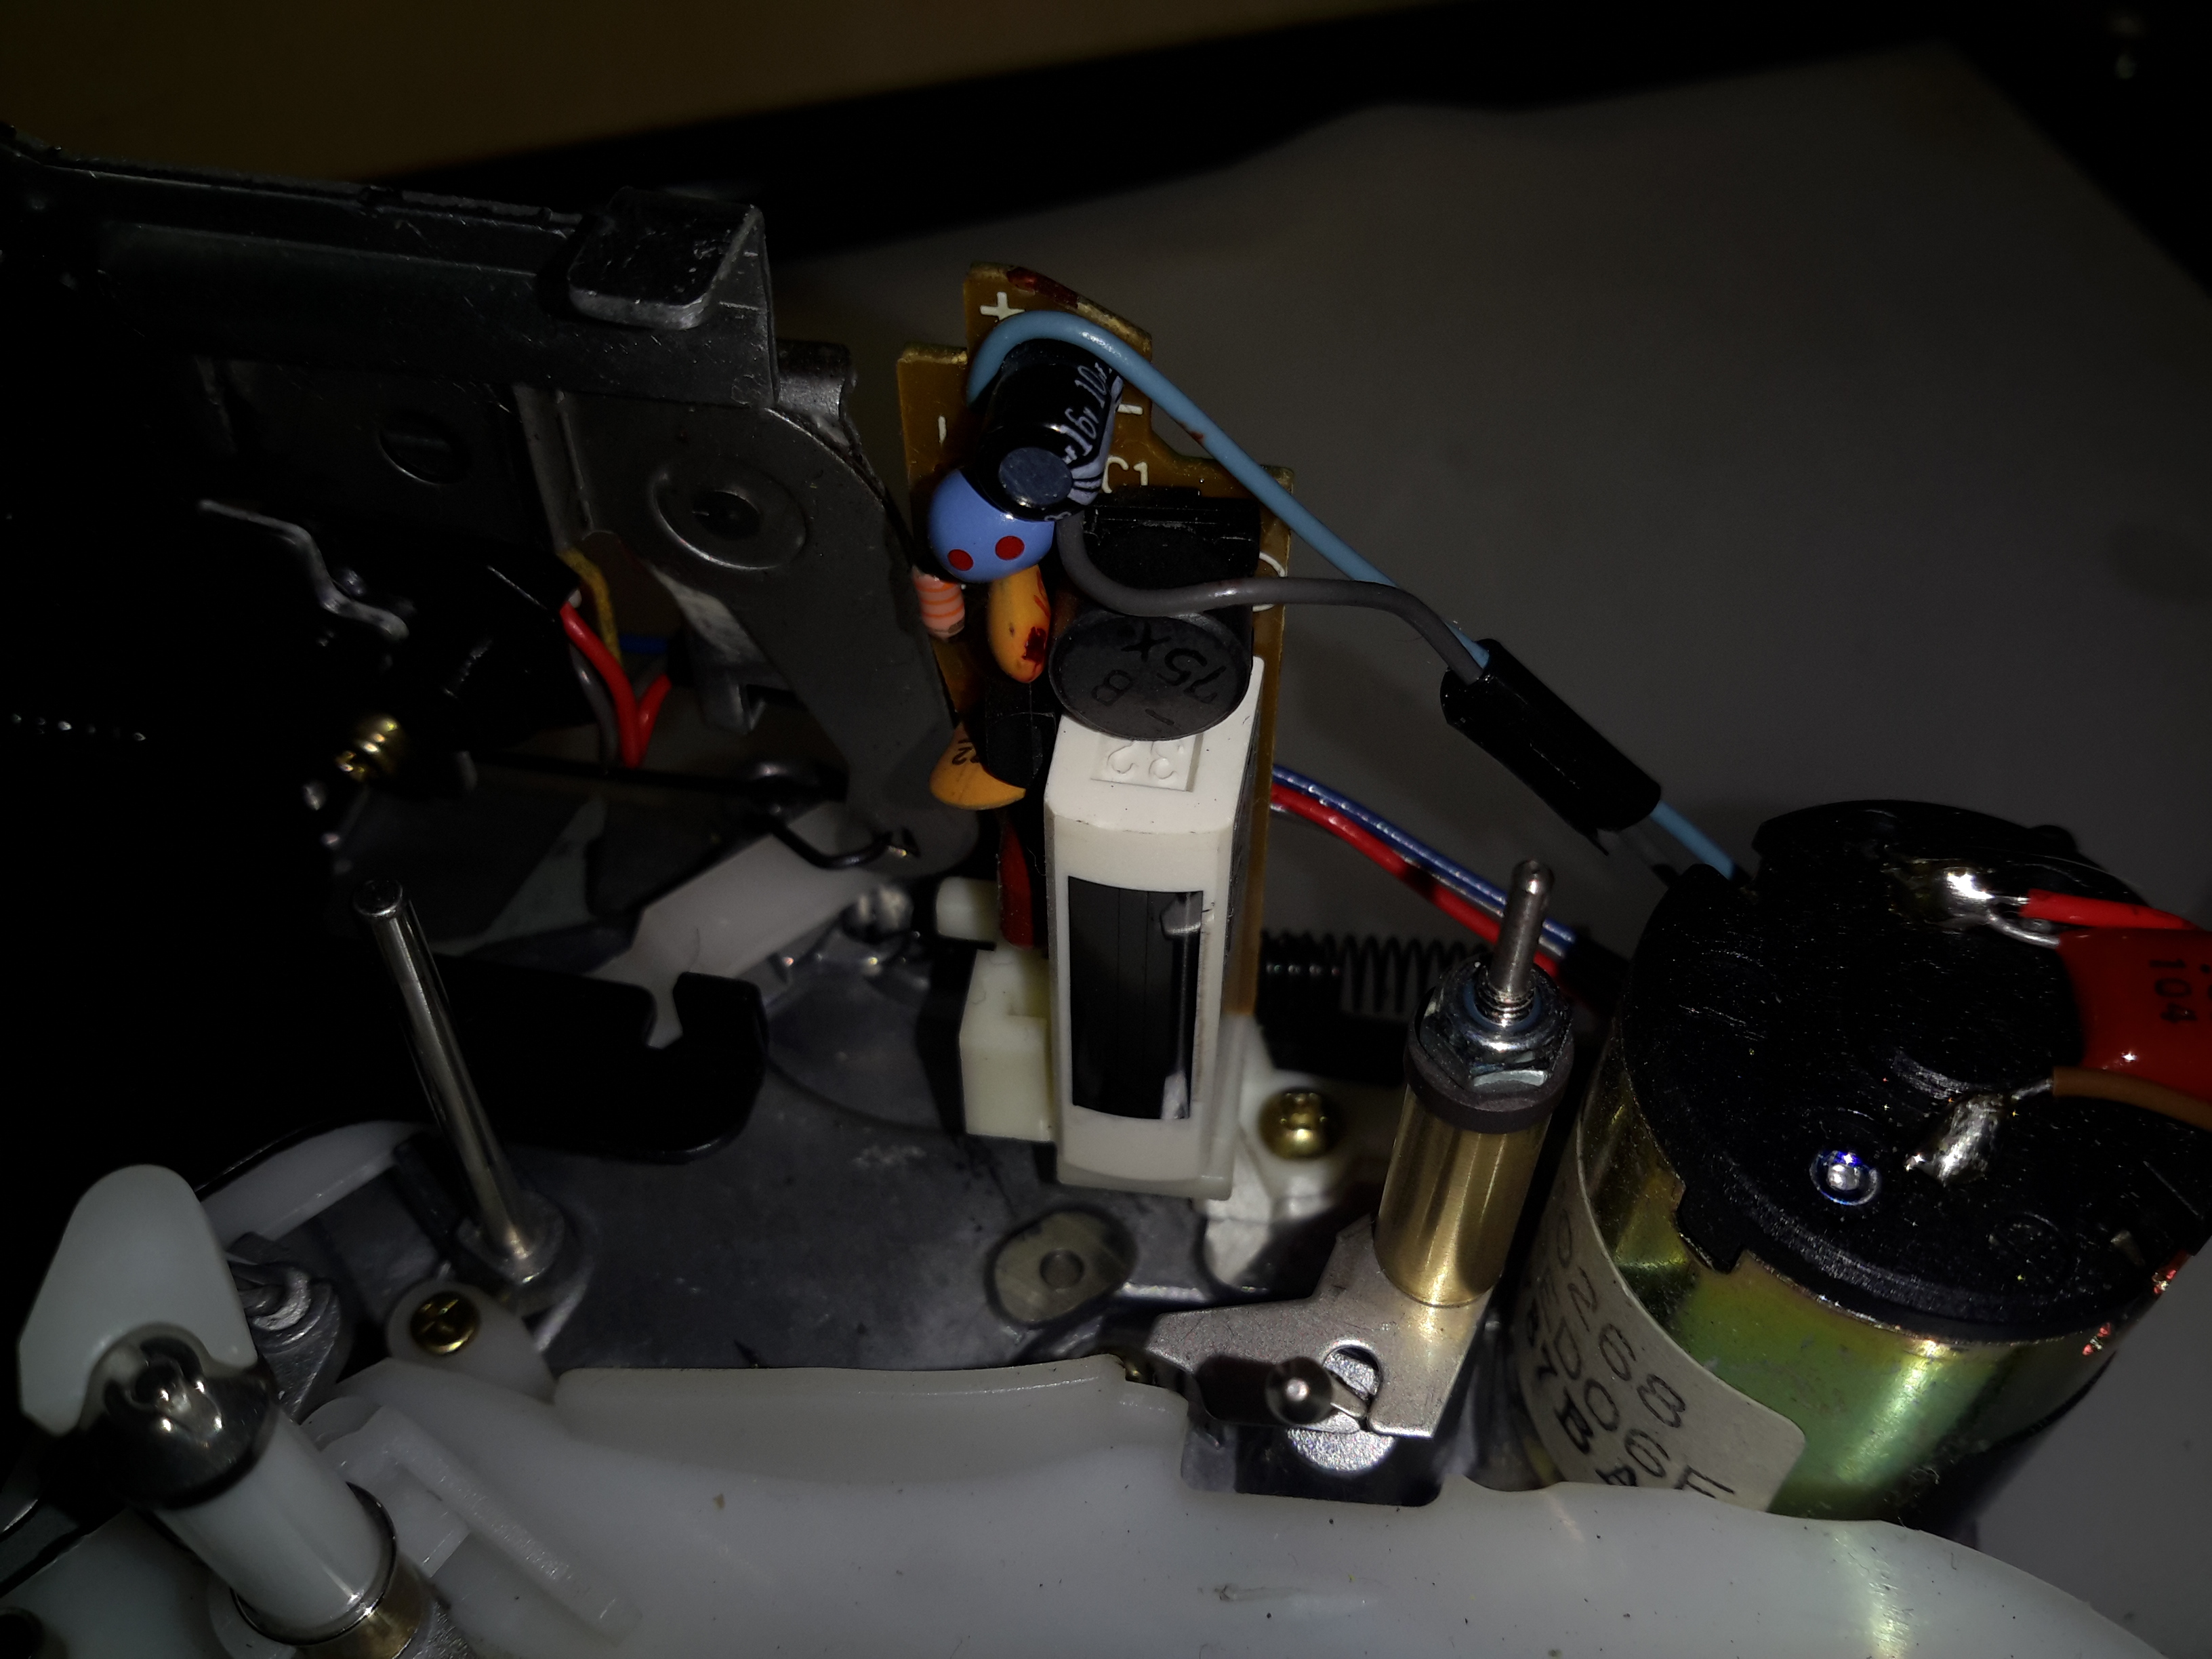
The full erase head has it’s power supply & oscillator on board, applying 9v to this board results in an AC signal to the head, which erases the old recording from the tape before the new recording is laid down by the flying heads on the drum.
The Audio & Control head is connected to this PCB, which handles both reading back audio from the tape & recording new audio tracks. The audio bias oscillator is on this board, & the onboard microphone feeds it’s signal here. The control head is fed directly through to the servo section of the main board.
The motor that drives the head drum is another DC brushless 3-phase type.
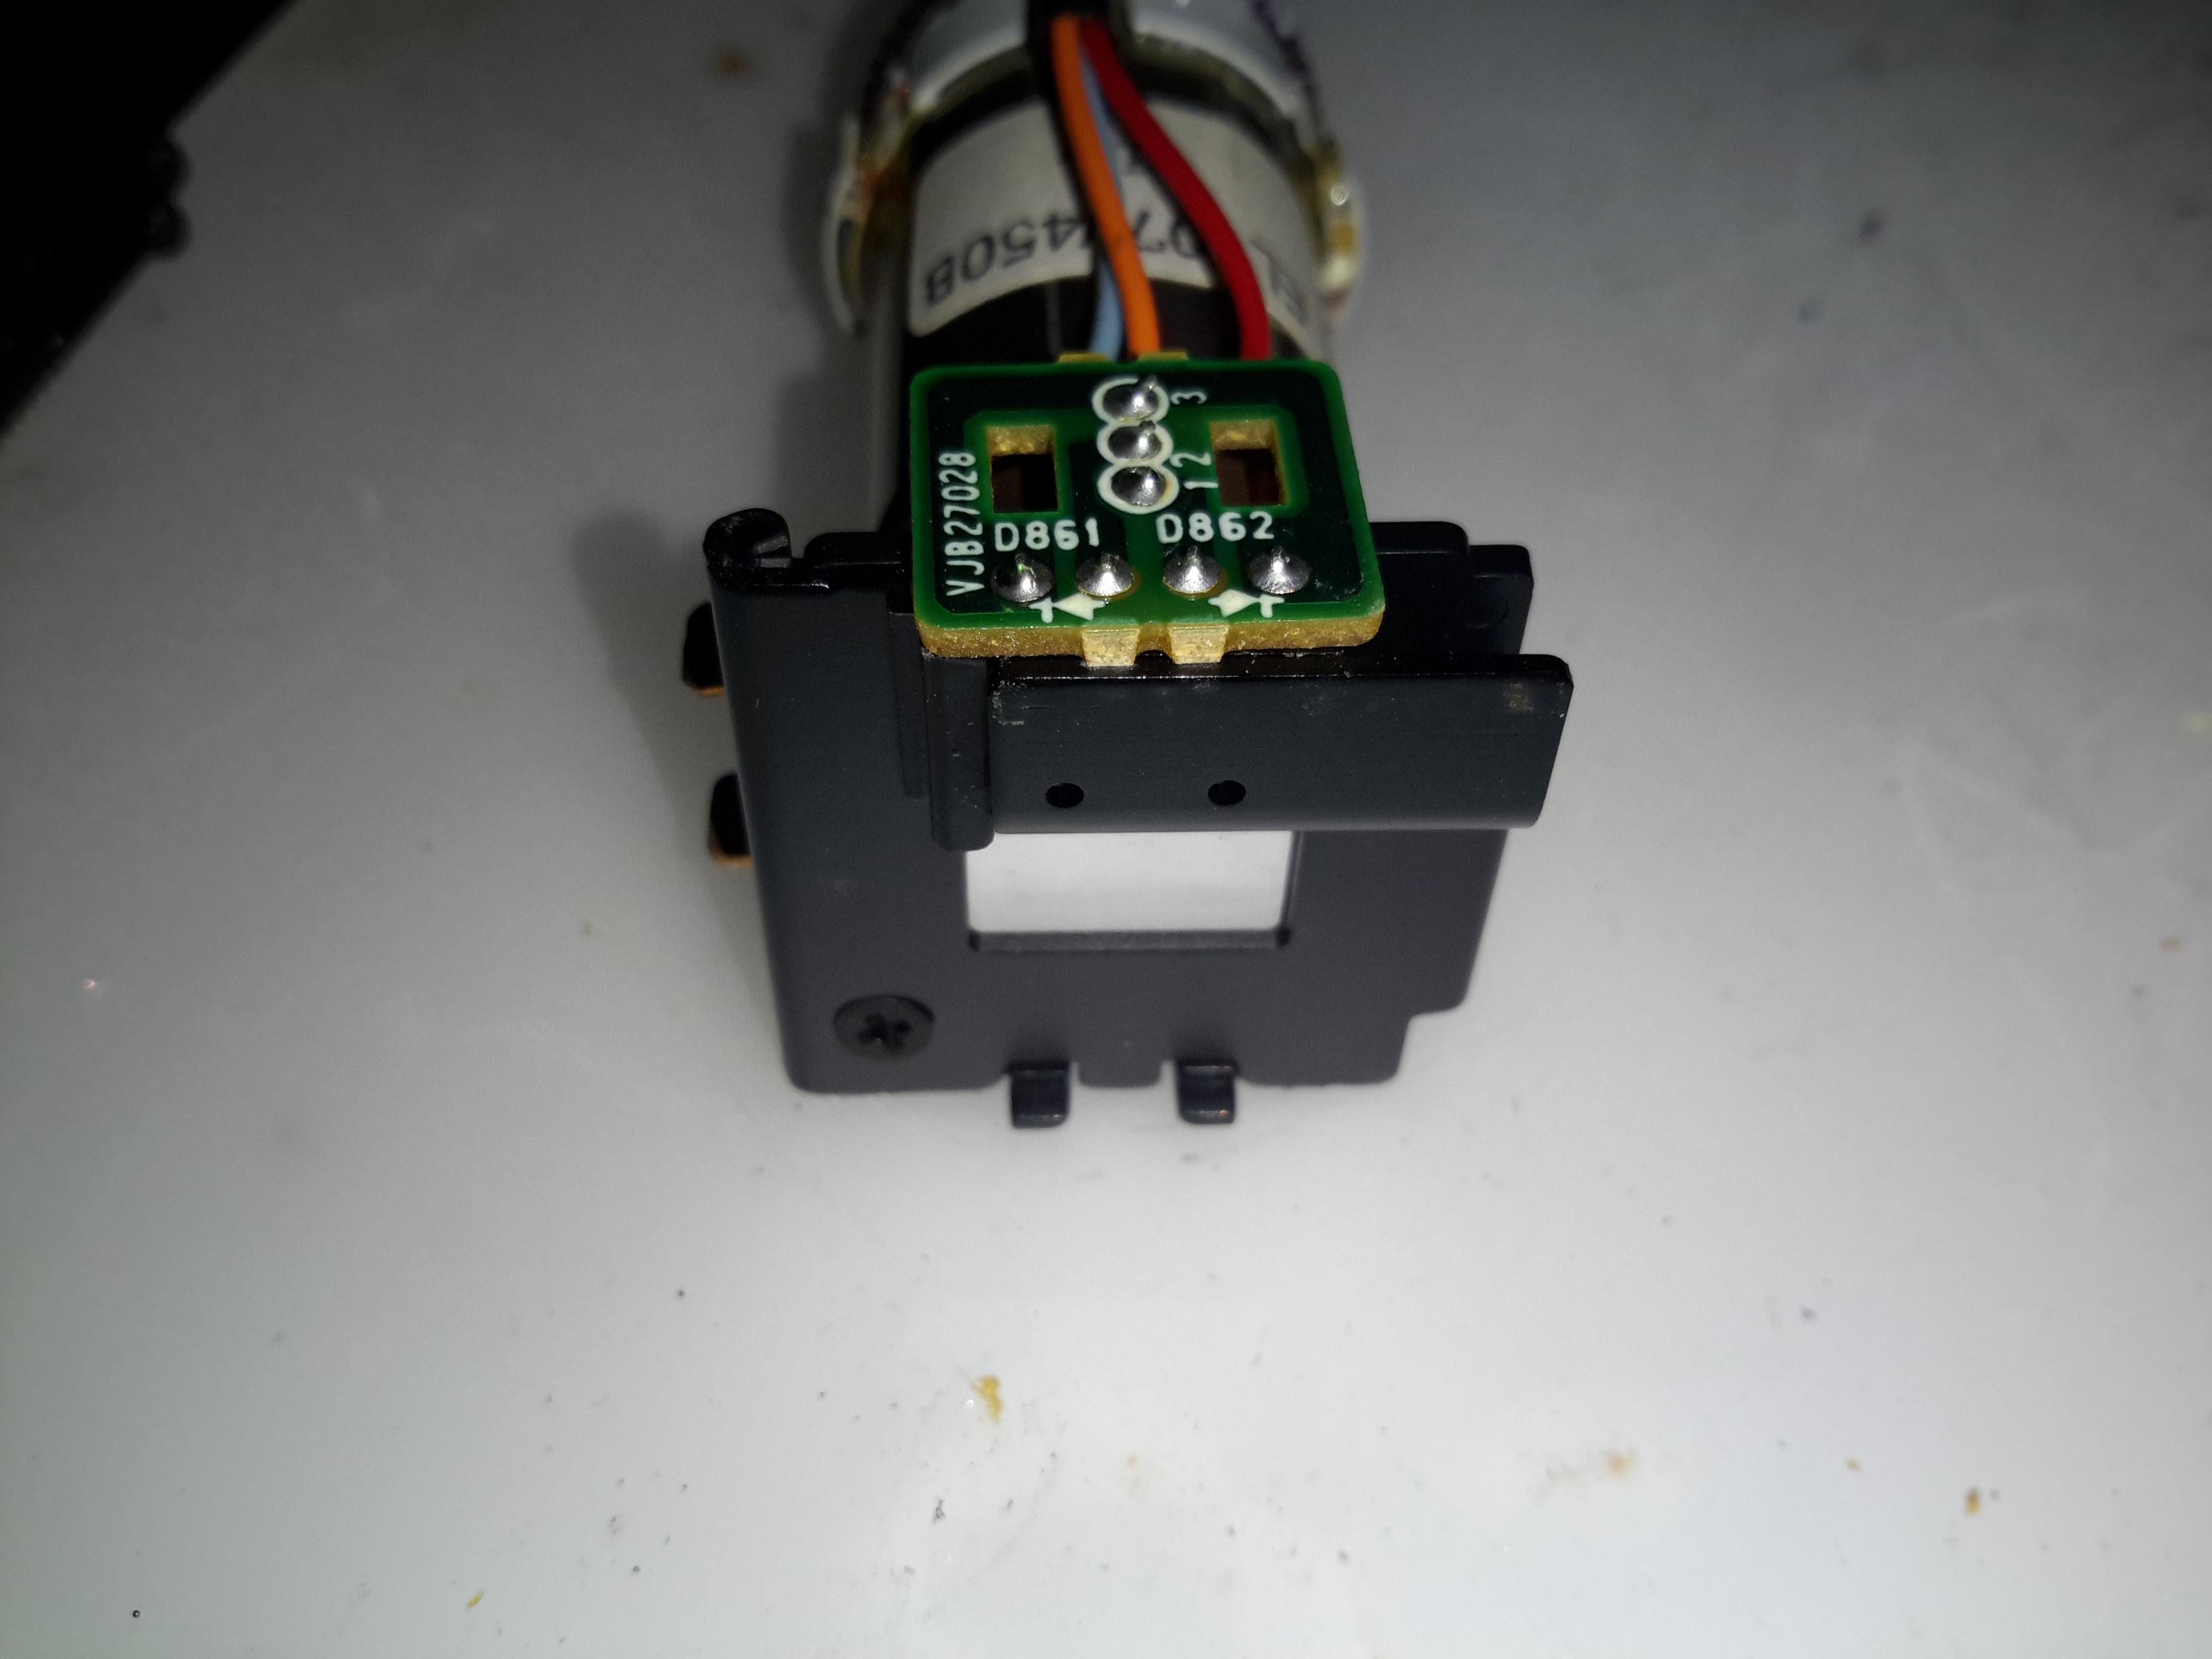
These 3 Hall sensors are used by the motor drive to determine the rotor position & time commutation accordingly.
The stator on this motor is of interesting construction, with no laminated core, the coils are moulded into the plastic holder. The tach sensor is on the side of the stator core. This senses a small magnet on the outside of the rotor to determine rotational speed. For PAL recordings, the drum rotates at 1500 RPM.
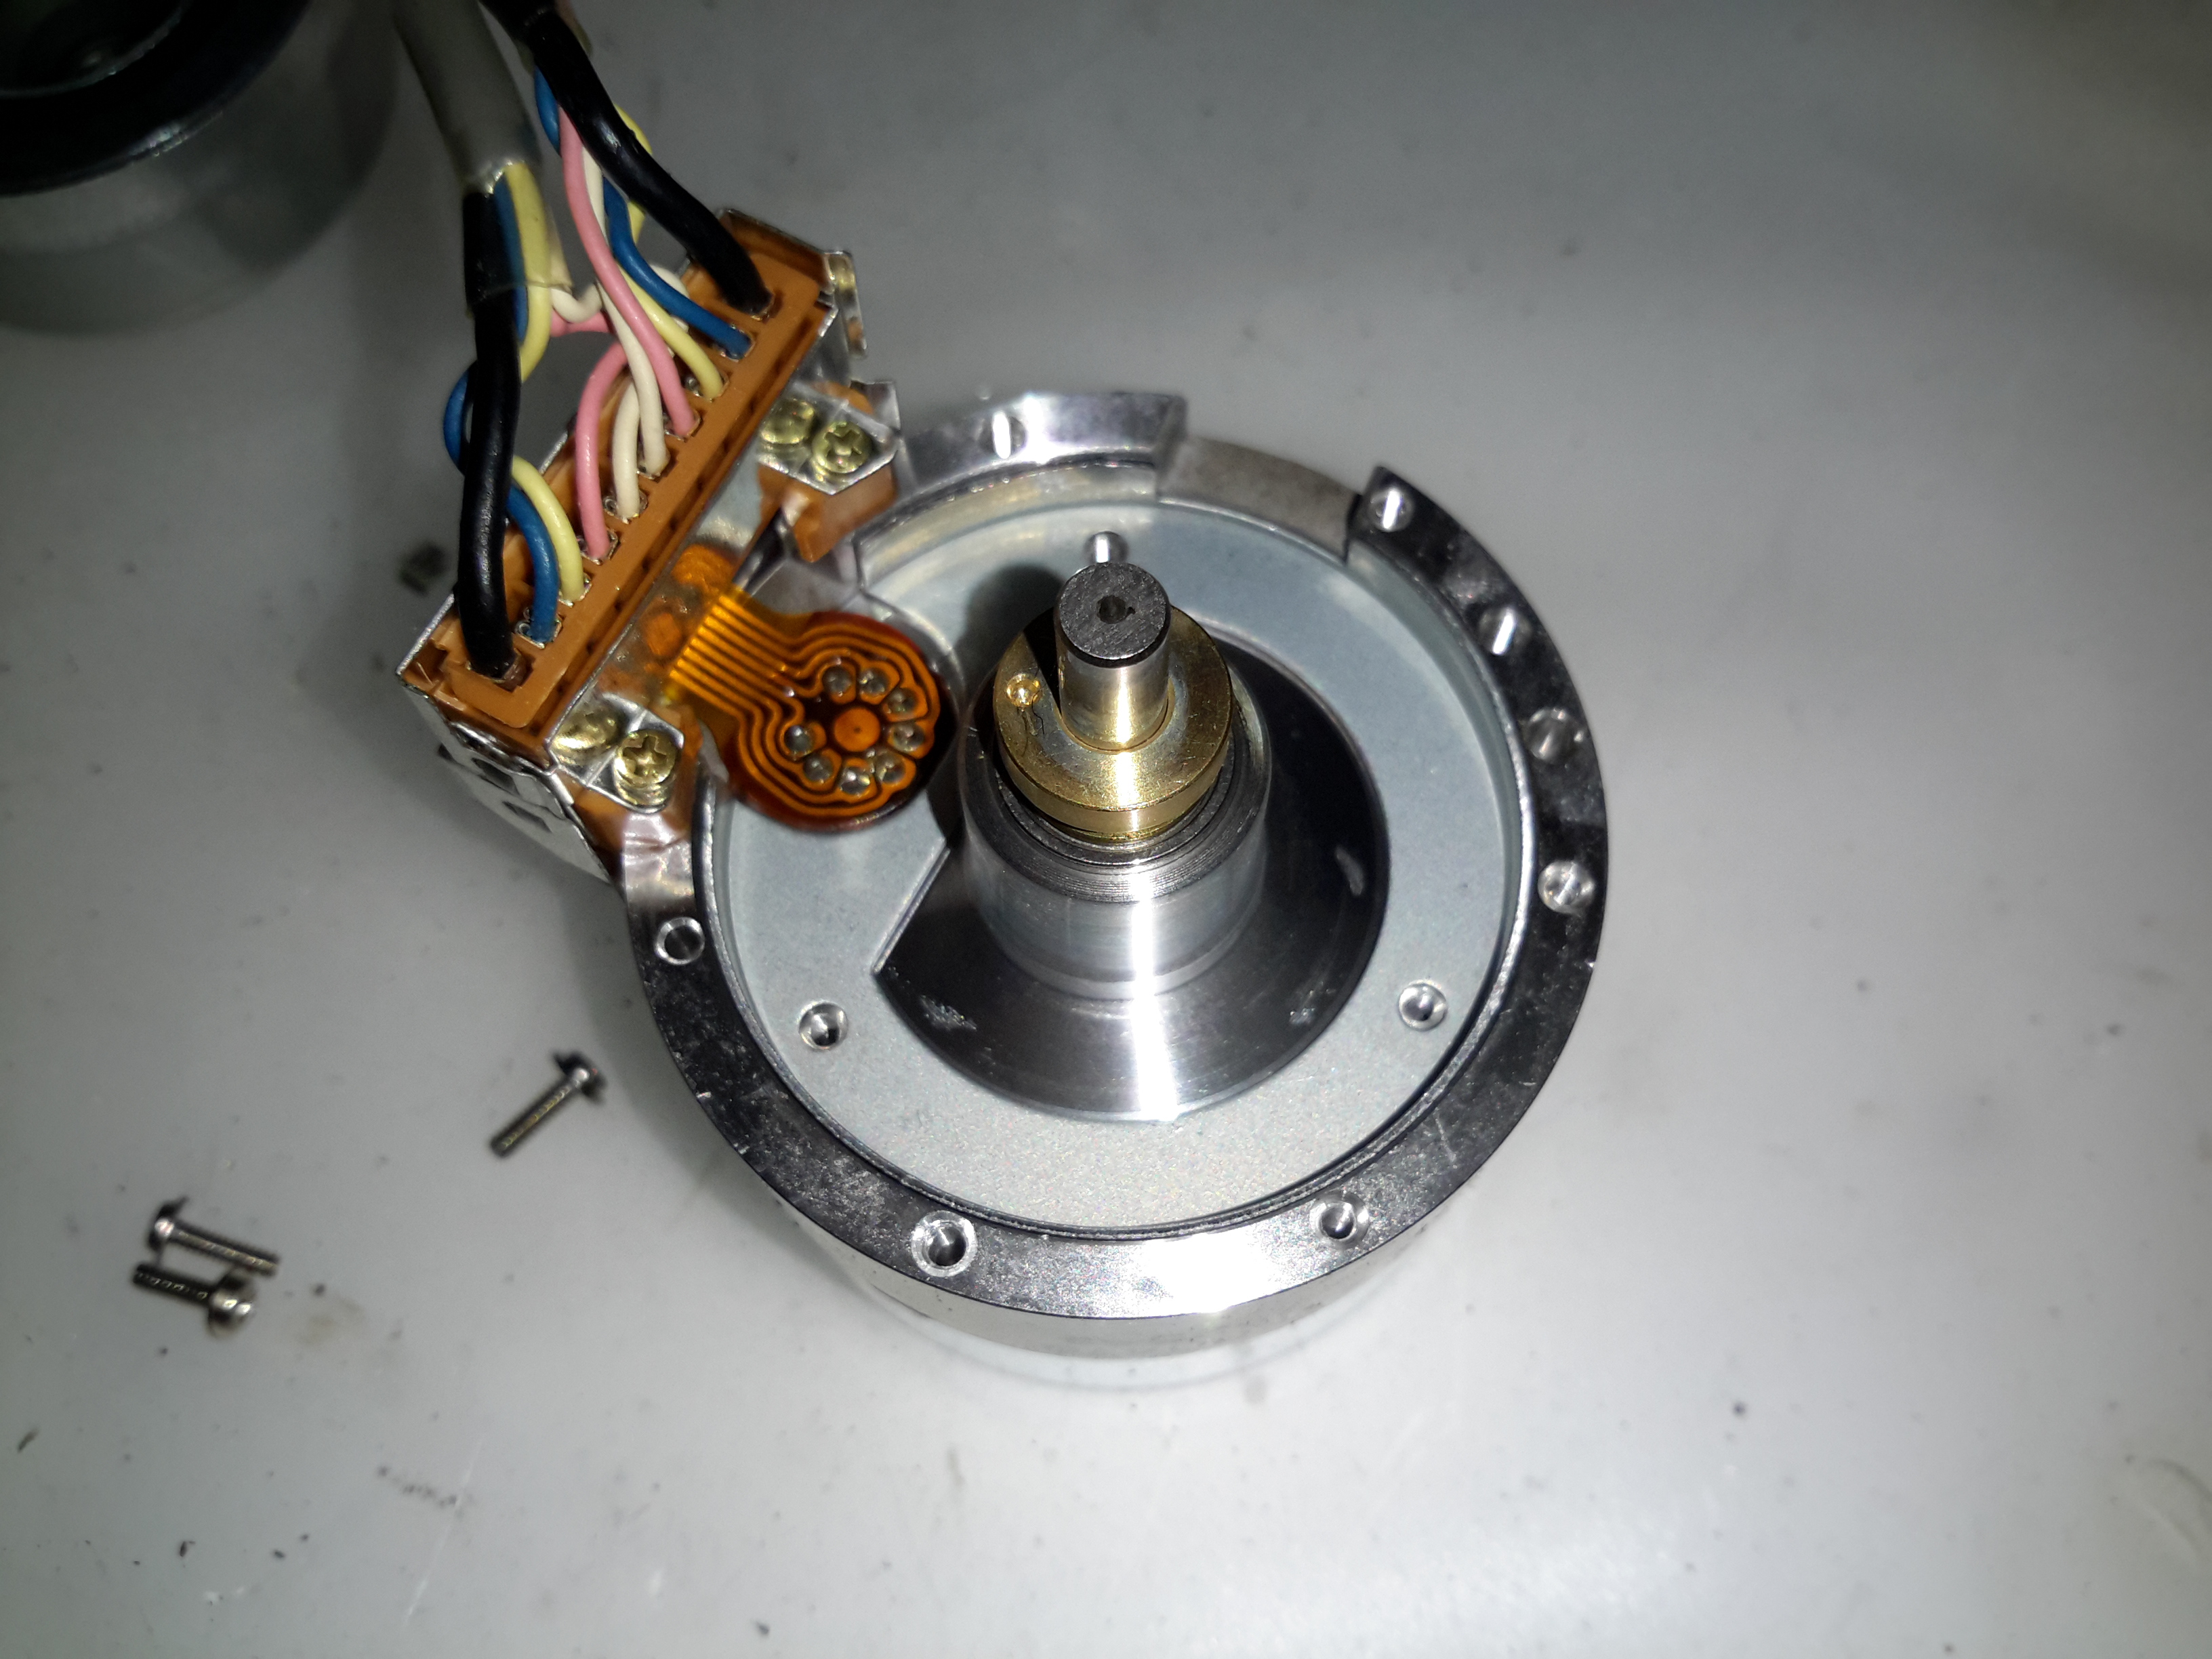
Not much under the stator other than the bearing housing & the feedthrough to the rotary transformer.
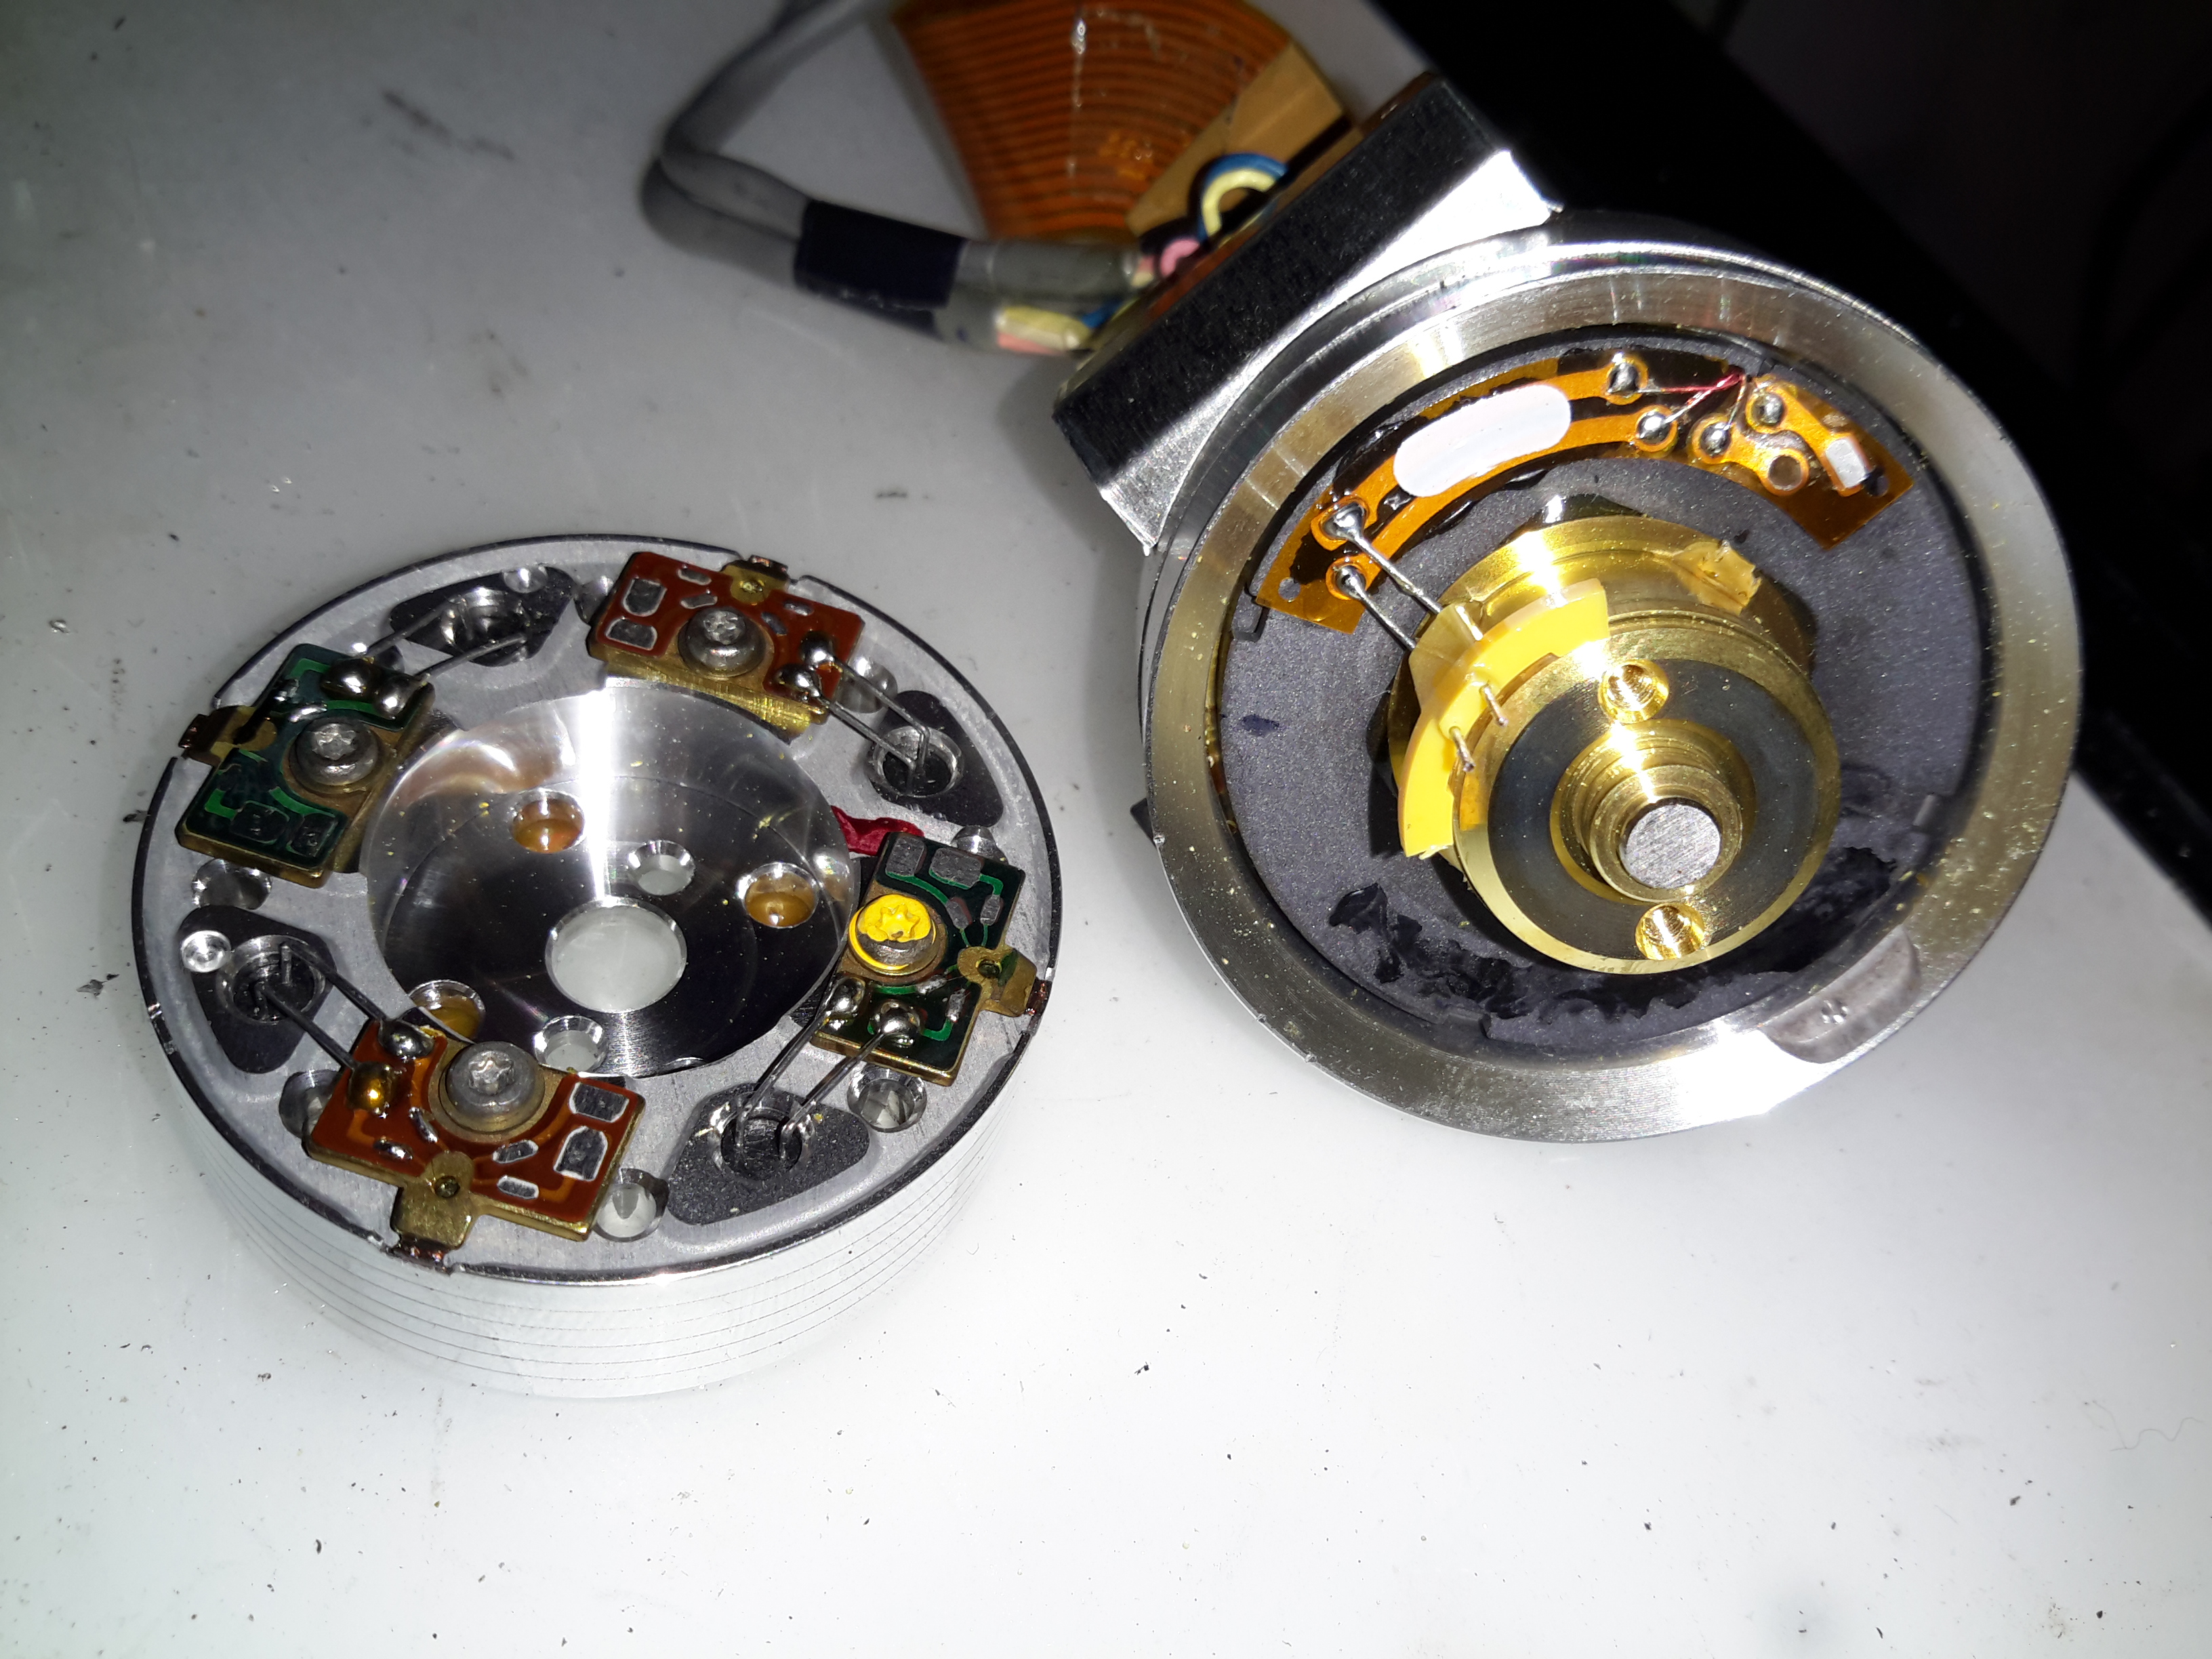
The heads are mounted onto the top disc of the drum, 4 heads in this recorder. The signals are transmitted to the rotating section through the ferrite rotary transformer on the bottom section.
The tiny winding of the ferrite video head can just about be seen on the end of the brass mounting.
The capstan motor is similar to the drum motor, only this one is flat. The rotor has a ferrite magnet, in this case it wasn’t glued in place, just held by it’s magnetic field.
The PCB on this motor has a steel backing to complete the magnetic circuit, the coils for the 3 motor phases are simply glued in place. The Hall sensors on this motor are placed in the middle of the windings though.
Again there is a tach sensor on the edge of the board that communicates the speed back to the controller. This allows the servo to remain locked at constant speed.
Viewfinder
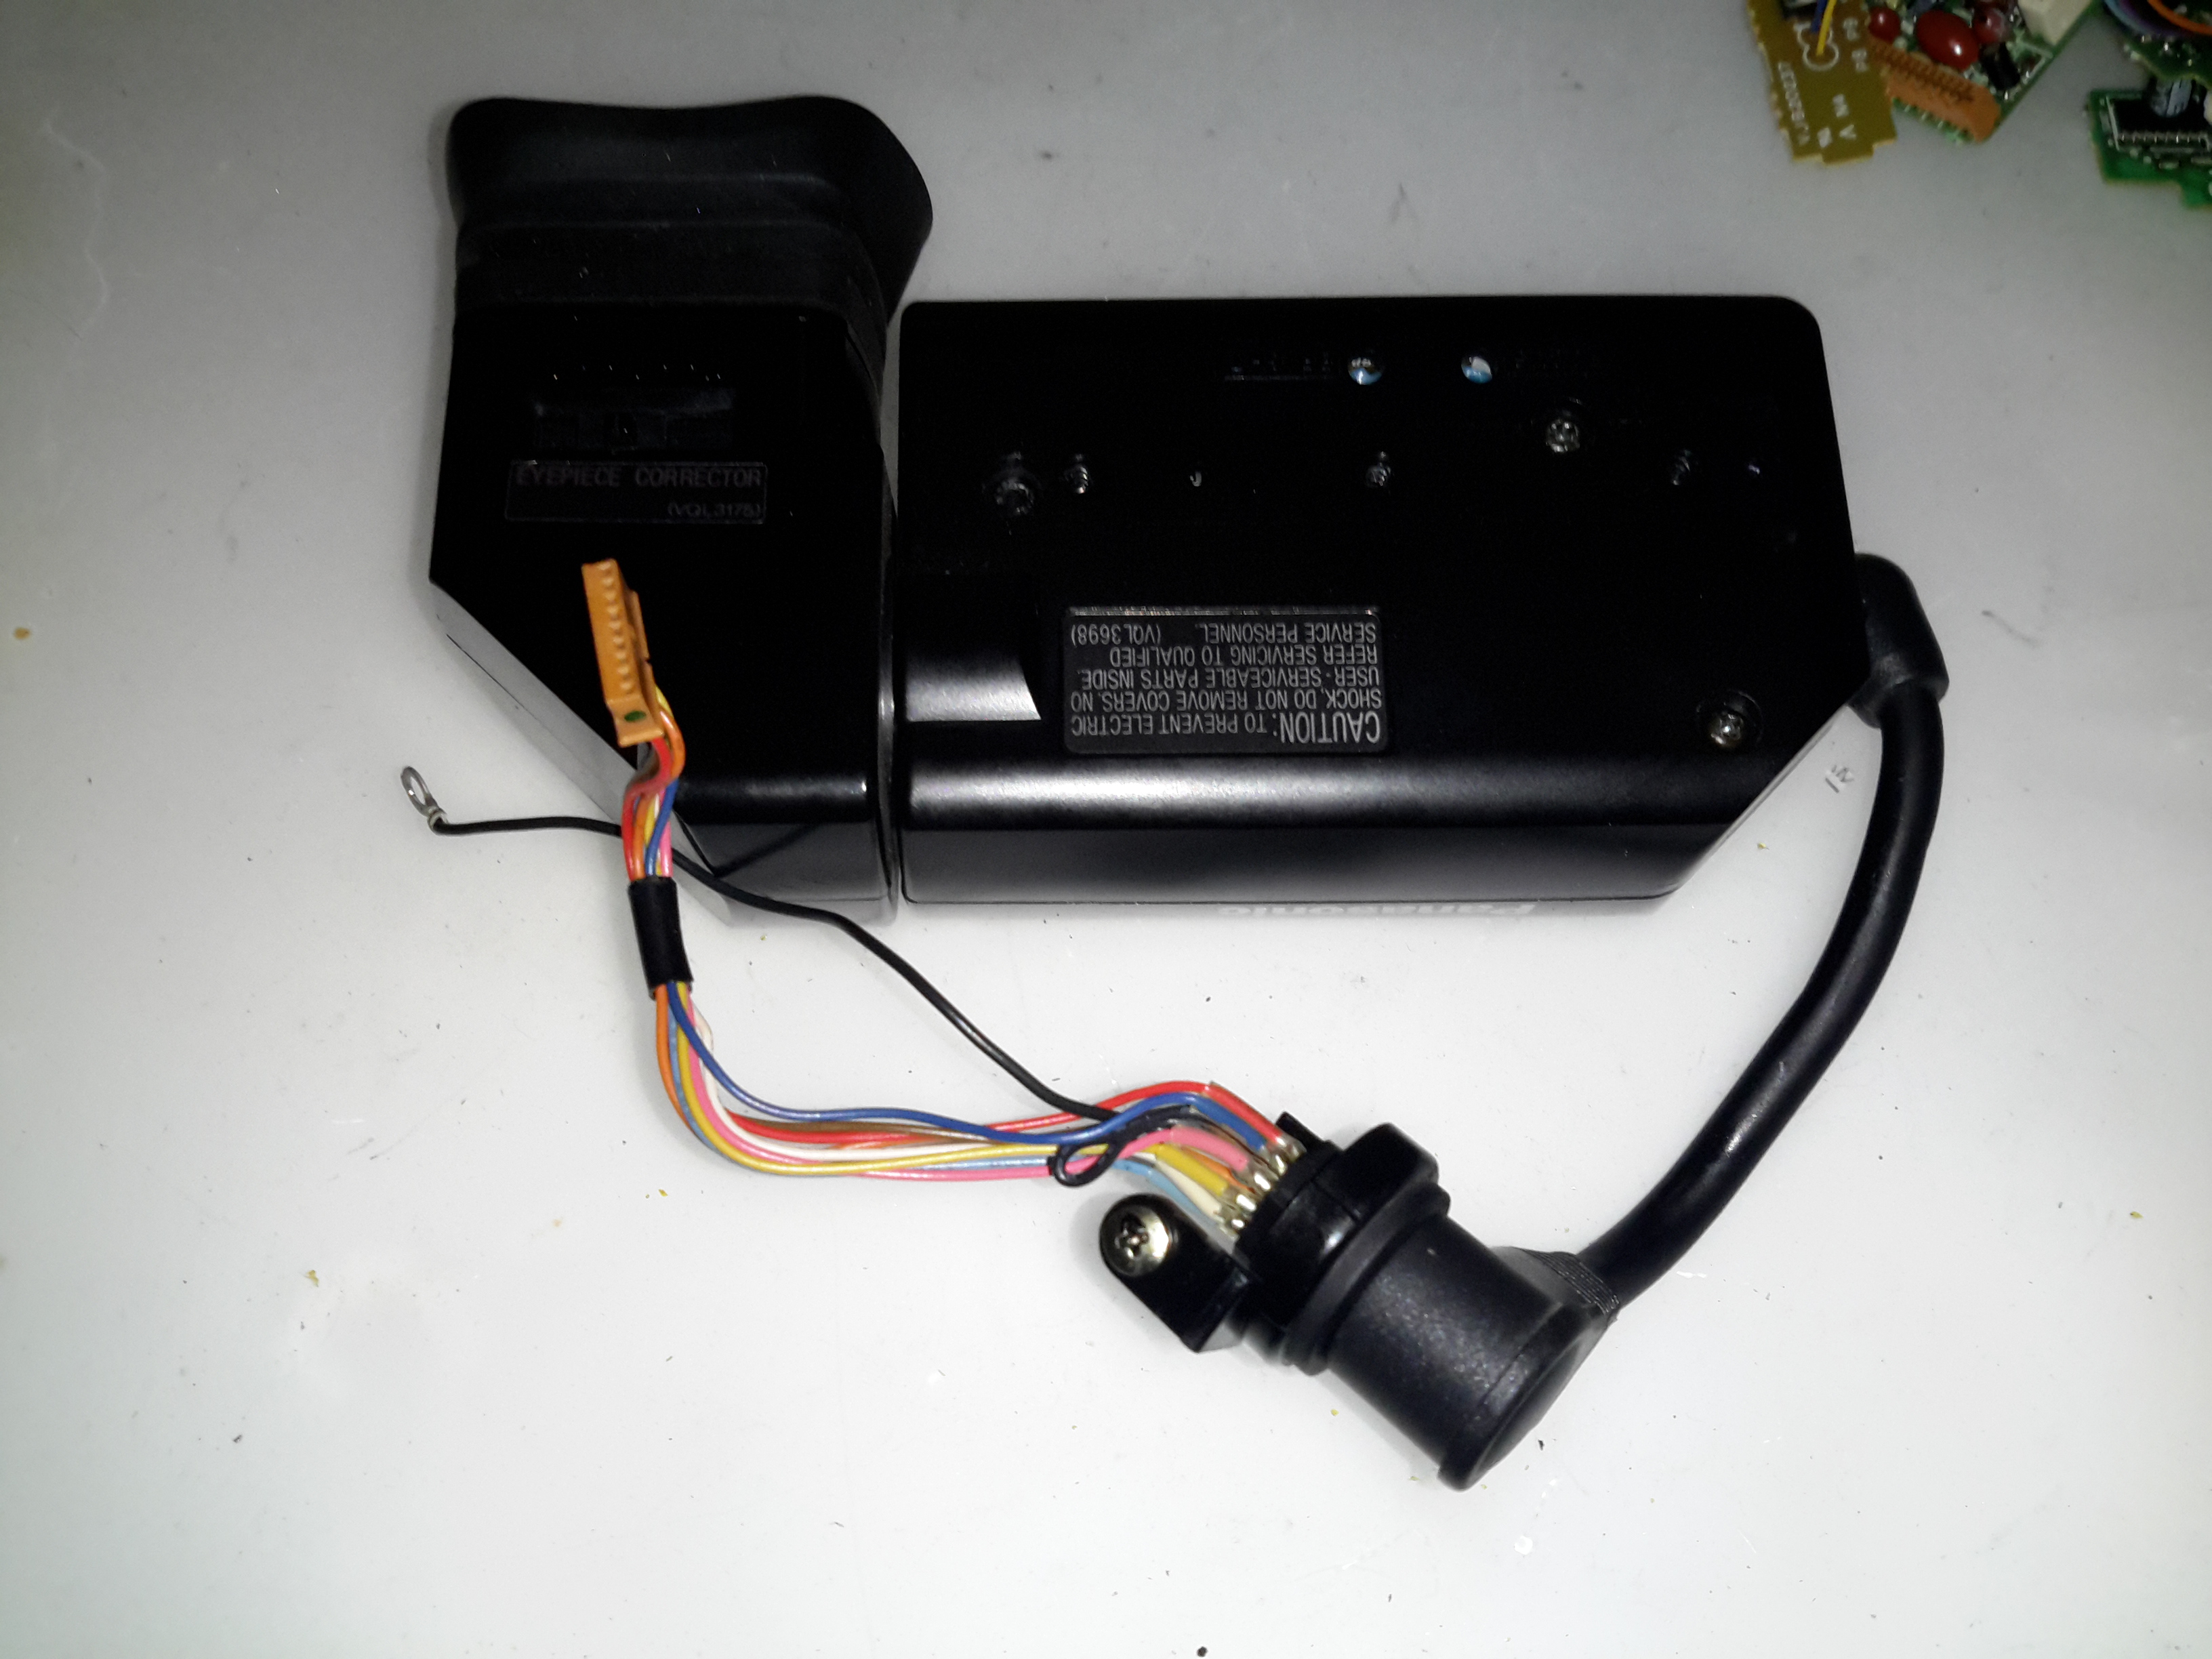
As usual with these cameras, this section is the CRT based viewfinder. These units take the composite signal from the camera to display the scene. This one has many more pins than the usual viewfinder. I’ll hack a manual input into this, but I’ll leave that for another post.

Being an older camera than the ones I’ve had before, this one is on a pair of PCBs, which are both single-sided.
The main board has all the power components for driving the CRT & some of the adjustments. The main HV flyback transformer is on the right. This part creates both the final anode voltage for the tube & the focus/grid voltages.
The viewfinder control IC is on a separate daughter board in this camera, with two more controls.
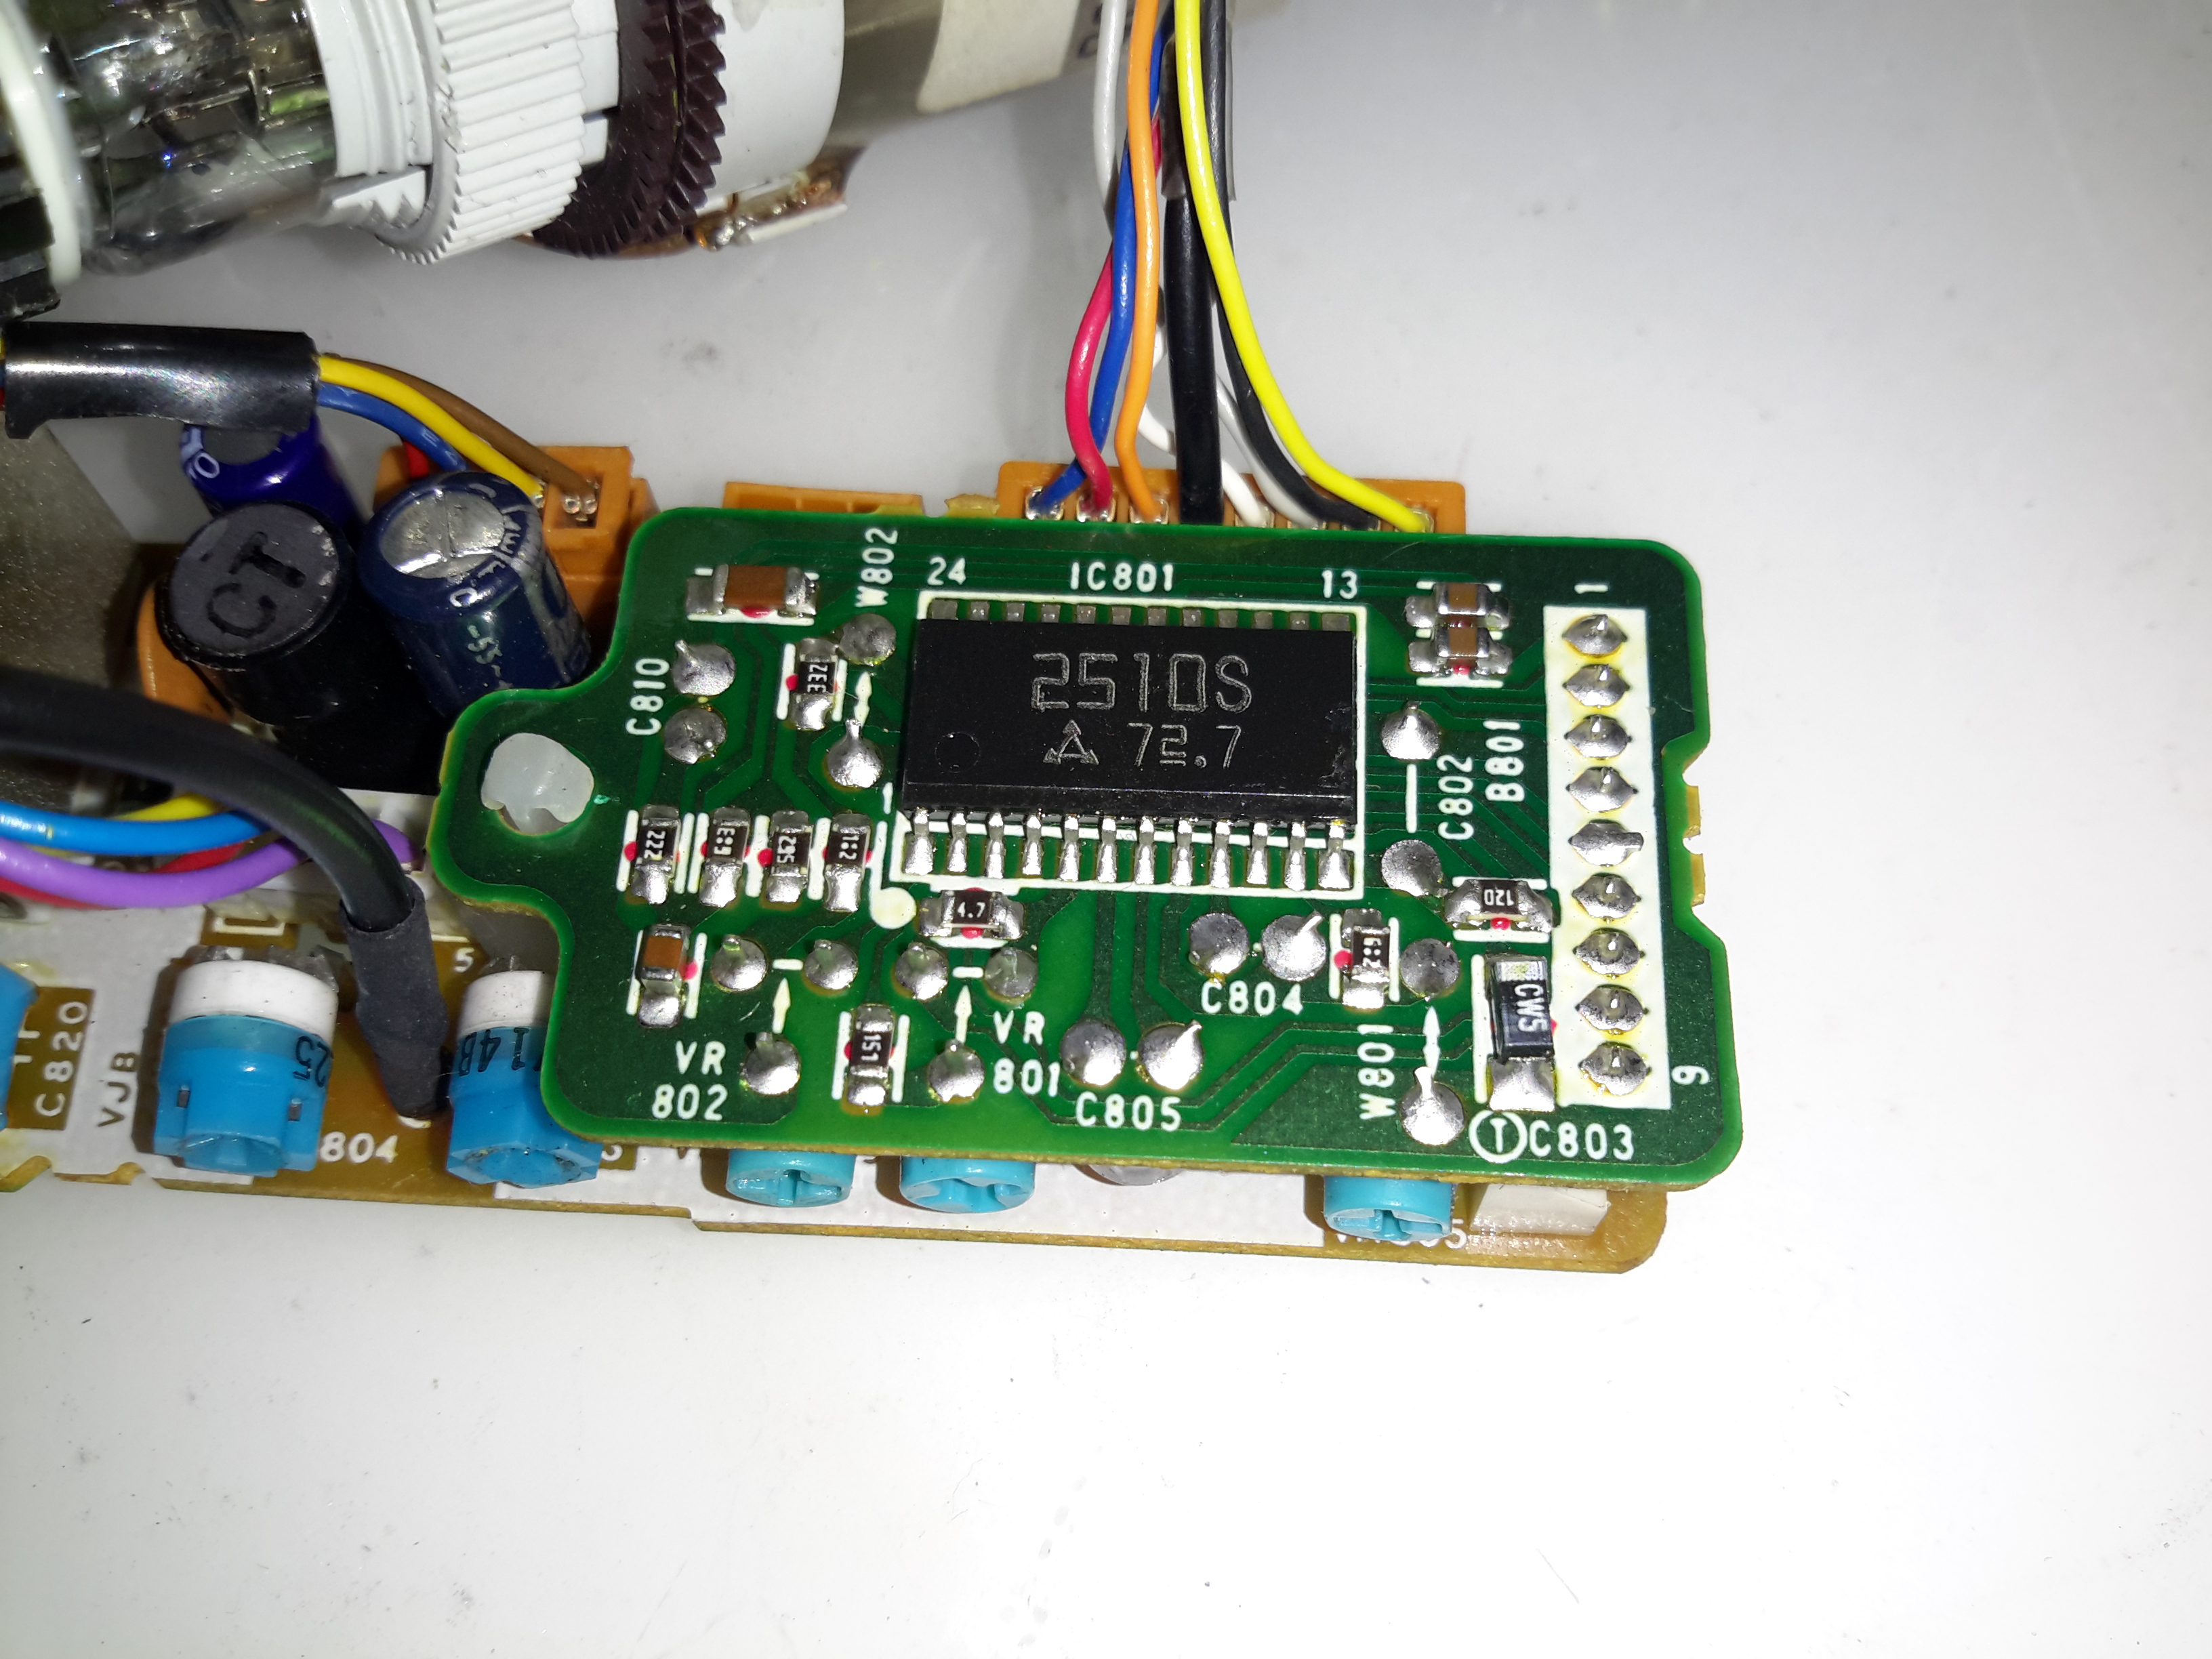
The control IC is a Matsushita AN2510S, this has all the logic required to separate the sync pulses from the composite signal & generate an image on the CRT.
The recording indicator LEDs are mounted in the frame of the CRT & appear above the image in the viewfinder.
Here the CRT has been separated from the rest of the circuitry with just the deflection yoke still attached.
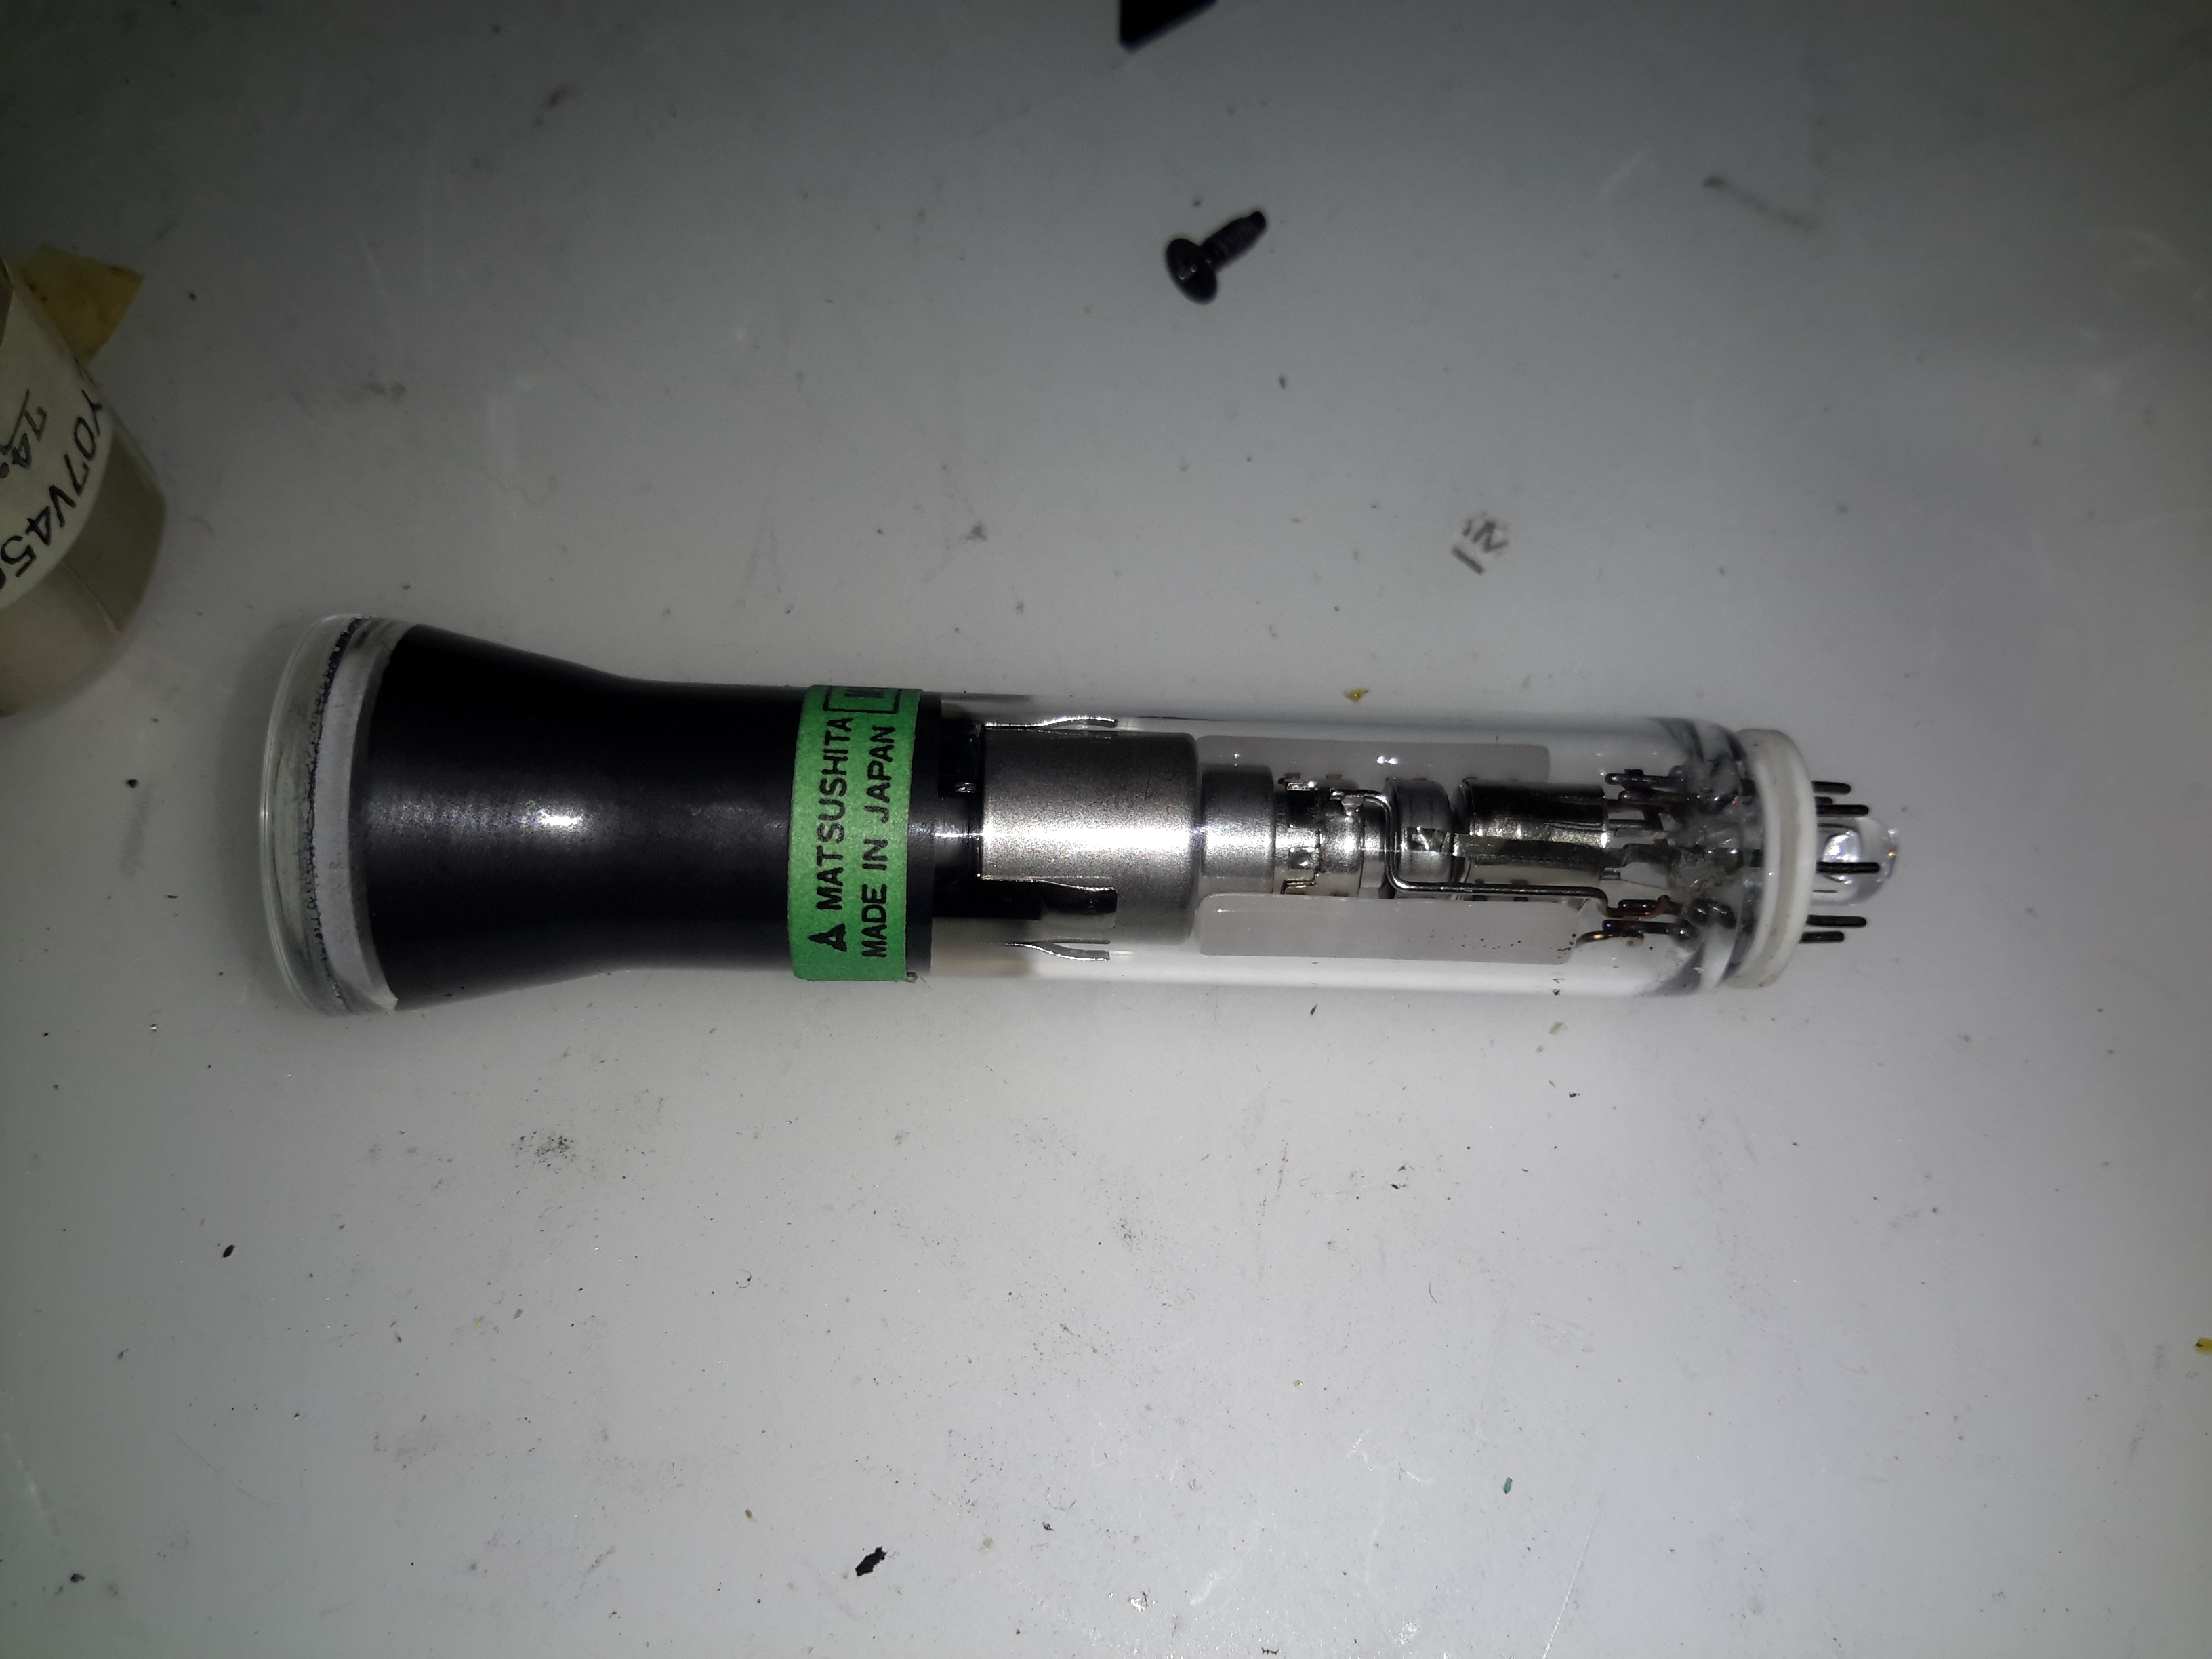
The electron gun in this viewfinder CRT is massive in comparison to the others that I have seen, and the neck of the tube is also much wider. These old tubes were very well manufactured.
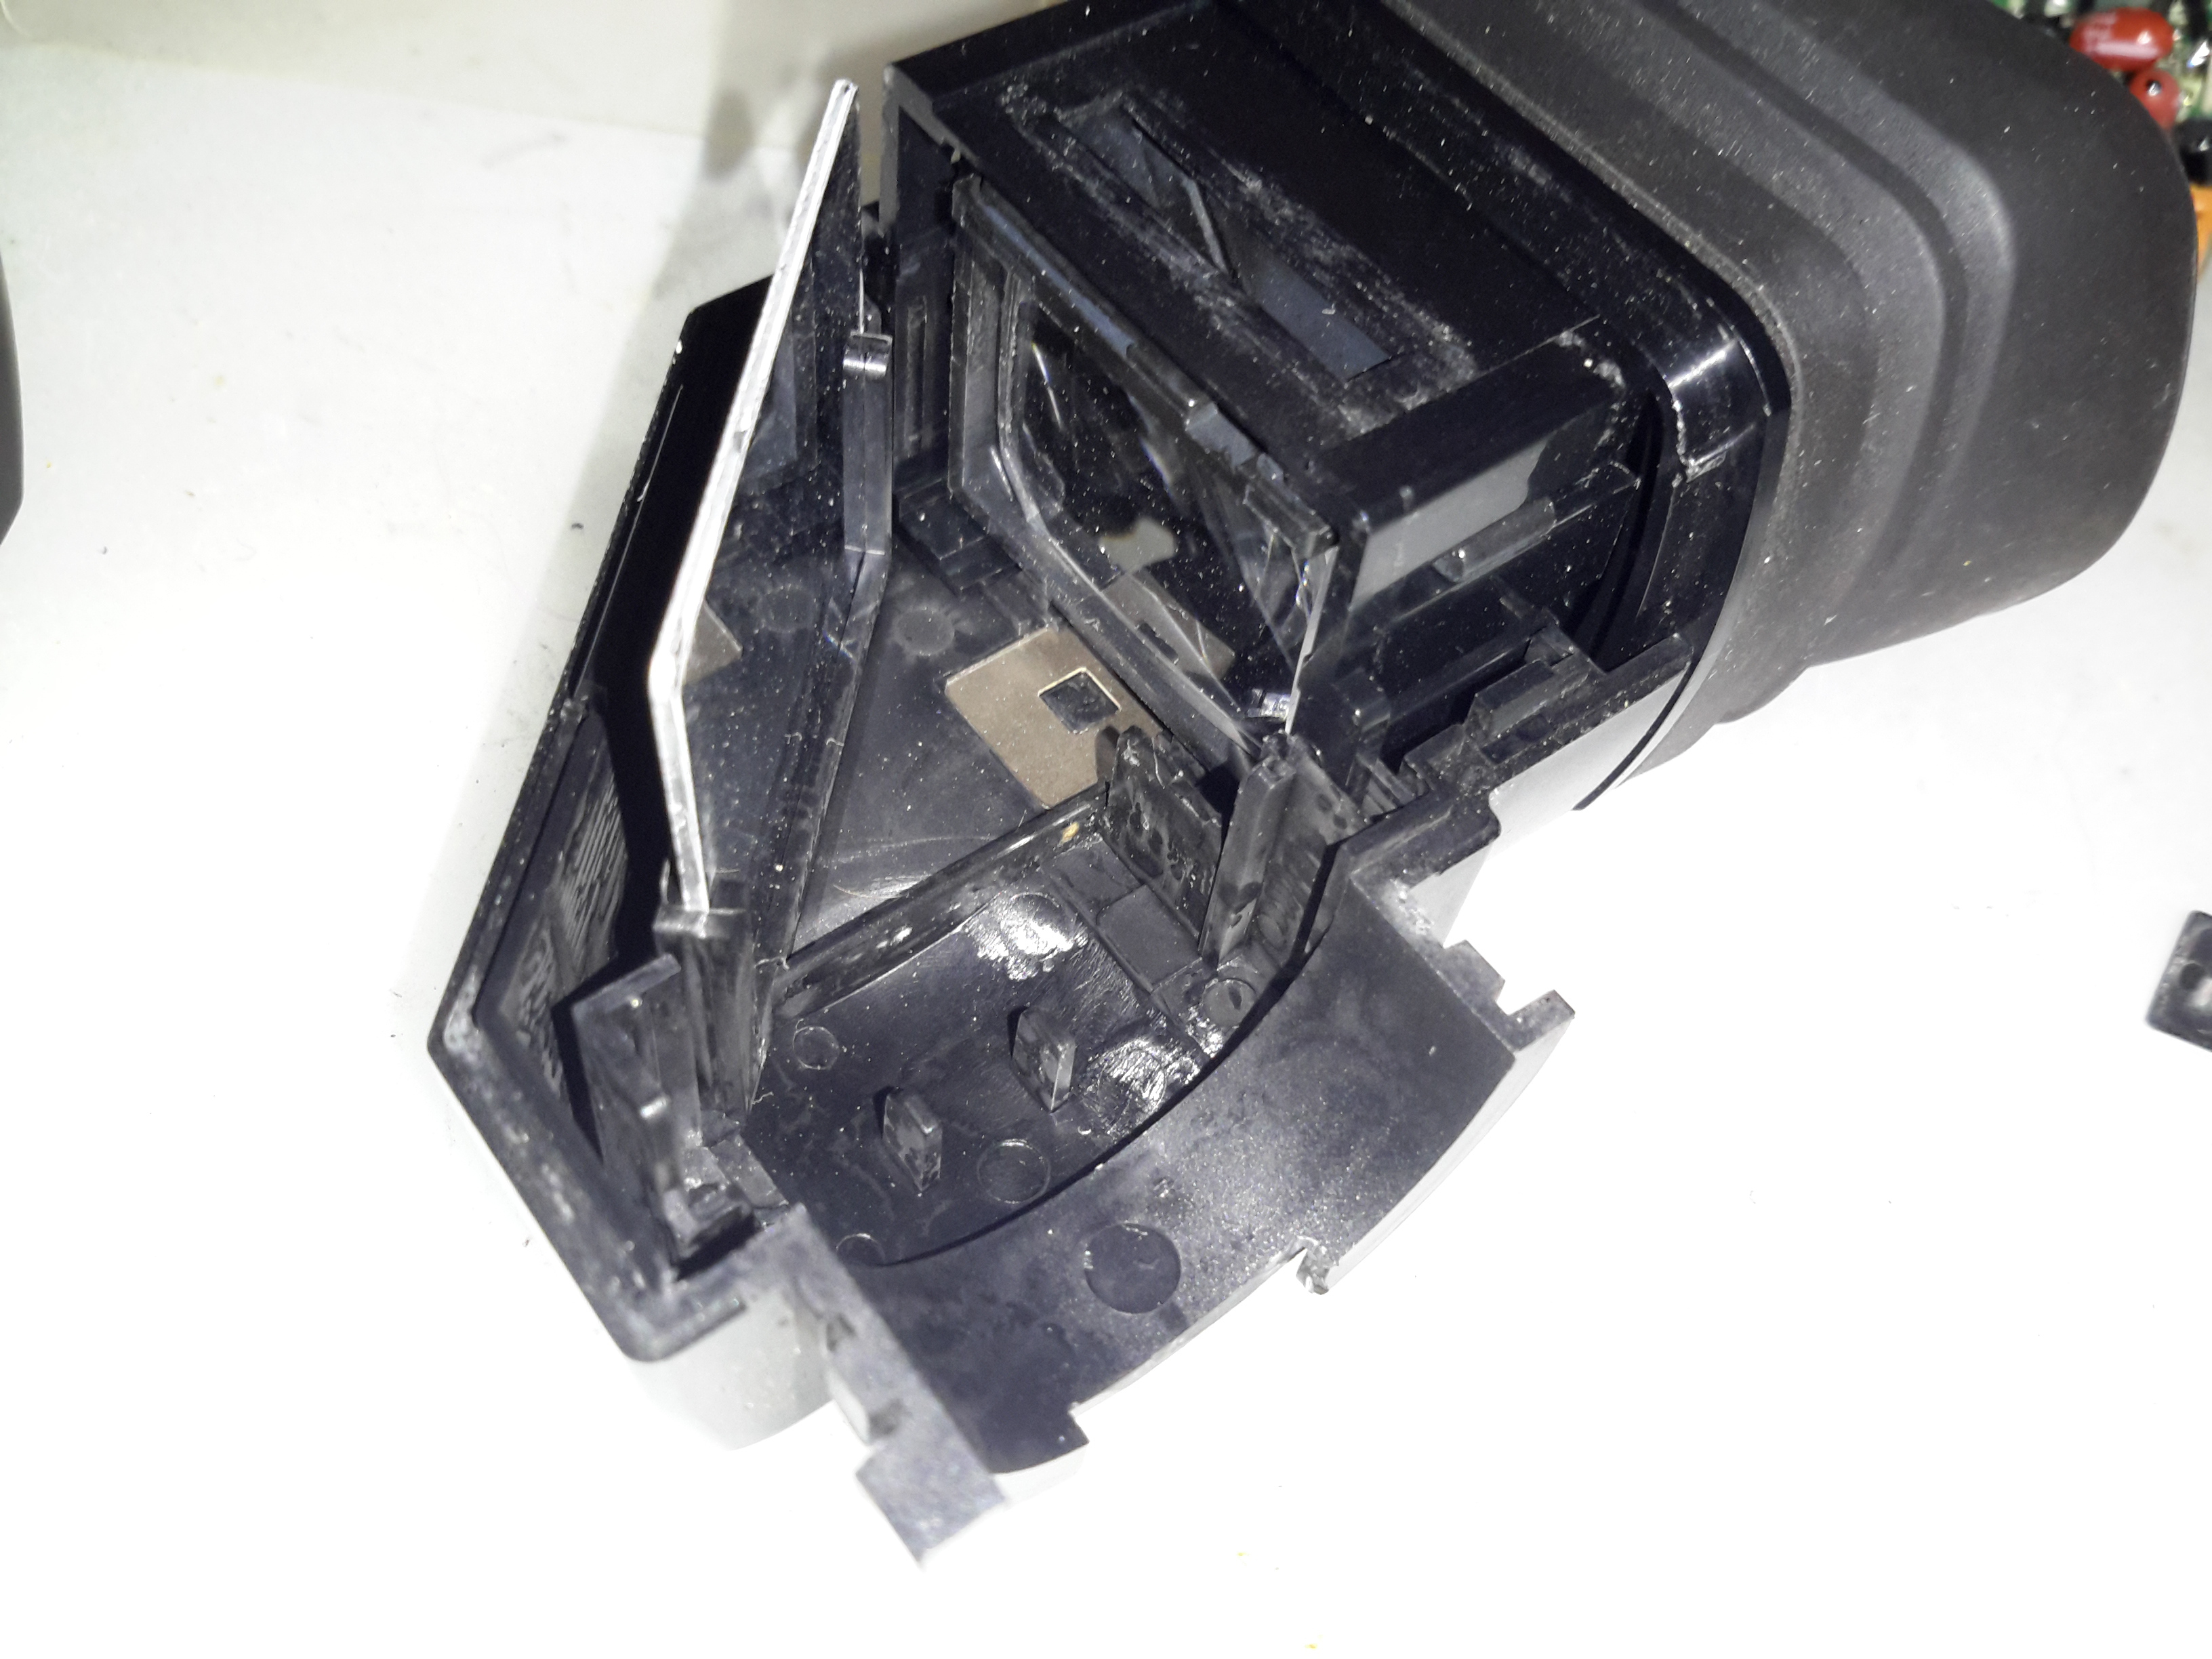
A simple mirror & magnifying lens completes the viewfinder unit.

Io la posseggo ancora ed è perfettamente funzionante,con i vecchi TV collegandola con l’antenna vedevo le registrazioni ,è possibile con i nuovi TV?
Converters are available to go from Composite video to more modern interfaces on TVs as far as I know. A Google search will bring up such results.
Cheers,
2E0GXE
How can I remove the tape from this M5. Eject button will open the carrier and mains power goes off after a few seconds. Can you advise me please.
Hi Ronnie,
Unfortunately I don’t have any information on manually ejecting a tape. Sounds like there is a jam or the electrolytics in the power supply have dried out causing the power rail to drop.
de 2E0GXE
I had the same problem. I removed the lid in front of the VHS compartment and pulled a little on the tape until the camcorder was able to pull it back on its own. That was it. The camcorder stopped turning itself off and worked as before. Perhaps it’s better not to use the same tape again as it might happen again.
I just tore down a Panasonic PV-120D VHS-C camcorder from 1989. The color balance sensor is a 4-pixel high-sensitivity CCD color sensor manufactured by Mitsubishi (M51096AU) designed for handheld chroma meters- quite an expensive device to put into a consumer camcorder.
Oh…and Panasonic still uses a piezo focus element in their cameras.
Fun teardown. I have recently pulled apart a similar vintage JVC GR-45 camcorder. Do you have any idea if it would be possible to get an image signal out of the CCD chip with some modern electronics? The CCD chip from my camera has 10 pins with ~2.5mm spacing and is marked “mn3761f85”, but I’m not sure where I could start in finding information about the pinout of the sensor or how to interface with it. I’ve put some picures here:
https://imgur.com/a/joRoBtj Any suggestions? Thanks!
Hi Muffin,
It’s certainly possible. But I’m not familiar with interfacing with CCDs, but I do know there is a lot of processing involved as a CCD is basically a giant shift register. Maybe the EEVBlog forums would be of help?
I’m not sure if you’ll be able to help or direct me to somewhere that can but I have the exact same camera but it keeps turning itself off after a couple seconds, any ideas?
I had this issue because there was a busted tape inside.
I just spammed the eject button the second I turned it on to get it out.
Tried it on another model with the same take and it made that turn off also.
Might not be your issue but its worth a shot.
Hi there,
Do you know the function of the back light button on the left hand side controls? I mistook it for a black light and got super confused trying to find where the black light bulb was!