Since everything in my shack is run from 12v, I thought it would be handy to convert my new scope to 12v as well, as 99% of the places I find myself needing test gear are off grid, with no access to mains supplies.
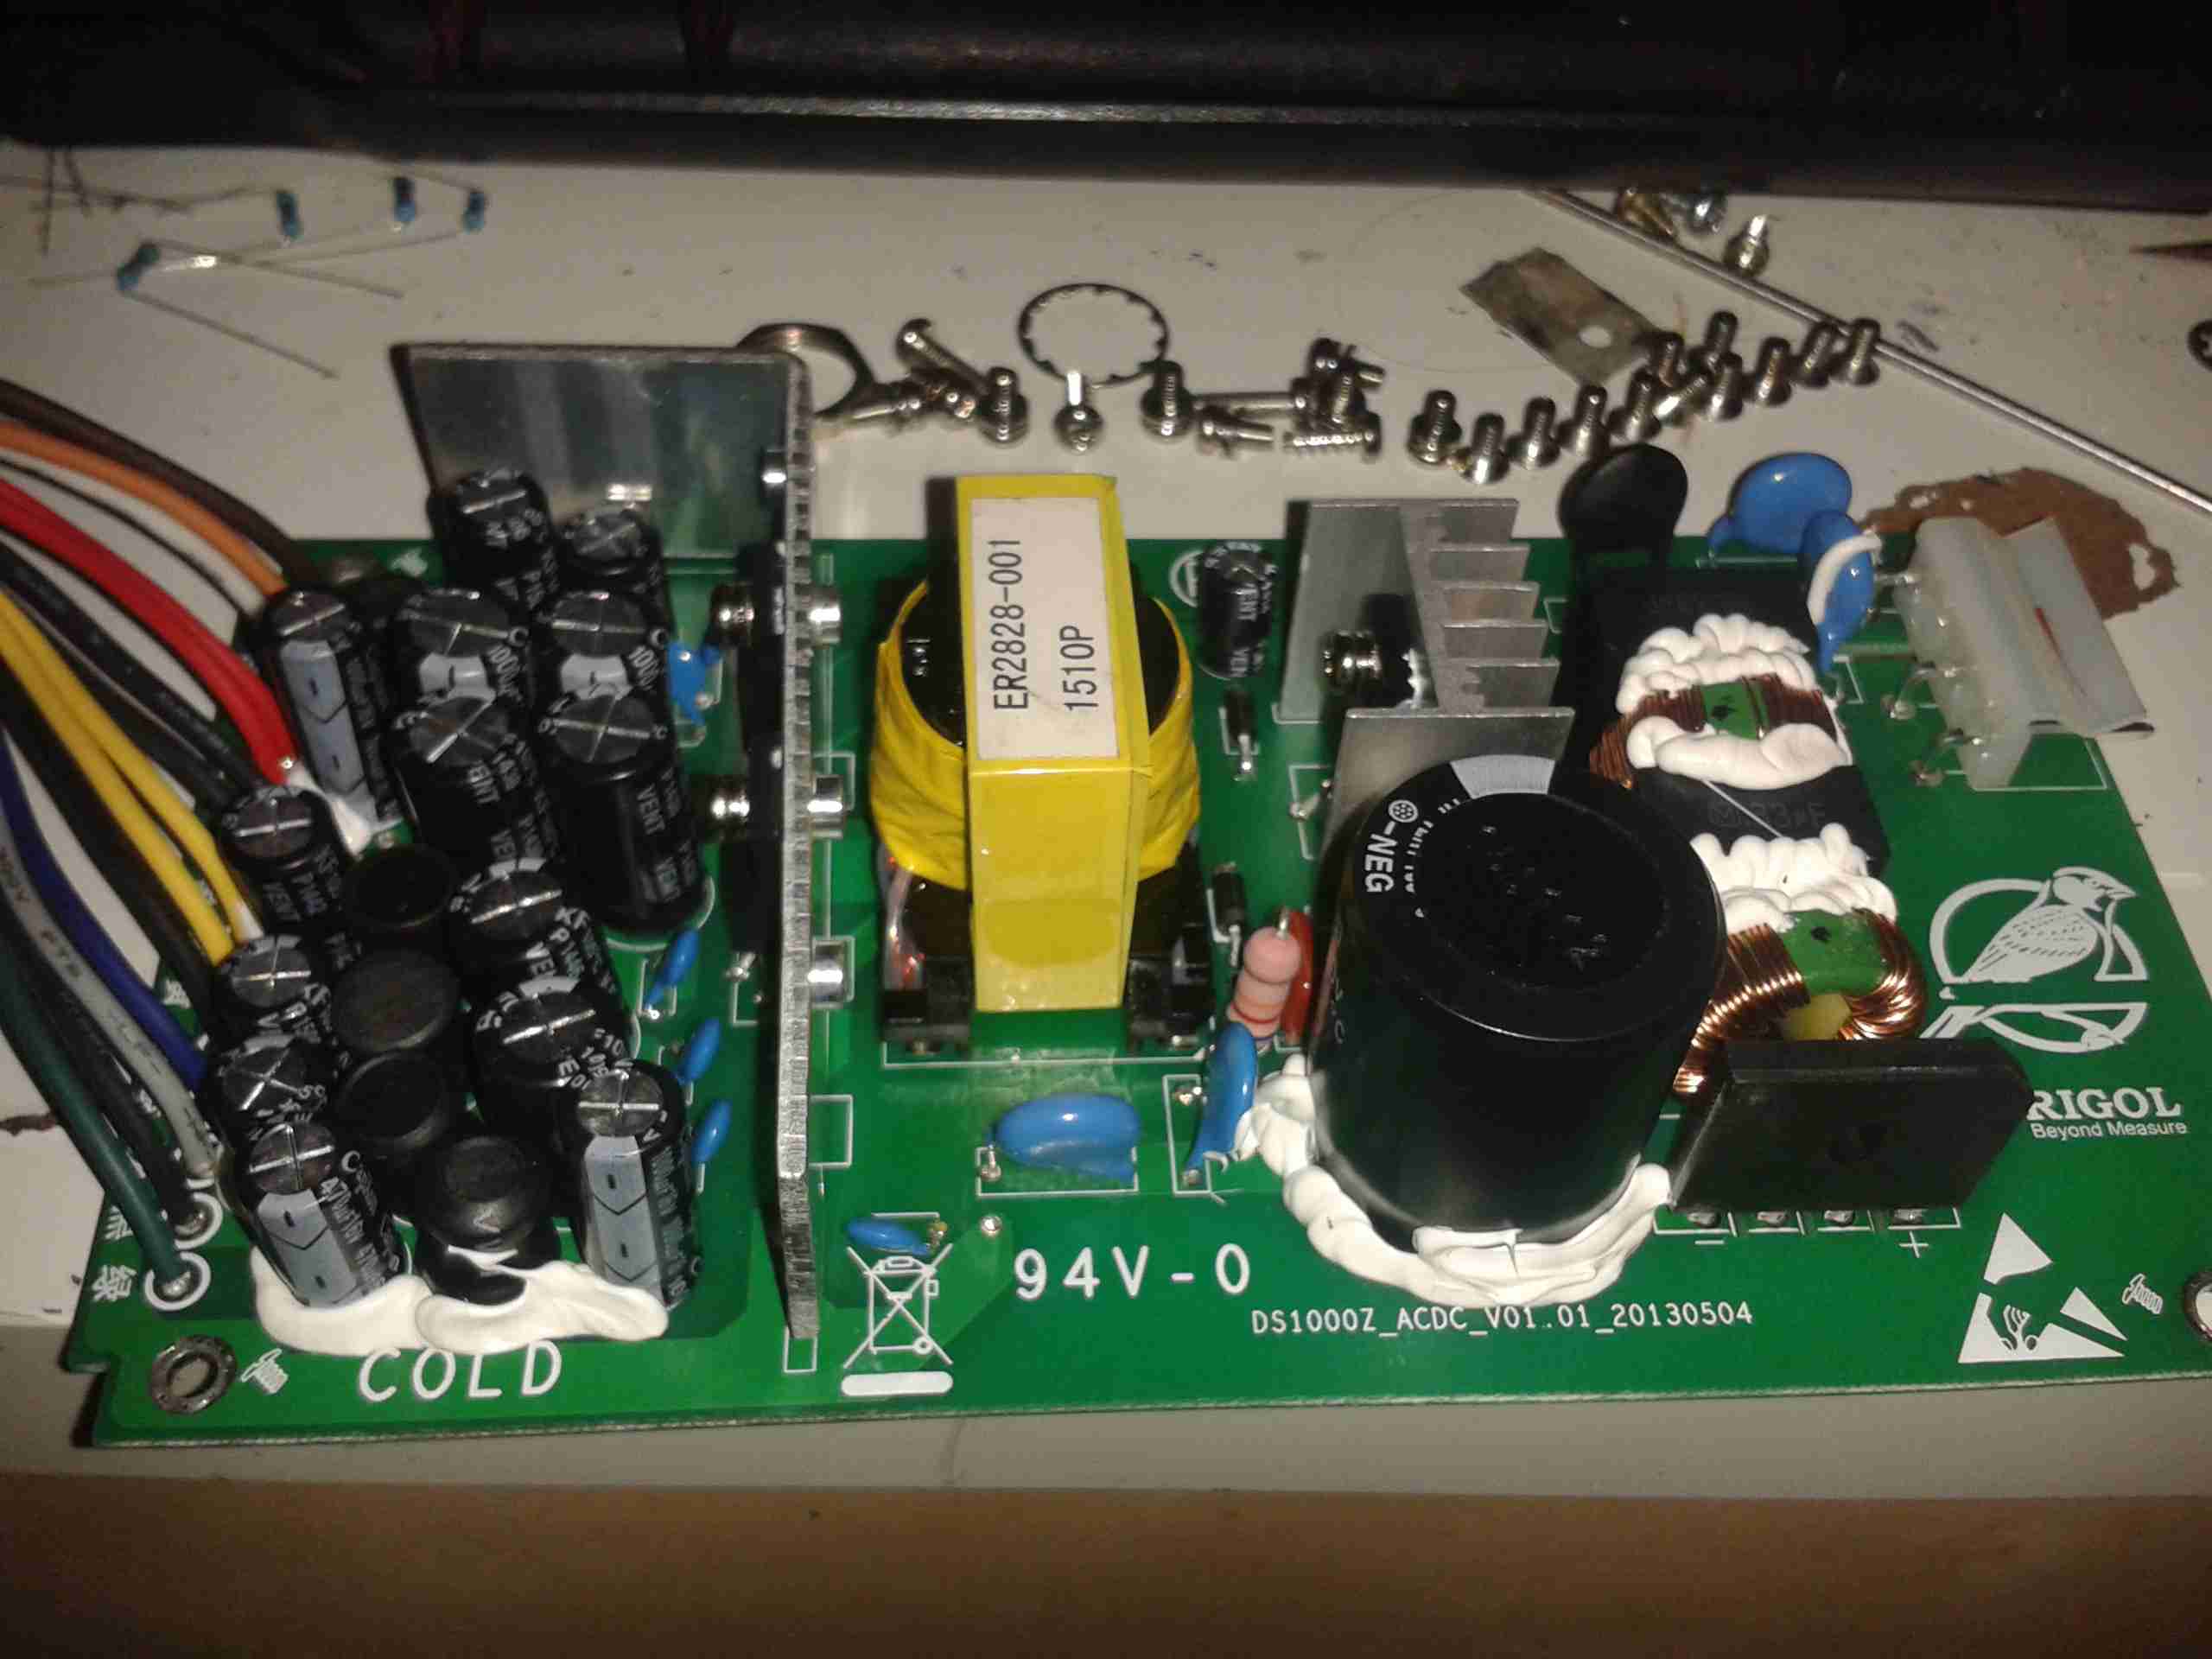
Here’s the factory mains SMPS unit from the back of the scope. This is a nice multi-rail unit, with several different outputs, the table below details the wiring of the PSU.
| Connector Pin | PCB Pin | Signal | Measured Voltage | Mainboard | Rectifier Rating | Wire Colour |
|---|---|---|---|---|---|---|
| 5 | 1 | AC_TRIG | N/A | AC_TRIG | N/A | BROWN |
| 2 | 2 | +9v_GND | N/A | FAN -- | NA | ORANGE |
| 11 | 3 | +9V | 10.16V | FAN + | 2A | WHITE |
| 6 | 4 | +5V | 5.1V | 5V5A | 20A | RED |
| 13 | 5 | +5V | 5.1V | 5V5A | 20A | RED |
| 7 | 6 | GND | N/A | GND | N/A | BLACK |
| 8 | 7 | GND | N/A | GND | N/A | BLACK |
| 3 | 8 | +7.5V | 6.9V | 6.3V | 20A | YELLOW |
| 10 | 9 | +7.5V | 6.9V | 6.3V | 20A | YELLOW |
| 1 | 10 | GND | N/A | GND | N/A | BLACK |
| 12 | 11 | 17.5V | 17.51V | 17.5V | 2A | BLUE |
| 9 | 12 | -17.5V | -17.36V | -17.5V | 2A | GREY |
| 14 | 13 | GND | N/A | GND | N/A | BLACK |
| 4 | 14 | -7.5V | -6.84V | -7.5V | 2A | GREEN |
The only feature I will lose if I make this switch is AC line triggering, but I never use that anyway, so it’s not a big issue for me.
The connector used by Rigol to connect to the mainboard is a Molex Mini Fit Jr. Series 14-way type.
Since I have been able to locate the connector, the plan is to design a replacement low voltage supply unit for the scope, with the same footprint as the original AC mains supply. This will allow me to do a direct swap without causing any damage or modifying the original supply.
This method will allow me to swap the 240v supply back into the scope if I ever come to need it.
I’m planning to use the LTC3863 DC-DC Controller from Linear Tech to generate the negative rails, this will go down to -150v on the output, so it’s pretty much perfect to generate them.

Here’s the output side of the mains PSU, it has a lot of filtering on the output rails, the two TO220 devices are the output rectifiers for the +5v & +7.5v rails, these are rated at 20A, 60V.
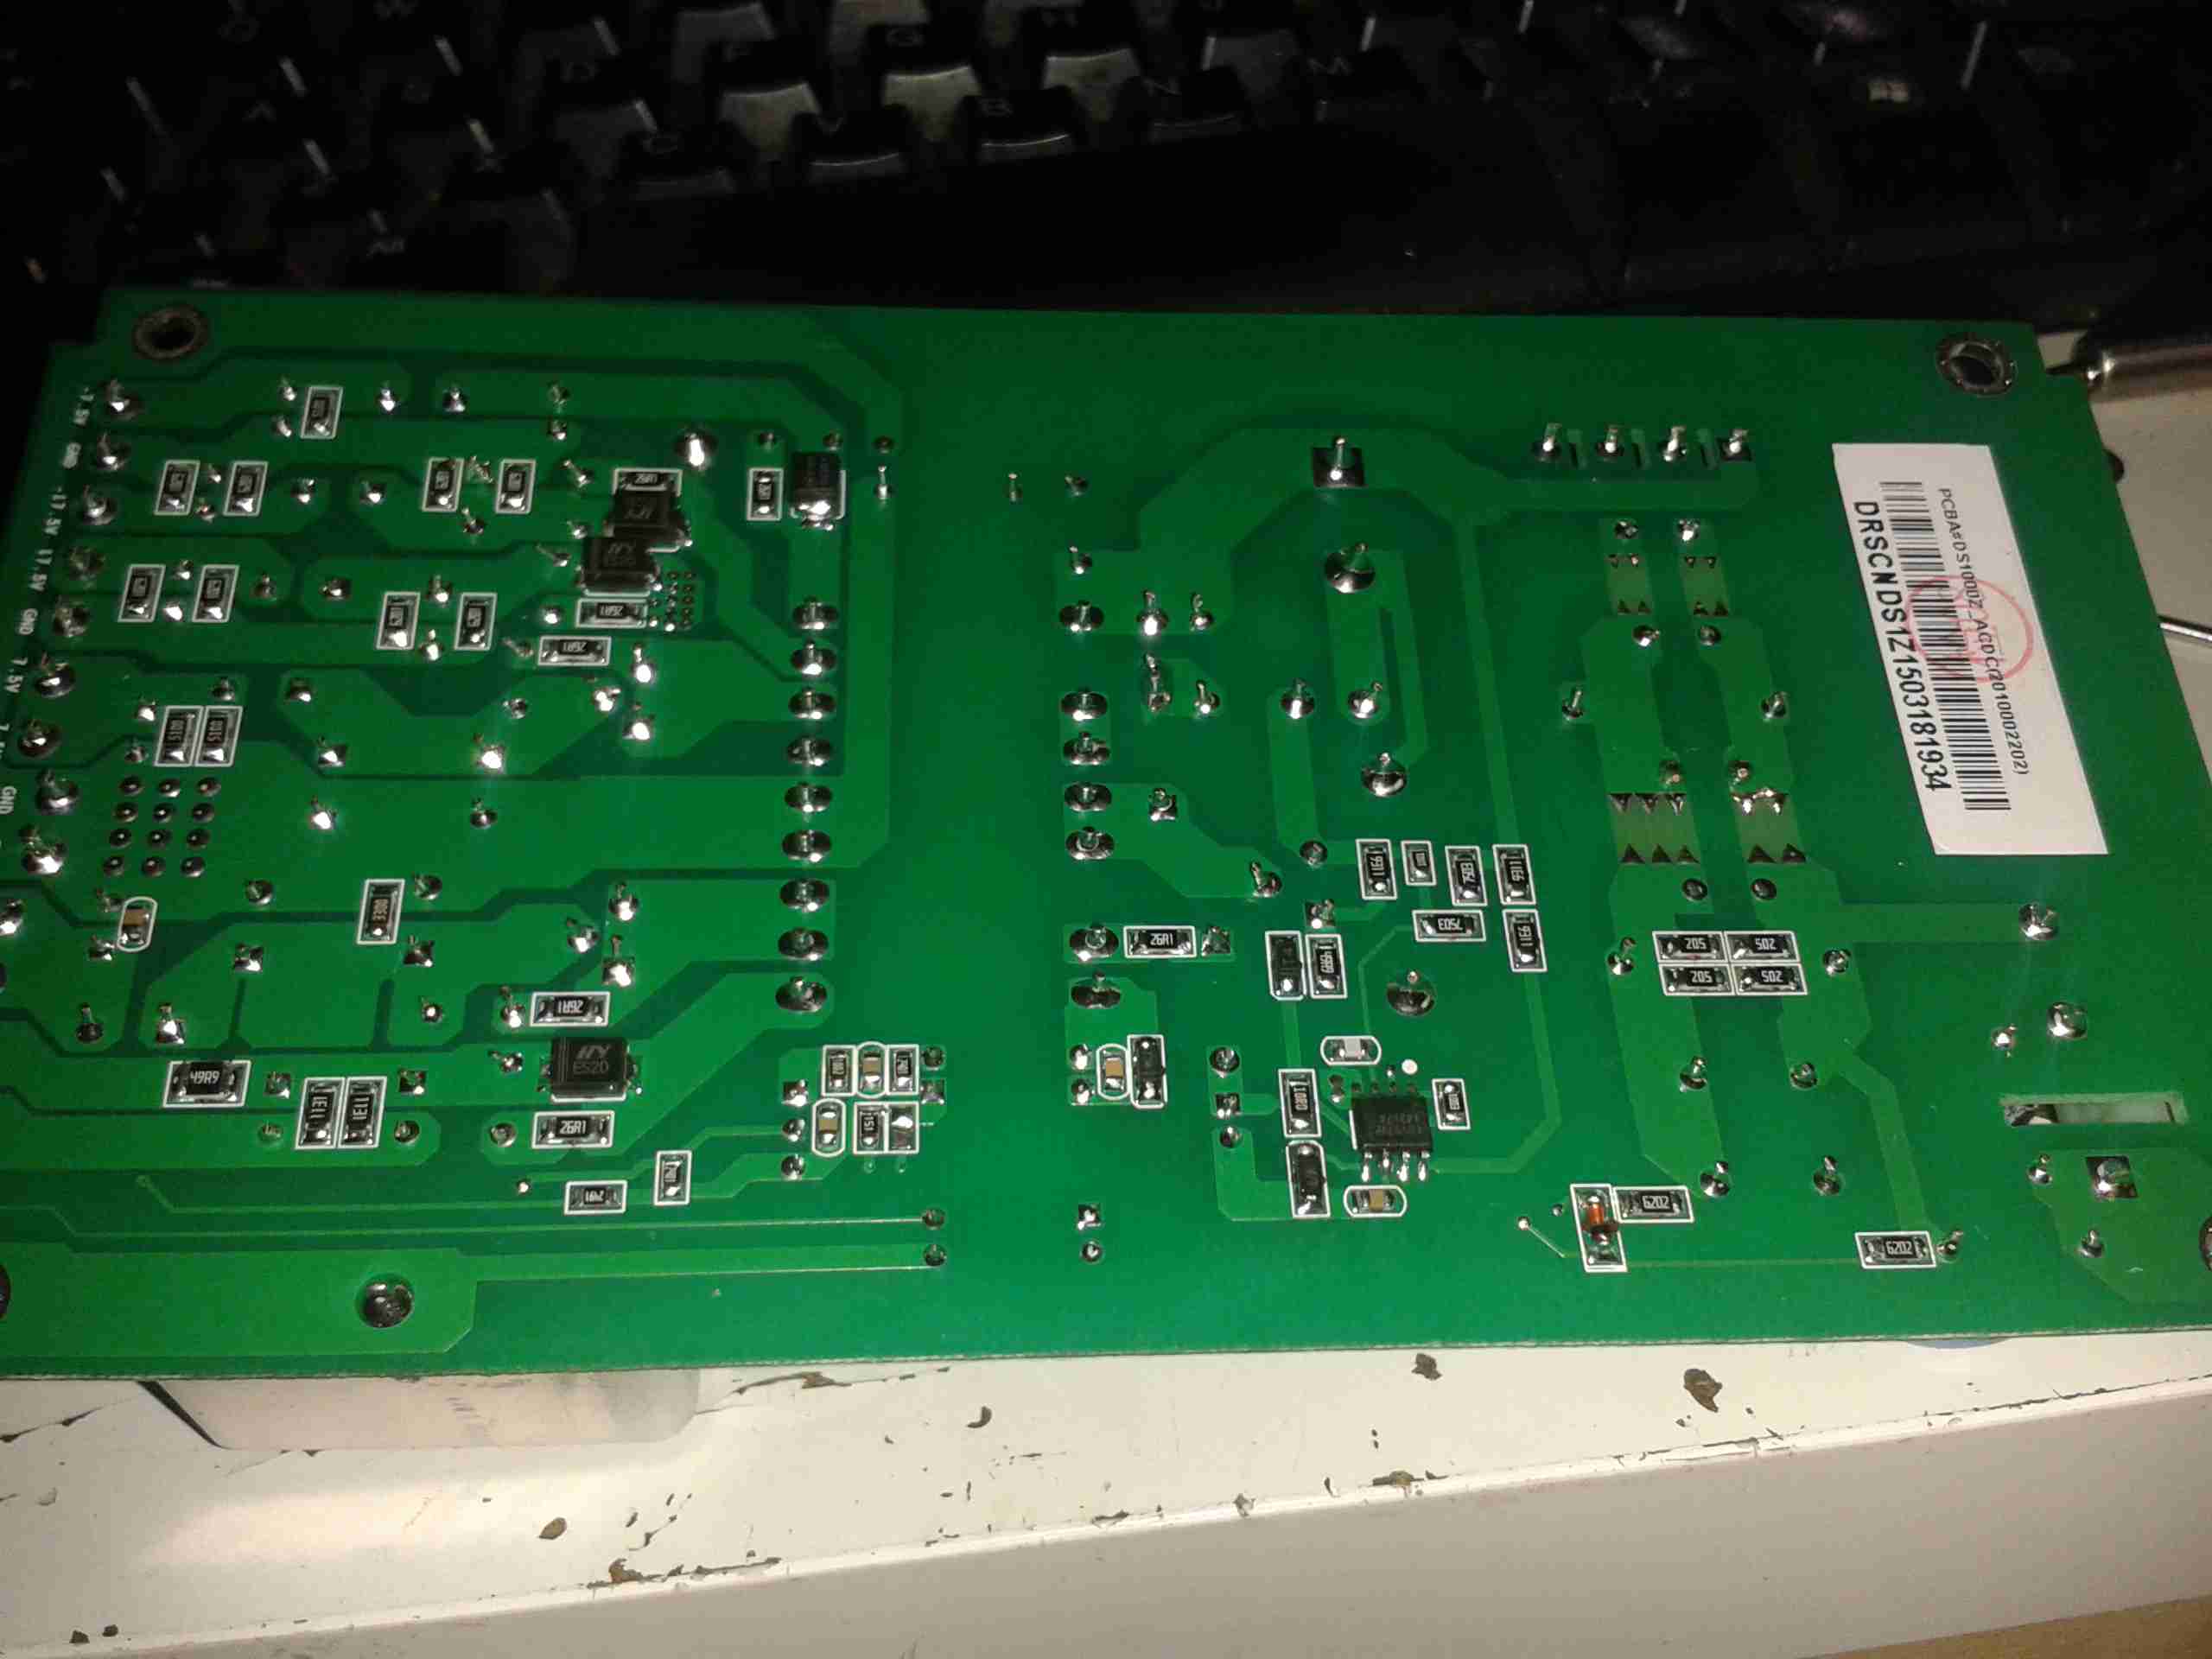
Here’s the bottom side of the PCB. It’s a really nicely designed PSU, massive isolation gap, spark gaps on the primary side & good filtering. The output side on the left has the rectifier diodes for the other voltage rails, these are only 2A rated, so designing the inverting supply to generate the negative rails will be pretty easy.
From looking at the PCB markings on both the mainboard & the PSU, the +9v rail seems to be used to drive the fan, both silkscreen markings indicate this.
The voltages marked on the PSU & the mainboard connector don’t quite match up though, there’s a small variation in the stated voltage between the two. This is most likely because all of the regulation of the supplies seems to be done on the mainboard, there are several linear regulators, and a few DC-DC switchers. Providing that the replacement supply isn’t noisy it should work fine.
This is backed up by the fact that the mains PSU only seems to regulate the +5v rail – on measuring the rails that’s the only one that’s close to spec.
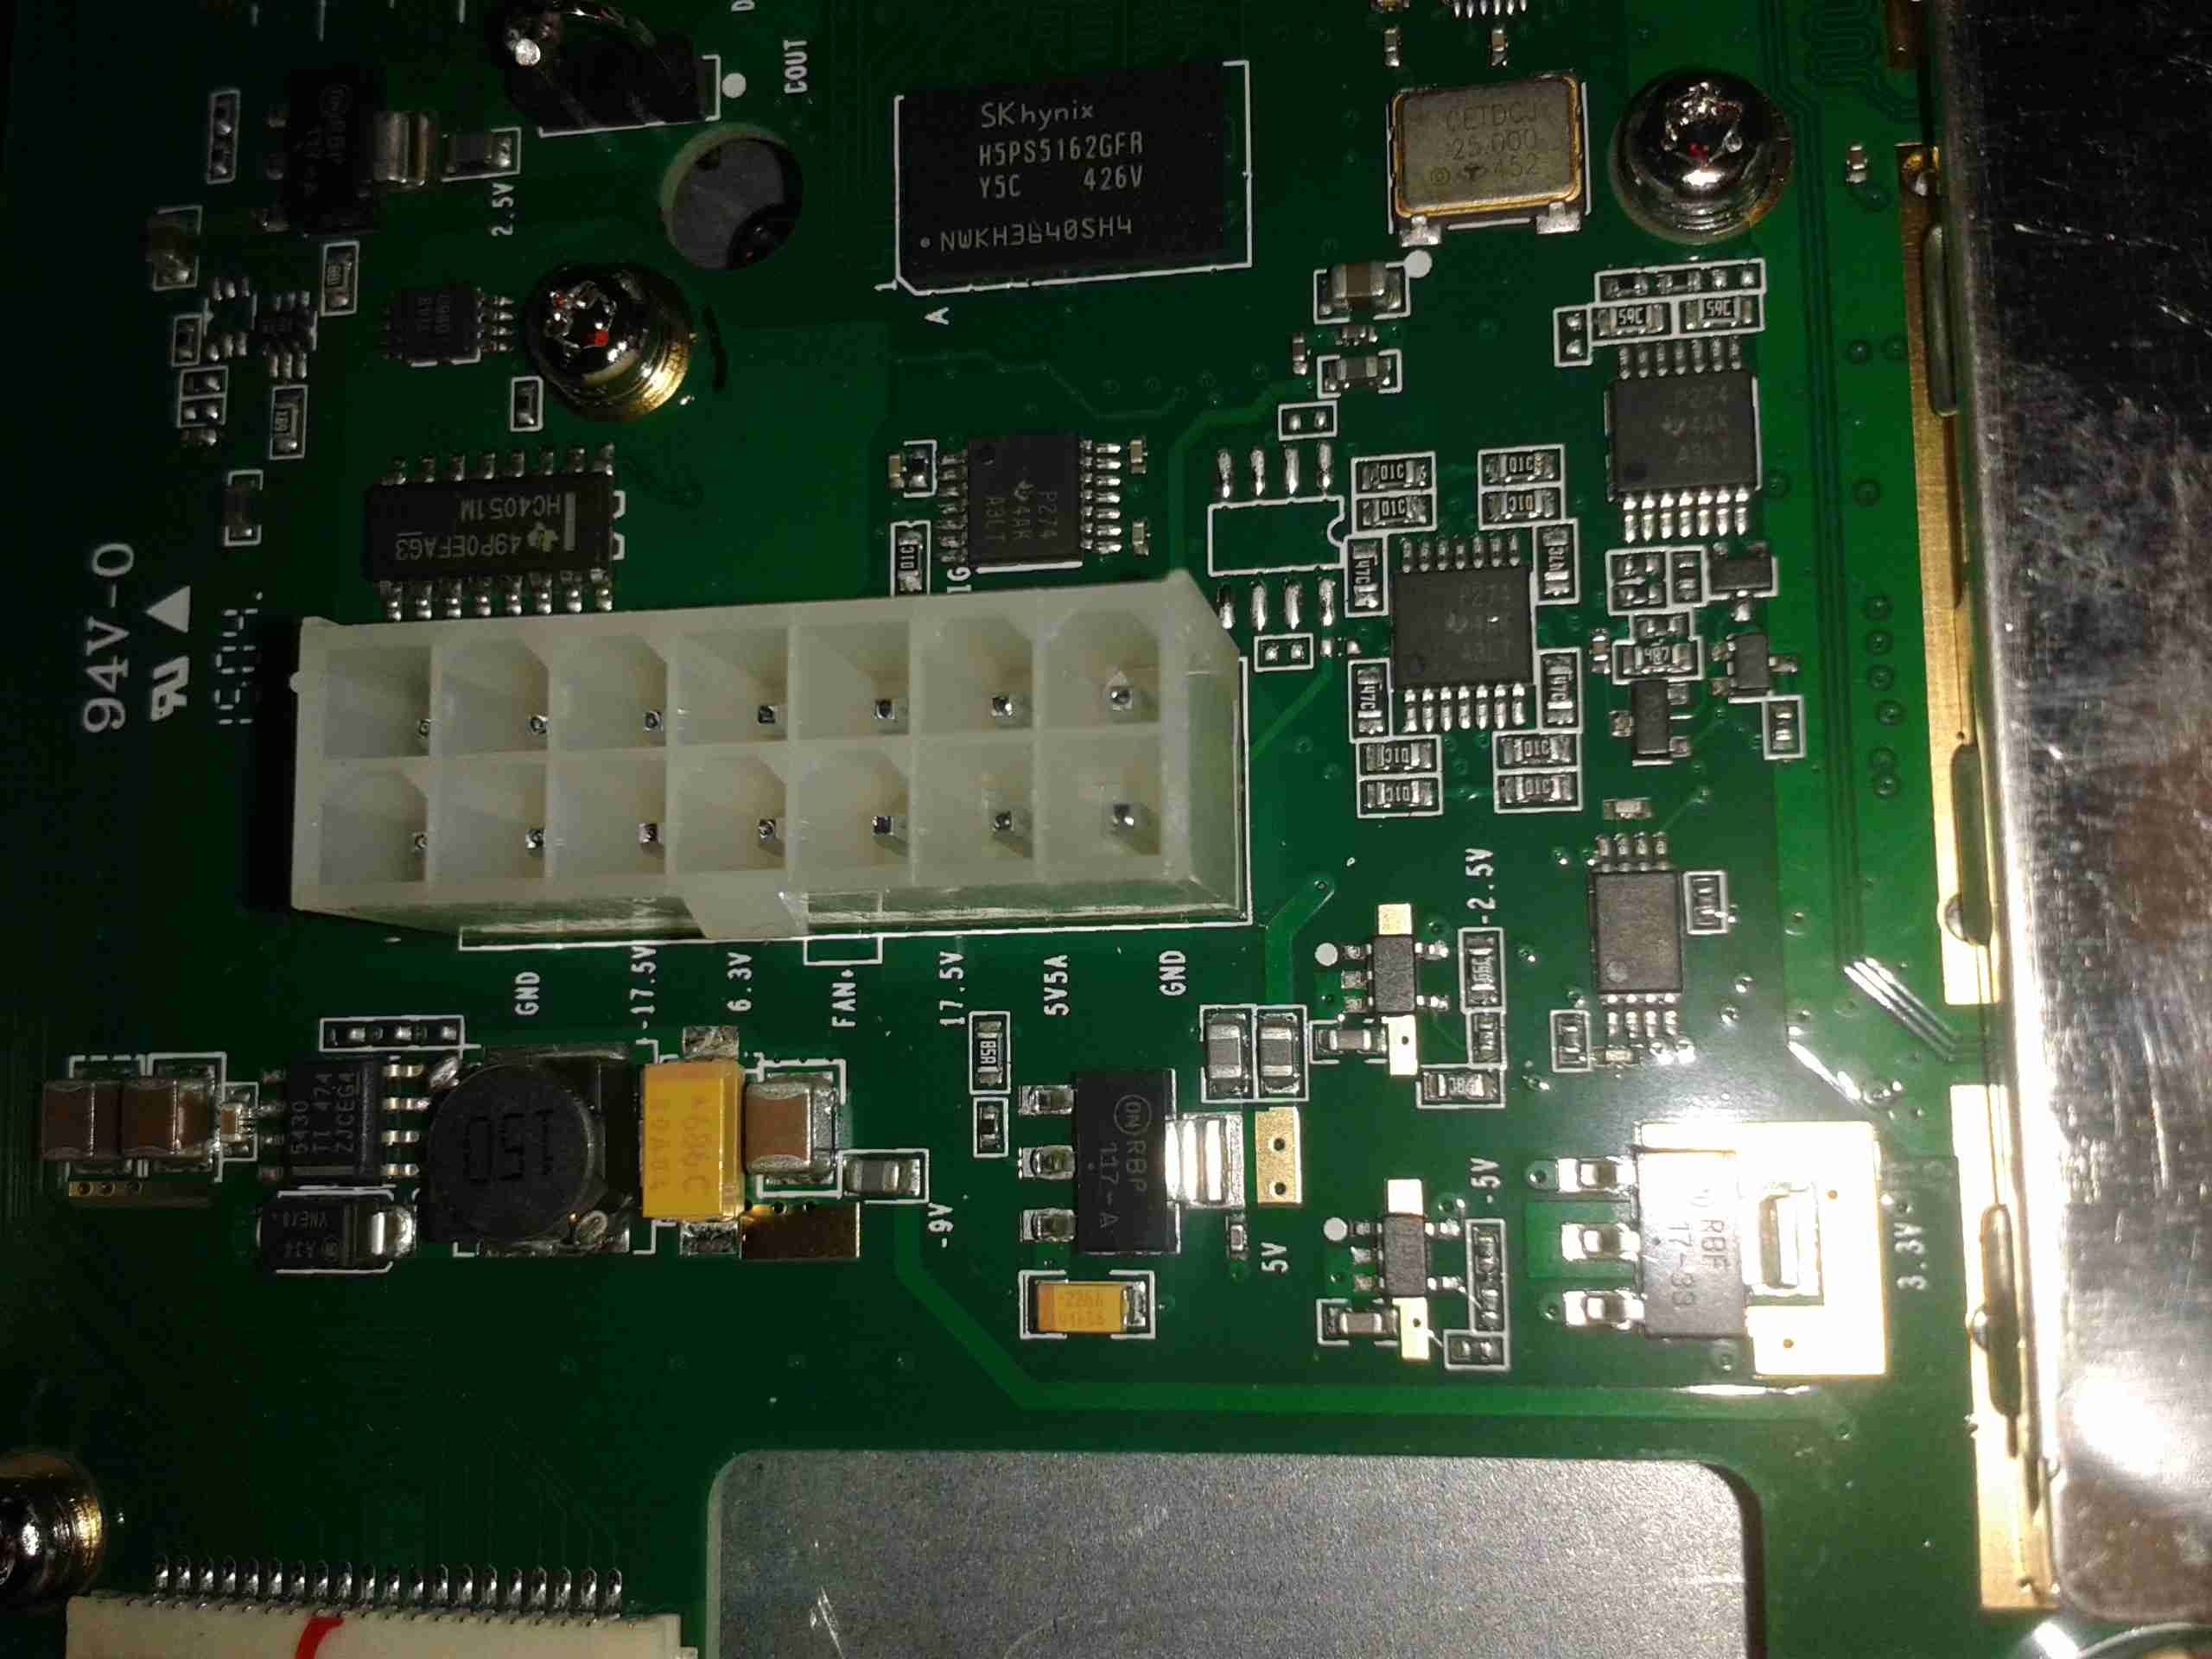
Here’s the mainboard power connector, with it’s silkscreen labelling on the pins. (Very useful). As can be seen here, there’s at least 5 regulators, of both switching & linear types here, generating both positive & negative rails.
More to come when I have some components!
73s for now 🙂

Hey, did you get any further with this? 🙂 I’ve just purchased one, and like you, run everything in my shack from 12V – so would be nice not to HAVE to have 240v for the new CRO!
73’s,
DG
Hi Damien,
I did indeed, with a multi-channel switching converter. The base noise on the scope was increased somewhat, and would not pass a self-test until I fitted the supply with several stages of Pi filtering. Unfortunately I lost the scope to a slight high voltage accident so I no longer have the supply I built, but it did work.