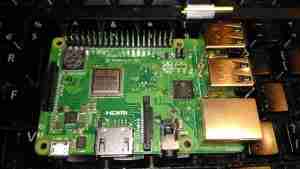
Yesterday, the Raspberry Pi community got a nice surprise – a new Pi! This one has some improved features over the previous RPi 3 Model B:
- Improved CPU – 64-Bit 1.4GHz Quad-Core BCM2837B0
- Improved WiFi – Dual Band 802.11b/g/n/ac. This is now under a shield on the top of the board.
- Improved Ethernet – The USB/Ethernet IC has been replaced with a LAN7515, supporting gigabit ethernet. The backhaul is still over USB2 though, so this would max out at about 300Mbit/s
- PoE Support – There’s a new 4-pin header, and a matching HAT for power over ethernet support.
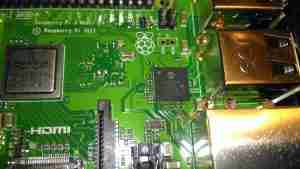
The USB/LAN Controller is now a BGA package, supporting gigabit ethernet. The USB connections are still USB2 though, limiting total bandwidth. This shouldn’t be much of an issue though, since anything over the 100Mbit connection we’ve had previously is an improvement.
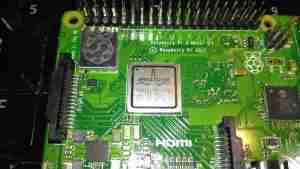
The CPU now has a metal heatspreader on top of the die, no doubt to help with cooling under heavy loads. As far as I know, it’s still the same silicon under the hood though. The WiFi radio is under the shielding can to the top left, with the PCB trace antenna down the left edge of the board.
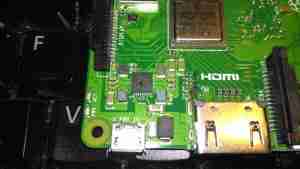
The power supplies are handled on this new Pi by the MaxLinear MxL7704, from what I can tell from MaxLinear’s page, it seems to be somewhat of a collaborative effort to find something that would do the best job, since they apparently worked with the Foundation to get this one right. This IC apparently includes four synchronous step-down buck regulators that provide system, memory, I/O and core power from 1.5A to 4A. An on-board 100mA LDO provides clean 1.5V to 3.6V power for analog sub-systems. This PMIC utilizes a conditional sequencing state machine that is flexible enough to meet the requirements of virtually any processor.
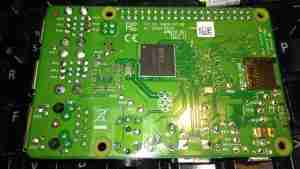
The bottom of the PCB has the Elpida 1GB RAM package, which is LPDDR2, along with the MicroSD slot.
A quick benchmark running Raspbian Lite & a SanDisk Ultra 32GB Class 10 SD card gives some nice results:
Raspberry Pi Benchmark Test
Author: AikonCWD
Version: 3.0

temp=45.1'C
arm_freq=1400
core_freq=400
sdram_freq=500
gpu_freq=300
sd_clock=50.000 MHz

Running InternetSpeed test...
Ping: 45.278 ms
Download: 151.50 Mbit/s
Upload: 9.52 Mbit/s

Running CPU test...
 total time: 11.3003s
 min: 4.48ms
 avg: 4.51ms
 max: 44.50ms
temp=56.4'C

Running THREADS test...
 total time: 10.2161s
 min: 3.94ms
 avg: 4.08ms
 max: 21.49ms
temp=59.6'C

Running MEMORY test...
Operations performed: 3145728 (2418384.67 ops/sec)
3072.00 MB transferred (2361.70 MB/sec)
 total time: 1.3008s
 min: 0.00ms
 avg: 0.00ms
 max: 9.99ms
temp=60.7'C

Running HDPARM test...
 Timing buffered disk reads:  66 MB in  3.01 seconds =  21.91 MB/sec
temp=51.5'C

Running DD WRITE test...
536870912 bytes (537 MB, 512 MiB) copied, 34.6011 s, 15.5 MB/s
temp=46.7'C

Running DD READ test...
536870912 bytes (537 MB, 512 MiB) copied, 23.5404 s, 22.8 MB/s
temp=45.6'C

AikonCWD's rpi-benchmark completed!
