A Smorgasbord of Acronyms
There are ANSI, OSHA, FDA (CDRH), NRPB, and military standards. The CDRH (Center for Devices and Radiological Health is part of the Food and Drug Administration and is the most relevant regulatory organization in the USA for commercial and scientific lasers. The complete CDRH document may be found at: Performance Standard for Light Emitting Products.
As of Summer 2007, there is an updated “ANSI Z136.1 (2007) Safe Use of Lasers” which among other things substitutes Class 3R for Class 3A, add Classes 1M and 2M, changes some of the control measures and terminology, and more. Nothing earth shattering though. I have not yet seen a full copy. However, there is a summary article in the June 2007 Photonics Spectra magazine. And a narrated slide show of the changes can be found in the Laser Institute of America ANSI Z.136.1 Presentation. However, without details or access to the full document, it’s an excellent cure for insomnia at best. 🙂 Also see: Wikipedia: Laser Safety, which includes many references and some links.
The best discussion of the various classifications, plus general treatment of the topic, is a book by Sliney and Wolbarsht, “Safety with Lasers and Other Optical Sources”, Plenum Press, New York. While they will agree with each other in most respects, some differences will result in a particular laser changing classes depending on which standard is used. The major criteria are summarized below.
Note: I may use Class 1 and Class I, Class 2 and Class II, Class 3 and Class III, and Class 4 and Class IV interchangeably. They are equivalent.
The following is based on material from the University of Waterloo – Laser Safety Manual.
All lasers are classified by the manufacturer and labelled with the appropriate warning labels. Any modification of an existing laser or an unclassified laser must be classified by the Laser Safety Officer prior to use. The following criteria are used to classify lasers:
- Wavelength. If the laser is designed to emit multiple wavelengths the classification is based on the most hazardous wavelength.
- For continuous wave (CW) or repetitively pulsed lasers the average power output (Watts) and limiting exposure time inherent in the design are considered.
- For pulsed lasers the total energy per pulse (joule), pulse duration, pulse repetition frequency and emergent beam radiant exposure are considered.
Lasers are generally classified and controlled according to the following criteria:
- Class I lasers – Lasers that are not hazardous for continuous viewing or are designed in such a way that prevent human access to laser radiation. These consist of low power lasers or higher power embedded lasers (e.g., laser printer or DVD burner).
- Class II visible lasers (400 to 700 nm) – Lasers emitting visible light which because of normal human aversion responses, do not normally present a hazard, but would if viewed directly for extended periods of time. This is like many conventional high intensity light sources.
- Class IIa visible lasers (400 to 700 nm) – Lasers emitting visible light not intended for viewing, and under normal operating conditions would not produce a injury to the eye if viewed directly for less than 1,000 seconds (e.g., bar code scanners).
- Class IIIa lasers – Lasers that normally would not cause injury to the eye if viewed momentarily but would present a hazard if viewed using collecting optics such as a magnifier or telescope).
- Class IIIb lasers – Lasers that present an eye and skin hazard if viewed directly. This includes both intrabeam viewing and specular reflections. Class IIIb lasers do not produce a hazardous diffuse reflection except when viewed at close proximity.
- Class IV lasers – Lasers that present an eye hazard from direct, specular and diffuse reflections. In addition such lasers may be fire hazards and produce skin burns.
Here is another description, paraphrased from the CORD course: “Intro to Lasers”. (Cord Communications. Lasers.) It relates the laser classifications to common laser types and power levels:
- Class I – EXEMPT LASERS, considered ‘safe’ for intrabeam viewing. Visible beam.Maximum power less than 0.4 uW for long term exposure (greater than 10,000 seconds). Looking at a Class I laser will not cause eye damage even where the entire beam enters the eye and it is being stared at continuously.A laser may also be labeled as Class I if it is entirely enclosed and not accessible without disassembly using tools. Thus, a DVD burner with a 150 mW laser diode (normally a Class IIIB laser) would still be considered Class I.
- Class II – LOW-POWERED VISIBLE (CW) OR HIGH PRF LASERS, won’t damage your eye if viewed momentarily. Visible beam.Maximum power less than 1 mW for HeNe laser.
- Class IIIa – MEDIUM POWER LASERS, focused beam can injure the eye.HeNe laser power 1.0 to 5.0 mW.
- Class IIIb – MEDIUM POWER LASERS, diffuse reflection is not hazardous, doesn’t present a fire hazard.Visible Argon laser power 5.0 mW to 500 mW.
- Class IV – HIGH POWER LASERS, diffuse reflection is hazardous and/or a fire hazard.
The classifications depend on the wavelength of the light as well and as noted, there may be additional considerations for each class depending on which agency is making the rules. For example, the NRPB (British) adds a requirement for Class IIIa that the power density for a visible laser not exceed 25 W/m2 which would thus bump some laser pointers with tightly focused beams from Class IIIa to Class IIIb. For more information on laser pointer safety and the NRPB classifications, see the NRPB Laser Pointer Article.
In the US, start with the Center for Devices and Radiological Health (CDRH), part of the Food and Drug Administration (FDA). See the section: Regulations for Manufacturers of Lasers and Laser Based Equipment for more info on how to find the relevant guidance documents.
For additional information on laser safety and laser safety classifications, see the section: Laser Safety Sites (May Also Include Other Laser Information).
Here is a table of the CDRH classification and labeling requirements for commercial laser products:
Class Max Power (mW) Logotype Warning Label Text
-----------------------------------------------------------------------------
I <,= 0.39 None Required None Required
IIa > 0.39 to 1.0 None Required None Required
(Exposures < 1,000 s)
II <,= 1 CAUTION Laser Radiation - Do not
stare into beam
IIIa <,= 5 CAUTION Laser Radiation - Do Not
(Irradiance < 2.5 mW/cm2) Stare into Beam or
View Directly with
Optical Instruments
CAUTION Laser Radiation - Avoid
(Irradiance >,= 2.5 mW/cm2) Direct Eye Exposure
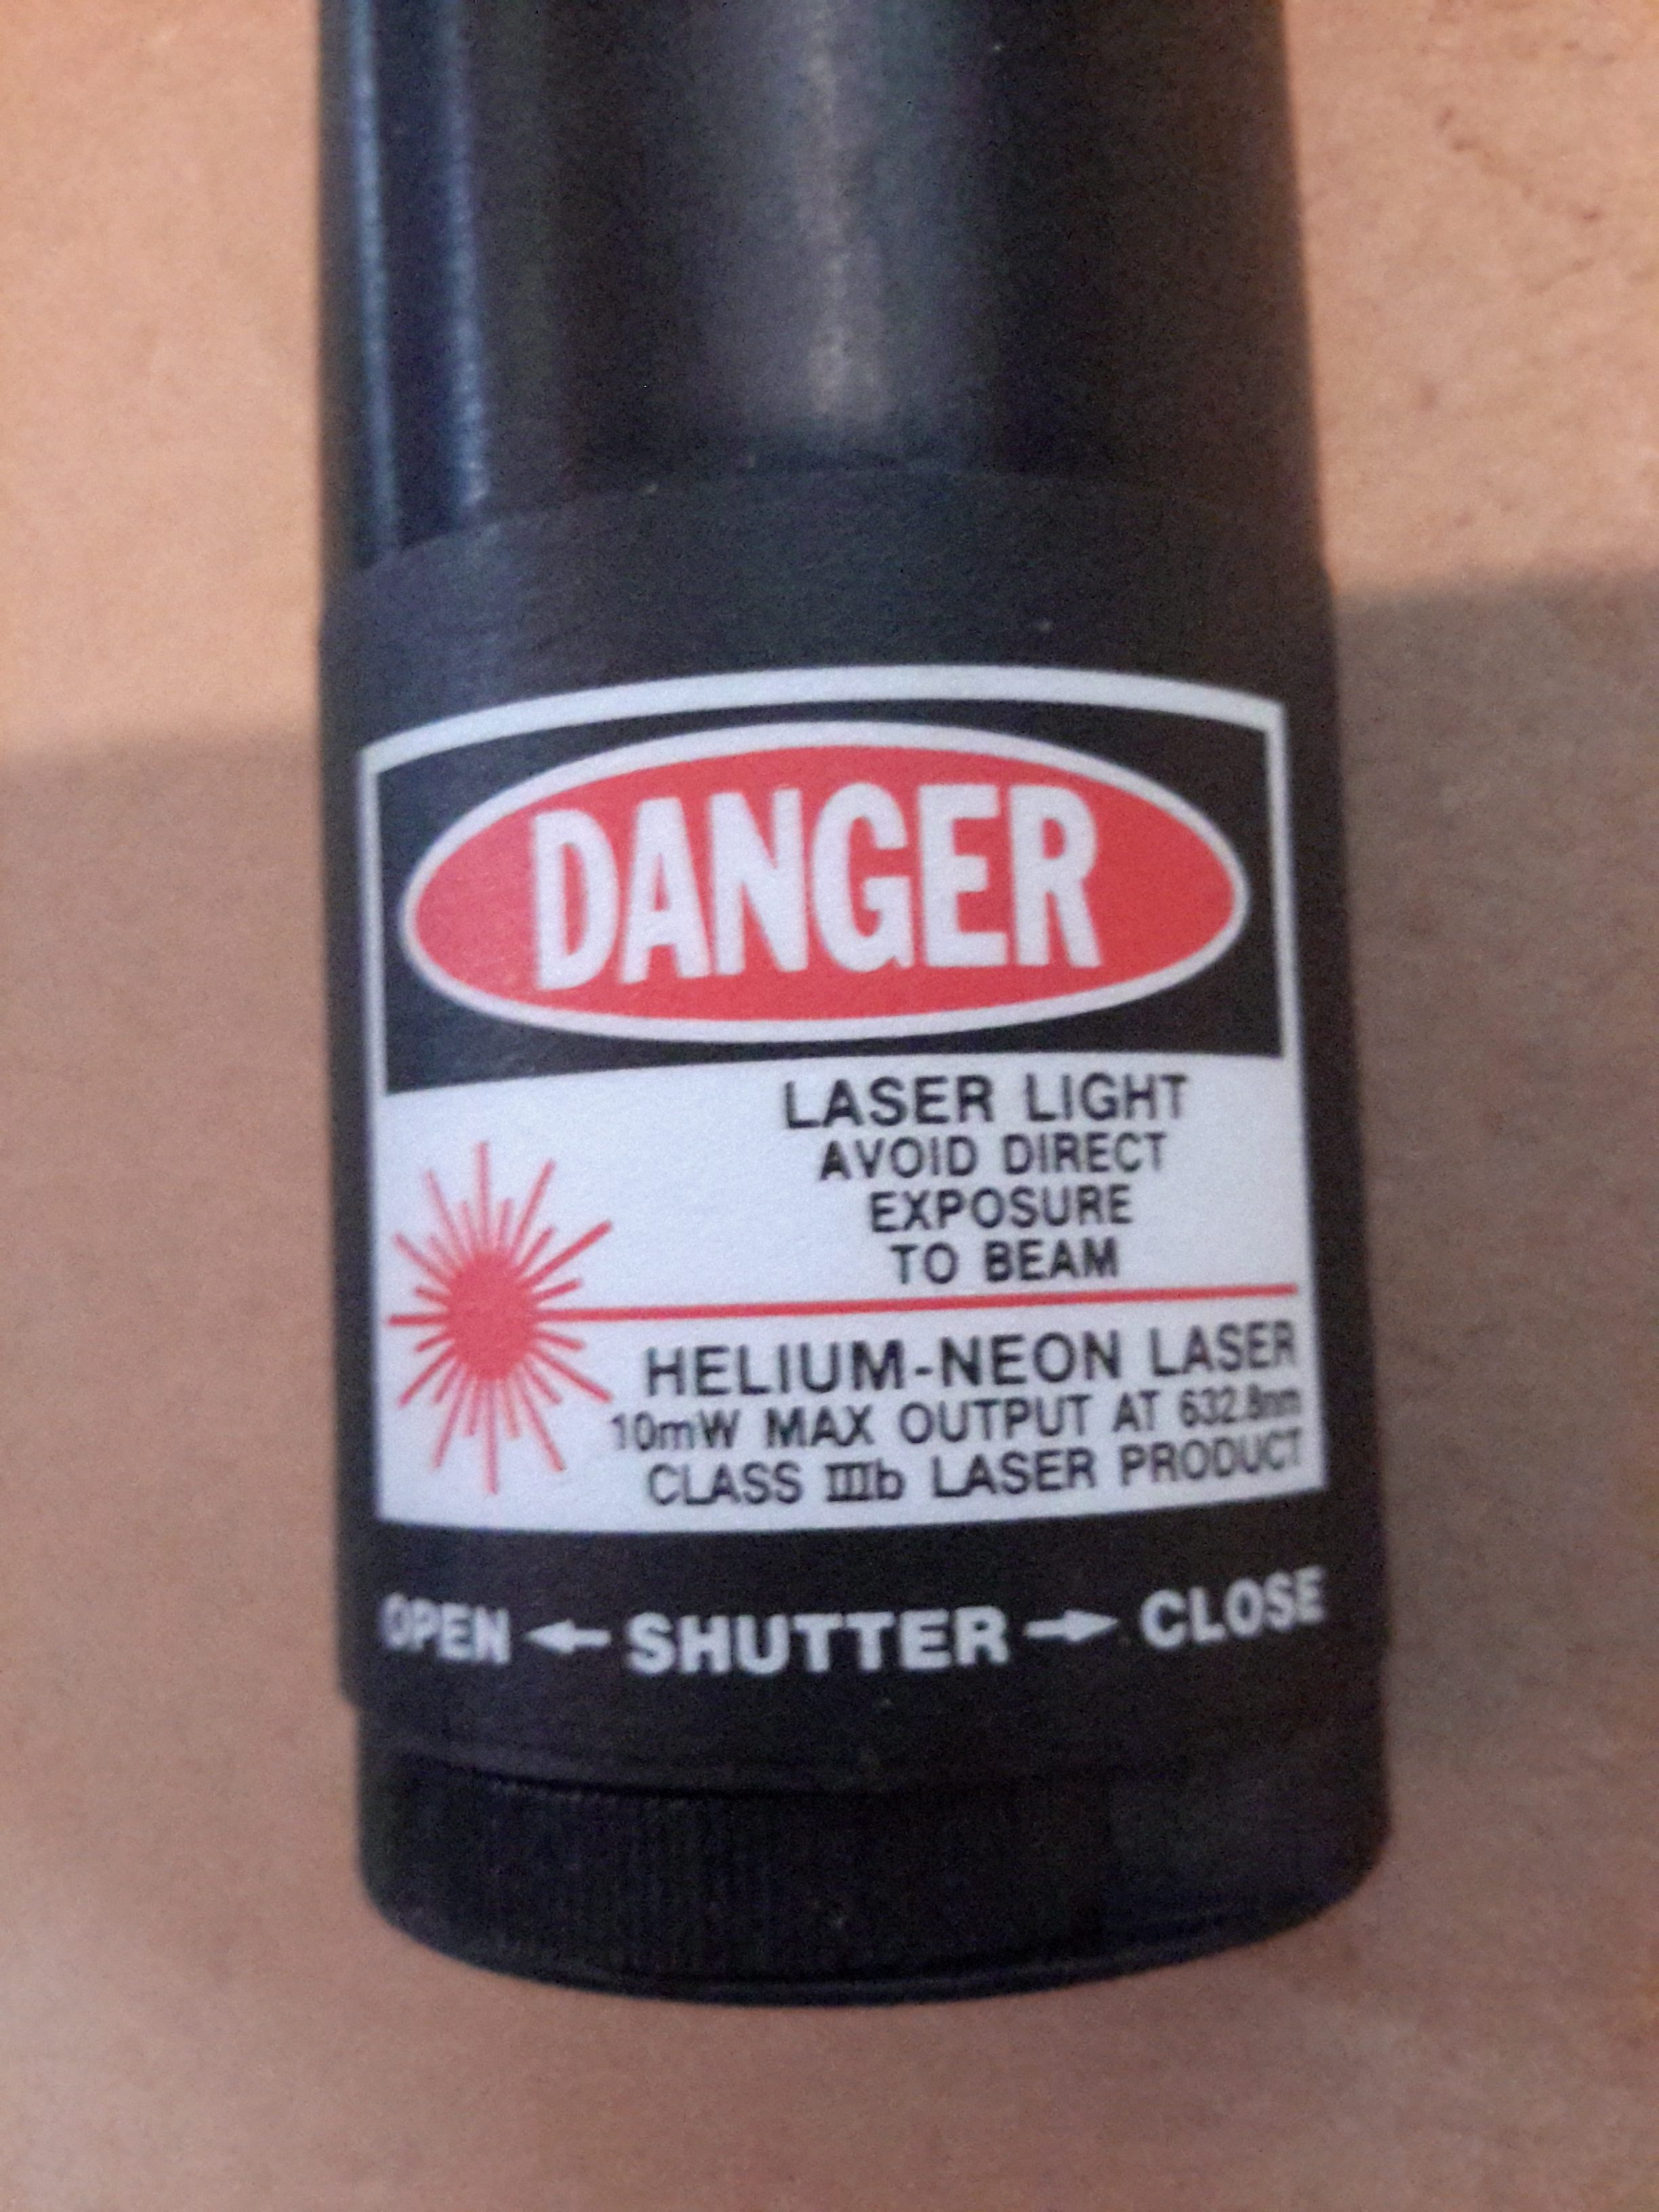
IIIb <,= 500 DANGER Laser Radiation - Avoid
Direct Exposure to Beam
IV > 500 DANGER Laser Radiation - Avoid
Eye or Skin Exposure to
Beam
Here are some excerpts from the Center for Devices and Radiological Health (CDRH) regulation 21 CFR 1040.10 and 21 CFR 1040.11, the standard classification for lasers are as follows with some additional comments by Wes Ellison (erl@sunflower.com):
- Class I laser productsNo known biological hazard. The light is shielded from any possible viewing by a person and the laser system is interlocked to prevent the laser from being on when exposed. (large laser printers such as the DEC LPS-40 had a 10 mW HeNe laser driving it which is a Class IIIb laser, but the printer is interlocked so as to prevent any contact with the exposed laser beam, hence the device produces no known biological hazard, even though the actual laser is Class IIIb. This would also apply to CD/DVD/Blu-ray players and recorders (which might have Class IIIb laser diodes of 100 mW or more) and small laser, as they are Class I devices).
- Class II laser productsPower up to 1 milliwatt. These lasers are not considered an optically dangerous device as the eye reflex will prevent any occular damage. (I.e., when the eye is hit with a bright light, the eye lid will automatically blink or the person will turn their head so as to remove the bright light. This is called the reflex action or time. Class II lasers won’t cause eye damage in this time period. Still, one wouldn’t want to look at it for an extended period of time.) Caution labels (yellow) should be placed on the laser equipment. No known skin exposure hazard exist and no fire hazard exist.
- Class IIIa laser productsPower output between 1 milliwatt and 5 milliwatt. These lasers can produce spot blindness under the right conditions and other possible eye injuries. Products that have a Class IIIa laser should have a laser emission indicator to tell when the laser is in operation. They should also have a Danger label and output aperture label attached to the laser and/or equipment. A key operated power switch SHOULD be used to prevent unauthorized use. No known skin hazard of fire hazard exist.
- Class IIIb laser productsPower output from 5 milliwatts to 500 milliwatts. These lasers are considered a definite eye hazard, particularly at the higher power levels, which WILL cause eye damage. These lasers MUST have a key switch to prevent unauthorized use, a laser emission indicator, a 3 to 5 second time delay after power is applied to allow the operator to move away from the beam path, and a mechanical shutter to turn the beam off during use. Skin may be burned at the higher levels of power output as well as the flash point of some materials which could catch fire. (I have seen 250 mW argons set a piece of red paper on fire in less than 2 seconds exposure time!) A red DANGER label and aperture label MUST be affixed to the laser.
- Class IV laser productsPower output >500 milliwatts. These CAN and WILL cause eye damage. The Class IV range CAN and WILL cause materials to burn on contact as well as skin and clothing to burn. These laser systems MUST have:A key lockout switch to prevent unauthorized use Inter-locks to prevent the system from being used with the protective covers off, emission indicators to show that the laser is in use, mechanical shutters to block the beam, and red DANGER labels and aperture labels affixed to the laser.
The reflected beam should be considered as dangerous as the primary beam. (Again, I have seen a 1,000 watt CO2 laser blast a hole through a piece of steel, so imagine what it would do to your eye !)
- Registration of laser systemsAny laser system that has a power output of greater than 5 milliwatts MUST be registered with the FDA and Center for Devices and Radiological Health if it has an exposed beam, such as for entertainment (I.E. Laser light shows) or for medical use (such as surgery) where someone other than the operator may come in contact with it. (This is called a ‘variance’ and I have filled them out and submitted them and they ARE a royal pain in the backside!)
Sometimes, you will come across a laser subassembly that has a sticker reading something like: “Does not Comply with 21 CFR”. All this means is that since the laser was mounted inside another piece of equipment and would not normally be exposed except during servicing, it does not meet all the safety requirements for a laser of its CDRH classification such as electrical interlocks, turn-on delay, or beam shutter. This label doesn’t mean it is any more dangerous than another laser with similar specifications as long as proper precautions are taken – such as adding the missing features if using the laser for some other purpose!
(From: Johannes Swartling (Johannes.Swartling@fysik.lth.se).)
It is not the laser in itself that is given a class number, but the whole system. A system which is built around a very powerful laser can still be specified as Class I, if there is no risk of injury when operating the system under normal conditions. For example, CD players are of class I, but the (IR) laser diode may in itself be powerful enough to harm the eye. CD players are designed so that the laser light won’t escape the casing.
When it comes to laser safety and exposure levels the regulations are fairly complicated and I will not go into details. Basically, there are tables with ‘safe’ levels of exposures. The exposure has to be calculated in a certain way which is unique to each case, depending on among other things: laser power, divergence, distance, wavelength, pulse duration, peak power, and exposure time.. Although it is true that near infrared lasers are potentially more dangerous than visible because you can’t see the radiation, it is incorrect to say that it must be, say, Class III. The level of exposure may be so low that it can be a Class I (note that Class II lasers are always visible though, so infrared lasers are either of Class I or Class III or higher).
(From: John Hansknecht (vplss@lasersafetysystems.com).)
OSHA STD-01-05-001 – PUB 8-1.7 – Guidelines for Laser Safety and Hazard Assessment is an “open source” release of the ANSI Z136.1-1986 standard. It is not as up to date as the present ANSI standard (ANSI Z136.1-2015), but it’s close. The ANSI standard is considered to be the authoritative guide for safe work practices and would be a better source than a University safety manual. The key point to understand is if a laser accident ever occurs and a lawsuit ensues, the lawyers will be checking to see if the facility was following the “recognized best work practices”.
Laser Safety Systems LLC, a supplier of laser safety products, has a good intro page for anyone serious about becoming ANSI compliant at A Practical Guide to Laser Class 4 Entryway Control Requirements.
Hobbyist Projects and Laser Safety Classifications
While many of the partial circuits and complete schematics in this document can and have been used in commercial laser products, important safety equipment has generally been omitted to simplify their presentation. These range from simple warning labels for low power lasers (Class I, II, IIIa) to keyswitch and case interlocks, beam-on indicators, and other electrical and mechanical safety devices for higher power lasers. Laser safety is taken very seriously by the regulatory agencies. Each classification has its own set of requirements.
The following brief summary is just meant to be a guide for personal projects and experimentation (non-commercial use) – the specifics for each laser class may be even more stringent:
- For diode lasers and HeNe lasers outputting 5 mW or less (Classes 1, II, IIIa), packaging to minimize the chances of accidental exposure to the beam and standard laser warning labels should be provided.
- Where the case can be opened without the use of tools, interlocks which disable the beam are essential to prevent accidental exposure to laser radiation (Class IIIa and above). Their activation should also remove power and bleed off any dangerous voltages (ALL HeNe and argon/krypton lasers).
- A beam-on indication is highly desirable especially for lasers emitting invisible IR (or UV).
Aside from their essential safety function, laser warning or danger stickers DO add something in the professional and high-tech appearance department. Companies selling laser accessories will likely offer genuine CDRH approved stickers. If you are selling any laser based equipment, you’ll need them (and a lot more). For hobbyist, some semi-standard unofficial samples can be found in the next section.